


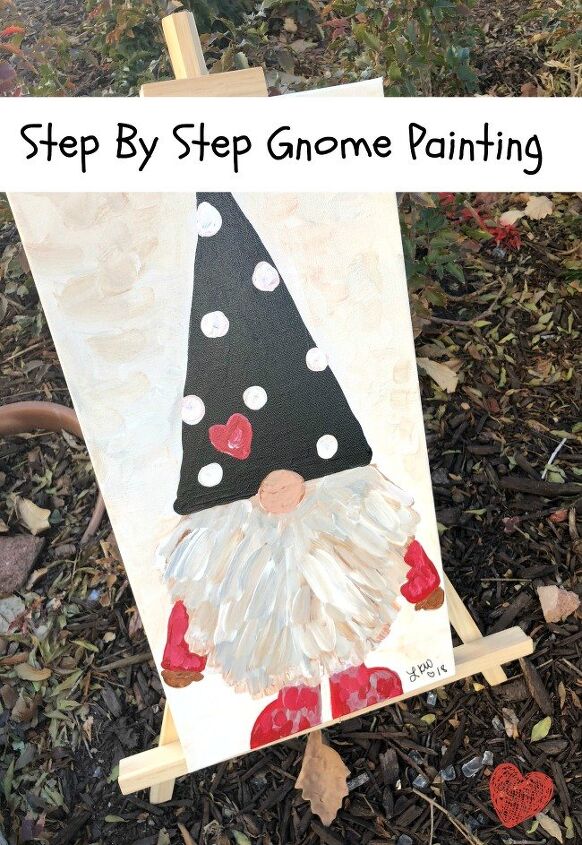
Gnome Painting Step By Step
If you have been following my journey this holiday season then you are already aware of my new obsession. I LOVE gnomes. This step by step gnome painting was the first of many that I painted for gifts this year (and decorations around my home). I used acrylic paints from DecoArt (even some METALLICS) and am excited to share the steps with you. This post is sponsored by DecoArt but the ideas and opinions are my own.
Supplies for Step By Step Gnome Painting and Set Up
To get started, prep your materials and work space. I like to have all of my paints lined up and ready, my canvas prepped and my brushes handy. It is a good idea to have a small cup of water and some paper towels in your work space too. Just in case… These are the colors I used in this painting. I love love love the way the Dazzling Metallics added depth and texture to my art.
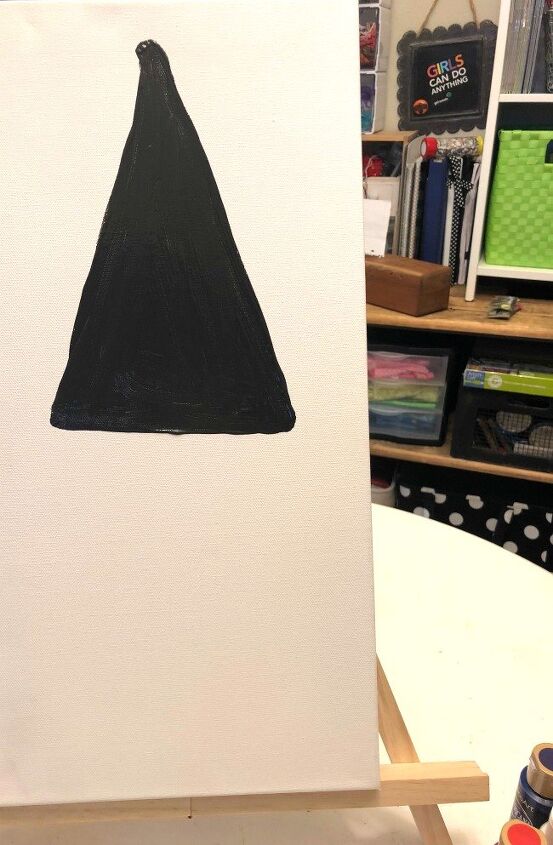
- Black Americana Multi-Surface Black Tie (Hat)
- Off White Americana Multi-Surface Cotton Ball (Hat Dots and Mixing All Over)
- Brown Americana Multi-Surface Cocoa Bean (Mittens and Beard)
- Beige Americana Warm Beige (Nose)
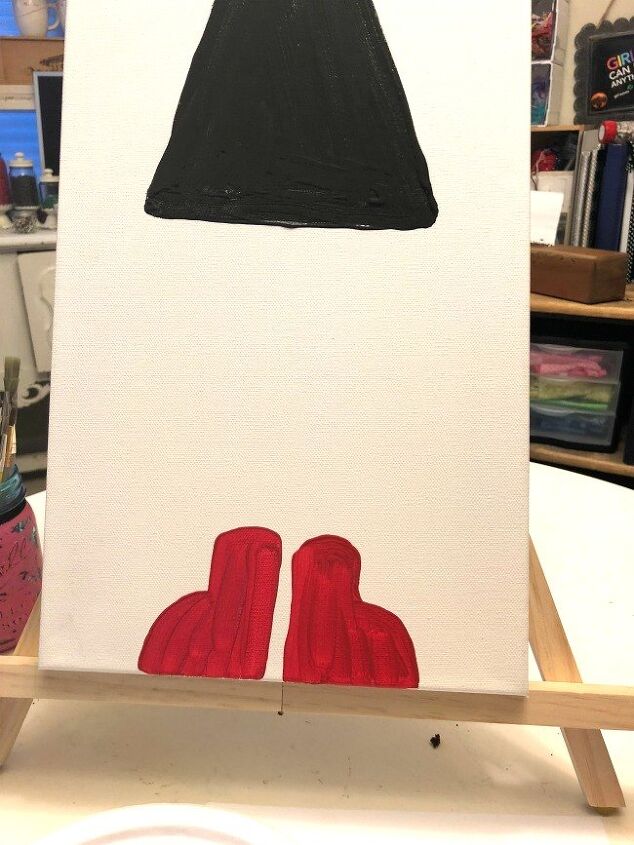
- Red American Santa Red (Boots and Sleeves)
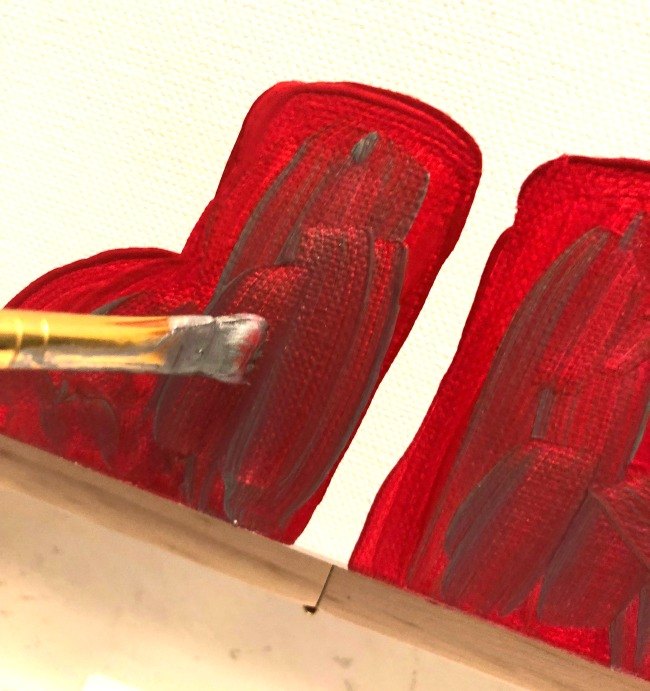
- Dazzling Metalics Festive Red (Boots and Sleeves)
- Dazzling Metalics Shimmering Silver (Boots, Sleeves and Beard)
Steps to create this Gnome Painting:
Paint Hat. Let Dry.
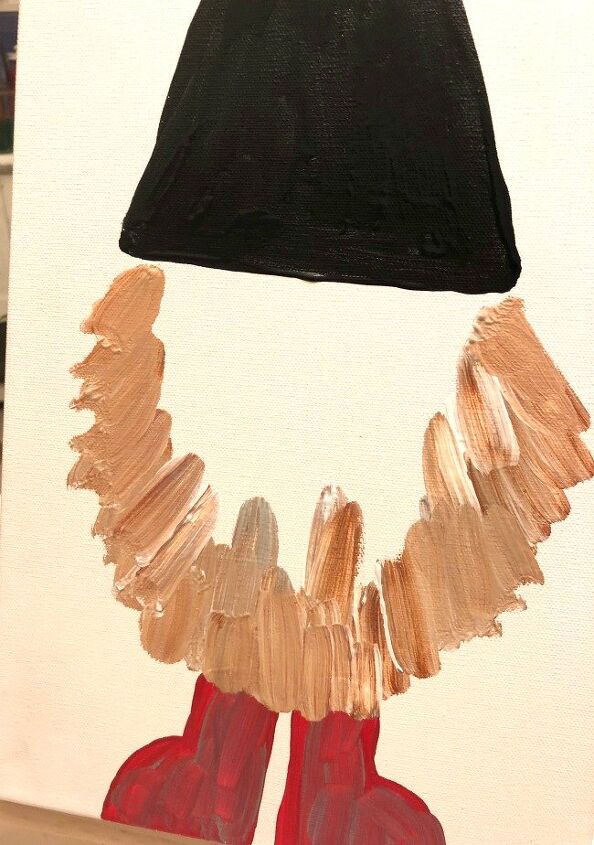
Paint Boots. Mix reds and silver. Let Dry.
Add the beard. I mixed Cocoa Bean, Slate Gray, Metallic Silver and White.
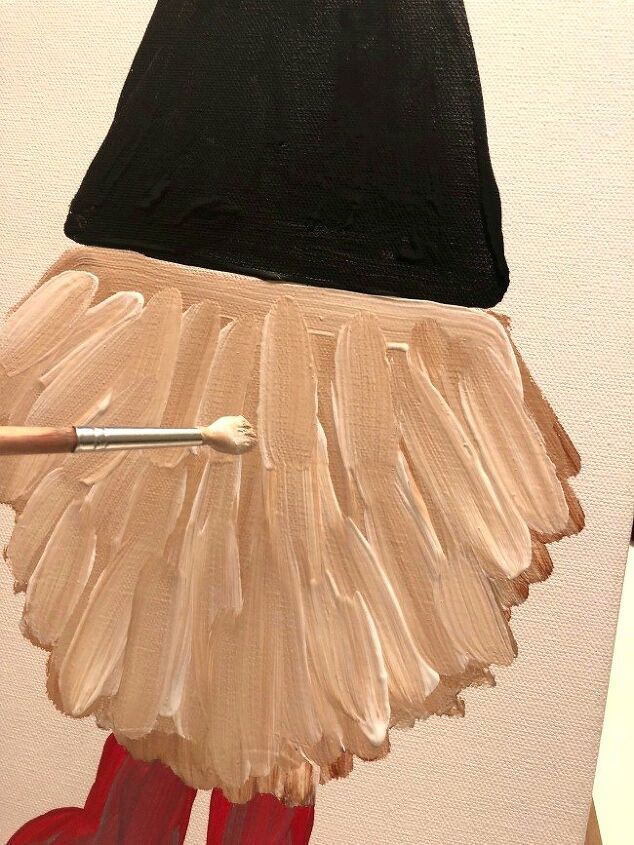
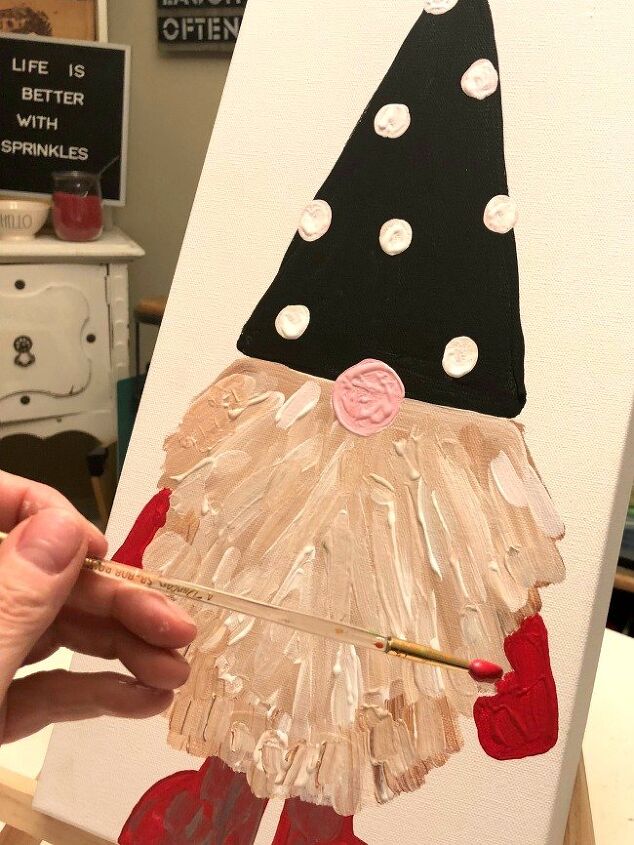
Add white dots to the hat. Add a nose. Add arms with the same colors as the boots if desired. I added mittens too.
If you want to add a background color, great! I mixed white with a little tiny bit of brown and grey to do mine. Ta Da!
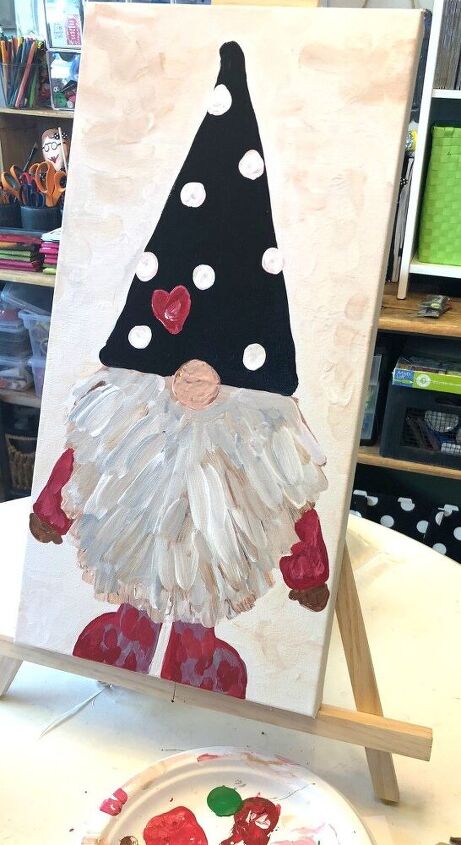
I did add a red heart to my gnome’s hat. My word of the year for 2019 is LOVE and I am going to keep him up in my studio as a reminder. Love always wins. Always!
Wood Slice Gnome Painting Step By Step
For the wood slice gnome paintings, I did the first entire coats in metallic sliver and metallic red. Then I painted the elves on top. I LOVE LOVE LOVE them. If I had a hundred slices, I would have painted a hundred elves that day!. I ordered 48 slices and they are on the way!


Frequently asked questions
Have a question about this project?