


How to Reupholster a Cane Chair
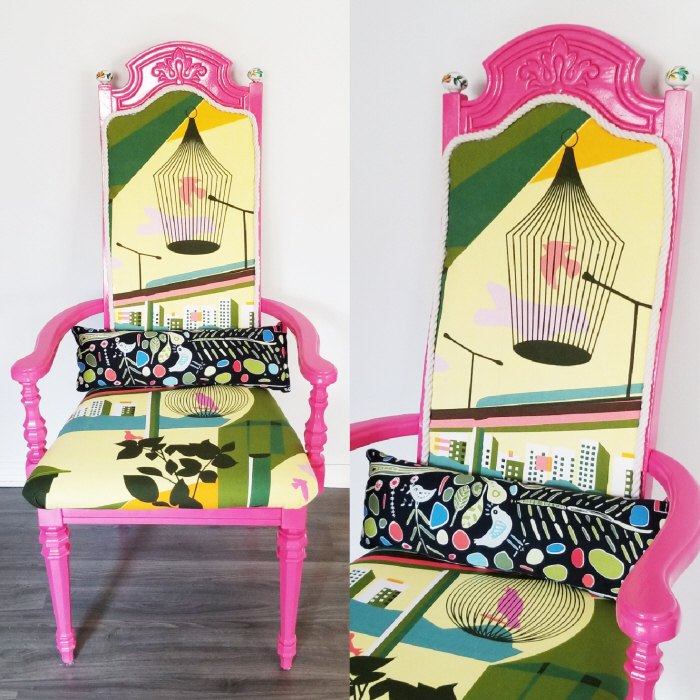
I’m super proud that this trash to treasure refashion lasted for over four years of daily use!
Unfortunately the cane back finally decided to give up, fortunately I came up with a marvelous mending idea using items I already had on hand:
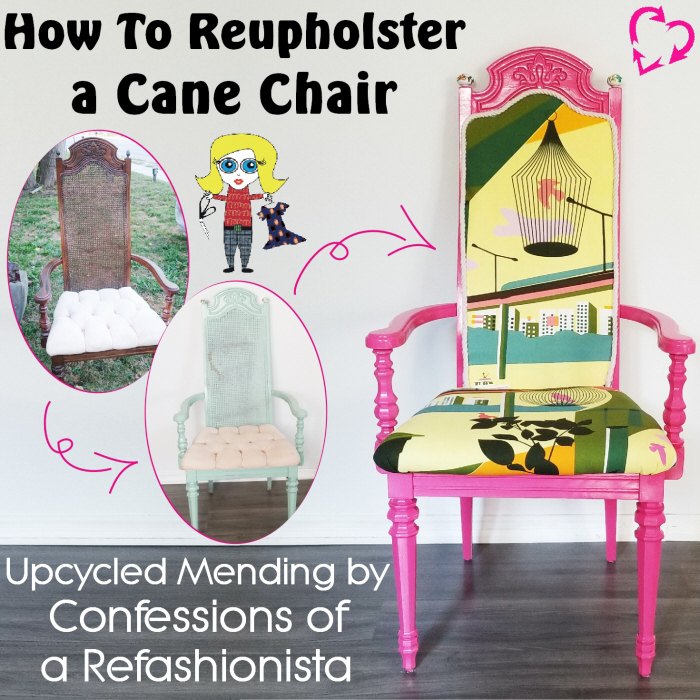
Discover how to reupholster a cane chair + recover a tufted seat too – you’ll never guess what I used!
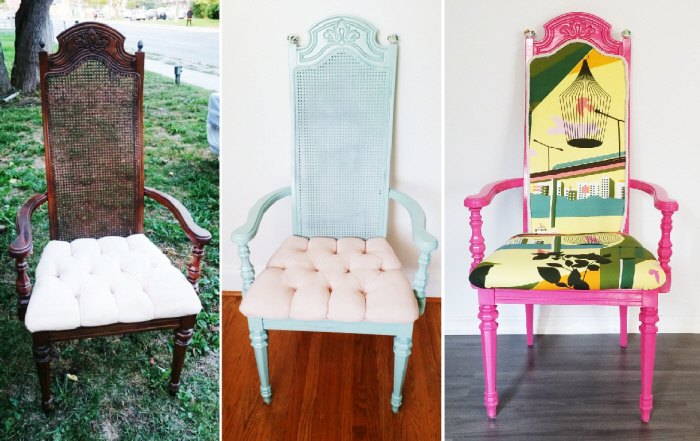
After over 4 years my poor trash to treasure desk throne definitely needed some work!
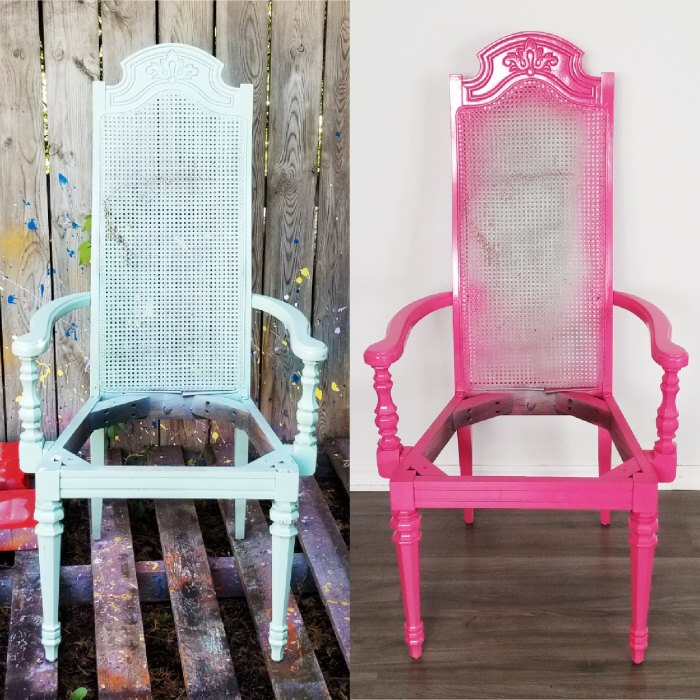
I removed the seat, gave the wood a light sand and refreshed it with a few coats of bright berry pink.
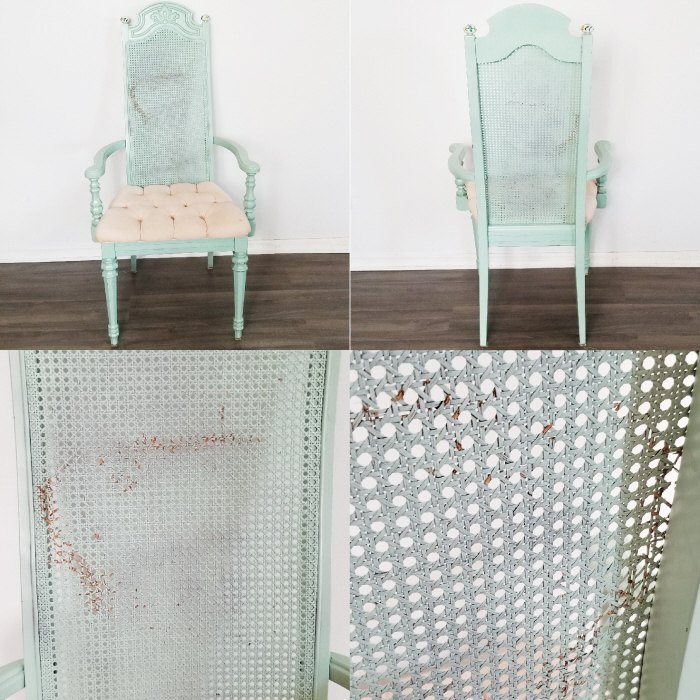
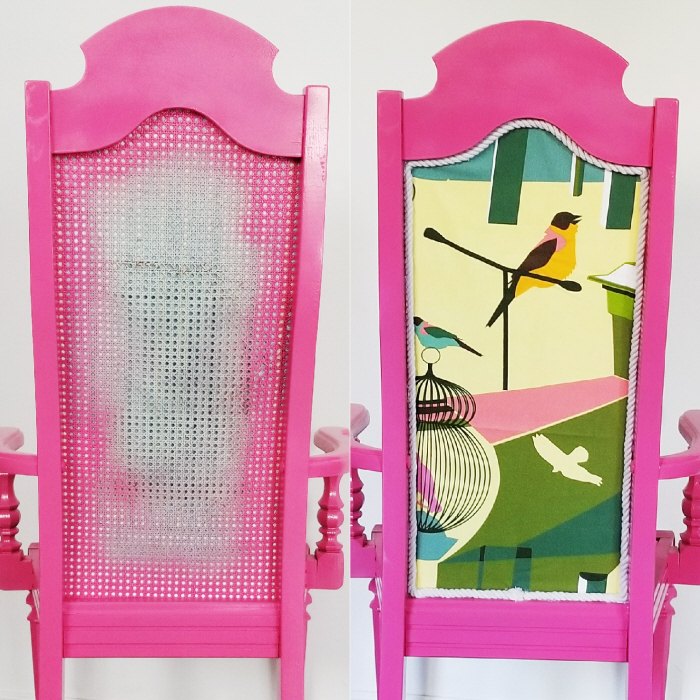
As the cane back was still in somewhat usable condition I decided to leave it in place for extra support.
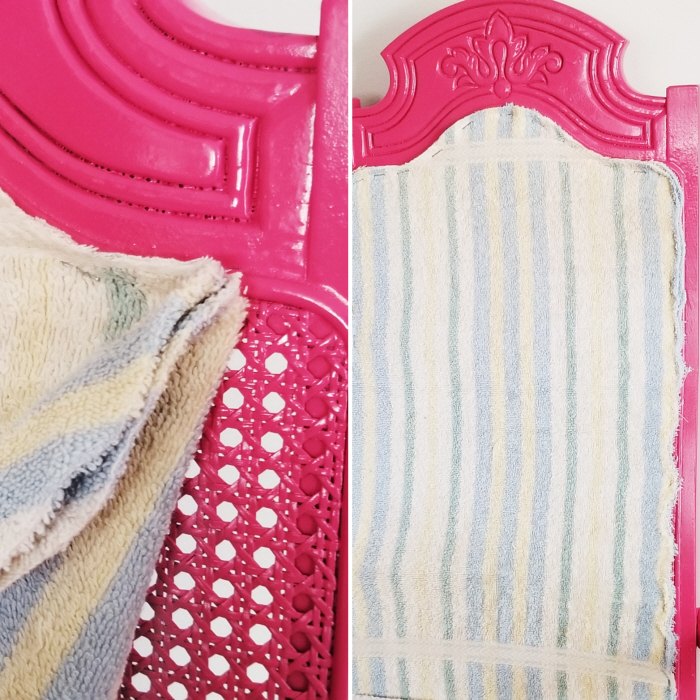
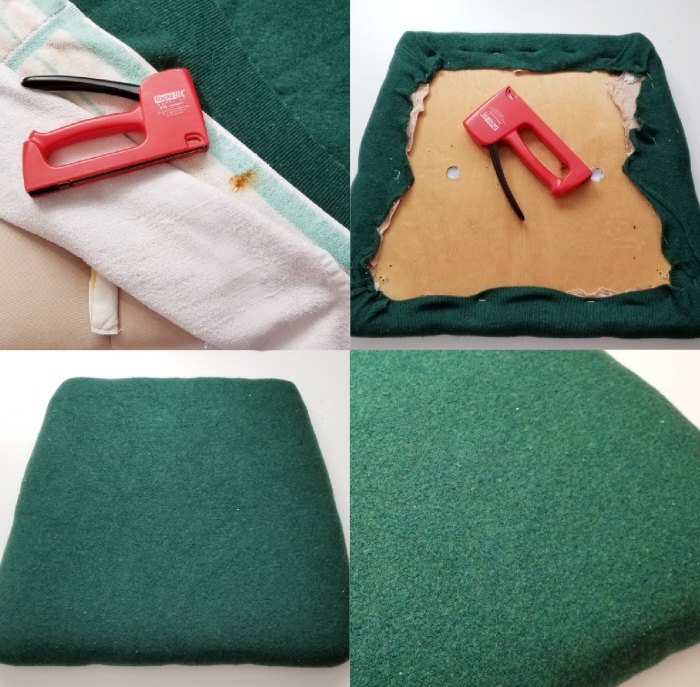
I grabbed a couple of old towels from my rag stash, created a template out of scrap paper for the correct size/shape, cut the towels and securely stapled them in place over the cane on the front of the chair.
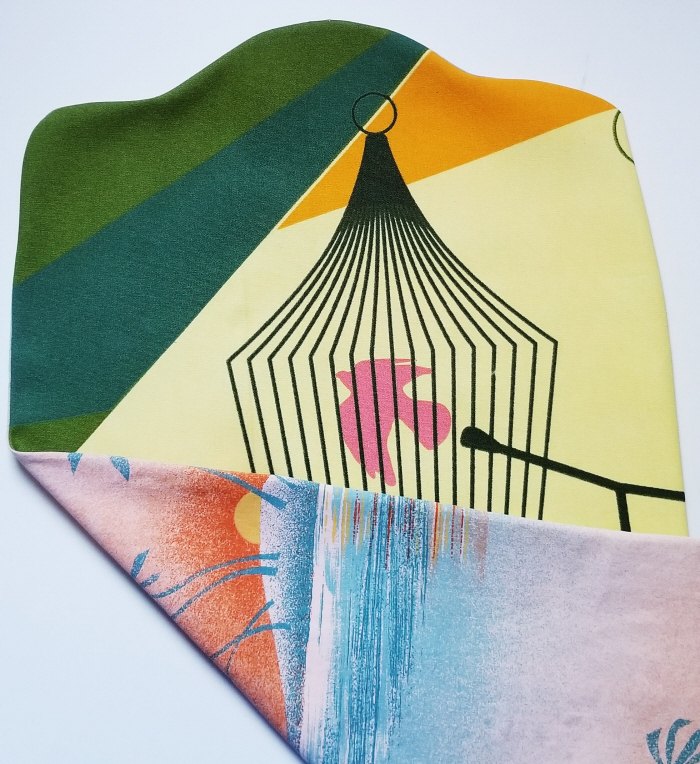
As this is my desk chair and I use it every day I was a bit concerned about the fabric fraying on the back support so I used the template for my towels + a few centimeters for seam allowance and created a no-fray cover by simply making a pillow case in the correct shape.
Both of those fabric leftovers had been in my stash for years and even moved from Berlin to Toronto with me!
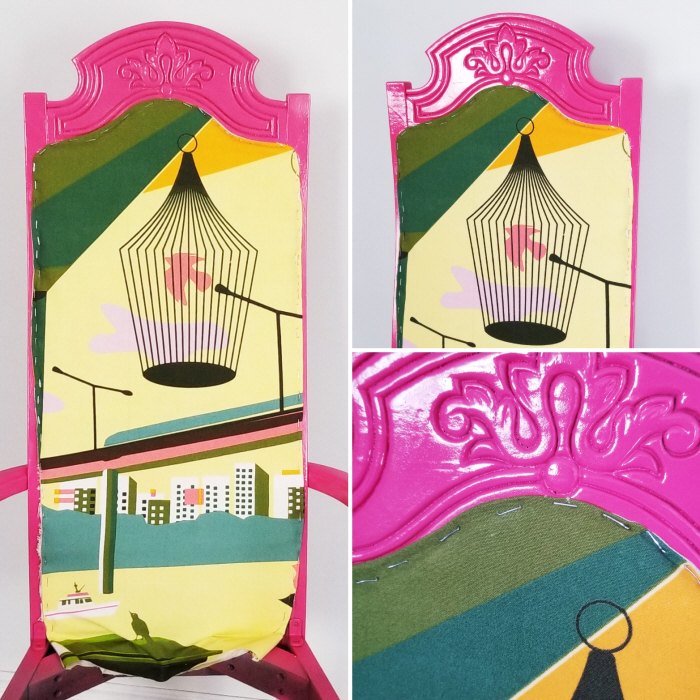
Then stapled the cover over top of the fancy towel upholstery.
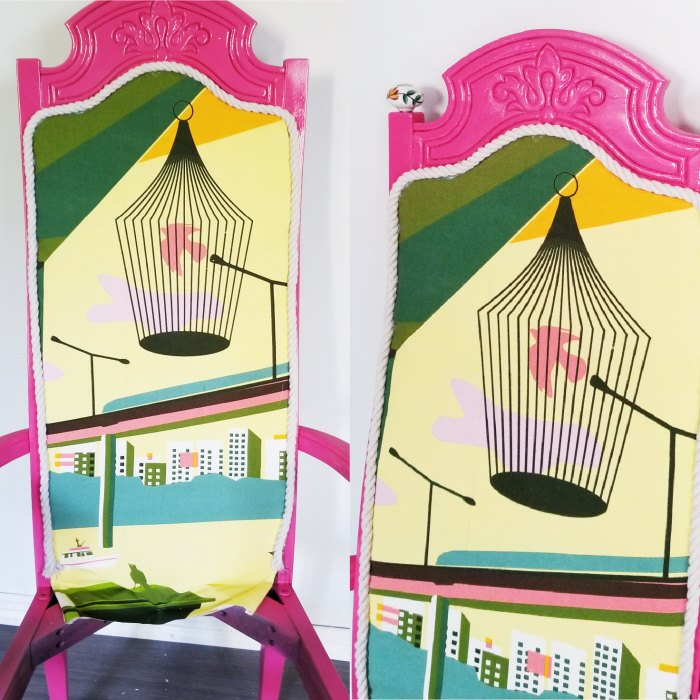
I then grabbed my trusty glue gun + some cotton rope I had in my stash and covered up the staples.
Once the front was complete I repeated the whole process on the back and my chair was half done, whew!
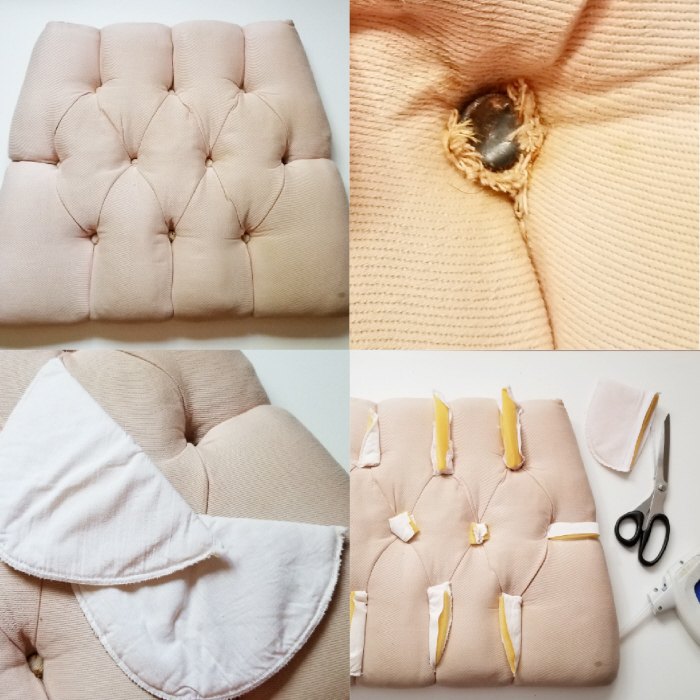
The seat was still in fairly good condition but as the tufts were quite uncomfortable I attempted to remove them. Unfortunately they were impossible take off without completely destroying the seat so I put on my refashioning thinking cap and searched my stash.
I’ve saved more than few puffy shoulder pads over the years so I went ahead and used a few of them to fill in all of the crevices in the tufted seat.
To create a smooth, comfy seat I simply grabbed a couple more rag towels + a piece of sweater scrap, layered it all together and stapled it in place.
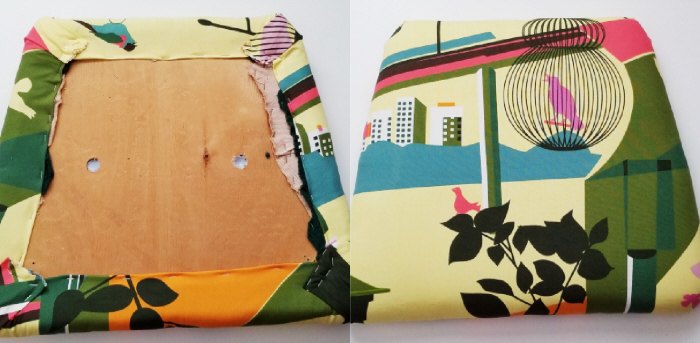
Then recovered it all with my pretty birdie fabric.
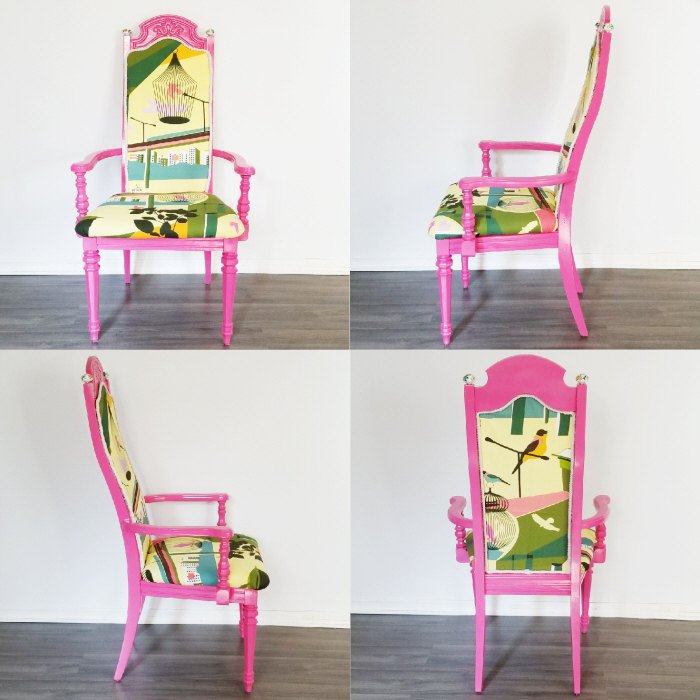
I am in love with my stellar office throne ♥
Items I already had in my stash + 5 days of work + a lot of imagination = an absolutely fabulous result!
From trash to treasure to even better treasure!
Buying new is completely unnecessary when you have imagination (+ the load of free refashionista tutorials available right here on my site)!
Resources for this project:
See all materials


Comments
Join the conversation
-
This chair make me cry because I want it so badly!
-
Beautiful!
Upcycled 3x...WOW 👏 👏 👏


Frequently asked questions
Have a question about this project?
How did you secure the bottom seat to the chair
Love the color & the fabric