


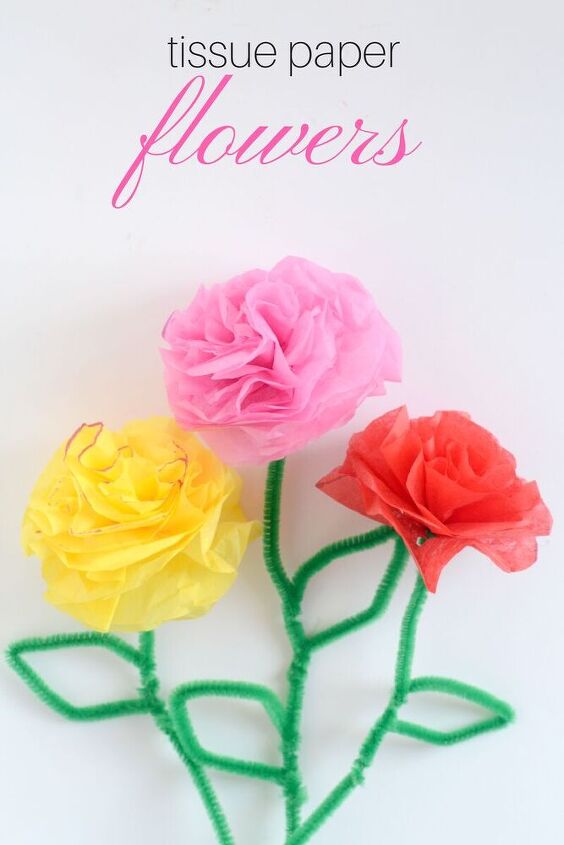
Brighten Someone Special's Day With These Easy Tissue Paper Flowers!
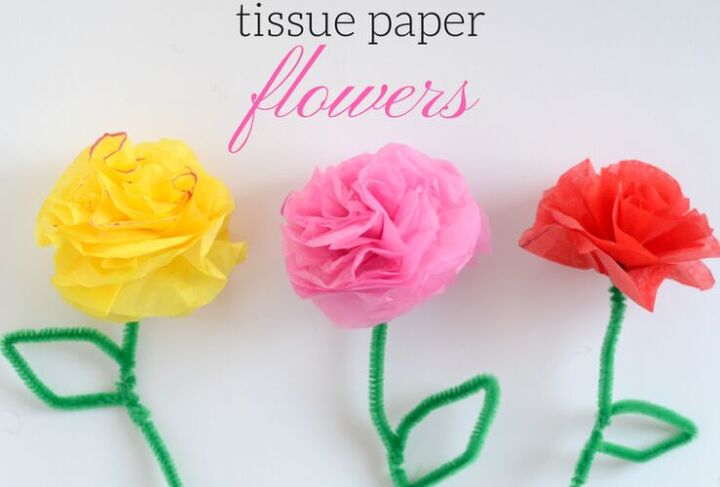
April showers brings May flowers. Do you remember that saying from childhood? You don’t have to wait for May flowers, you can make your very own Spring flowers with this fun and easy tissue paper flower tutorial. You can make a beautiful bouquet of your own flowers in your favorite color
Do you remember making these fun Tissue Paper flowers in grade school? I know we made them all the time! You use colorful paper to make a flower shape.
Now I am making them with my own kids! My daughter loves making these DIY tissue paper flowers for her friends or for gifts for loved ones! We love doing DIY projects and this makes a great addition to a spring craft for a rainy afternoon or weekend.
Tissue Paper Flowers are a beautiful way to keep some flowers out all the time.
- Baby Showers
- Cinco de Mayo
- Mother’s Day
- Valentine’s Day
- a Birthday Party
- Bridal Showers
- as well as table decorations, as they make great decorations for all sorts of party decor.
The first step is to gather all of your supplies together. Below, I have a printable list for you, so just take it to the store with you! You can find everything either at the dollar tree, your favorite retail store, or craft store.
To make these adorable tissue paper flowers, you will need:
- pipe cleaners for the stem,
- full sheets of tissue paper in different colors
- a marker,
- a small cup and
- a pair of scissors

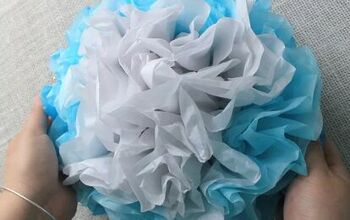
Step 1: Layer your tissue paper sheets together. We played around with different amounts and discovered that a layer of tissue paper from 8-12 sheets made a pretty flower. You can use different colors of tissue paper or the same color.
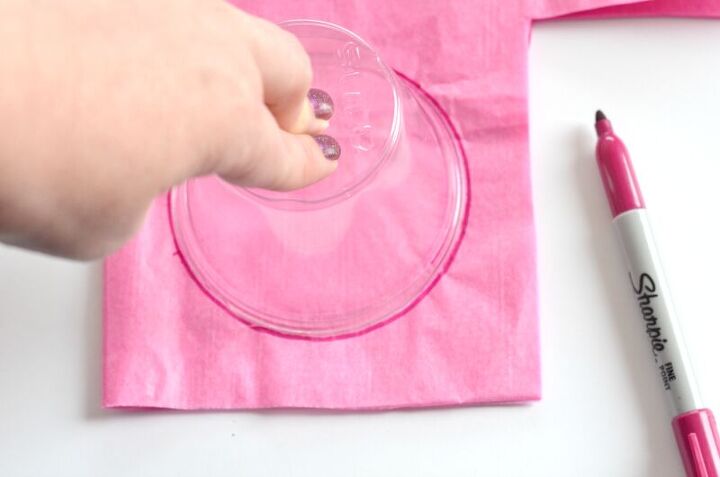
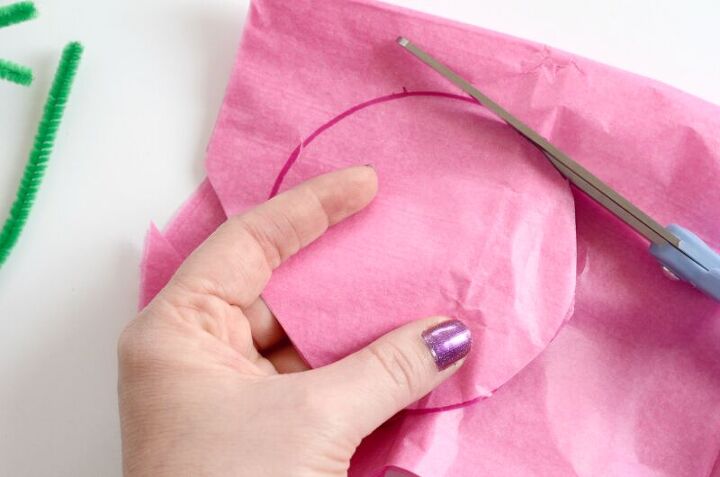
Step 2: Using your cup as a guide, trace a circle onto your tissue paper and cut it out, through all your layers of tissue paper. It doesn’t have to be perfect, so don’t worry about that.
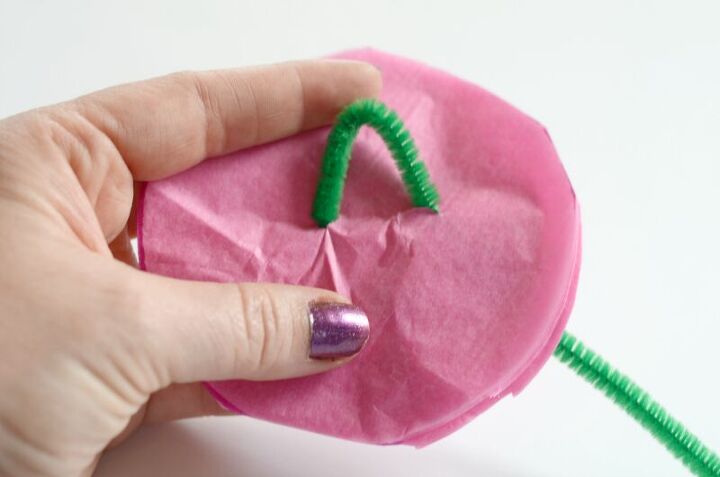
Step 3: With the tip of your scissors, carefully make 2 small holes in the center of your tissue paper circle (the center of your flower). Insert one end of your pipe cleaner into the first hole and loop it down into the second hole.
Step 4: Twist the pipe cleaner around itself to secure your pieces of tissue paper circles onto you pipe cleaner. This is going to be the outer petals of your flower and your stem!
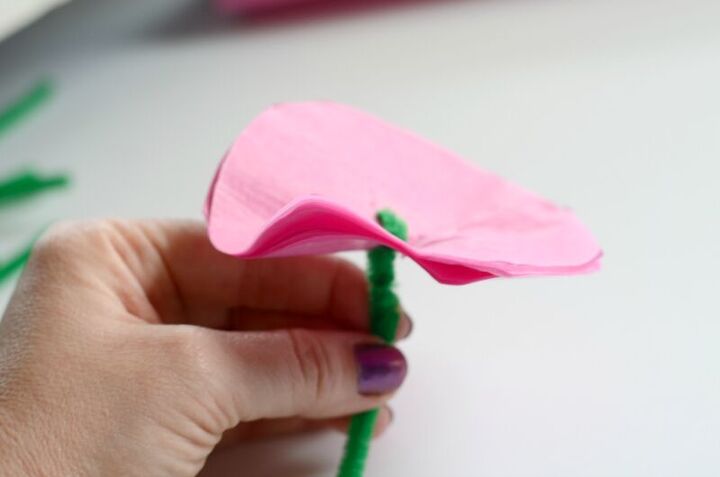
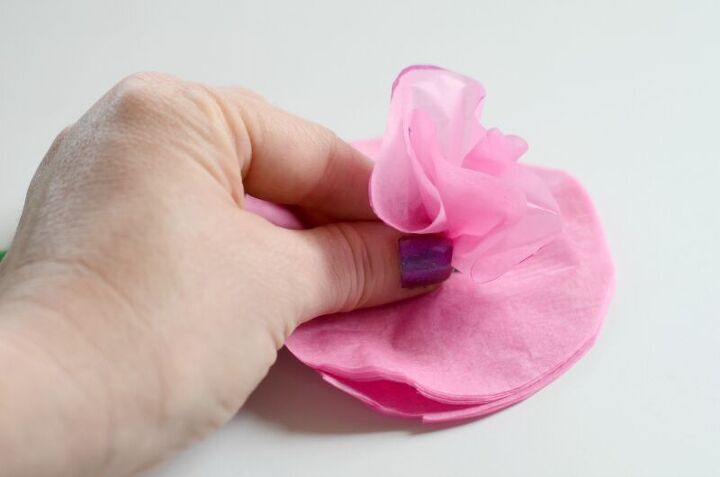
Step 5: Now onto making our flower, the fun part! Scrunch up the first layer of your tissue paper at the base where it connects to your pipe cleaner. Keep doing this for each layer, sort of turning as you go, so each layer is scrunched together at different angles, each with a different look.
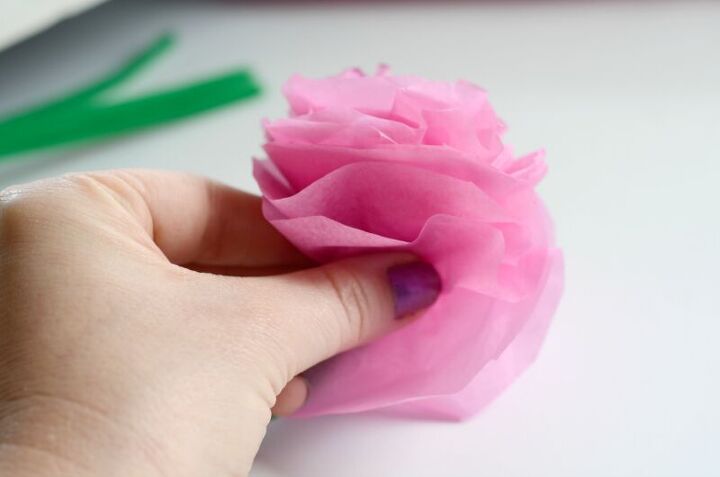
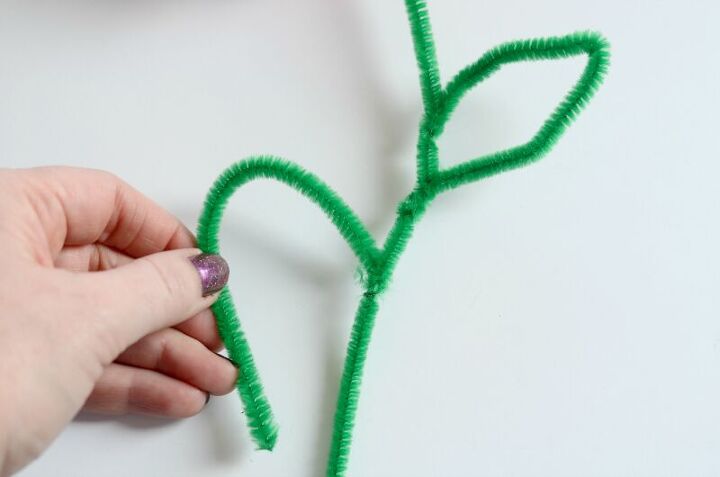
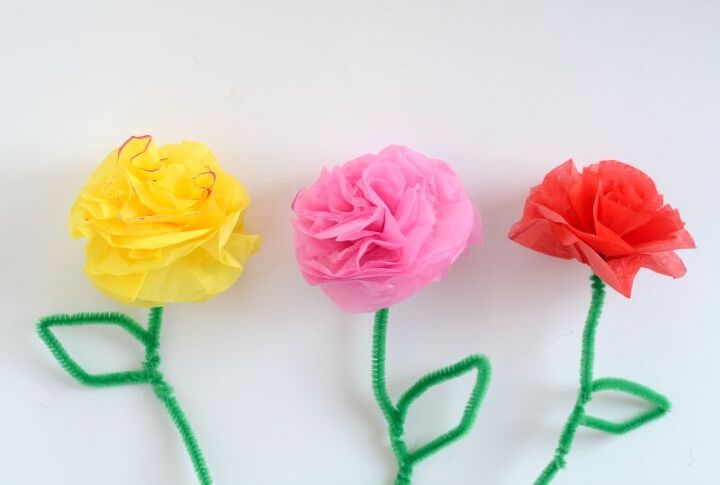
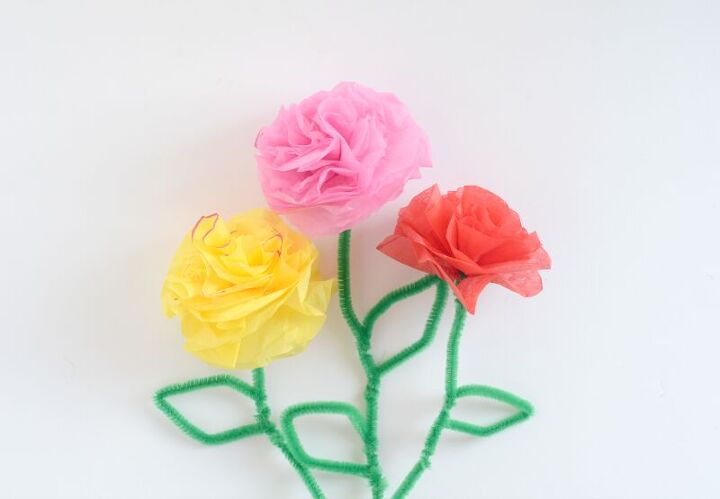
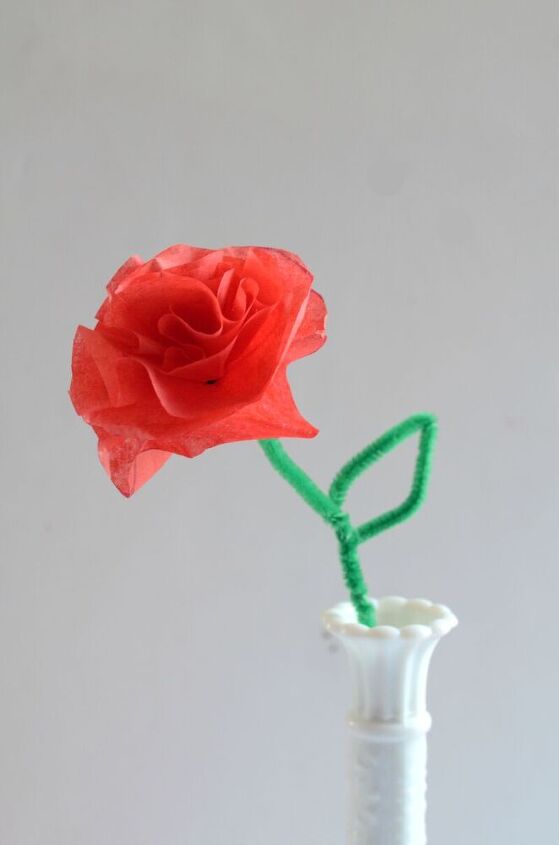
When you get to the bottom layer of the ends of the tissue paper, you are all finished with your finished flower! You can make leaves too if you’d like.
To make the leaves, just take another pipe cleaner and cut it into 2 pieces. Twist each piece onto the pipe cleaner stem and shape into a leaf like so.
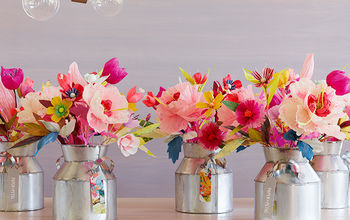
These tissue paper flowers are so pretty! Make a bunch for your Spring table decor. Give a bouquet to friends and family! Whatever you do with them, they’re sure to make you smile!
How to Make a Paper Flower Wreath
-
Tissue paper in various colors -
Scissors -
pipe cleaners, green -
marker -
cup, to make circle
- Layer your tissue paper together. We played around with different amounts and discovered that anything from 8-12 layers of tissue paper made a pretty flower.
- Using your cup as a guide, trace a circle onto your tissue paper and cut it out, through all your layers of tissue paper. It doesn’t have to be perfect, so don’t worry about that.
- With the tip of your scissors, carefully make 2 small holes in the center of your tissue paper circle.
- Insert one end of your pipe cleaner into the first hole and loop it down into the second hole.
- Twist it around itself to secure your tissue paper circles onto you pipe cleaner. This is going to be your flower and your stem!
- Now onto making our flower.
- Scrunch up the first layer of your tissue paper at the base where it connects to your pipe cleaner.
- Keep doing this for each layer, sort of turning as you go so each layer is scrunched together at different angles. Your tissue paper flower is complete! You can make leaves too if you’d like.
- To make the leaves just take another pipe cleaner and cut it into 2 pieces. Twist each piece onto the pipe cleaner stem and shape into a leaf like so.
As an Amazon Associate and member of other affiliate programs, I earn from qualifying purchases.
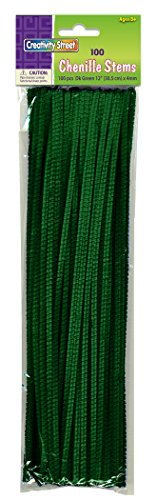
Creativity Street Chenille Stems/Pipe Cleaners 12 Inch x 4mm 100-Piece, Green
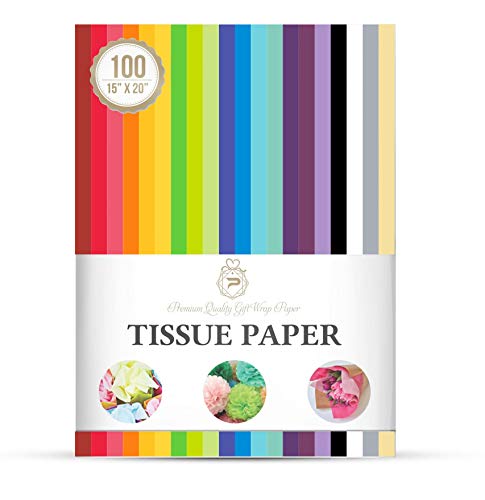
Tissue Paper for Gift Bags Assorted 20 Colors Gift Wrap for Packaging, Floral, Birthday, Christmas, Halloween, DIY Crafts and More 15" X 20" 100 Sheets

Comments
Join the conversation
-
Tissue flowers are the best!
-
This will be a fun diy project with the grandchildren 💐🌹


Frequently asked questions
Have a question about this project?