


DIY Pottery Barn Inspired Beachy Beads
Create that beachy vibe trending for the summer with this easy and inexpensive hack!

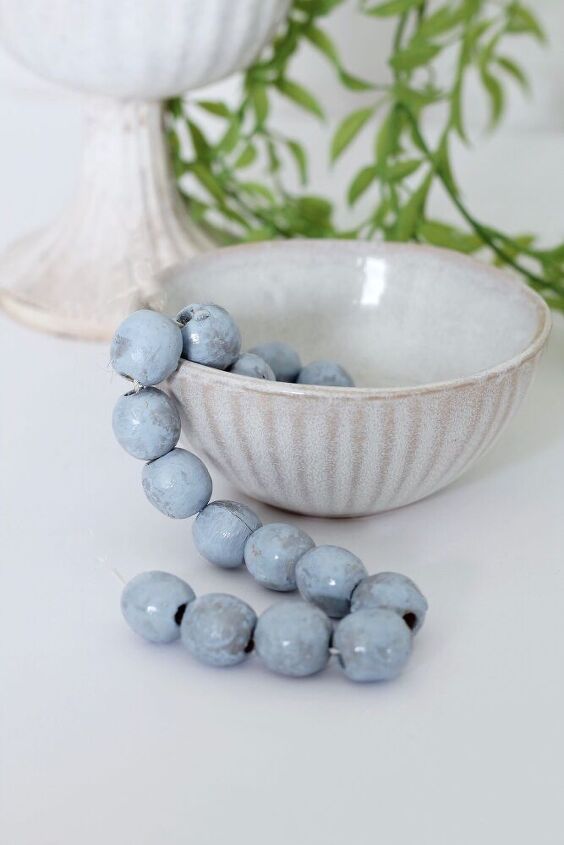
Recently, I saw some gorgeous beads online at Pottery Barn. (You can see a photo of them in my blog post.) They were made from sea glass and I just fell in love with the color and beachy vibe. But alas, they were $99 just for a string of beads, and that was not in my budget.
So I decided to do a trial and error DIY and see if I could create my own.
Materials I used:
Wood Beads ( I already had some leftovers from a project. I think they were 16 mm.)
Paint ( I combined two colors-Blue and white)
Looking Glass Paint
Clear Glossy Enamel Paint
White String
Dowels
Styrofoam
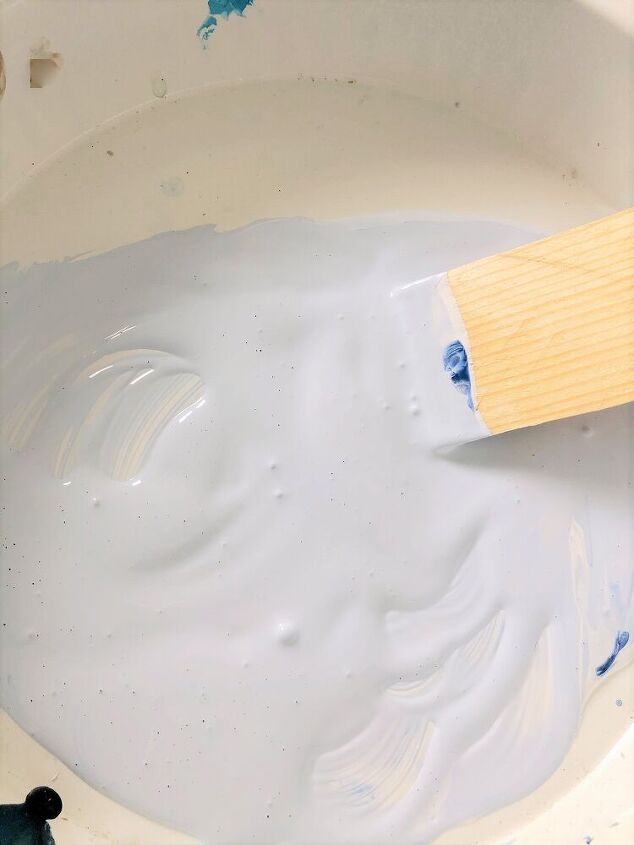
The first step was to try and create a close match to the color the inspiration beads were. There are spray paints on the market in several shades of 'sea glass' but I couldn't find one close to what I wanted so I made my own. I used some chalk paint I already had on hand in white and coastal blue.
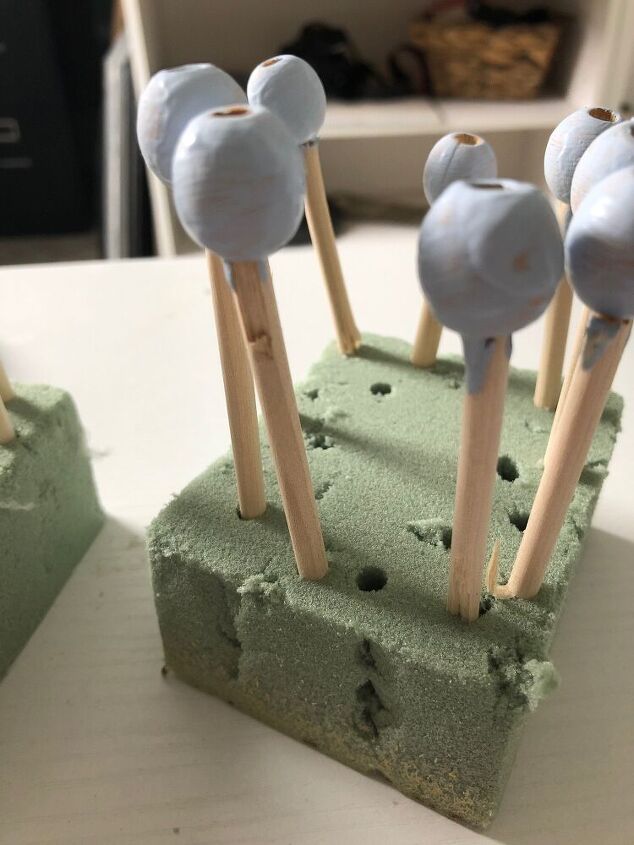
When I had the color I wanted I was ready to paint. To do this I first placed each bead ( I had 19) onto a dowel rod. Then I dipped each bead into the paint, swirled it around to allow any excess to drip off, and then stuck the dowels into a scrap piece of styrofoam.
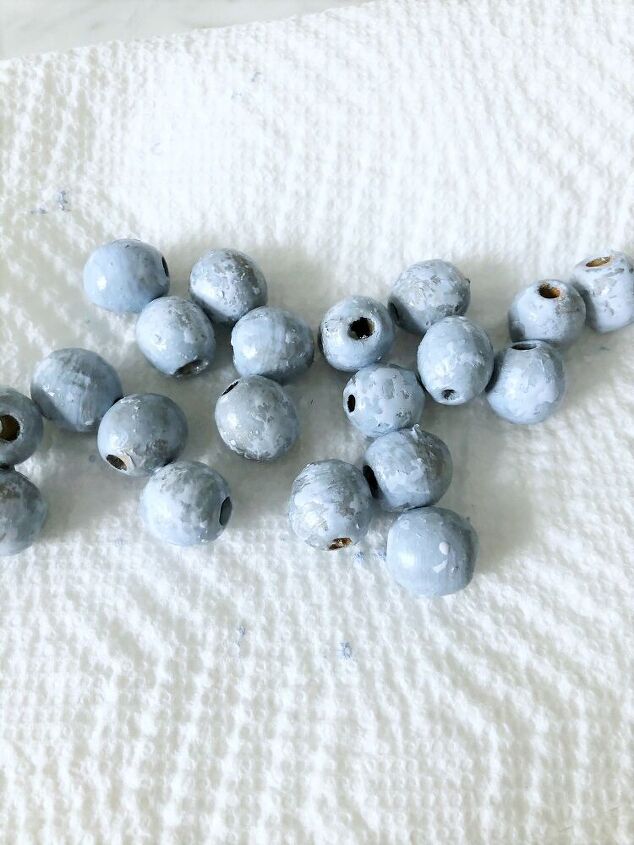
After the paint dried I decided I wanted more of a 'weathered' look for the beads. So I experimented a bit and sprayed each of the beads with one coat of the Looking Glass Paint. Then I dipped the beads back into the blue paint. Finally, I laid them out on a piece of paper towel and gently blotted them with another piece to get the aged look I wanted.
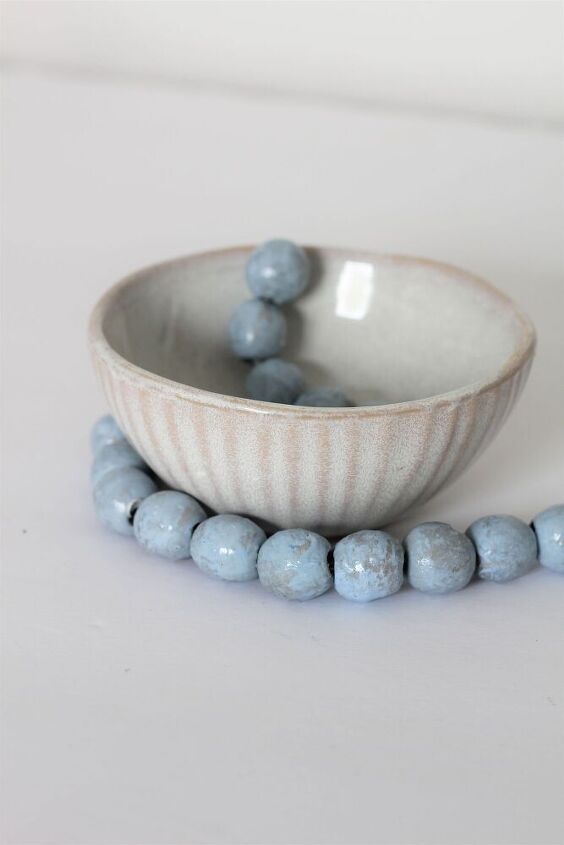
Once the beads dried I gave them two coats (drying time in between coats) of Clear Coat -Glossy to give them that shiny-glass-like look.

Then I simply strung them onto a piece of white string, tying a knot at each end to secure them. I think I'd like to get a few more beads to make a longer strand, but overall, I like how my beachy beads turned out. And the best part is they didn't cost me anything to make!
They will definitely go with some of the other beachy decor I found in my stash the other day. You can find the full tutorial in the link below, along with more summery DIY's!
Resources for this project:
See all materials


Comments
Join the conversation
-
I live on the beach, definitely will be making some. Thanks!
-
So I probably would have used the baking clay! Mixed the colors together till you get the marble affect you’re looking for, poke a hole thru the middle, bake it, (after, for a shinier look apply clear decoupage’). But only because I hate to paint small things due to arthritis, but I can roll little balls forever!! Lol!😂


Frequently asked questions
Have a question about this project?
Did you use the "silver colored" looking glass paint? Thank you
Looking Glass Paint isn't on the materials list. What is it and where do you get it?