


How to Press Leaves
If you're wondering how to press leaves, check out this simple tutorial. You won't believe how easy it is to press autumn leaves to use in crafting projects.

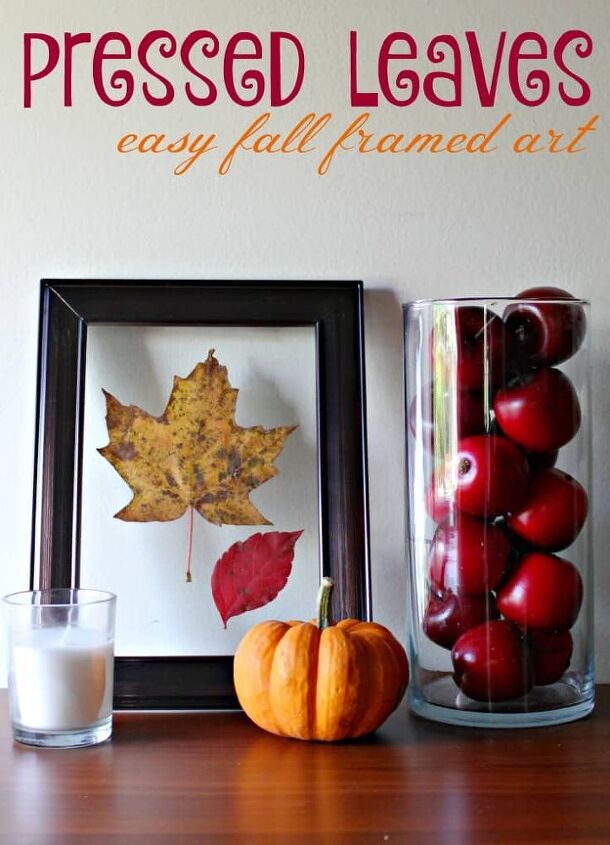
This fall-framed art is so easy to do! I love the way pressed leaves look, but I don’t have the patience to wait while they press flat and dry.
I made an easy fall framed art project that uses pressed leaves that takes just 5 minutes or less to create.
I used the fall framed art with a few other fall-themed items I already had but you could easily hang yours on the wall or display it alone.
It's important that you keep your leaves out of direct sunlight so that they don't fade. And, you don't want to store them anywhere that gets damp. If you do, the leaves might rot rather than dry.
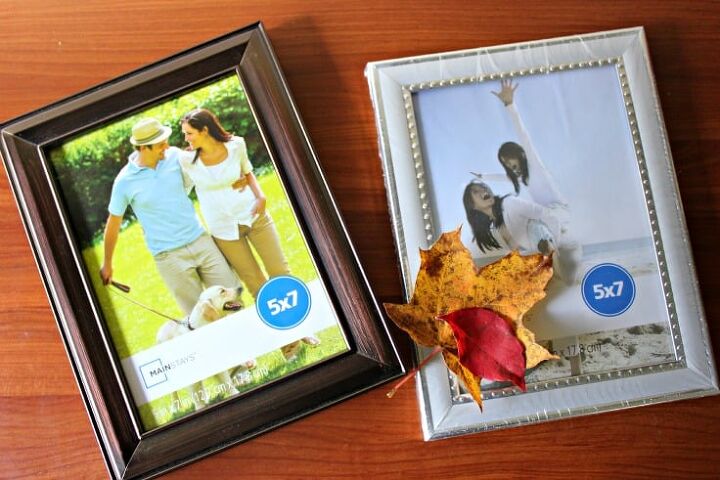
I had to buy two new picture frames since I didn’t have any that weren’t already being used. What I would recommend that you do is buy one “nice” picture frame that you will use to display your fall framed art and one “junk” picture frame that you can take apart for the extra piece of glass.
If you're having problems getting the leaves to lay flat, check out the blog post for a tip right here.
- Gather leaves in the afternoon when they are not damp from dew.
- Separate the glass from the picture frames.
- Remove the back of the frame and discard.
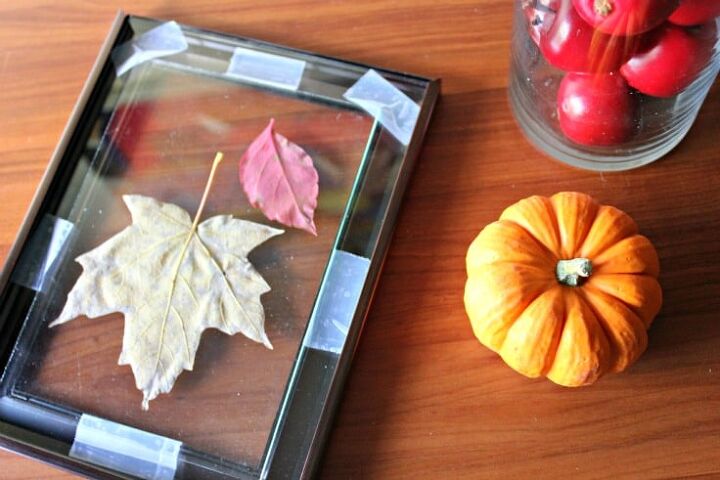
- Place the leaves face down on the glass.
- Carefully attach clear scotch tape to hold them in place.
- Place a second piece of glass on the back.
- Place the glass back into the frame.
- Lean against the wall or use a hanger to hang the project.

Comments
Join the conversation
-
And then, after they dried, we would place them on waxed paper. Surround them with crayon shavings. Add another piece of waxed paper. Then the teacher would iron the pieces. The crayons would melt and hold the waxed paper together. Then they would be hung in the classroom windows. I just had a seven year old flashback.
-
I think I would use those autumn leaves that are preserved in glycerin (the bunches that you find in supermarkets every fall). I think they would last much longer and the colors should last longer, too. I like the idea of the floating leaves in the frames.


Frequently asked questions
Have a question about this project?