


How To Make A Coastal Planter
I had one of those days today. I was so excited about how these turned out and was out front taking pictures in the sunshine.
I'm watching my son's dog this week so he along with our two were out front with me since it was beautiful!
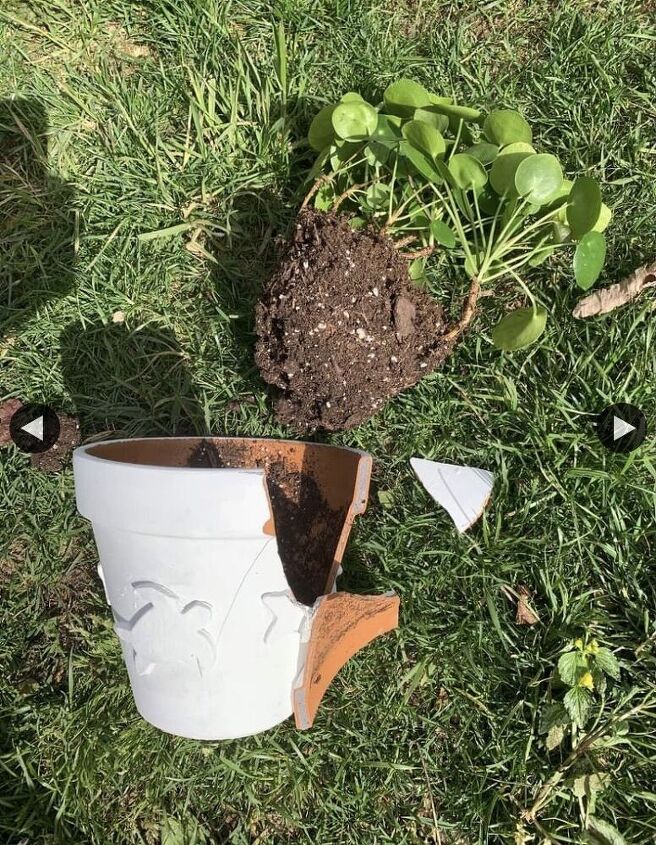
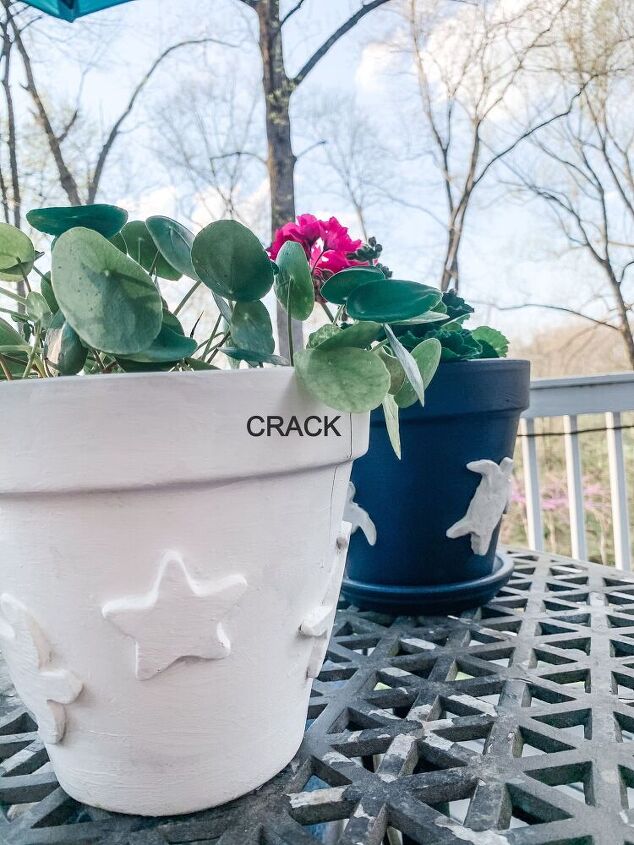
I had two of them on long lines, and was taking the pictures when some random cat ran right through the yard, seriously right past my table with the pots on them. There was a flurry of activity and the table when over, the pots fell, one broke, the plant fell out and broke, the chair ended up about 15 feet from where it was, my dog was wrapped around it, was limping, the other was around a tree. I wasn't very happy. Not only because of the pot but that plant had been knocked over in various pots at least 3x last year. I've babied it and I was so happy it was finally doing well.
But you know what I did do? I reached out to this amazing group of women bloggers to share my story and how I felt defeated. I longed for that feeling when you know someone "gets it." In the big picture it's a little thing but for some reason today it got me. My takeaway - never underestimate what a kind word of encouragement can do. It changed my outlook today and for that I'm grateful.
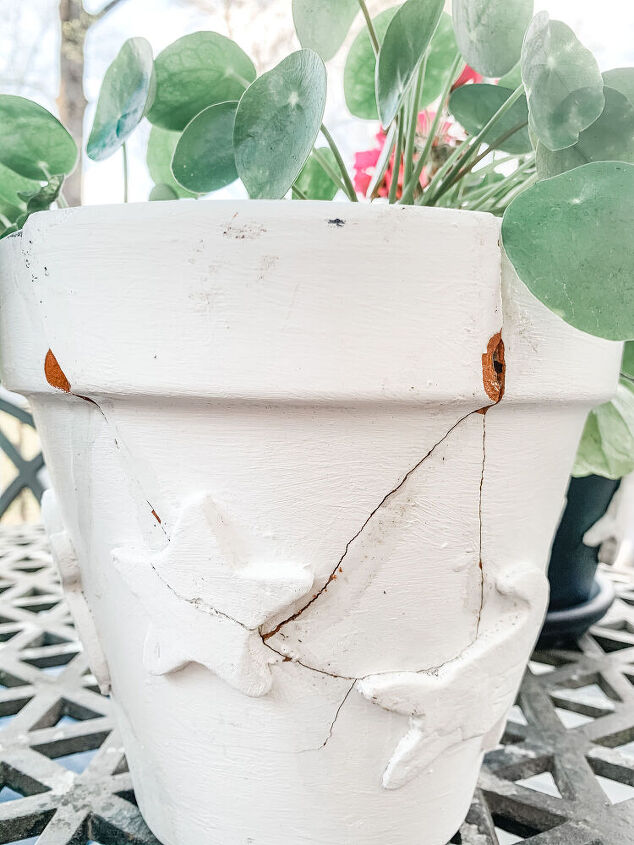
Also, thanks to them I decided I'd share a little behind the scenes with you and we could all laugh! I glued it together, and took pictures from the other side. Dang cat.

So here's where the post was supposed to start...
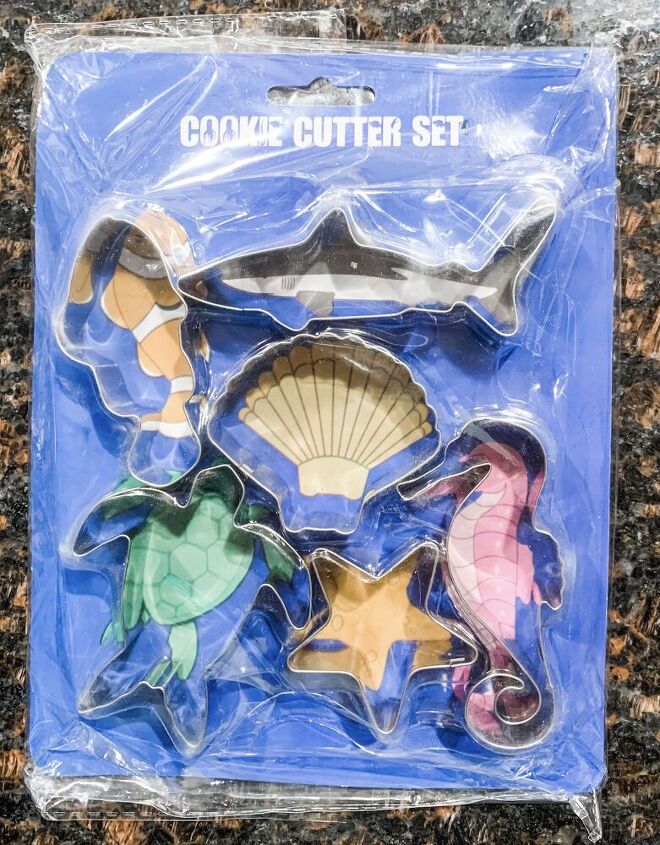
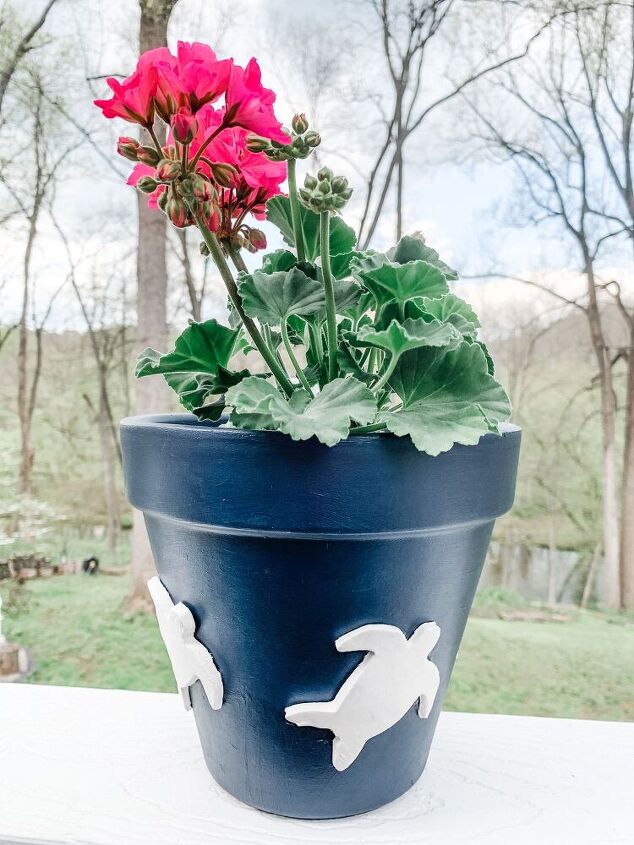
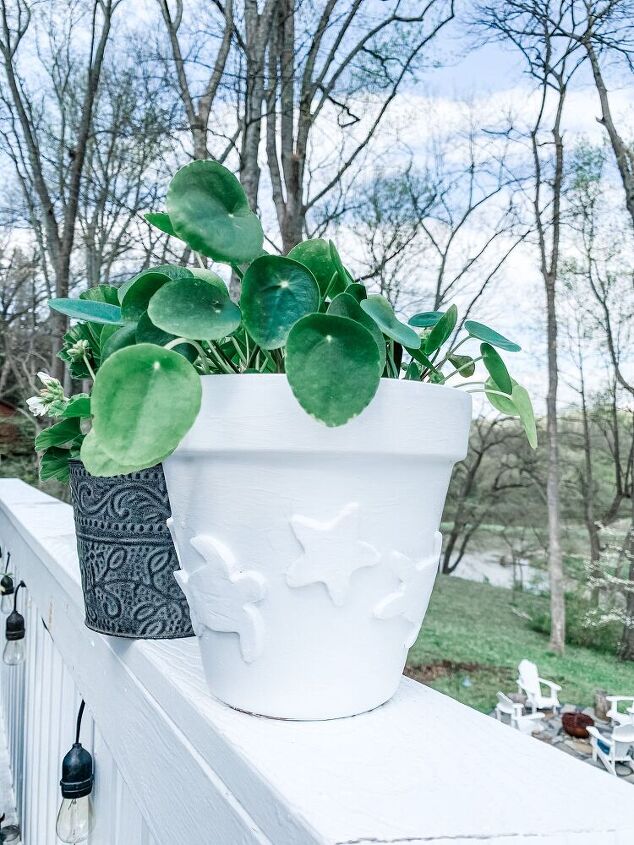
I ordered these adorable mini cookie cutters and decided I'd update a few of my terra cotta pots.
No, unfortunately I don't have a beach house, but I have friends and family that do! Maybe one day.
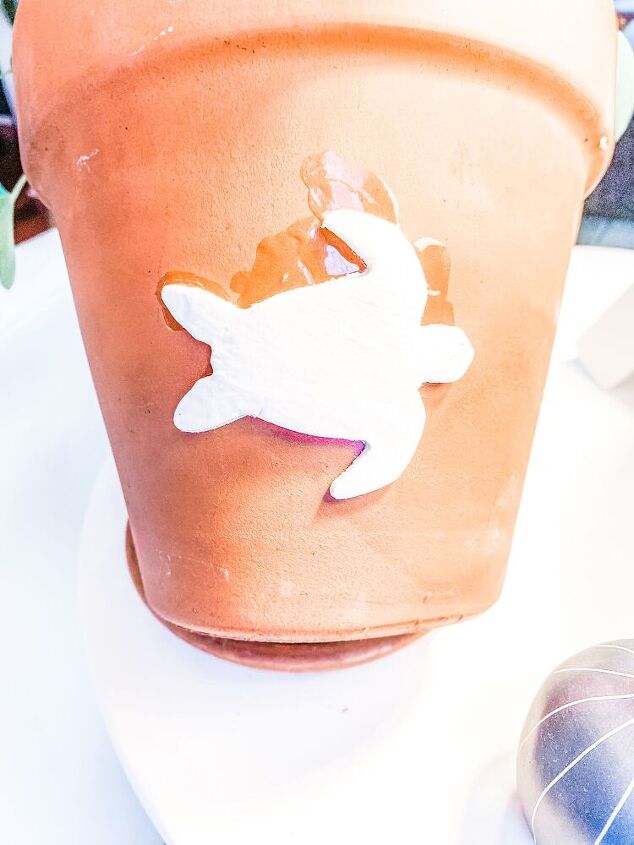
I do have water turtles, snapping turtles and box turtles near my house and I absolutely adore the beach so...These are super easy and there are so many fun ways to use this clay. Remember my Bunny Buttons or my Rustic Valentine Tablescape? Air Dry Clay. You just roll it out to your desired thickness and cut it into shapes with cookie cutters and let it dry overnight.
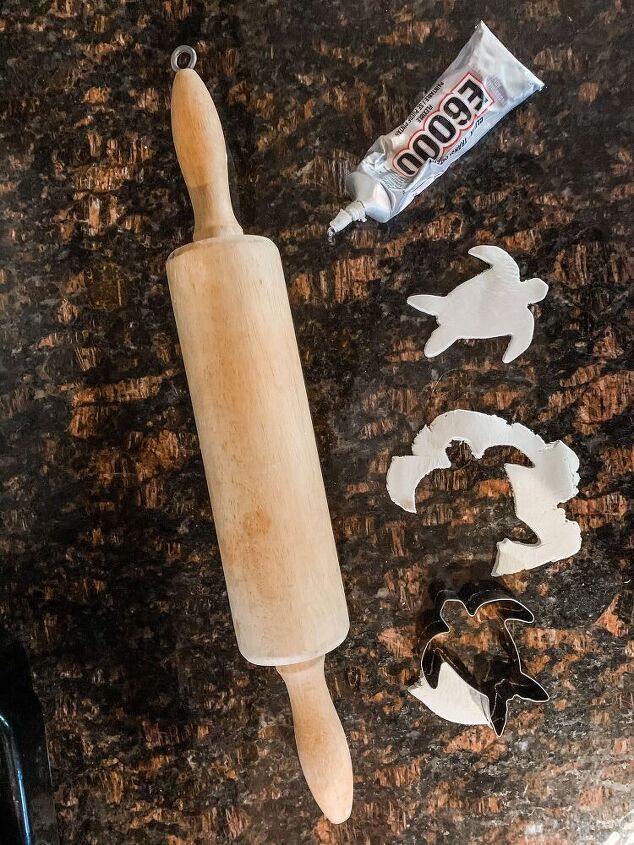
Here it is in the beginning stages. I wasn't sure if the clay would crack as it dried adhered to the pot but it didn't - win. You can see where it slid down the pot. I had to tip it on its side to let it dry, only problem was it was filled with a plant. I suggest using pots that you don't already have plants in.
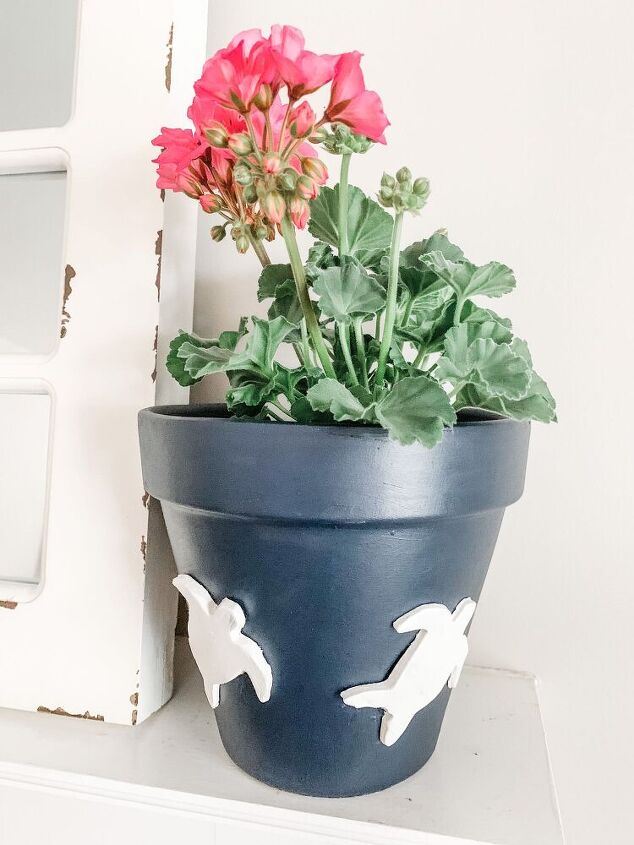
I started this in the evening and the next day when I saw it worked, I made some more turtles and added a few starfish.
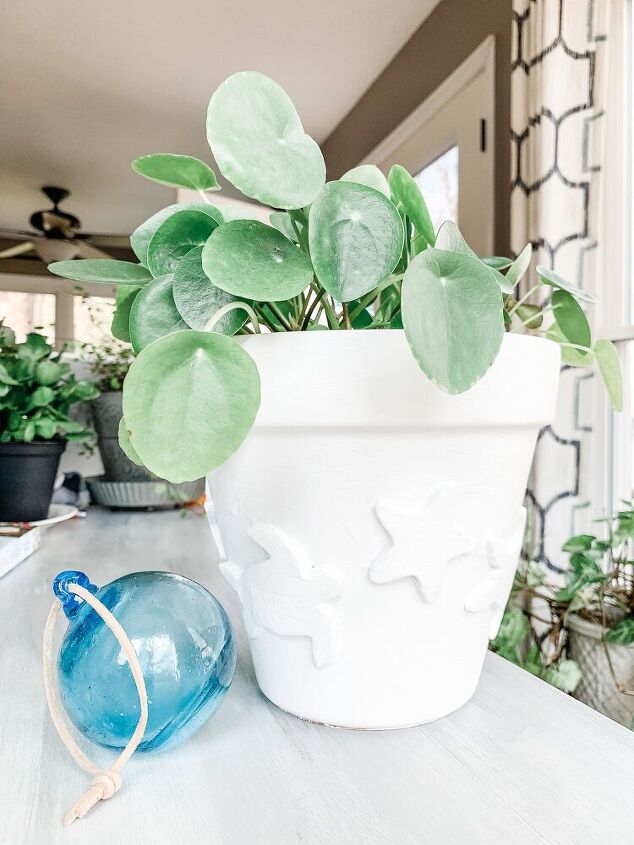
I thought about a navy pot then white turtles, but I decided to do my first one all white. Above is the beginning of the first coat. I painted it two coats all together.
I love the way they turned out. Such a cute and inexpensive way to personalize a pot. Perfect for hostess gift or birthday gift for a plant lover. And the sky is the limit with the shapes or designs you could add to your pot.
I can feel my head spinning as I type about my big crab cookie cutter, maybe putting it on a galvanized bucket for shells from eating crabs.
These are the same cookie cutters I used to create more buttons from Sculpey Clay. I am going to use these to make the perfect coastal pillow for friends. I made lime green and turquoise turtles for a really colorful and bright pillow.
Any ideas for more cookie cutter shapes to get? I'm game! I'll share the pillows when they are done.
So which planter do you prefer? The navy and white or all white? Should I add rope or no rope?
I hope you are inspired to create some new pots for Mother's Day or upcoming birthday or Hostess Gift. Thanks so much for stopping by my blog. I'm happy you are here.
XO, Regina
- DIY
- •
- Lake Life
- •
- Reg's Ramblings
Resources for this project:
See all materials


Comments
Join the conversation
-
I will hopefully try this soon. Do you know if you can add a bit of paint or food coloring to the cutouts prior to gluing them in place?😁👋
-
You could certainly paint them.


Frequently asked questions
Have a question about this project?
I'm guessing you cut them out, glued them to the pot then let them dry on the pot. Is that right? Did you paint them after they were on the pot and dry?