


How To Chalk Paint A Desk
If you love this project, grab your quick start DIY guide & subscribe to our blog!
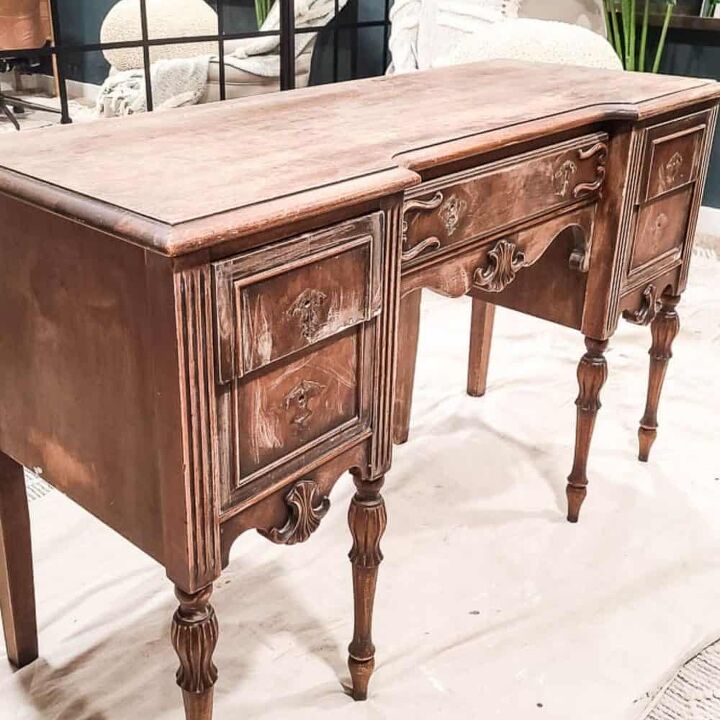
Who’s ready for a furniture flip? We’re going to teach you how to repair wood furniture while transform a wood vintage desk. This chalk paint desk turns out so good!
The best time to repair damage on wood furniture is before painting.
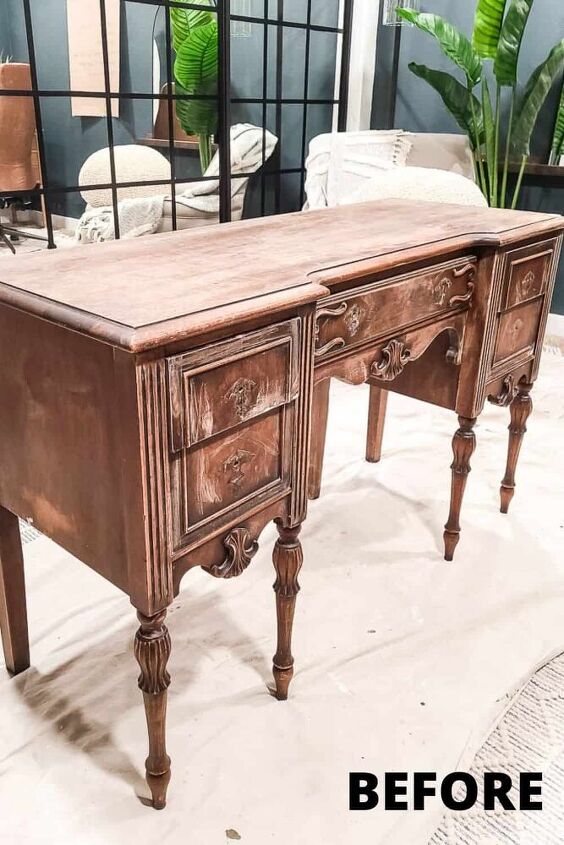
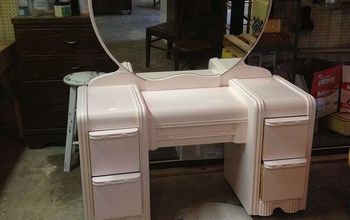
BEFORE PICTURE
How much chalk paint do I need for a desk?
If you’re going to chalk painting a desk, a quart of chalk paint usually covers 150 square feet.
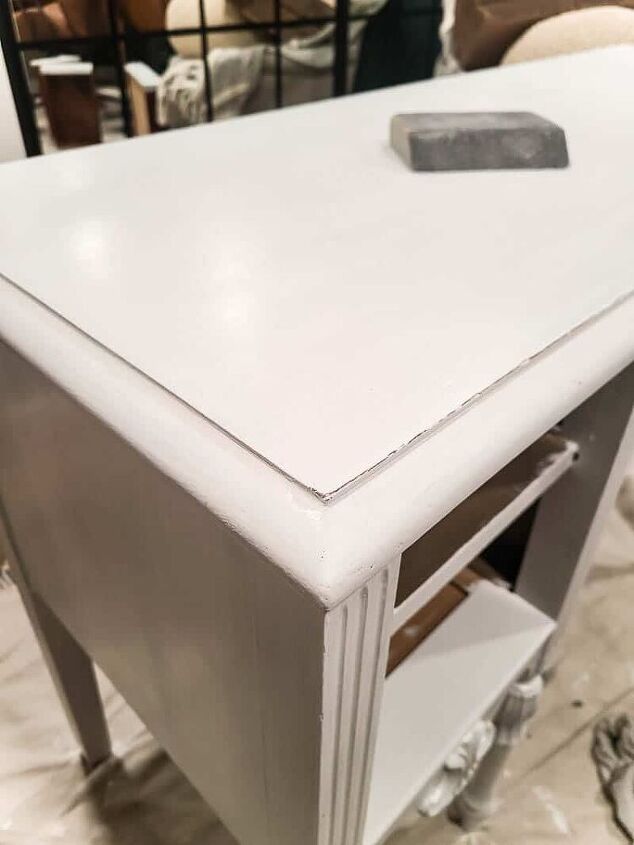
Furniture Repair with Epoxy Before Painting
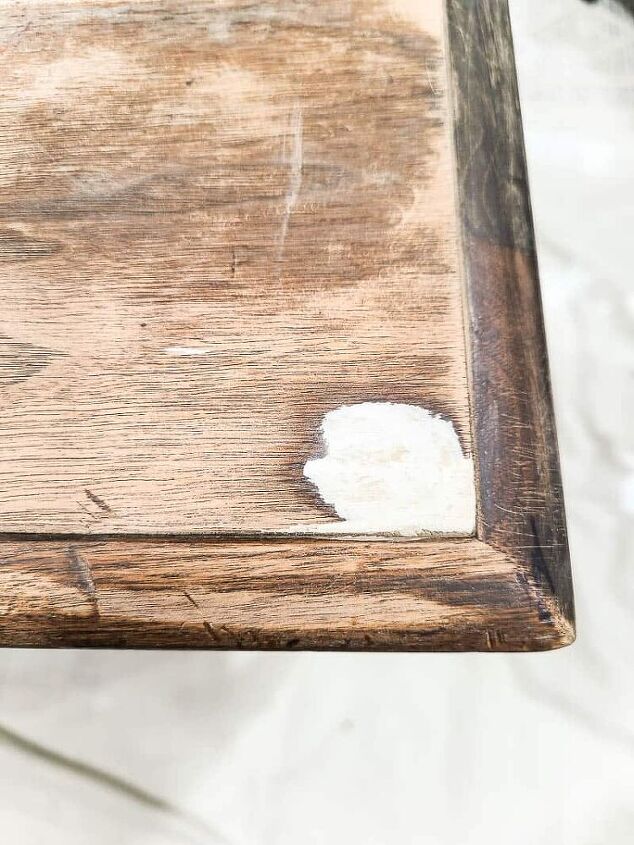
Step 1. Apply Epoxy Stick to repair wood furniture.
- Once you open the tube, simply pinch off a small amount (about a grape size depending on the damage area that you’re repairing).
- Smoosh it together in your fingers until it warms up a bit and is uniform in color. It’s similar to the consistency of Play-dough, so this part is really easy. Mix only what you can use immediately, the epoxy will remain workable for roughly 5-10 minutes.
- Then just firmly press it into place where the damage is on your wood furniture. Best to get it a little bigger/higher than the actual damage because you can sand it down.
- You can get your fingers slightly damp to create a smoother surface if you’d like, but I didn’t do this and mine turned out fine. Shape as desired.
- It will cure within 20-30 minutes and you can move on to sanding!
- I used an orbital sander with 150 grit sandpaper initially on the areas where I applied the epoxy stick. This was just to get the high spots of the epoxy. I finished the areas by sanding by hand lightly with 220 grit until smooth to the touch.
- Sanding is easiest within the first few hours of application, so it’s not recommended to leave it overnight or something.
Step 2. Lightly sand.
LIghtly sand the entire surface of the wood furniture by hand with 220 grit sandpaper.
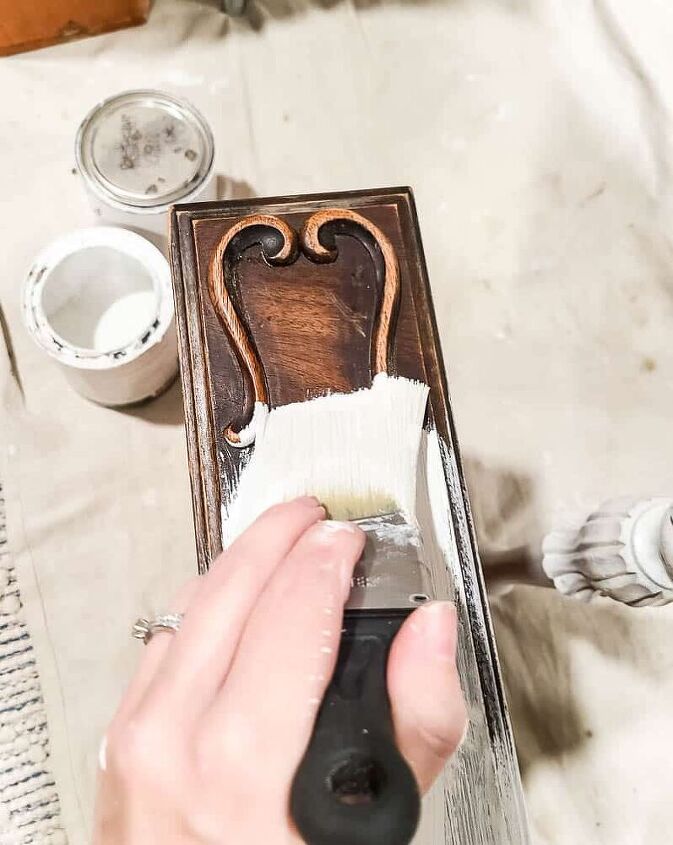
Step 3. Prime.
This will depend on the age and color of your wood furniture, but I tried out just skipping the step and going straight to chalk paint.
Step 4. Chalk paint desk.
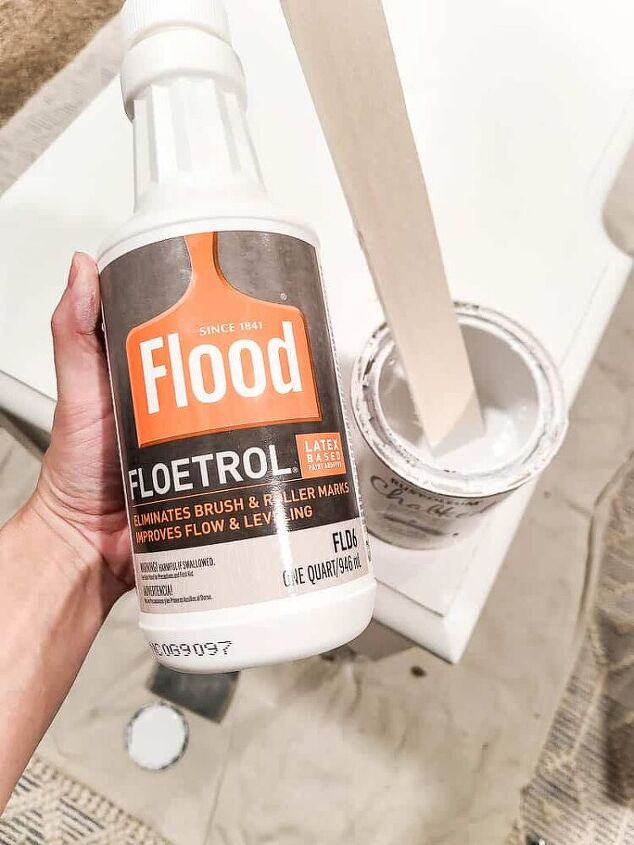
Since I was using a paintbrush for all of the paint, I decided to try out this paint additive that is supposed to help reduce brush marks. I added the recommended amount to the paint before starting.
Another step I took to reduce brush marks in the paint finish was lightly sanding the surfaces with a fine-grit sanding block in between every coat of paint once it was dried.
I used the same angeled paint brush to apply 3 coats of this chalk paint to the vintage desk, sanding in between each coat as mentioned.
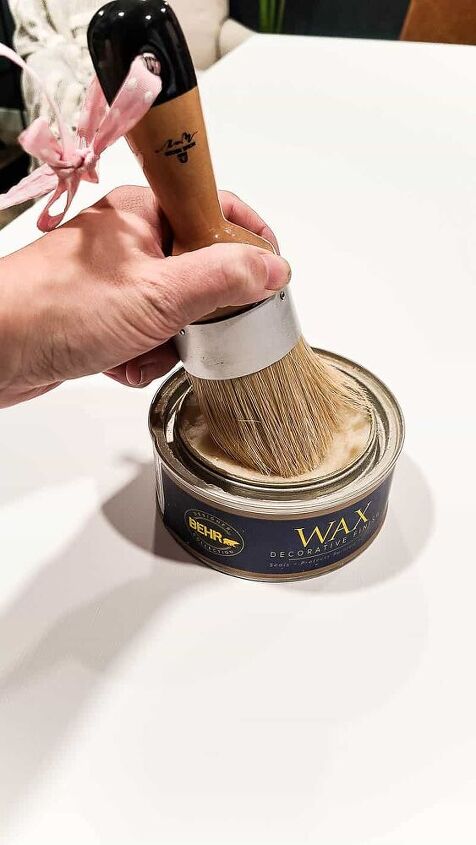
Step 5. Seal.
Using a wax brush and this wax finish, apply it in a circular motion over the entire surface of the desk.
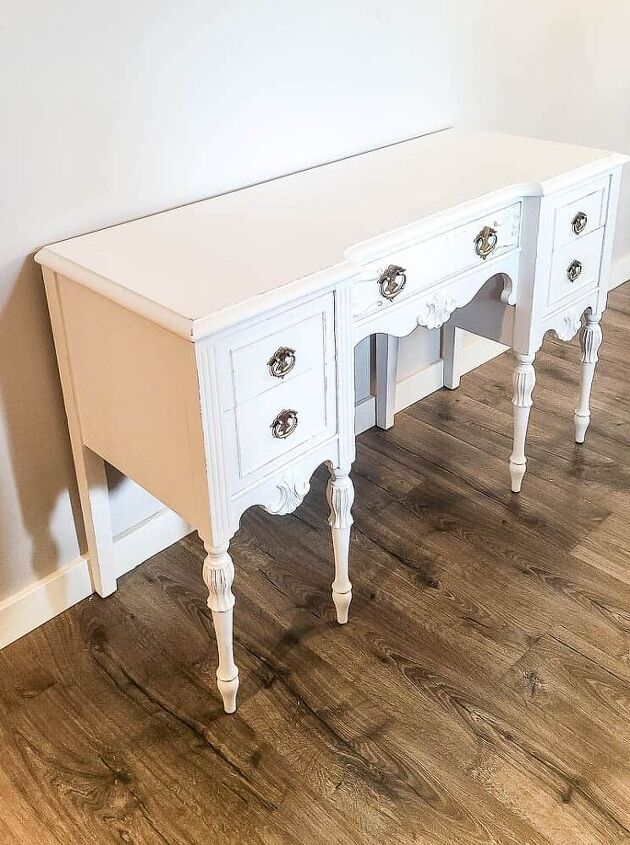
Turned out SO good, right?
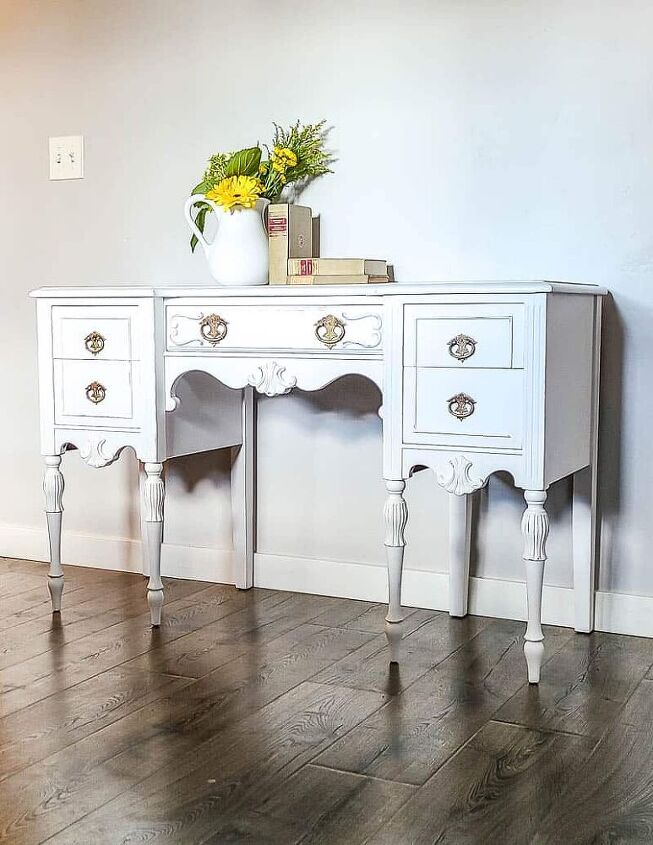
Crazy, right? You can’t even see the damaged area now!
If you love this chalk paint desk, check out all of my painting tutorials in the archive here!
Resources for this project:
See all materials


Comments
Join the conversation
-
Beautiful desk. Well done. But I personally prefer it in the original wood finish.
-
Floetrol is great , I never paint walls without it! Makes a HUGE difference!


Frequently asked questions
Have a question about this project?
Did you find that the Floetrol eliminated brush strokes? Beautifully done piece.