


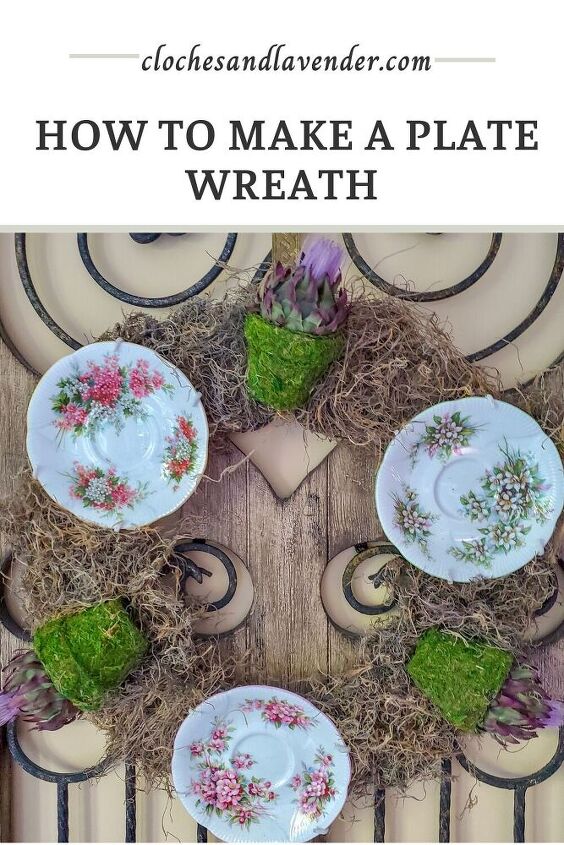
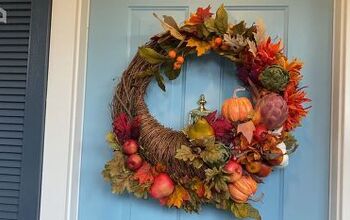
How To Make A Plate Wreath
14 Materials
$20
1 Hour
Easy
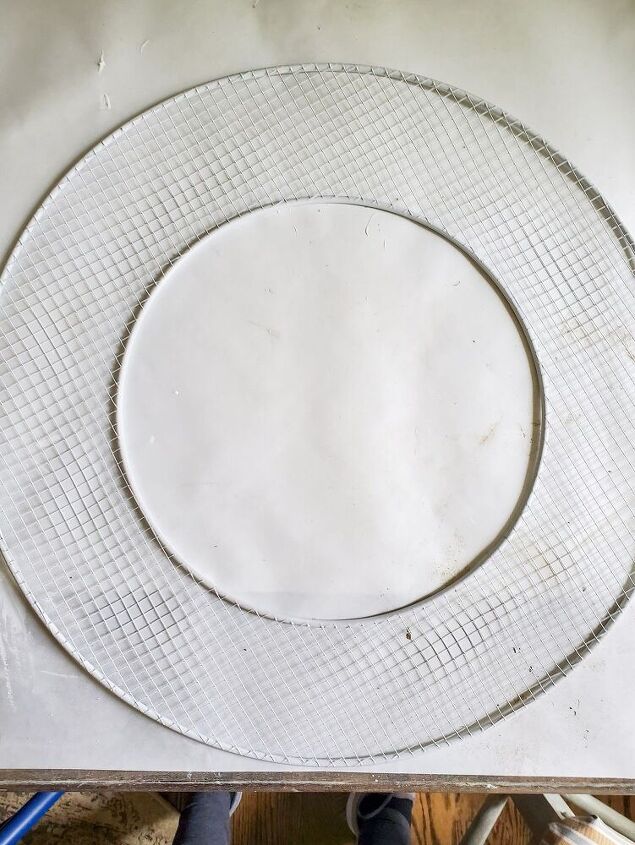
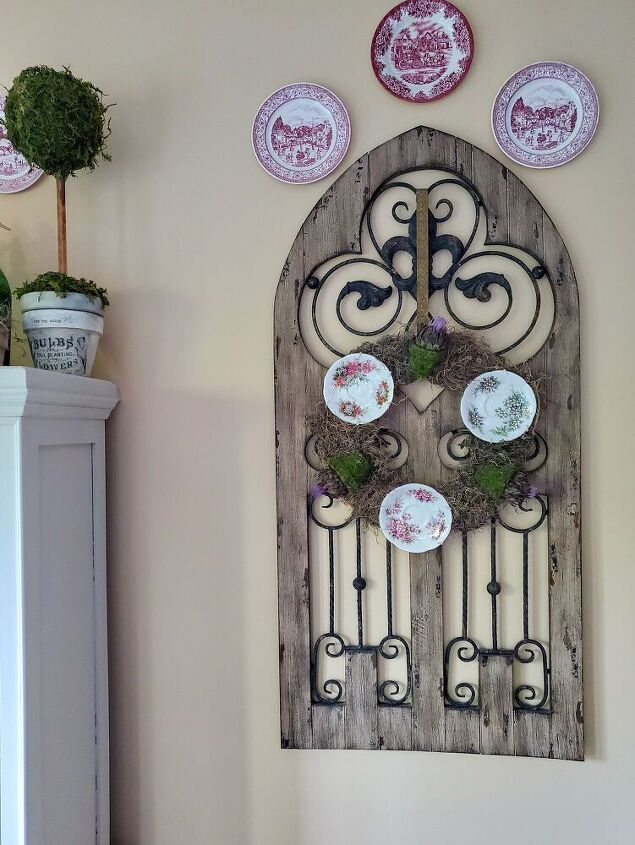
Today I’m sharing how to make a plate wreath. Before I begin getting into the details I’m going to share how this project began. As a rule, I make an effort to use pieces in our home that are sentimental. Because I have a collection of antique tea cups from my grandmothers. I am deciding how to display them in our home. I’m currently in the beginning phase of deciding the best way to display these. After thinking for a bit using the saucers came to mind and that’s how to make a plate wreath began.Of course I didn’t want to damage or harm these specials pieces. My grandmothers found these pieces out antiquing on weekends. Also a few of these are from my mom’s own collection. You can imagine these pieces are especially important to me mostly the pieces from my mom. My mom and I were extremely close. Anyway I can keep a piece of her around me I work to make it happen. So I came up with the idea of of sharing how to make a plate wreath. Because I do want to be careful with these special pieces this took some planning and thought.How To Make A Plate WreathFirst of all, a wreath form is needed. I did have to take a look around for the best one. Luckily, I did stumble upon a 16″ gold mesh hoop wreath at Michael’s. Because of the mesh I knew this would give me stability to make a plate wreath. After getting this home I did decide to spray paint both sides with Rust Oleum Chalked Paint in Linen White. Let dry.
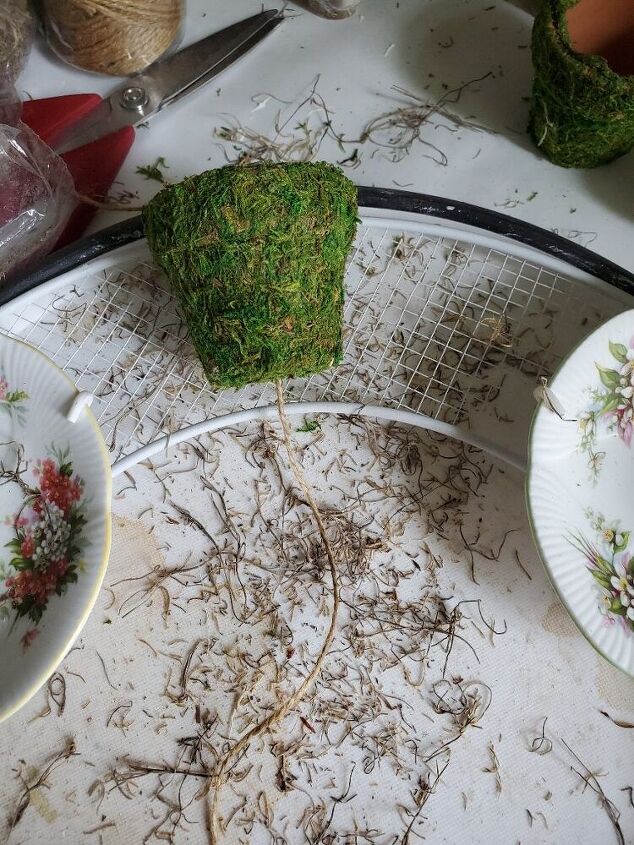
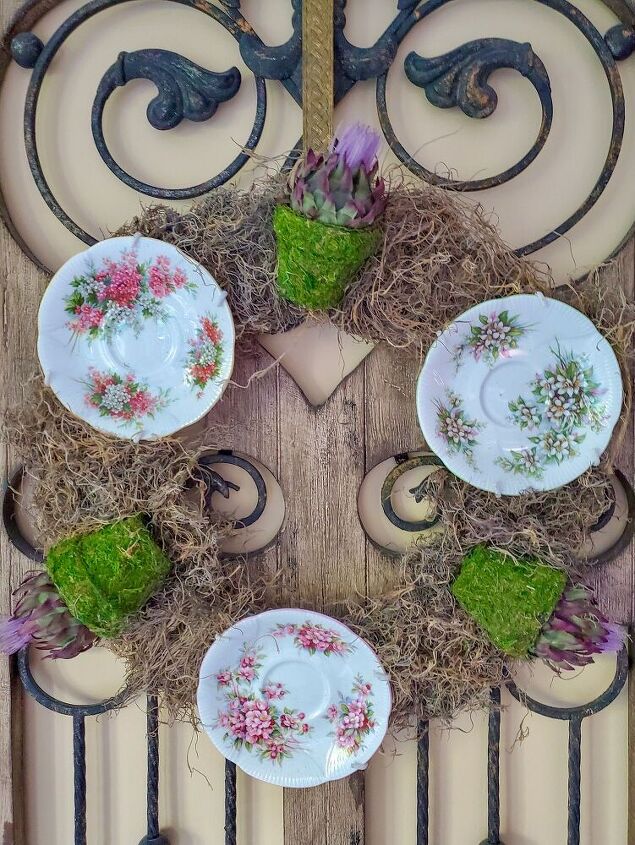
Also, I did buy plate hangers and did spray them the same color. For the most part, I did this so everything will blend when sharing how to make a plate wreath.My Next Step For Making This WreathAfter spraying these pieces, I did decide adding flower pots would be pretty. Because I already have flower pots and self stick moss from making this wreath. I did use it to cover the pots. Also, you may remember me saying I did buy self stick moss from Jo Ann. Well, having some leftover, it was a great way to save money and add it to make these pot prettier.
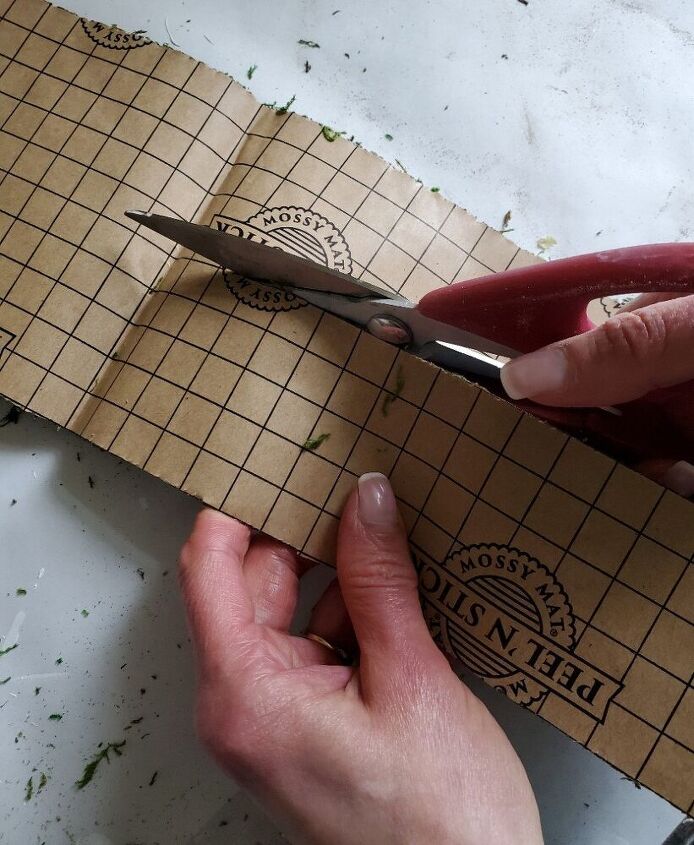
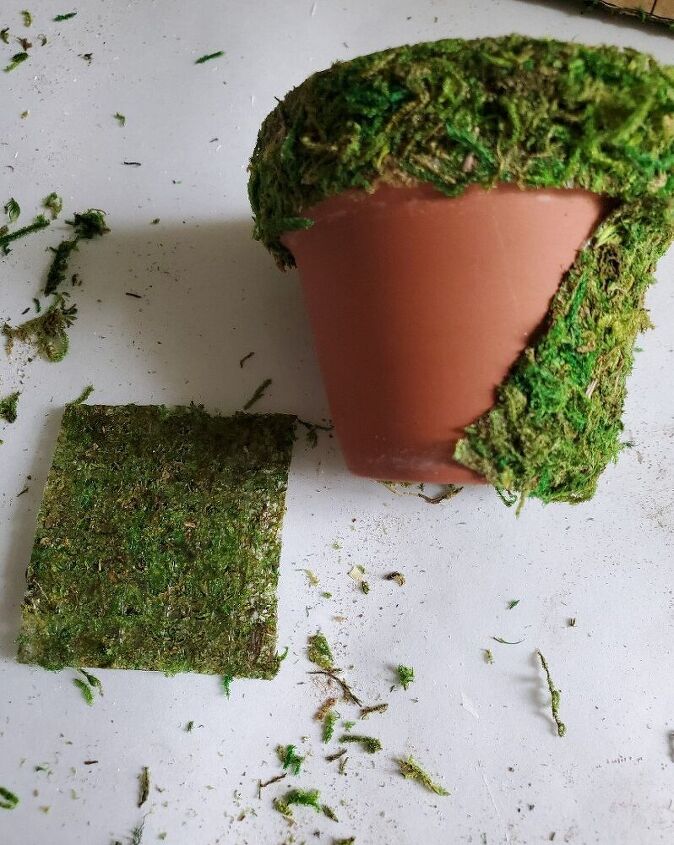
Cutting Moss To Cover The Flower PotsSo then, I did cut pieces of the moss and began covering the flower pots. By the way, I did this by cutting a narrow piece first to stick the rim of the flower pot. Afterwards, I cut small squares to also add to the sides.
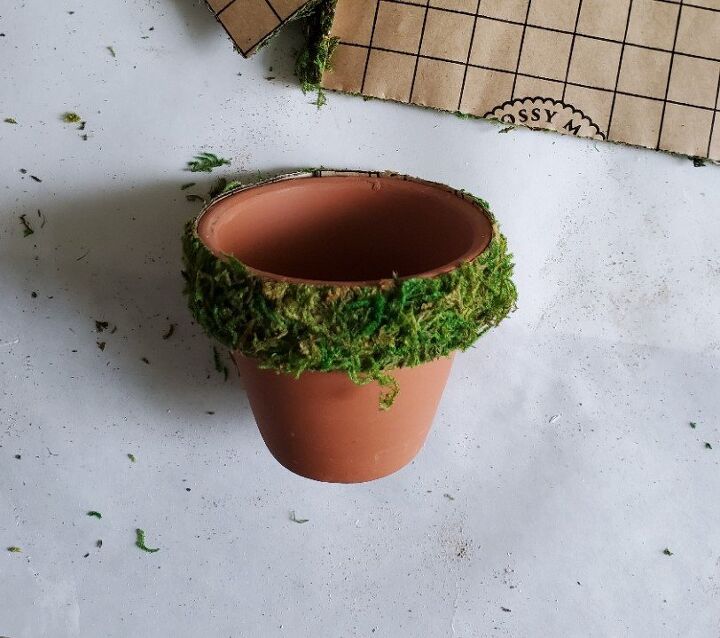
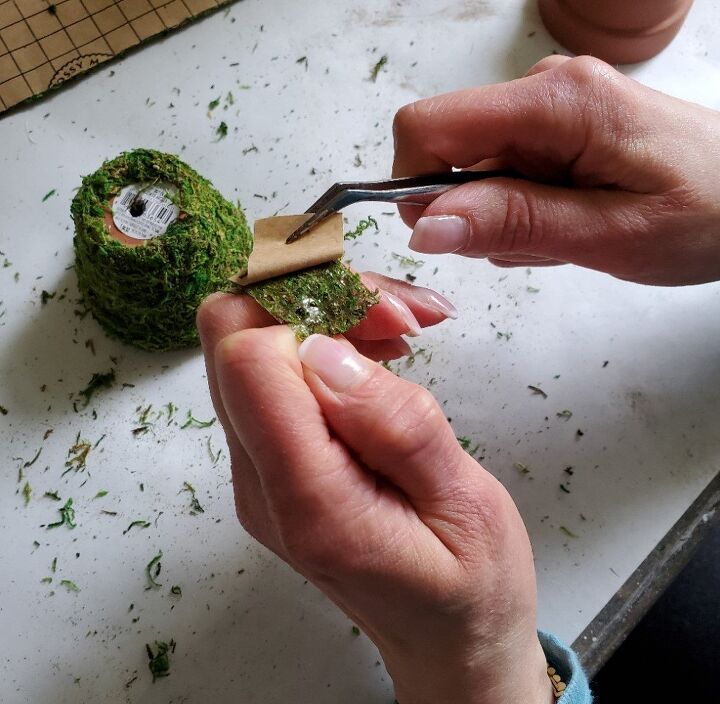
Also, I did add a thin strip of moss to the edge of each flower pot. This makes the pots look finished. Lastly, I cut small square to cover the bottom to share on how to make a plate wreath.
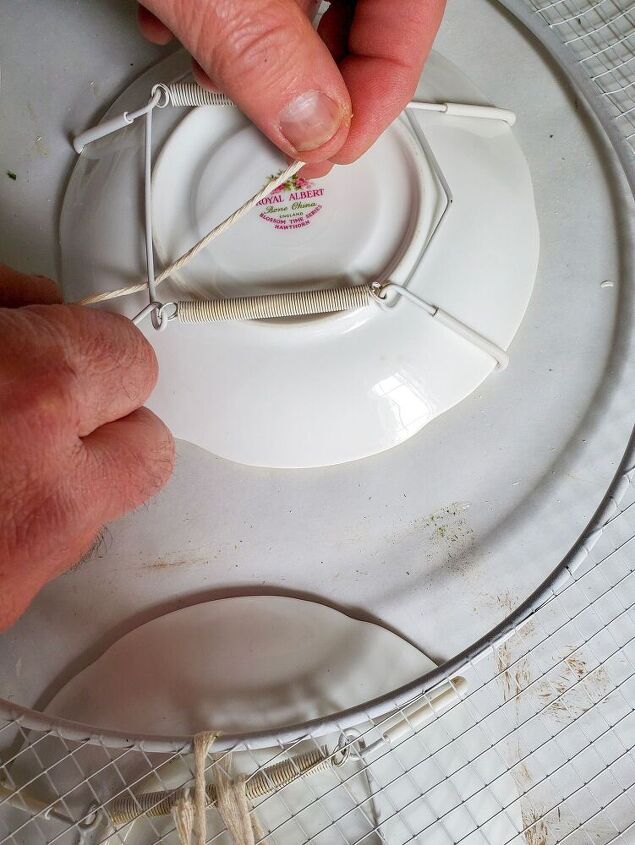
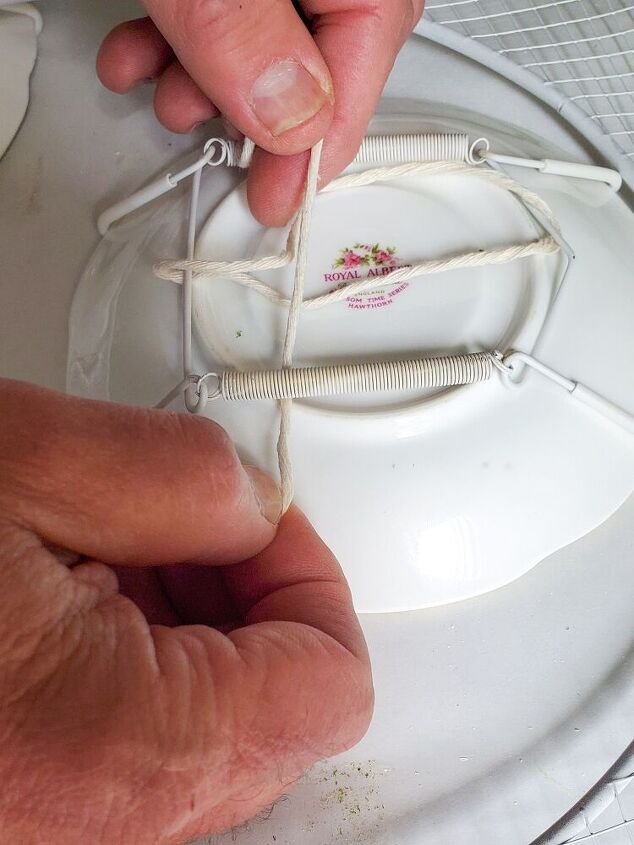
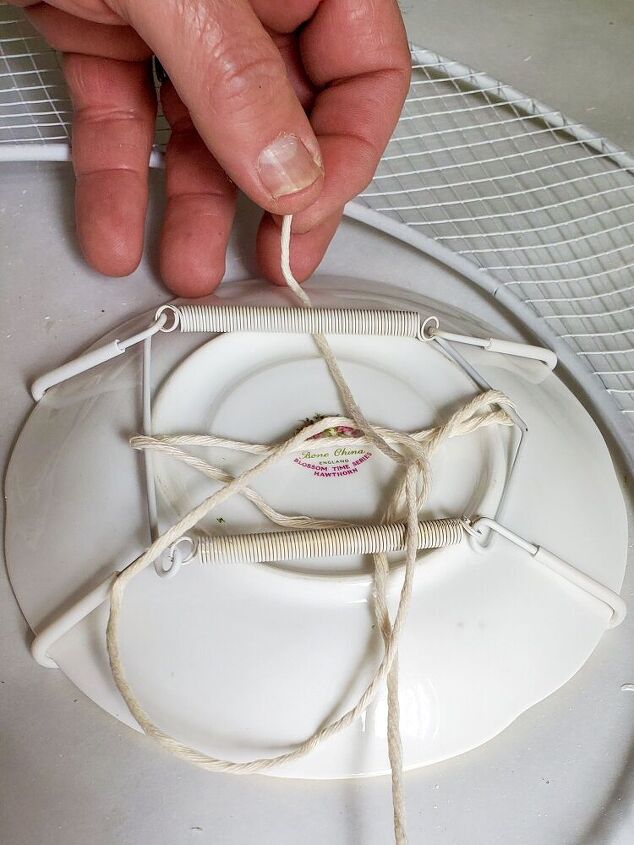
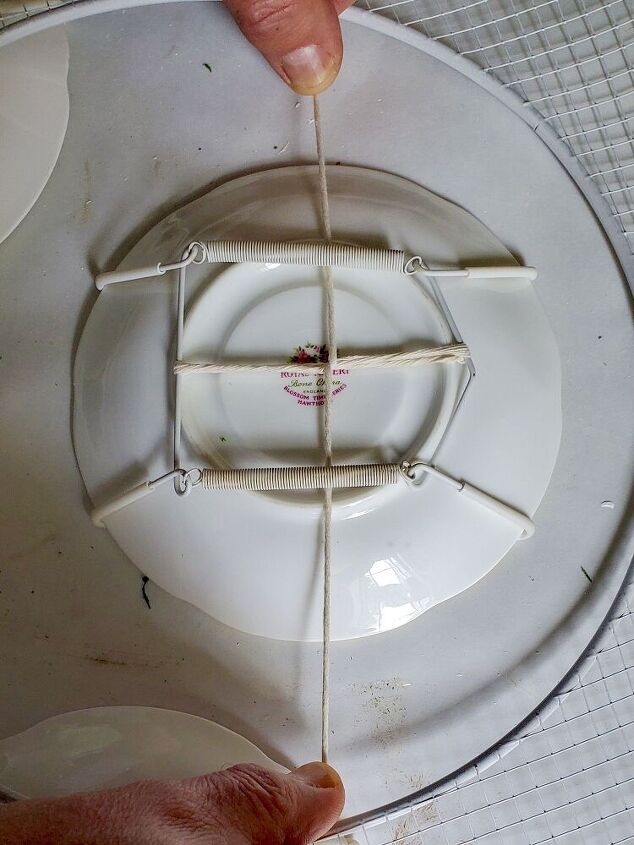
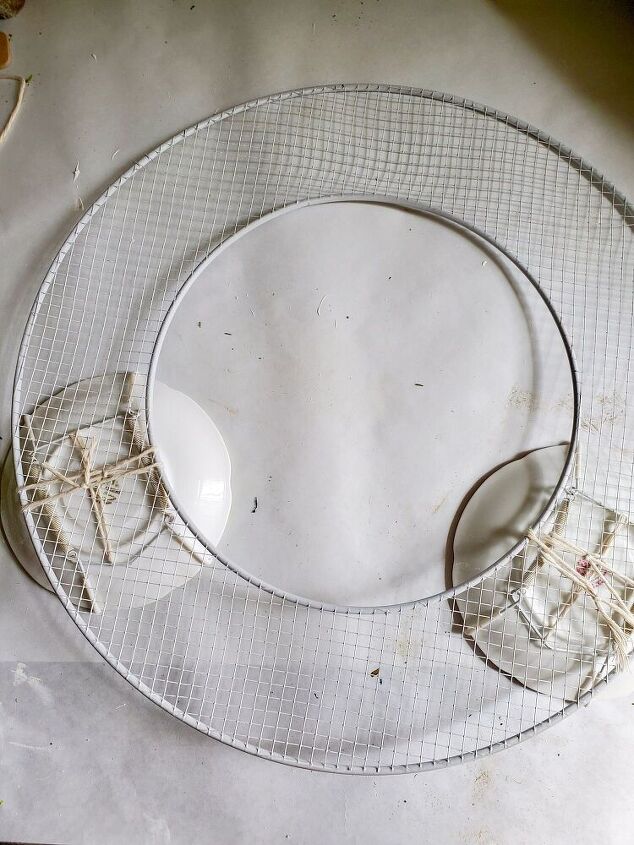
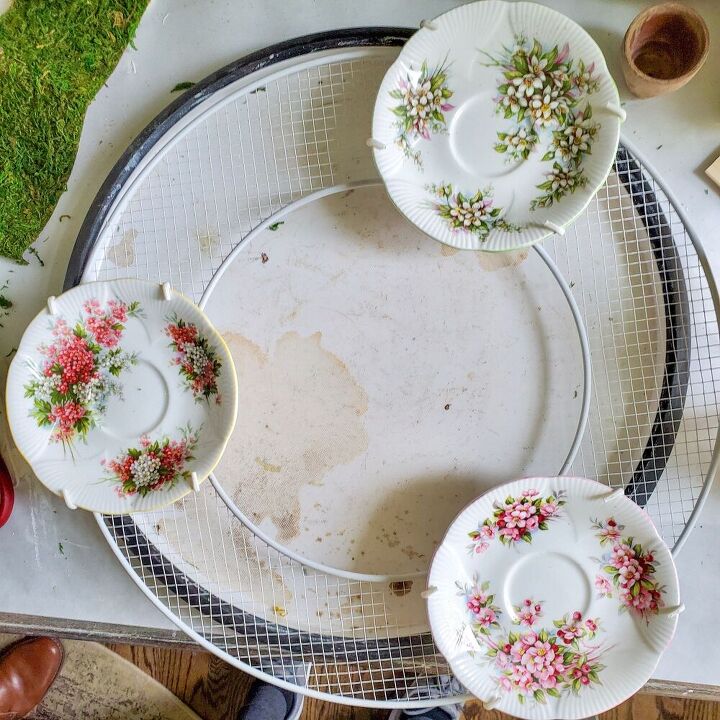
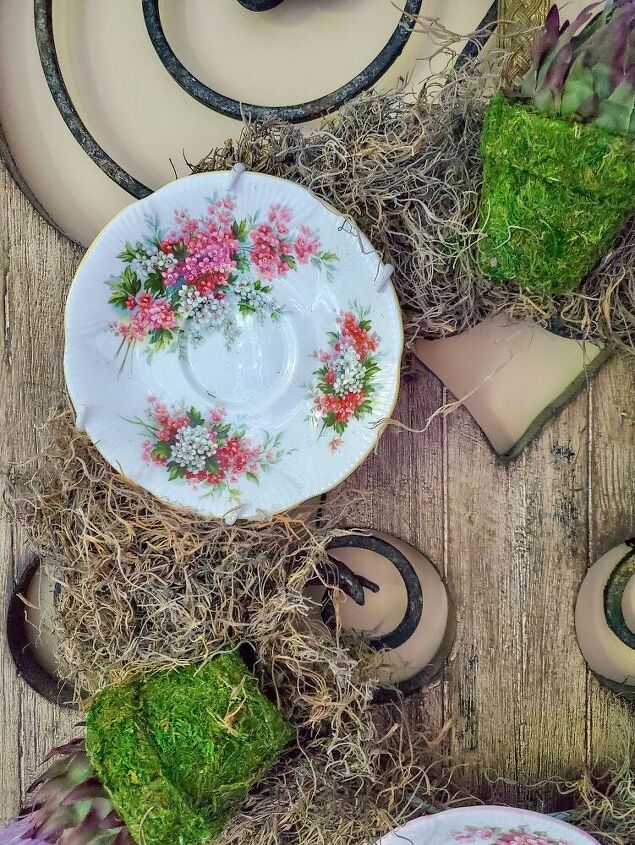
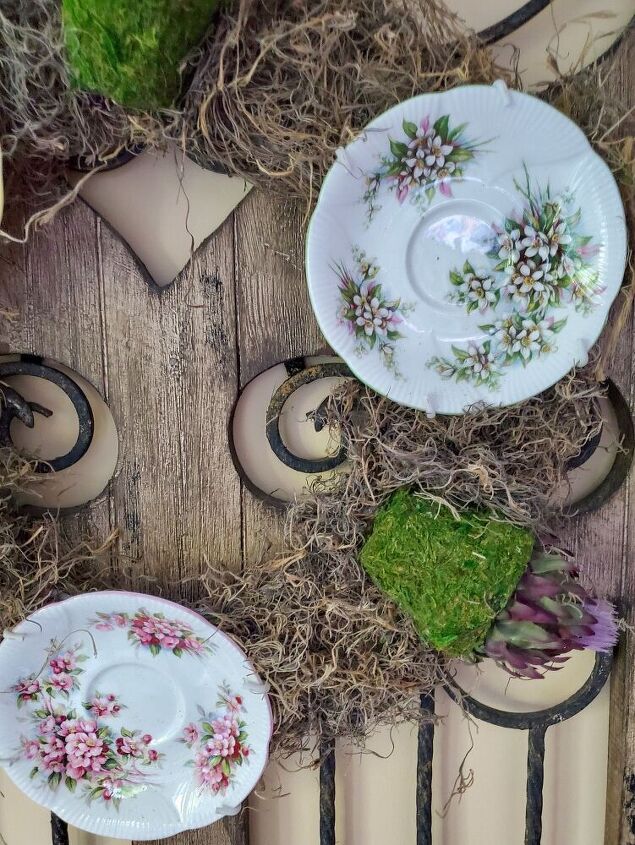
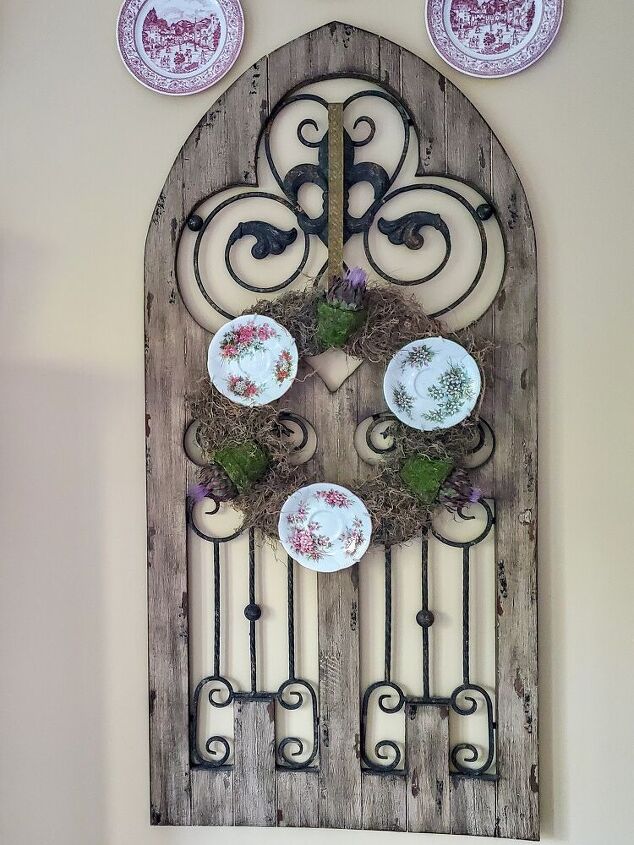
Next Step For How To Make A Plate WreathNext I began putting my wreath together. First I add the dishes to my wreath using butchers twine. We began with sliding the string underneath the wreath hanger. So next, looping it through the wreath frame and tied a knot. Then, we repeat the process until all three plates were attached to the wreath form. Also, I am using three plates to make the wreath I have balance and form a triangle.
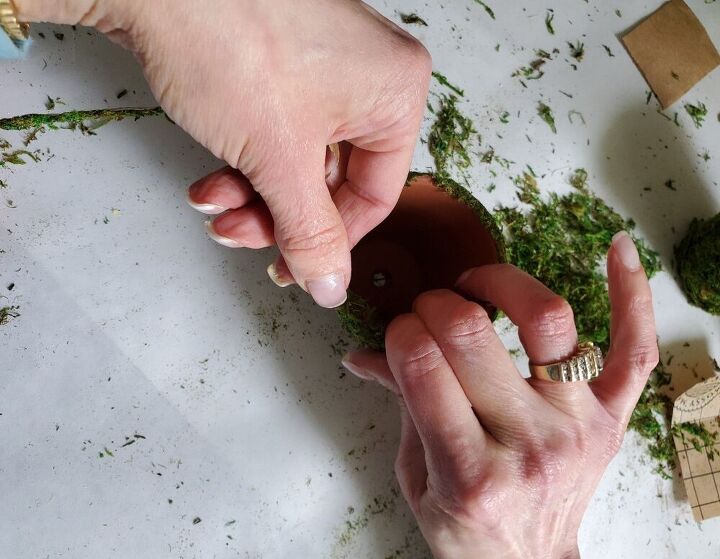
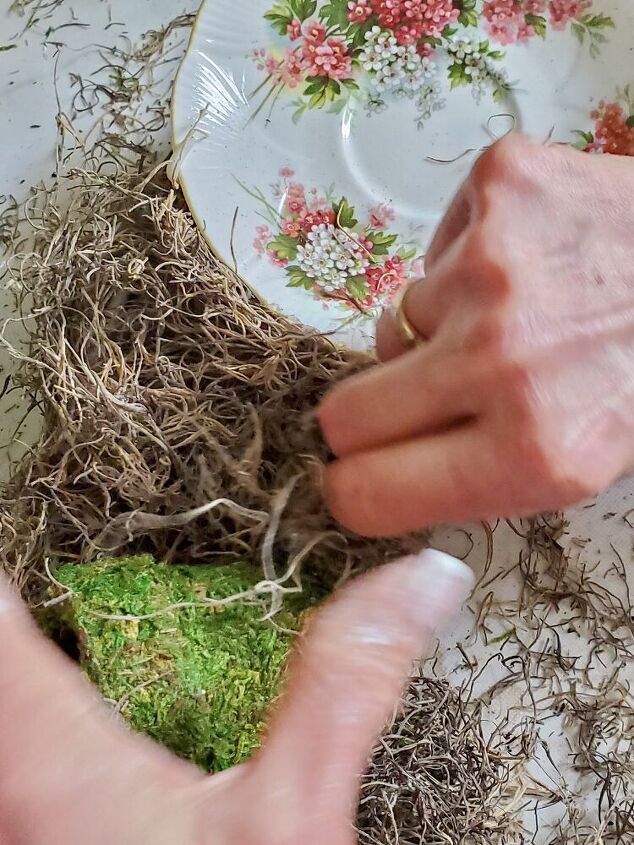
Next How To Make A Plate Wreath Add The Flower PotsMy next step, is connecting the flower pots and for this step we did use jute. First, using a long tweezer I did push jute through the hole on the bottom of the flower pot. After this step, the jute is pushed through the mesh wreath and tie a knot securing the flower pot.
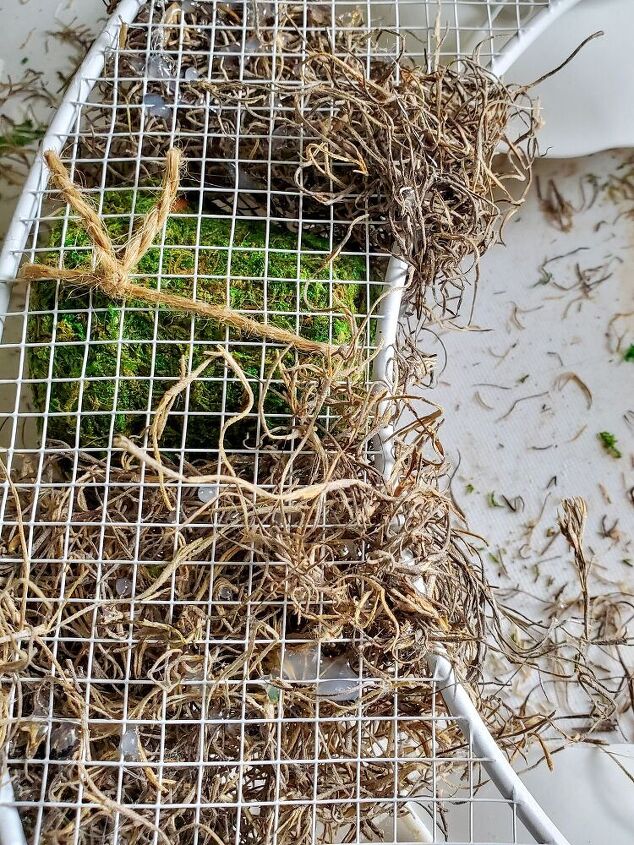
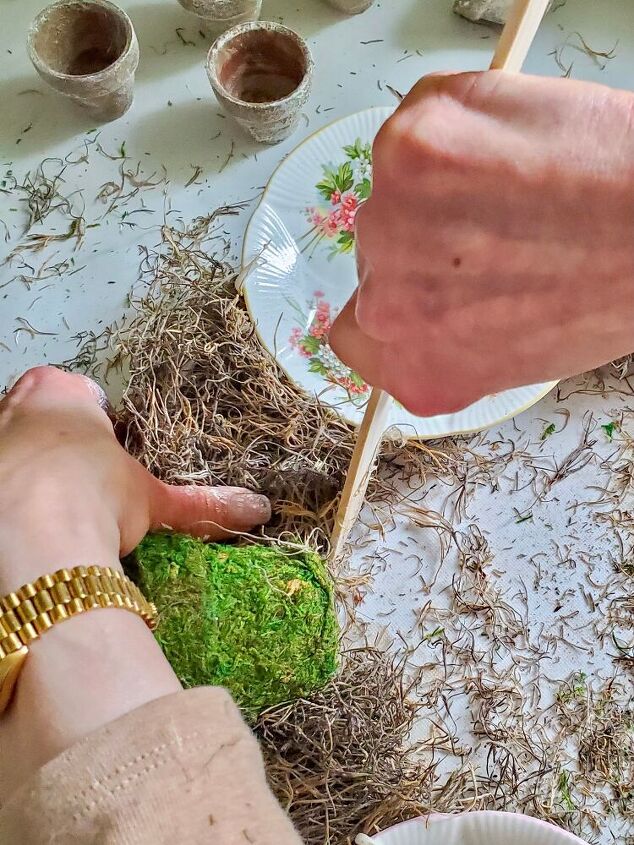
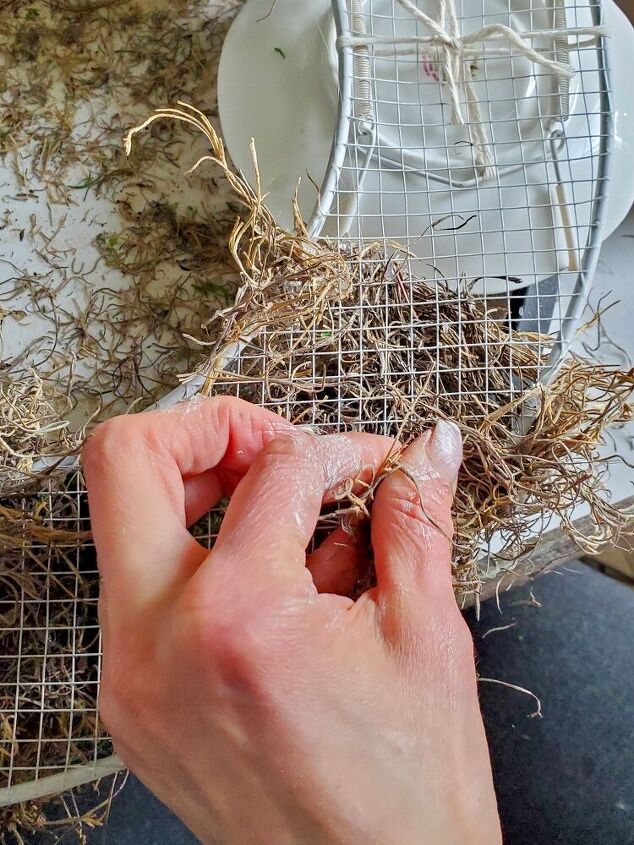
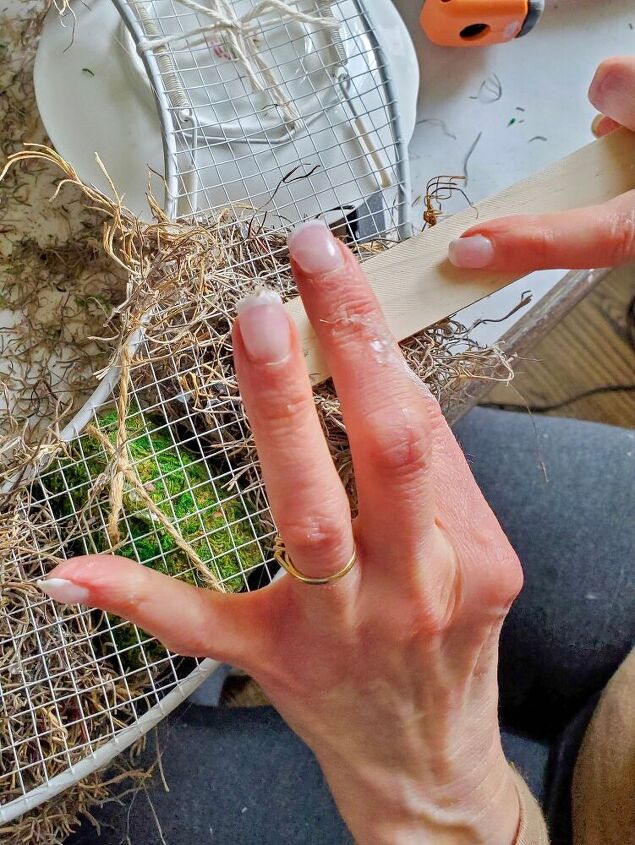
Lastly For How To Make A Plate WreathNext for texture and to cover the mesh, add Spanish moss hot gluing it to the wreath form. Also, use a paint stirrer or another tool holding the moss to set. Doing this, keeps fingers safe from burns. I continue this process until the wreath form is covered. I also, turn the wreath over so I am able to get the outer edges of the wreath.
Last Step How To Make A Plate WreathLastly, how to make a plate wreath I add blooming artichokes I have had in my craft closet. Because I did purchase these from Magnolia and checked their website, they’re out of stock. However, I did find these at Wayfair. Any flower will work such as, lavender, baby’s breath or succulents.
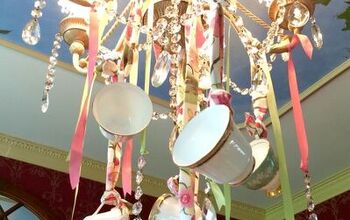
After how to make a plate wreath, I plan on finding ways to add tea cups. I have many from both grandmothers and my mom in a cabinet. Who knows, summer decorating still needs to take place in our house so you will probably see these cups.
So, sign up and follow Cloches & Lavender so you don’t miss how I add these pieces in our home. Because I am not a tea drinking finding different ways to use these takes some thought. Besides, adding the typical candle or flower petals, I’d love to read your ideas in the comments.
Also, I would love for you to sign up for my monthly news letter at the top of my page. You will also find Cloches & Lavender has a Facebook and Instagram page. You can also follow me on Pinterest where you can discover ideas to decorate your home.
Resources for this project:
See all materials


Any price and availability information displayed on [relevant Amazon Site(s), as applicable] at the time of purchase will apply to the purchase of this product.
Hometalk may collect a small share of sales from the links on this page.More info

Want more details about this and other DIY projects? Check out my blog post!
Comments
Join the conversation
2 of 15 comments
-
Ive seen these on Pintrest... and I actually saw a teacup and ribbon chandaleir done up at an Ashley furniture store. They wouldn't let me take a picture but it was so darn cute!!!

-
Just an idea but I would have put the flowering artichokes in china as apposed to the flowerpots. I don't care for the fake moss, it's too green and it takes away from the elegance of your display. You could have used the china cups in their place.
Otherwise you whole display is simply beautiful. I love the iron and wood wall-hanging you placed your wreath on. I betting you made that to. Great work.


Frequently asked questions
Have a question about this project?
I love it,
It also love the metal and wood piece on your wall,where did you find that?