


My Not So Summer Wreath
I’m so excited. I’ve been asked to participate in my first ever DIY challenge! It’s a summer porch makeover. Of course, if you’ve been reading my blog then you’ll know that I live in New Zealand so it’s actually autumn here.
Summer porch makeover – now that’s really a challenge, but it turned out really great. I’ll be revealing my front porch makeover on Saturday (my time) on Instagram with my other challenge participants. Make sure you check it out and follow me on Instagram if you don’t already.

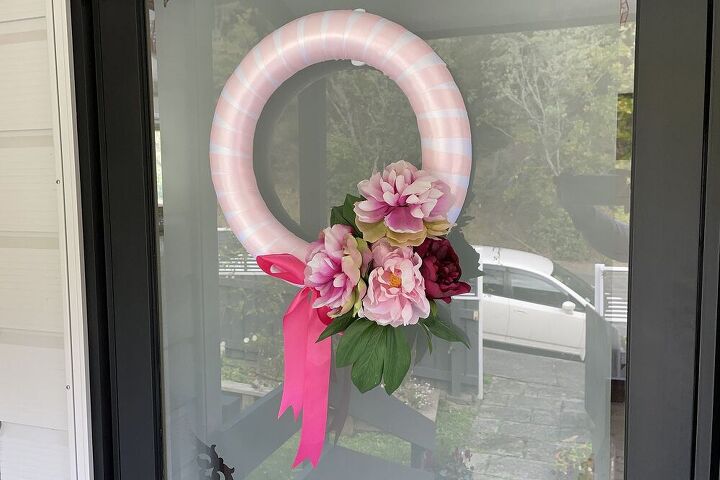
Anyhow, I was left with how to decorate a front porch with summer décor in the fall, and I aced it, if I do say so myself. Of course, being the overachiever that I am, I didn’t just decorate the porch, I gave it a full makeover. Stay tuned. I’m not going to show you the whole porch today, but I did make this wreath to go on my porch.
This wreath was not supposed to be like this – I actually had planned to use the same theory as my Christmas Wreath I made from a tablecloth and add flowers. I knew I had a box of the wire wreath forms somewhere but do you think I could find them!Next, I thought I’d make them with cut out felt but the Brother Scan and Cut had no blade!
Argh!
Does that ever happen to you?
Let me know in the comments below.
Materials
If you would like links to the materials I used, please visit my original blog post.
First, I gathered my materials. If you want to make this wreath you will need:
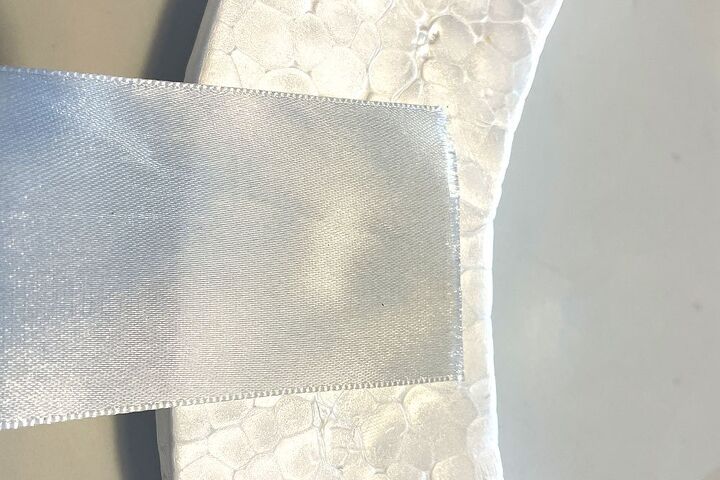
- Approximately 6 metres 5cm (2") wide white ribbon
- Approximately 6 metres 2.5cm (1") wide pale pink ribbon
- Approximately 1.5 metres 4cm {1.5") wide hot pink ribbon
- Approximately 20cm (7") twine
- 34cm (13") Polystyrene wreath form
- Faux flowers
- Scissors
- Pins
I have left links for these materials on Amazon but if you live in New Zealand or Australia you can buy them at Spotlight. I always buy my ribbon and wreath forms at my local Emporium.
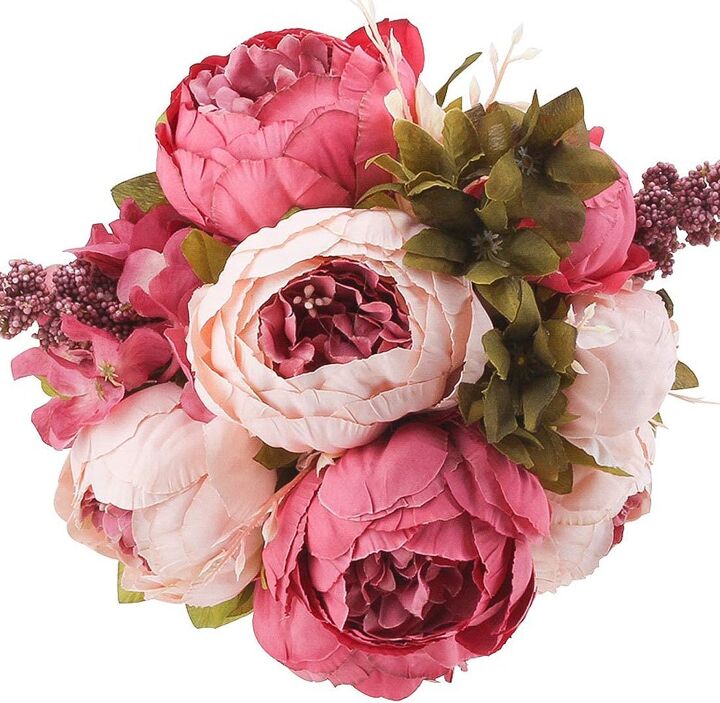
Faux Flowers
I’ve been looking at faux flowers for weeks with this project in mind. Unfortunately, they are quite expensive in NZ so I started looking elsewhere. I ended up using these Peonies from Spotlight. You could also use these ones from Amazon.
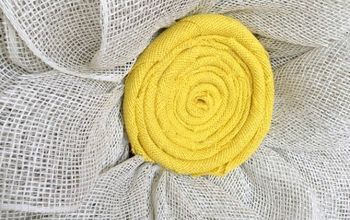
Instructions Wrap With White Ribbon
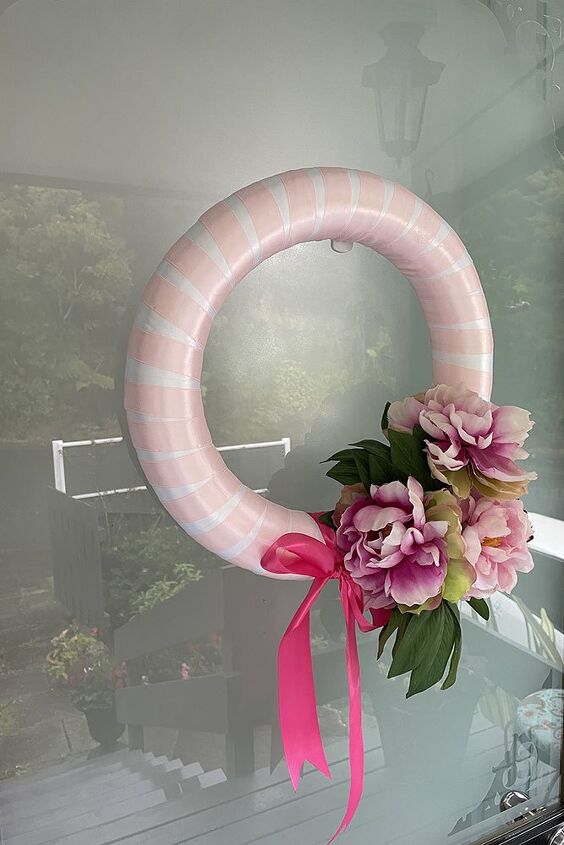
I wanted this to be a pastel striped wreath so that it didn’t distract from the beautiful colours in the flowers, so I wrapped my wreath in the white ribbon.
To do this I struck one end of my white ribbon onto the back of the wreath with the glue. If it won’t stay there, just poke a pin into the wreath until the glue is dry. Wrap the ribbon around the wreath until the entire thing is covered. Fold under the end and glue it on top of the place you started. You may get a few tucks on the back – that’s OK so long as the front looks nice and smooth.

Wrap With Pale Pink Ribbon
Glue on one end of the pale pink ribbon, just like you did for the white. Wrap the pale pink ribbon around the wreath, leaving spaces between the wraps so that you can still see the white ribbon. Try to get the spacing as even as possible on the front.
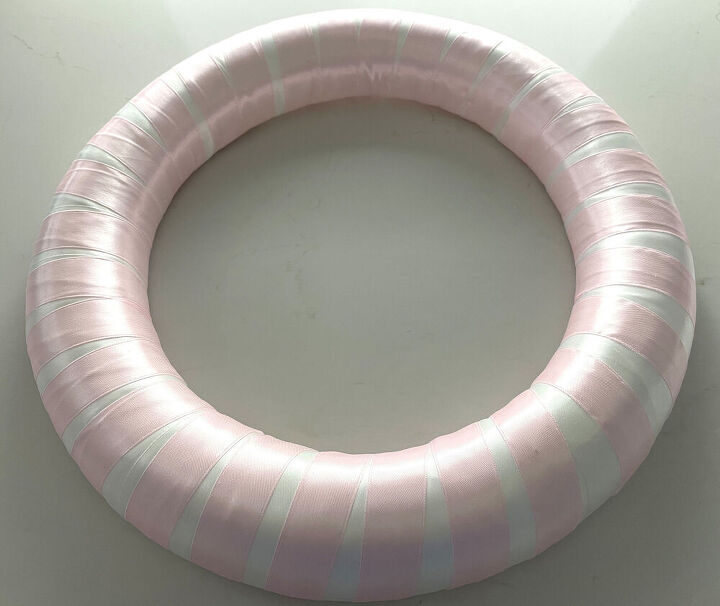
At this stage it looks like a big, pink donut!
Add the Flowers
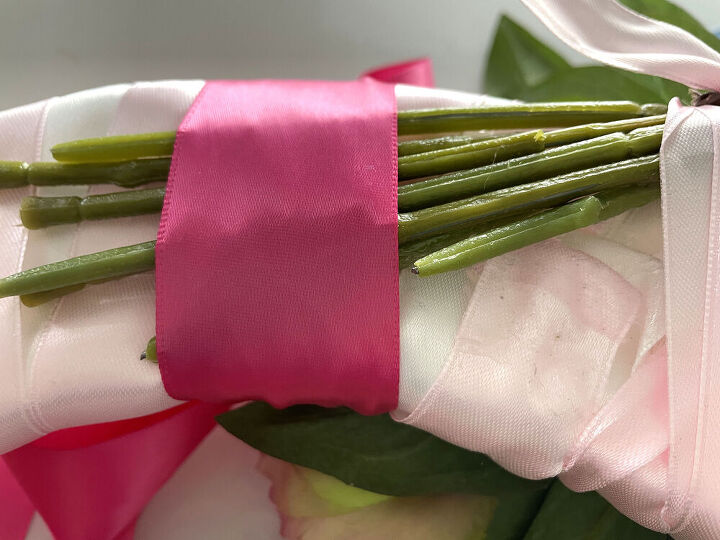
Adding the flowers stumped me for a bit. I didn’t want to cut the stems because I wanted to be able to use them elsewhere when I’ve finished with the wreath, so I bent their stems around to the shape of the wreath and glued them on.
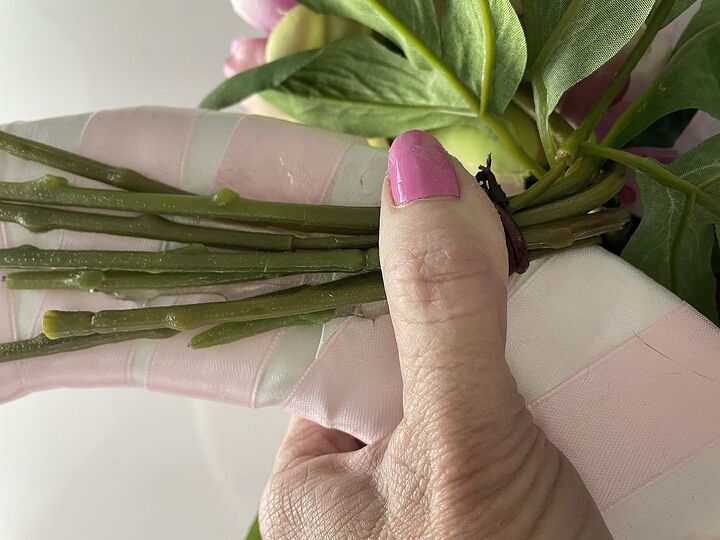
The glue wasn’t drying fast enough, and I also wanted to make sure that the flowers were really secure (this is an outside but under cover wreath) so I used a piece of the pale pink ribbon to secure it.
I hid the ribbon in the leaves so you really can’t see it.
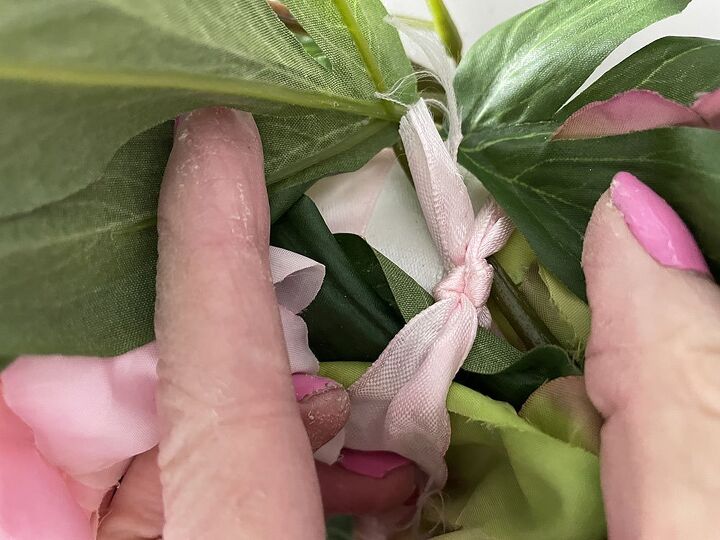
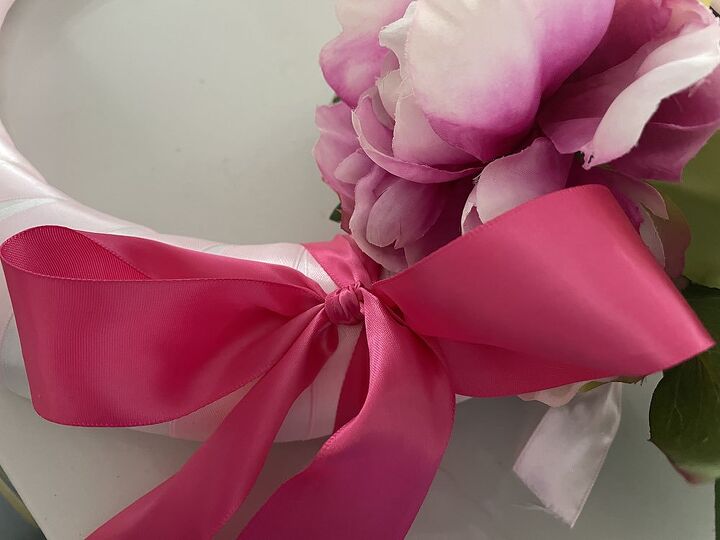
Bow
I also used the bow to secure the flowers. I tied the ribbon with a knot around the wreath. Then I tied a bow.
This is what it looks like on the back.
The last thing I did with the bow was to cut the ends of the ribbon to a v-shape. To do this, fold the ribbon along the length and cut from the edges to the fold on an angle facing up towards the fold. I used a lit match to heat seal the ends to stop them from fraying.

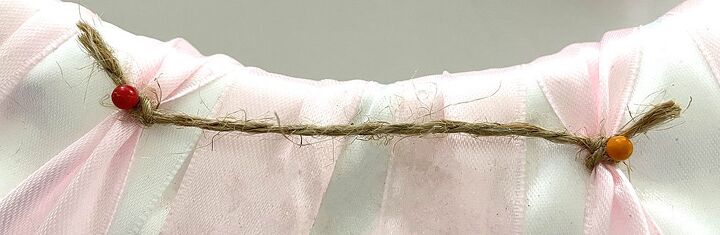
How to Hang the Wreath
I wanted the wreath to hang so that the hook wasn’t visible so I used the twine and pins.I tied knots with the twine around one of the pale pink ribbons where I wanted the hanger to sit. Notice that it’s quite close to the centre of the wreath – this was where I needed to place it so that you couldn’t see the hook. To keep it in place, I added some glue but then I also poked a pin into each of the knots. Make sure your pins are short enough that they don’t go right through to the right side of the wreath.
The only thing left to do is to hang it on the door.
I hope you enjoyed making this wreath with me
If so…..
PIN FOR INSPIRATION AND SHARE WITH YOUR FRIENDS!!
⇓ PIN THIS ⇓
Resources for this project:
See all materials


Comments
Join the conversation
-
Beautiful
-
Beautiful and good instructions! Your nails are lovely as well ! Not like the blue, green, yellow or black!


Frequently asked questions
Have a question about this project?