


DIY Planter Box
Spring has officially sprung in Southern California, and I decided our backyard needed a little facelift! Head to my blog for more fun projects like this!
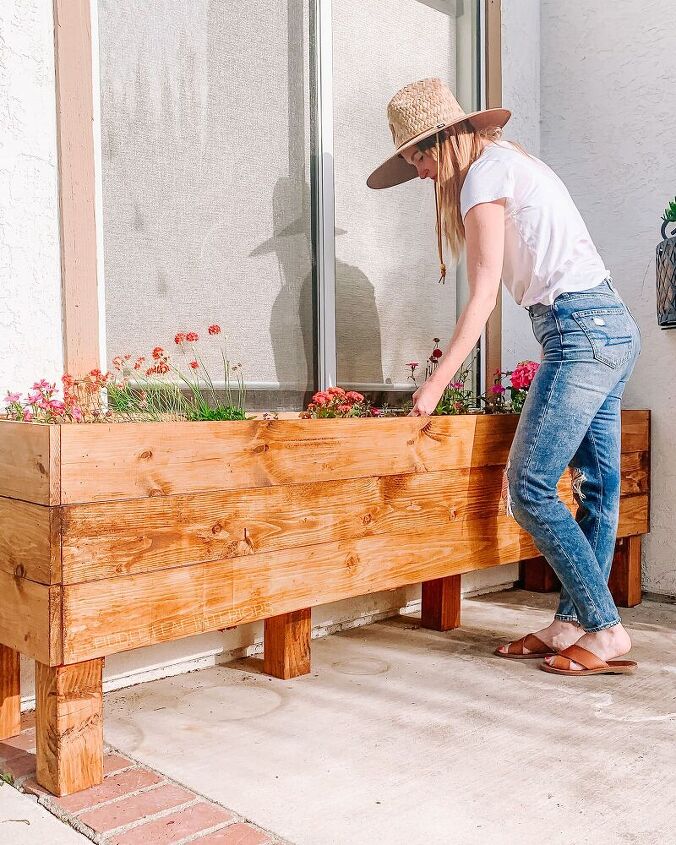
I decided to wing it and build a custom DIY Planter Box for our backyard, and it turned out SO well! My dad, who is a contractor, was here to help, and I am forever grateful because that made the whole “winging it” aspect less stressful.
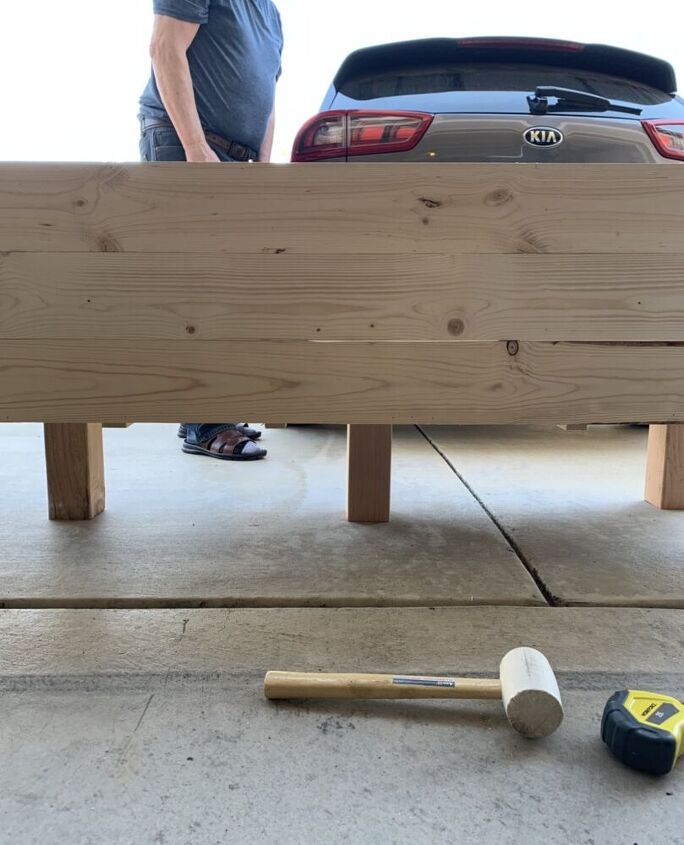
The great part about this is you can make it custom to fit YOUR space. Ours is a MASSIVE 7 feet long, 27″ tall, and about 18″ deep. It fits perfectly under our window that looks out from our indoor dining room, to our outdoor dining space. This DIY planter box project really helped to clean up the outdoor area, and it makes the space look more classic and beautiful. It is a more complex project, but I tried to break it down for ya! Keep in mind, your planer box should be made to go in a LEVEL space. If your space is not level, or even if there are slight variations in the planter box itself once built, you can always adjust with a shim or two as needed!
(Note: YES, lumber is expensive right now. This still cost less than what I would have paid for a planter this size/shipping).
Step 1: Cut your 4″x4″x10′ board into four 25″ pieces. Save the leftover piece, as we’ll use it later for extra support legs.
A quick note: I did not sand ANYTHING until the very end, when I just quick sanded off any super rough areas on the outside of the DIY planter box. I figure it’s going outside, and does not need to be perfect by any means. But if you want to sand each cut, by all means, please do!
Step 2: Cut nine of your 1″x6″x8′ boards to 7 feet long (this is where you can adjust your length if you’d like!)
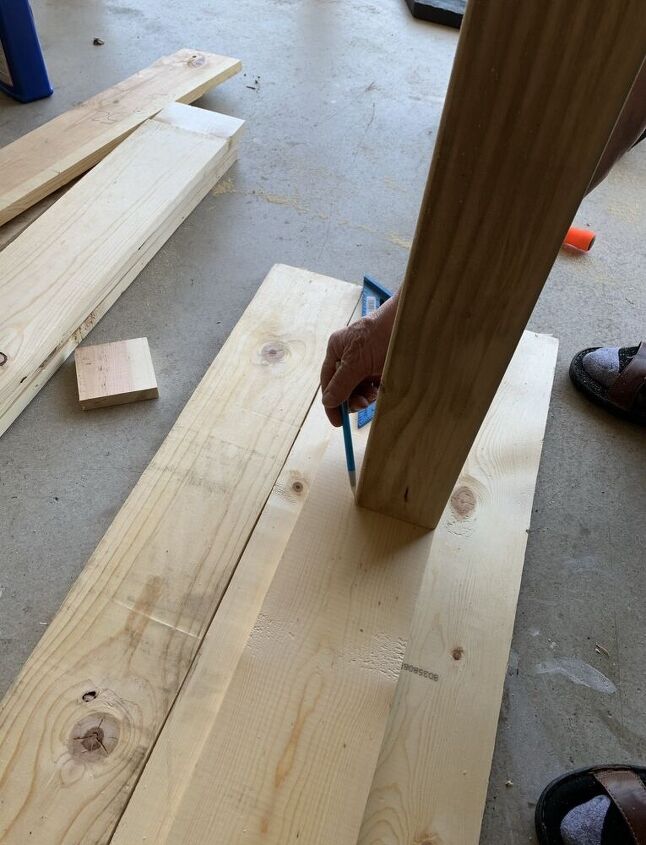
Step 3: Trace the end of one of your 4″x4″ boards onto the bottom left and bottom right corners of TWO of your 1″x6″7 feet boards (remember, you just cut them to the 7 foot length). Once traced, use a speed square to ensure your lines are straight.
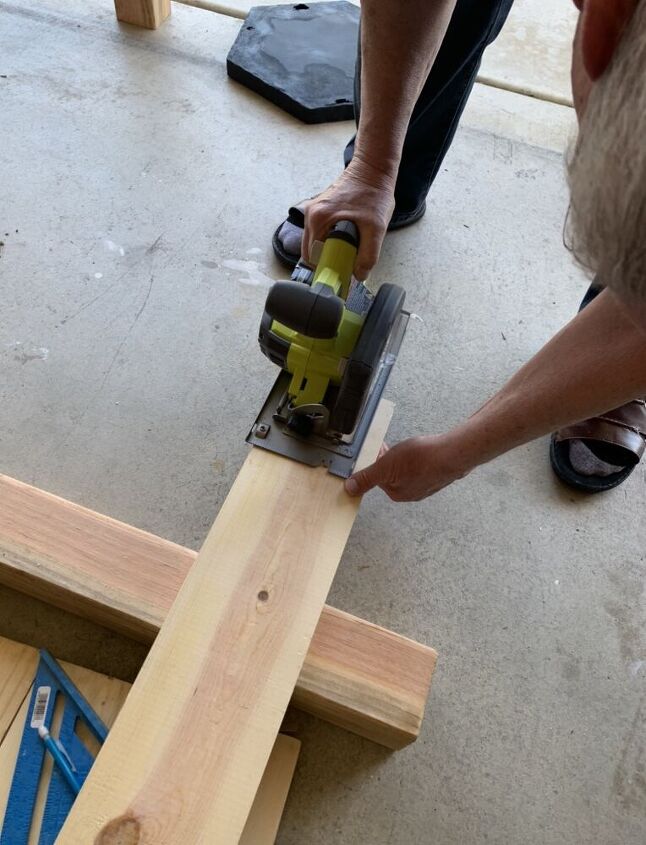
Step 4: Using your circular saw or jig saw, carefully cut out your 4″x4″ corners. You are creating the notches for your bottom boards here.

Step 5: Use your miter saw to cut 16 2.5″ pieces out of your 1″x2″x8′ boards – these will act as your cleats/support later on. Also cut 14 pieces of your 1″x2″8′ boards to 14 inches in length. These 14″ cleats will help support your VERY long sides and bottom!
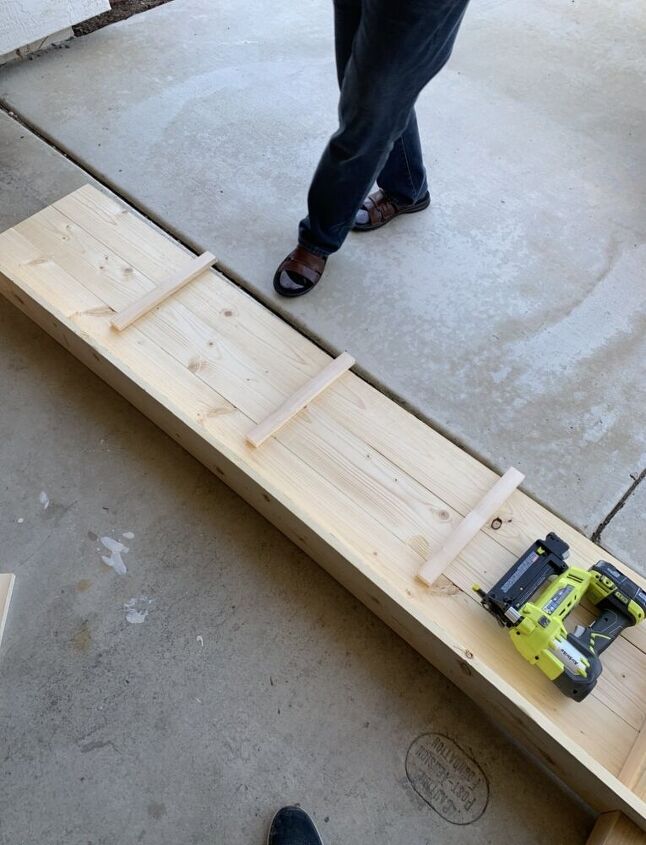
Step 6: Lay out three of your 1″x6″8′ boards and be sure they are aligned at each end. Measure the length of your boards with the measuring tape, and place each of your 14″ cleats down on top of your boards, making sure they are evenly spaced apart. Making sure to keep your three 7 foot boards straight and aligned, nail 1.25″ brad nails into one of the middle cleats and the boards below. Repeat this process with the two additional 14″ cleats. You now have one side of your diy planter box completed!
Step 7: Repeat step 6 to construct the second side of your planter box.
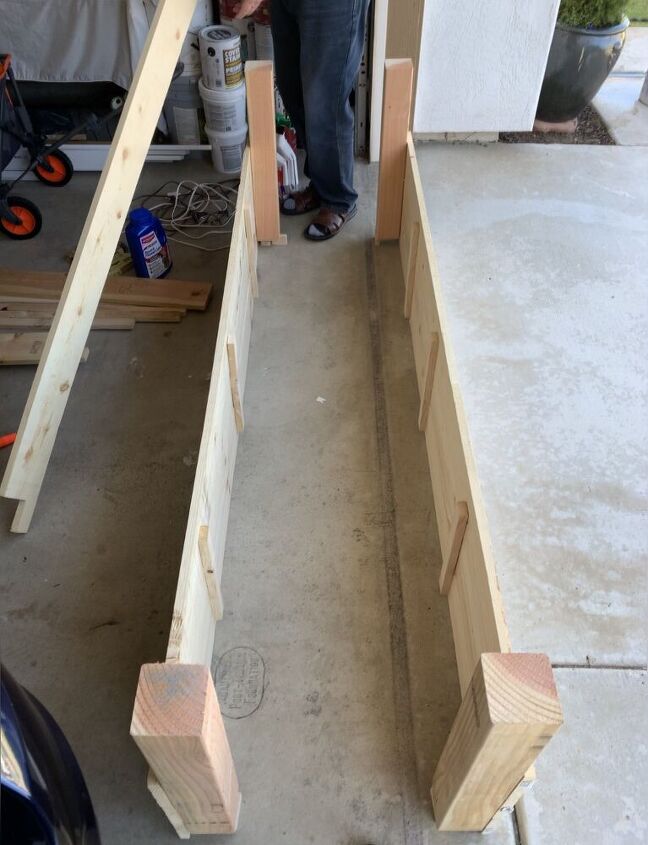
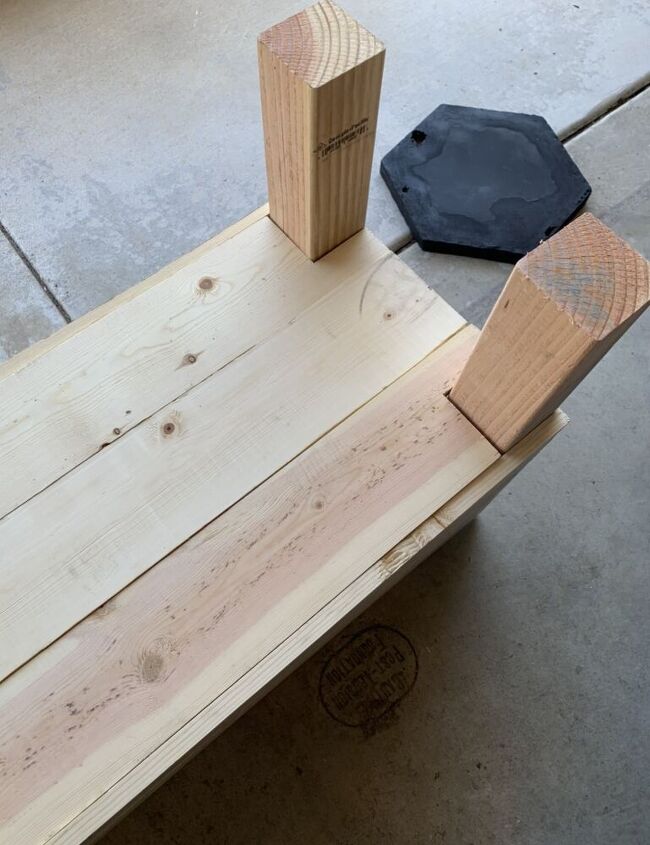
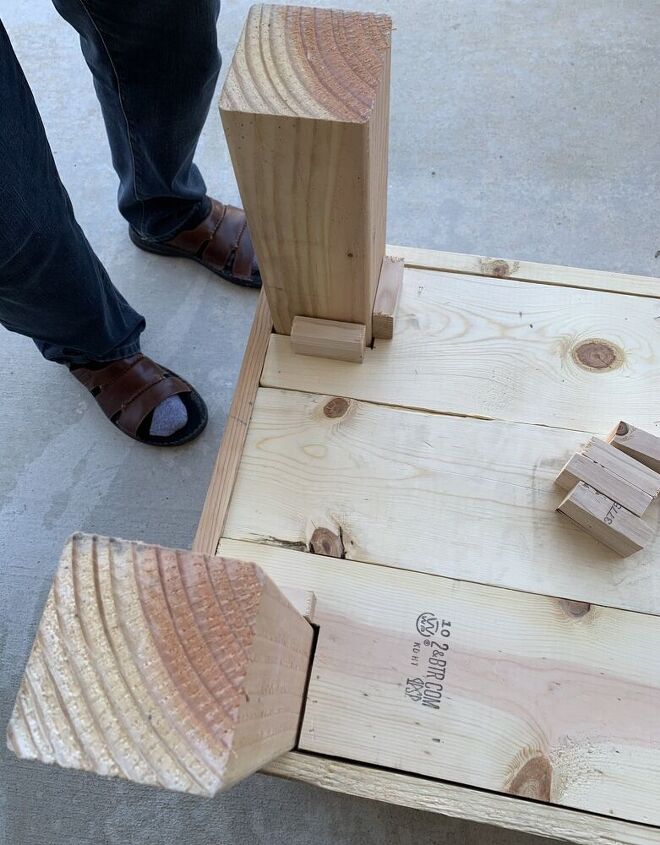
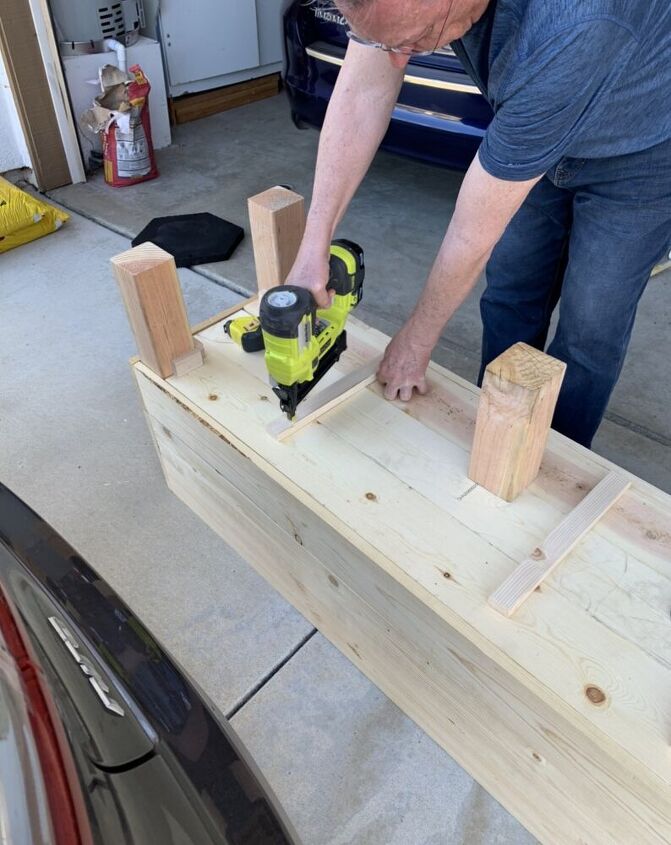
Step 8: Lay two of your 4″x4″ legs down on a flat surface. Position one of your newly constructed side pieces on top of the two legs. Line up the 7 foot side piece so the edges are in line with the outer edges of the 4″x4″ legs. You can choose to line the top of the side piece up with the tops of the legs, or you can adjust it so the sides are a couple inches taller than the legs (this will allow you to camouflage the legs with potting soil once everything is planted!) Use 3″ brad nails and your nail gun to attach the side piece to your two legs.
Step 9: Repeat step 8 to attach the second side to your other two legs.
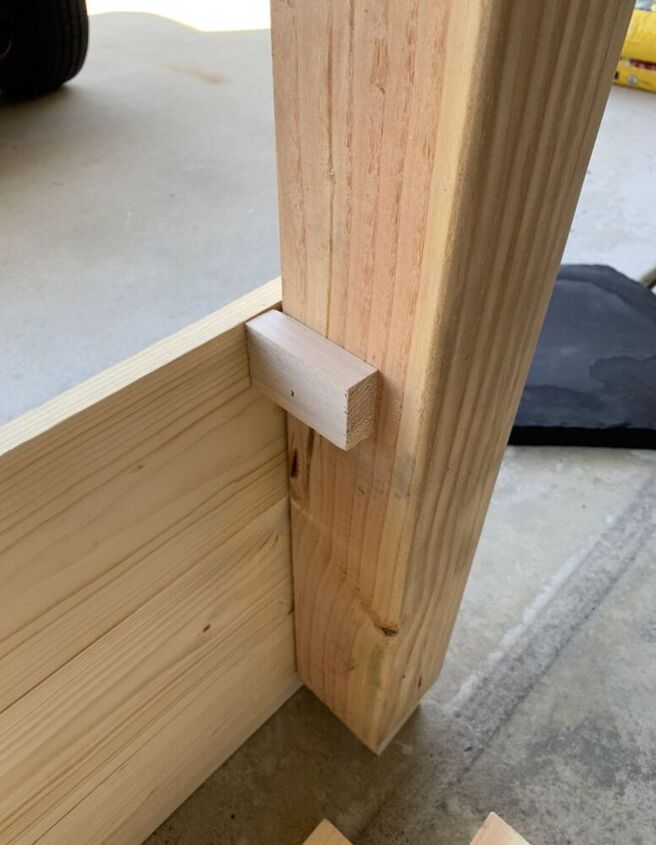
Step 10: We’re now going to attach your 2.5″ cleats to your legs. Position the cleats as shown in the photo below, and check to make sure they are level. Attach each cleat as shown below with your 3 brad nails. Add just one nail in the center of the cleat for now – you will beef them up with more nails once you attach the bottom of the planter.

Step 11: You will now construct the bottom of the planter box. Align your final three 7′ boards as shown below. The uncut board will be in the center, and your two notched boards (that you cut in step 4) will be on either side, with the notches facing outward. This time, using 1.25″ brad nails, attach FIVE of your 14″ cleats to the bottom boards (same process as Step 6). We want the bottom to have the most support, given it will bear the brunt of the weight from the dirt. Hence the extra two cleats here.
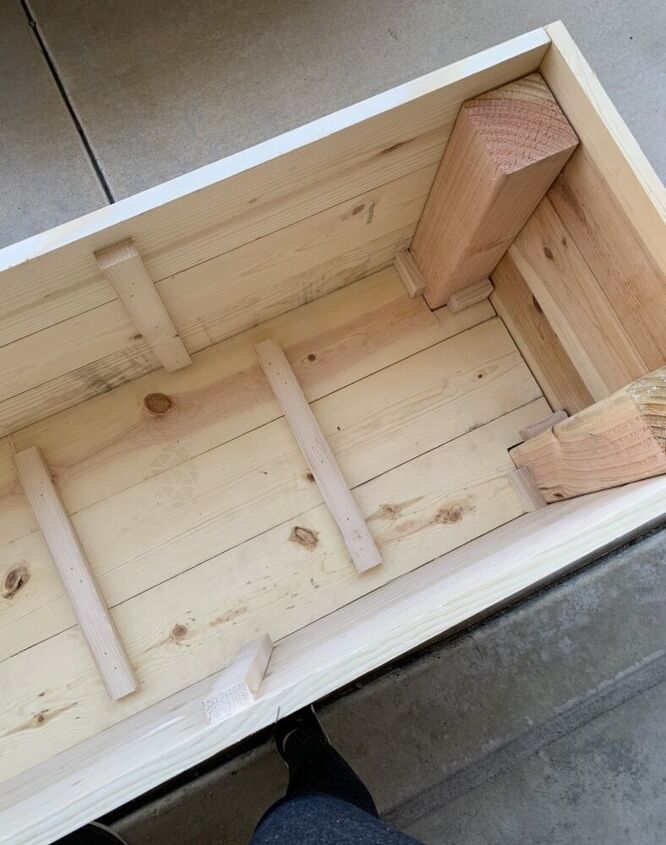
Step 12: Now lay your fully constructed bottom on TOP of the cleats you installed on your legs. Keep in mind, your planter is UPSIDE down right now. It should look like the below image. Use 1.25″ brad nails to secure the bottom of your planter to the cleats underneath it. Use 2-3 nails per cleat. You can also use 3″ brad nails and drive them in a sharp angle so the nails catch both the bottom of the planter, and your 4″x4″ leg.
Step 13: Also nail along the bottom SIDES of your planter box INTO the bottom edge using 3″ brad nails. Go slowly here and keep your nail gun straight, so you don’t have nails popping out either side of the bottom pieces.Now VERY carefully, flip your partially constructed planter box over, so that it’s standing upright. It is VERY helpful to have two people to do this. Because the short sides aren’t connected, the planter box is not super sturdy yet, so take this step SLOW.
Step 14: Add a SECOND cleat to the opposite side of each 4″x4″ leg with 1.25″ brad nails, as shown below. Do not worry about attaching the cleats to the bottom of the planter box yet – we will do that soon.
Step 15: Measure the distance between the long sides of your planter box and cut the remaining 1″x6″x8 foot boards to that size. You should have six boards total to construct the short sides of your box. I recommend measuring each side separately, as they can vary slightly given differences in the wood (slight warping, etc).
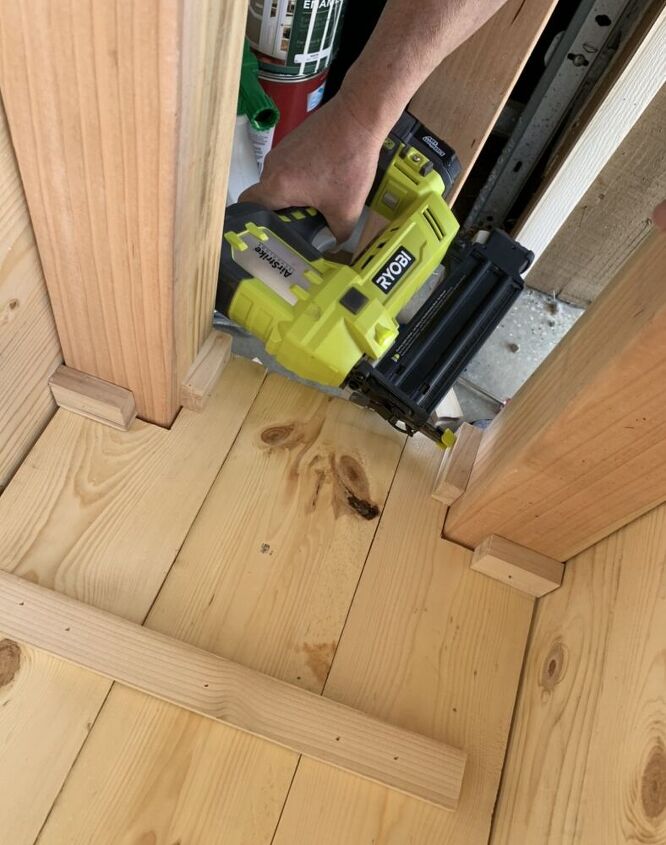
Step 16: Now your planter box is about to get a LOT more sturdy! Secure your short side boards (three on each side) to your 4″x4″ legs using 3″ brad nails and your nail gun. Repeat the end of step 15, and secure the bottom short side boards to the bottom of your planter. Your planter bottom should now be attached by four 2.5″ cleats, and all along the perimeter to the bottom side boards, both short and long!
Step 17: Flip your planter back over so it is upside down. Again, having two people to accomplish this is helpful! You will now nail from the bottom, up into that second cleat your attached on the inside in Step 14, using 1.25″ brad nails.
Step 18: Add two more 2.5″ cleats to each leg – these will be on TOP of the bottom, as you are looking at your planter box right now. See the photo below! Use 3″ brad nails to attach these cleats to the legs ONLY. Attach these cleats into your legs ONLY (not the bottom) with 3″ brad nails.
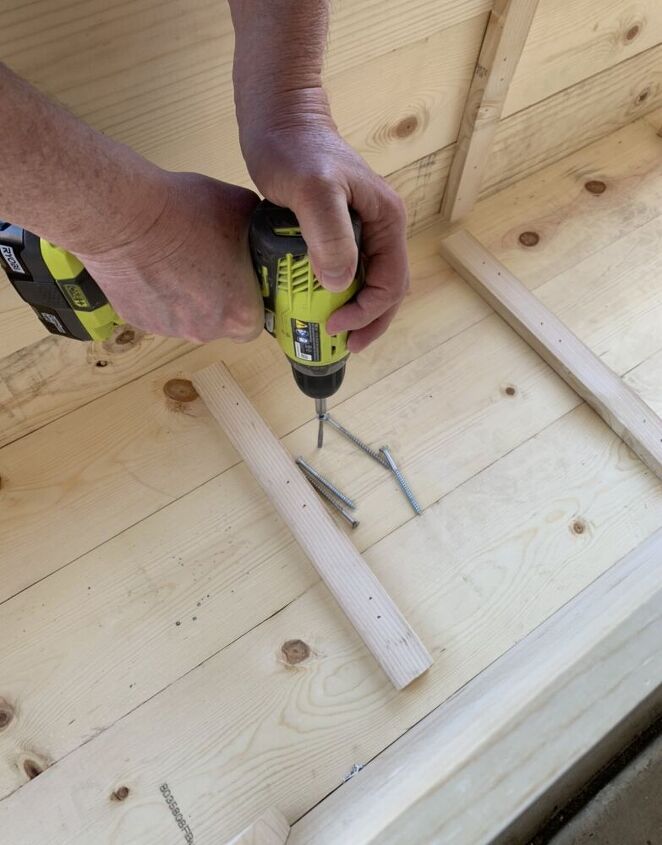
Step 19: Attach your last four 14″ cleats, to the outside of the bottom of your planter box using 1.25″ brad nails. Again, this just gives your bottom that EXTRA support it needs when filled with dirt! We placed them keeping in mind that we were going to add TWO more support legs using leftover 4″x4″ board. You can see that in the photo below! You can see how we planned to place the support legs toward the back of the planter – we did this intentionally. This way, the support leg caught TWO bottom boards, instead of just centering it in the middle, where it would only catch one. It also makes them less visible once your DIY planter box is set up and in it’s spot!
Step 20: Measure the height of your four legs, up to the bottom of the planter box (aka, the height of the leg that you can SEE). Cut one or two additional pieces of 4″x4″ board to this measurement. We had just enough for 2 additional legs, so that’s what we chose. (If your planter is less than 3 feet in length, you probably won’t need an extra support leg, but it won’t hurt!)
Step 21: Flip your planter box back over so it is rightside up! Place your extra support leg/s under the planter box where you determined they should go. Carefully drive two 3.5″ exterior wood screws per leg from the INSDIE of your planter box, down into each leg. You will need to apply a LOT of pressure here to ensure your leg doesn’t start spinning all over the place. Once one screw is in, double check to be sure that your leg is still straight, then drive in your second screw.
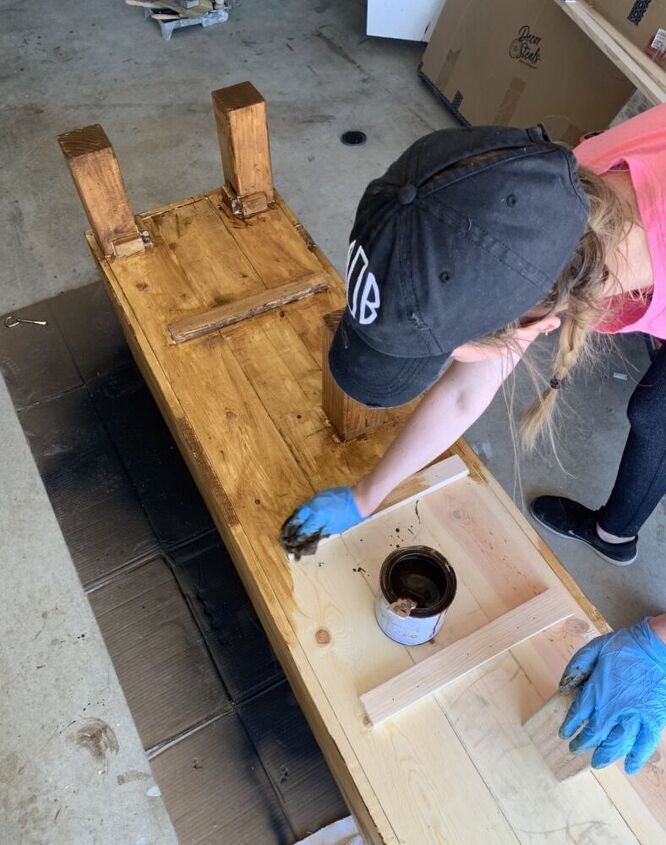
Step 22: Sand of any rough edges. Next, use deck stain of your choice to stain your now finished DIY planter box! I recommend a deck stain that will protect from rain, snow, ice, etc on it’s OWN, without the need to seal further. I stained the entire outside of the planter box, plus the the top board all around the inside. You could stain the entire inside if you want the wood to be extra protected.
And that's it! Full planting details are ovr on my BLOG! Hope to see you there!
Resources for this project:
See all materials


Comments
Join the conversation
-
Respectfully, I've read pressure treated is fine as arsenic is not used. With contractor or other linings, this might encourage recycling of deck boards or simply help keep costs down with new PT. Check me on this, Ted
-
My dear, this is exactly how I ended up as an engineer. An idea, and my dad helping. It was a 30 year career. Enjoy your dad.


Frequently asked questions
Have a question about this project?
I live this tutorial. Good instructions, I would use cedar but otherwise follow all steps. Wondering what you did about drainage?