


THE BEST HEAVY DUTY GARAGE SHELVING
{Disclosure: This is a sponsored post from Rhino Shelf but the opinions and project are mine all mine!} If you follow me on social media you know that we film in our garage pretty often, and you also know that it is a chaotic mess with stuff piled everywhere. So we couldn’t believe our luck when we discovered Rhino Shelf! Their heavy duty garage shelving has not only helped us get organized, it has given us the room we need to create even more great projects! Rhino Shelf has graciously offered a 14% discount for Hometalkers! Use code HOMETALK at checkout by typing HOMETALK into the "Gift Card or Discount Code" line on their website.
THE BEST HEAVY DUTY GARAGE SHELVING
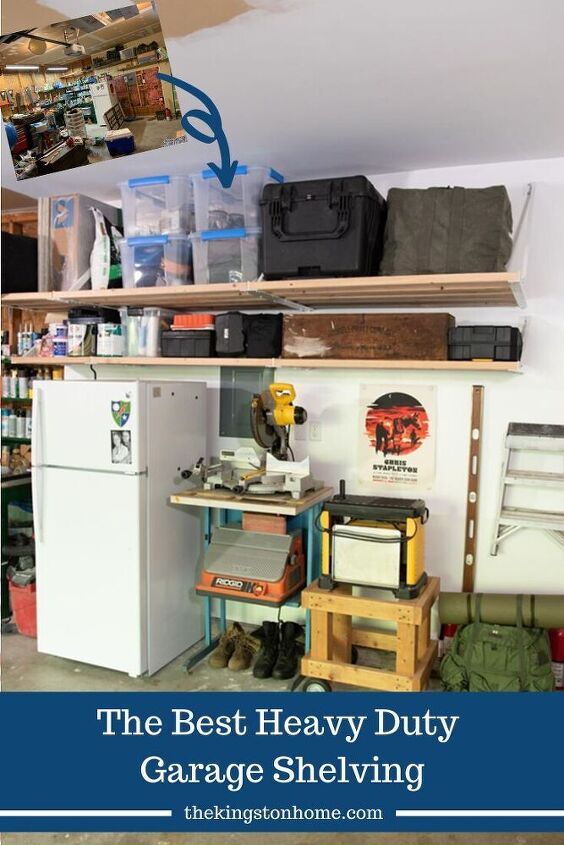
The garage is probably the most neglected “room” in our home. I know I can’t be alone in this! It was always meant to be Don’s workshop but because we didn’t have good storage it just sort of deteriorated into a disorganized catch-all. I can renovate rooms inside the house all day long, but because we need heavy duty garage shelving we thought our options were limited. Then we found Rhino Shelf! Their products are made in the USA, each 4’ shelf can hold up to 650 lbs, and their shipping was incredibly fast. We are thrilled with the results!
GARAGE BEFORE PHOTOS
I must really love you to share these. I CANNOT BELIEVE we lived like this for so long (it’s been three years since we moved in).
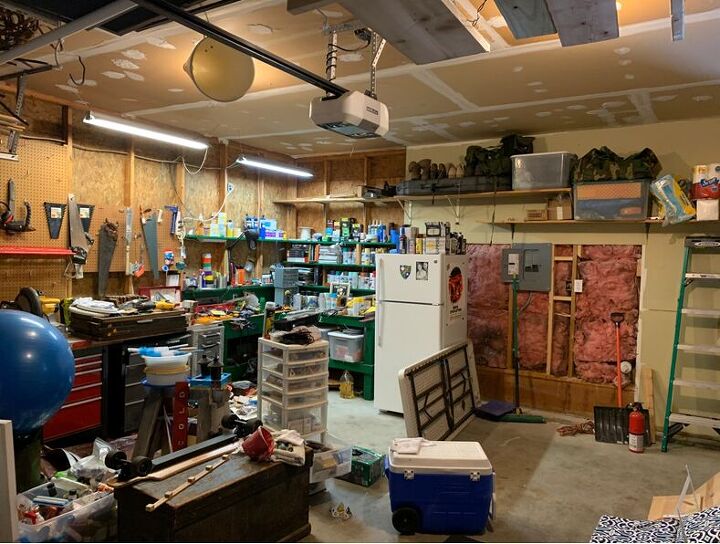
Yep - that is exposed insulation. And two shelves that were so flimsy we had to watch what we put on them because they would just pull out of the wall. Everything ended up on the floor, or piled on top of any flat surface, which means we bought duplicates of supplies and tools we couldn’t find and were constantly moving things around just to make a space to work. It wasn’t pretty.
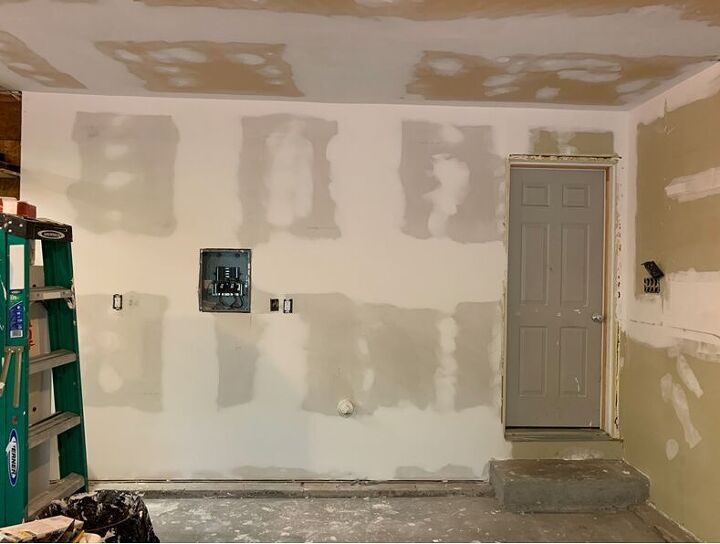
We finally added drywall a few months ago, but then were left with even LESS storage/organization because we didn’t want to put the bad shelves back up and couldn’t find anything that we liked. So….we added a folding table to tide us over.
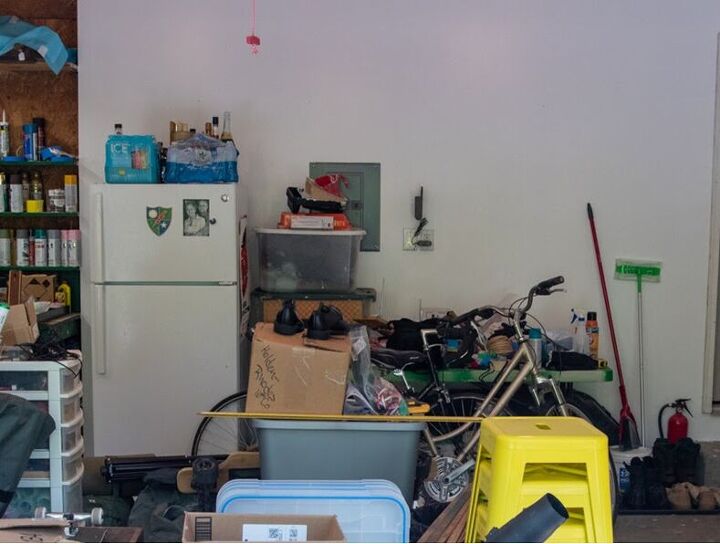
And the piles got bigger.
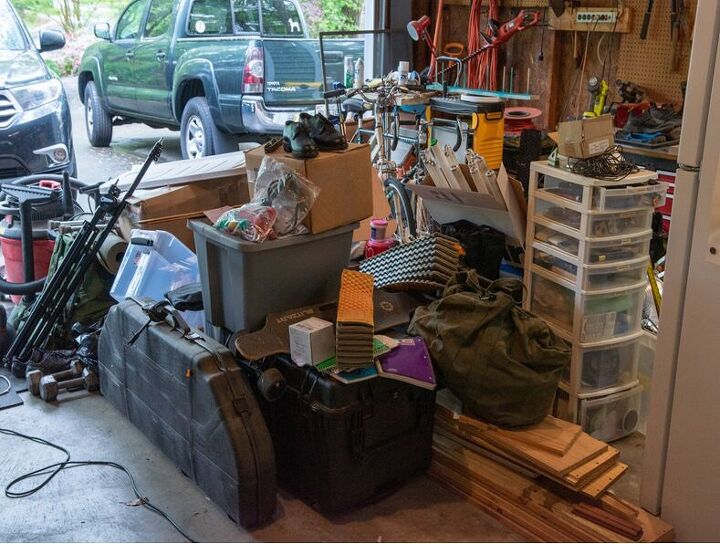
SO now you see why we needed Rhino Shelf!
SUPPLIES/TOOLS NEEDED:
- Rhino Shelf Combo Universal Shelf (we got the 12’)*
- 2” x 4” boards for the shelves
- Drill with 3/16” Drill Bit
- 4’ Level but a Laser Level is nice to have too
- Stud Finder
- Mitre Saw or Handsaw
- Framing Square
- Pencil
- Hex Nut Drivers - ¼”, 7/16”, and ½”
- Ladder
- Ratchet with 7/16” and ½” Sockets
- Adjustable Wrench
- Quick Clamps
*All the hardware you need is included in the kit.
This may seem like a small detail but speaks to the quality of Rhino Shelf and how well thought out the process is. When we opened the box each item was individually wrapped and labeled on the packaging. It also included written instructions in addition to a website link (because I for one still need paper instructions) and all of the hardware was carefully packed and organized.
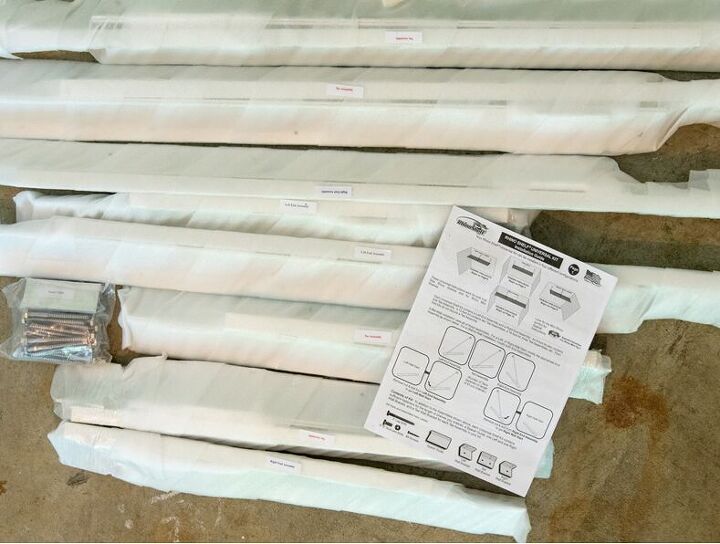
But THEN when we started unwrapping everything we discovered that each piece itself is labeled! No guessing, no trying to refer back to the instructions to see if the pieces are a slightly different shape, nothing. So easy and user friendly!
Rhino gives you very thorough instructions that walk you through installing the shelves starting from a corner, in the middle of a wall (like ours) or from wall to wall. They even have corner shelving options! Here we’re sharing a step-by-step tutorial with a few tips we learned along the way.
HOW TO INSTALL RHINO UNIVERSAL KIT HEAVY DUTY GARAGE SHELVING
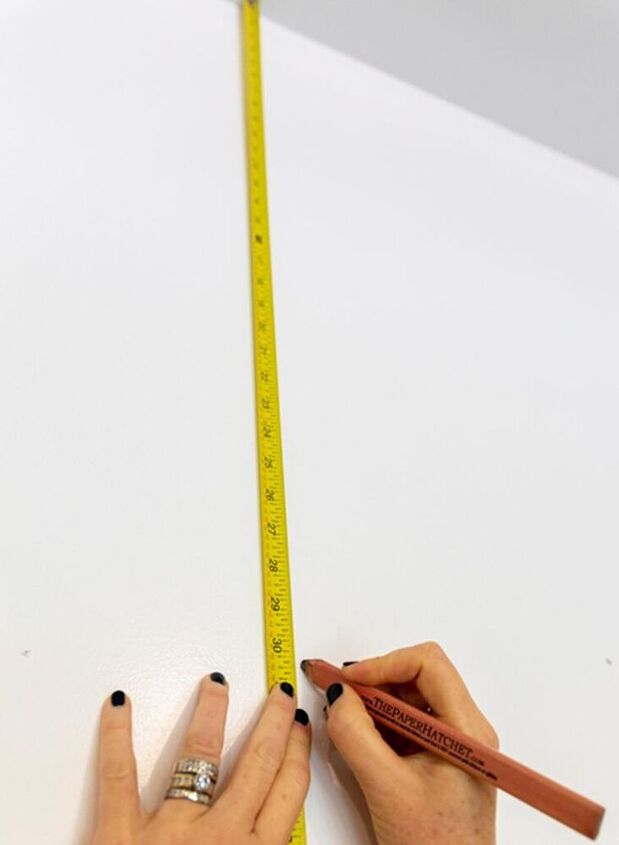
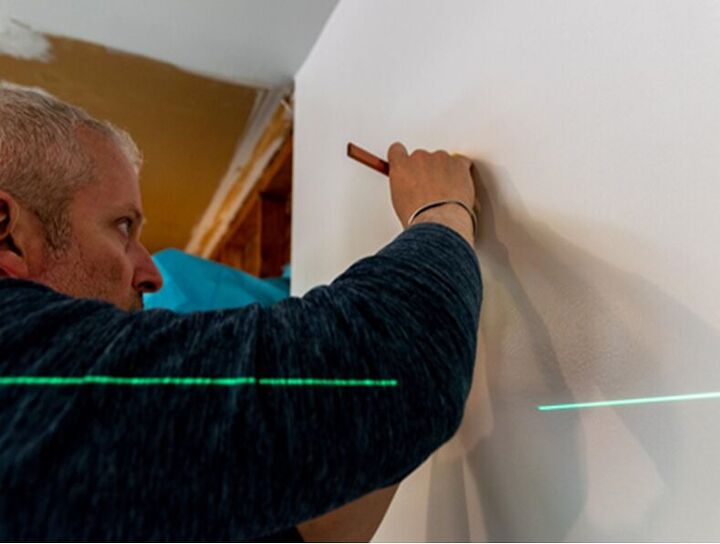
1. Decide where you want your shelf to sit on your wall. We used a laser level to find our level line but you can also mark it with a pencil. Rhino recommends you are at least 84” off the floor, we wanted to be sure we had room for big tubs on the top shelf and room for our fridge underneath so we used those as the basis determining where to put the shelves.
2. Find your studs using your stud finder - this is where you will anchor your brackets. Ours were spaced at 24”, your home may be laid out on 16” center.
The Rhino Universal Kit lets you customize your shelving however works best for you. Because the wall we chose also has a door that goes into our living room we decided to make our shelf a little shorter so ours is 10’ instead of the full 12’. This meant we had two 4’ sections and one 2’ section.
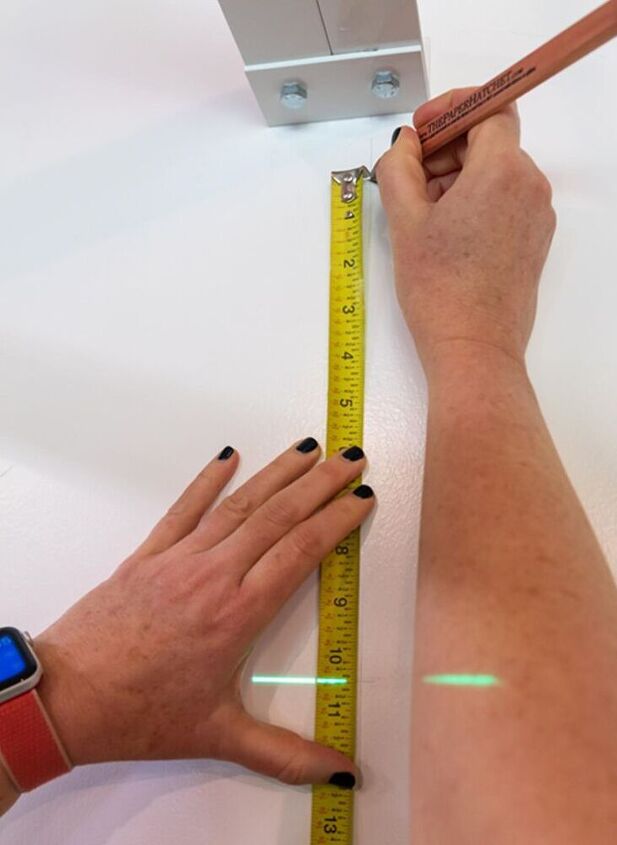
3. Align your level with the center of the stud and make a 2-3” long vertical mark where it intersects with the original level line and then again 2’ above the level line. At the 2’ mark draw another 2-3” horizontal level line so you know where to place the top of the angle assemblies. TIP: Do this all at one time BEFORE you put up the first bracket. We did each one as we went along and it is MUCH easier to draw the lines without the brackets on the wall. Now you’re ready to start installing shelving!
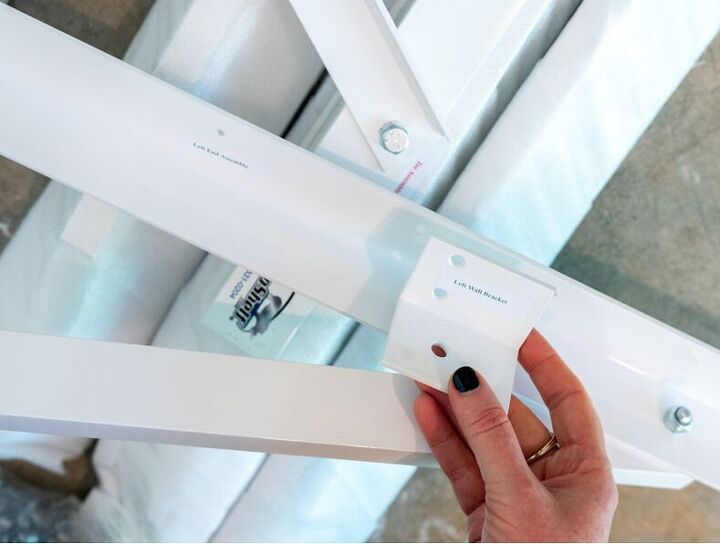
4. Begin with the left wall bracket. Attach it to the wall using the lag bolts. Set the top of the bracket in line with your level line and mark the top pilot hole. Make sure to keep it level and use the 3/16” drill bit to drill a pilot hole. Drive the top lag bolt with the ratchet, check for level and then repeat with the bottom hole.
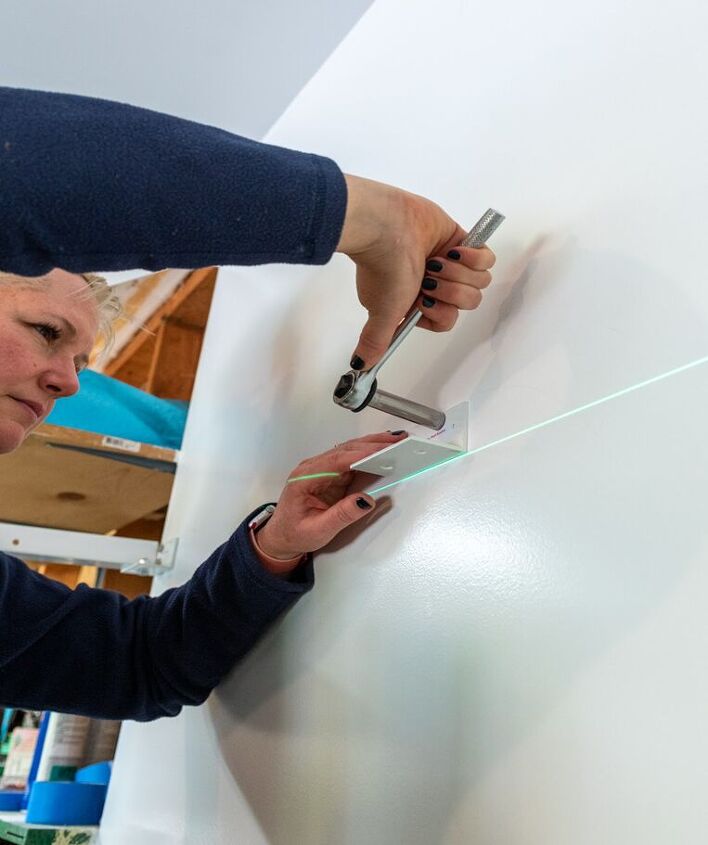
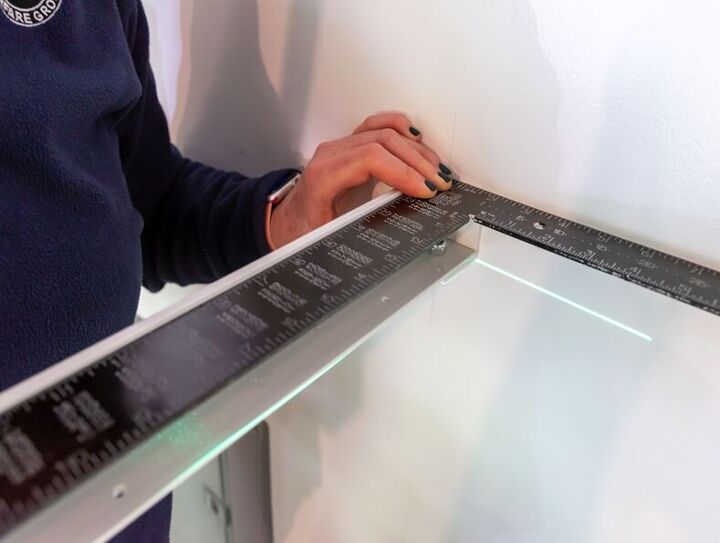
5. Attach your angle assembly to the bracket with the 5/16” bolt and hand-tighten the bolt. Using the framing square, check that the assembly is perpendicular to the wall. Once it is in place tighten it with the wrench and the ½” socket.
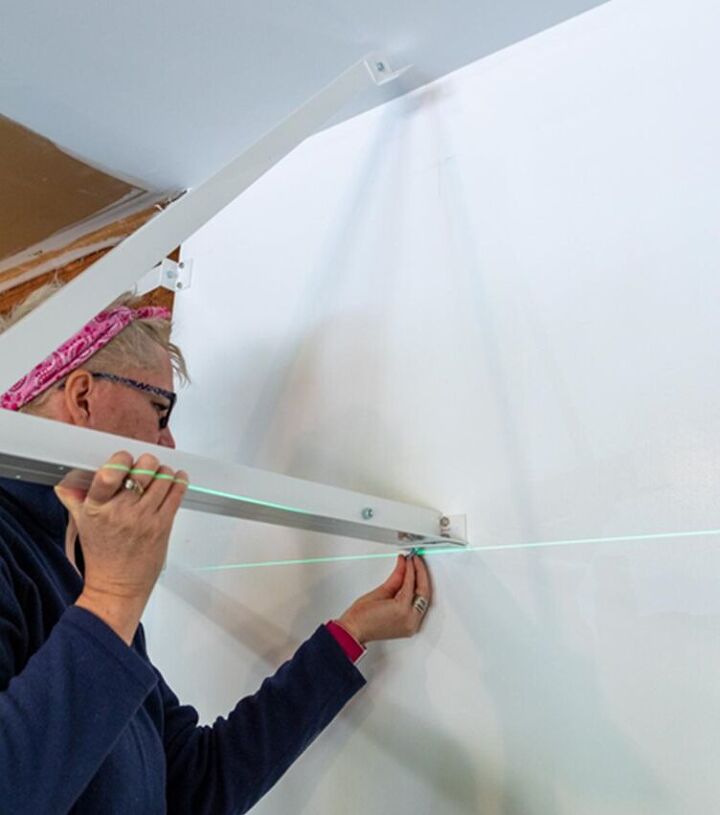
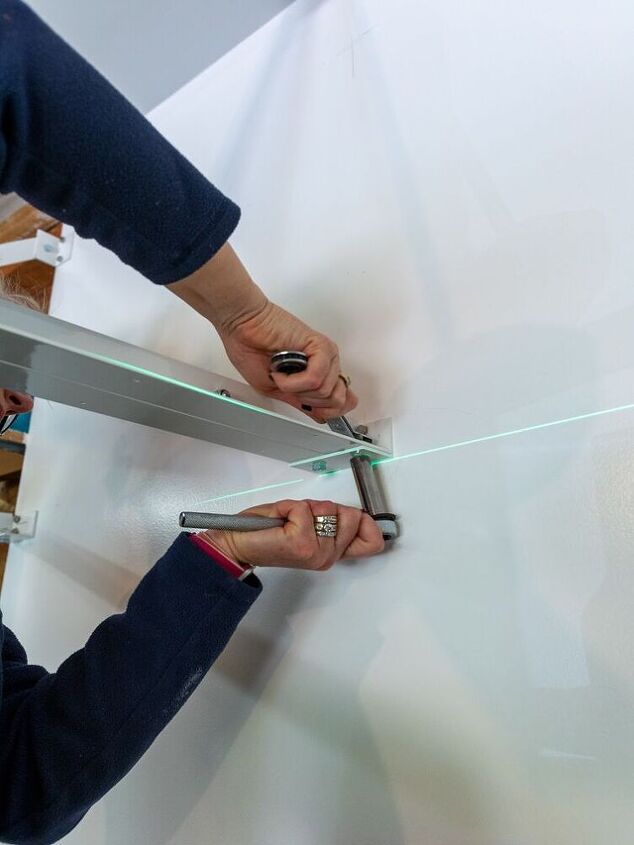
6. The angle assembly has a small mounting plate at the top of the diagonal piece. Referencing the lines you drew earlier, slide this bracket up to where the plumb line and the 2’ line meet and mark the top hole. Drill a pilot hole and drive the top lag bolt. Re-check for level and mark and drill the bottom hole. Drive the bottom lag bolt into the wall. Once the lag bolts are done, tighten all of the 5/16” bolts on the angle assembly with the ratchet and wrench. This locks everything into place.
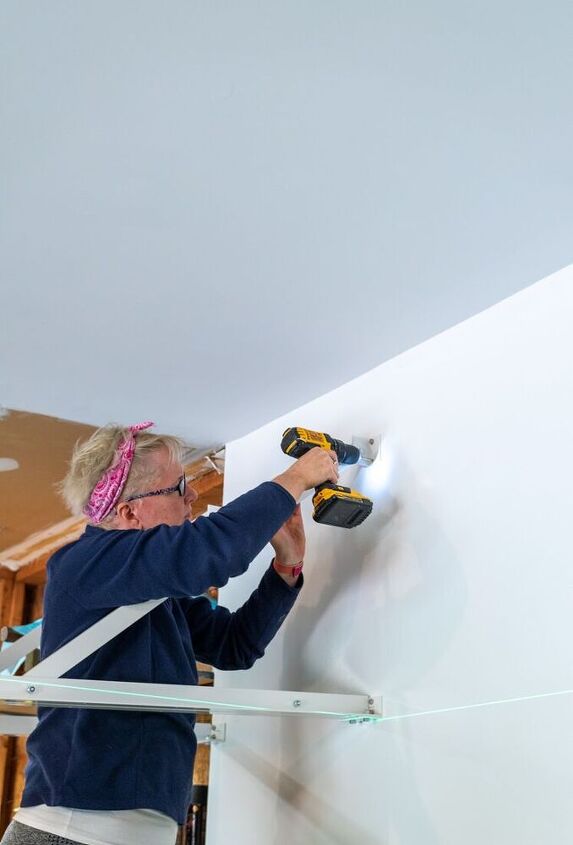
7. With the first assembly up you continue across the wall installing the Tee wall brackets and their angle assembly. The installation is very similar to the first bracket you put up except there are two 5/16’ bolts that attach the angle assembly to the wall bracket.
8. Once all the tee assemblies are installed you finish up with the right wall bracket and assembly. It is a mirror image of the left wall assembly.
9. Once the main shelf brackets are installed repeat the process with the mini shelf system. We mirrored the layout of the upper shelf. The only major difference is the height you anchor the plate at the top of the diagonal piece. TIP: we found that drawing a line 10 ½” up from the wall bracket ensured the shelf finished out level.
CUTTING BOARDS FOR THE SHELVES
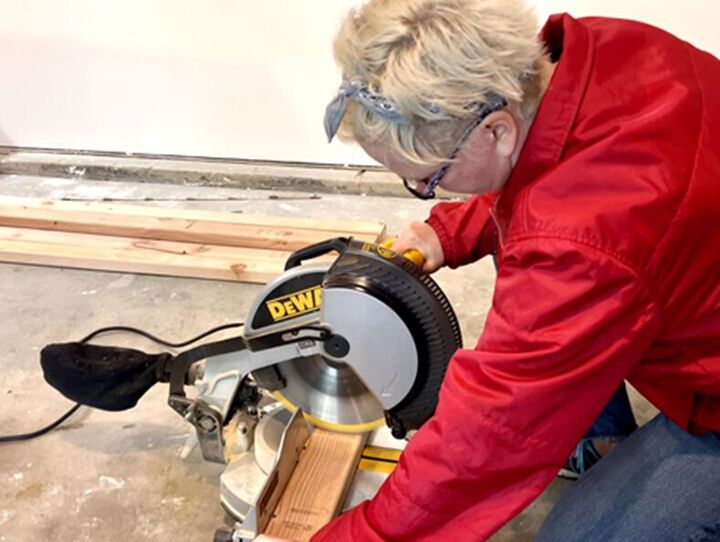
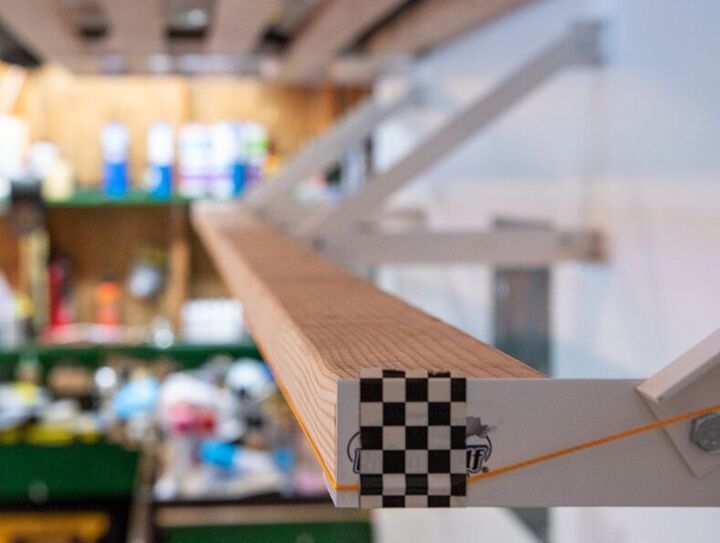
1. Measure the space between two assemblies against the wall. TIP: write the measurement on the inside of the bracket, that way you won’t mix up your boards and can quickly find the corresponding space and it keeps you from having to re-measure multiple times if you forget.
2. Cut five boards to length for each full-size shelf bay and three for each mini shelf. Put the pieces in the space but do not screw them in yet. Repeat until you have all the boards cut for all the bays.
TIP: To get a nice straight line and visually appealing shelf tape a string line from the left assembly to the right assembly on the outermost edge. Place the outermost board in each space and align it to the string. Sight down the boards to make sure it looks straight. Once everything is lined up, clamp one end of the first board in place, squeeze the assemblies tight against the board and clamp the other end of the same board.
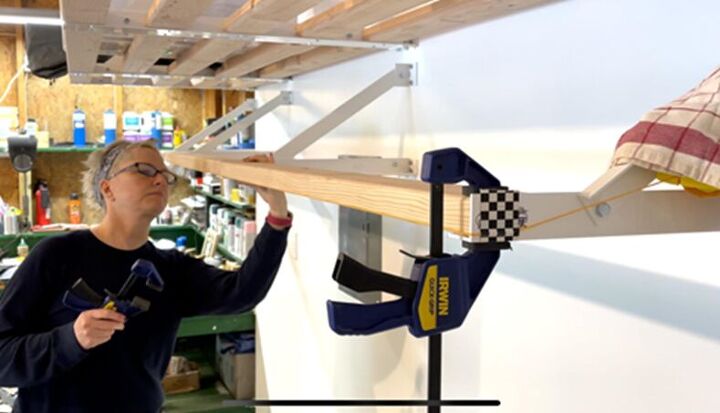
3. Take your ¼” socket driver and drive home one of the #8 self-tapping screws through the hole in the bottom of the assembly into the 2x4 piece. Continue this process down the line until the entire front row of boards is installed.
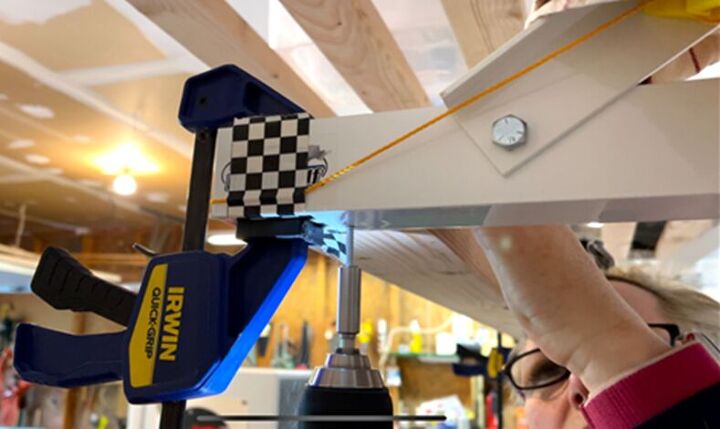
4. Take down your string line and get out the metal spacer that came with the kit. Place the spacer against the back edge of the front board and place the next board tight against it. Clamp the end of the board and move the spacer to the other end and repeat. Once the board is clamped, drive the screws.
TIP: It is important to work on only one row of boards at a time and do it from front to back and from end to end. If the spacer gets stuck, don’t worry a few light taps from the hammer gets it out and it is ready to go again. Repeat this process for the mini shelf board system.
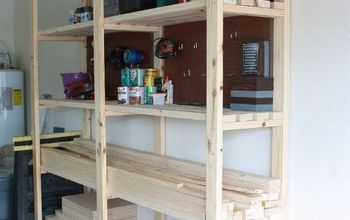
Now that all your boards are in place you can start to reclaim your floor by stacking all those bins and boxes of stuff! The full-size shelf fit multiple large bins and we used 75L waterproof and dust-proof locking bins. The upper shelf is a great place to store large items you only use occasionally like camping gear, specialty tools and supplies and holiday decorations. The mini-shelf is a great place to keep things you need regular access to. We found 30Q storage bins fit perfectly on this shelf.
TIP - because the shelves are made from 2x4”s there are big gaps between the boards. This means all items either need to be large enough that they span the gaps (like paint cans) or small items should be stored in bins.
Want to store bikes, tools or other equipment underneath? Rhino Shelf has a ton of options, or you can (like we did) use the space underneath to store large tools or equipment. Totally customizable!
NOW CHECK OUT THE REVEAL!!
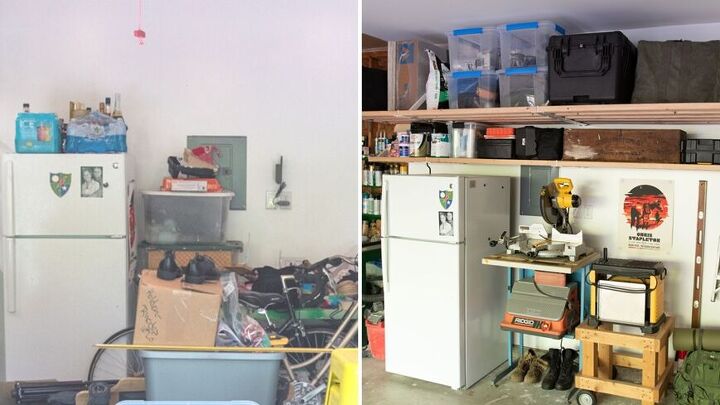
On the left we have a blank wall with a giant mess piled up on a folding table. On the right - 10’ of double storage filled with tools, holiday supplies, camping equipment and more. We were not only able to clear away the table and the pile we had room to move some bigger tools against the wall. But here’s the most amazing part...
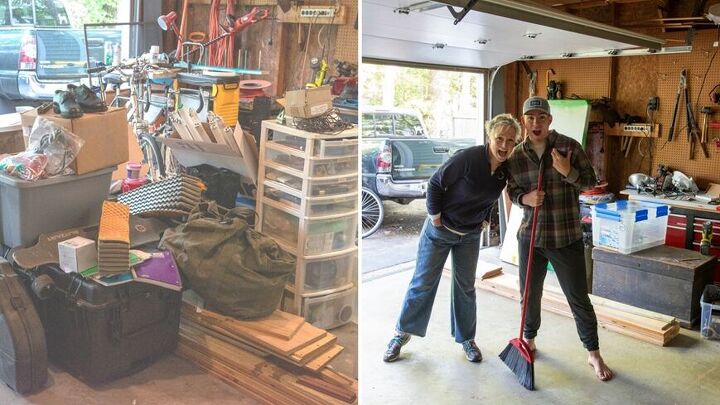
Look at the garage floor!!! We were able to fit ALL of those totes and bags on the Rhino Shelf Universal shelving with room for more! Don has his garage back! Here are a few more after photos. Are they “pretty”? Nope. But they are useful, and organized, and high quality storage that will last for as long as we live in this house. And if your garage is anything like our garage - that is everything we could ever need!
Come check out how we went from chaos to clean thanks to Rhino Shelf!
Resources for this project:
See all materials


Comments
Join the conversation
-
Please come make this 'almost' miracle happen in my totally out-of-control garage! I just this week had to buy zip ties that I know I have plenty of in a nice clear container because I could not find them, search as I did. And that's just one example...Your garage looks great, congrats and I hope it stays just like it is in the pics!
-
Oh I totally feel you!! The garage floor is a bit of a mess now but this shelf is still super organized!! We love it!!


Frequently asked questions
Have a question about this project?