


DIY Outdoor Concrete Table: Pottery Barn Look for Less
Find out how to build your own outdoor concrete table this summer to get a Pottery Barn style on a budget.
This post may contain affiliate links. Please see my full disclosure policy for more details.
I’m super excited to be teaming up with a group of talented bloggers today for our Build it for the home challenge. This month’s theme is “build it cheaper than buying it”.

So if you’ve been eyeing an expensive piece of furniture and looking to get started with your first build, then be sure to check out the other projects by clicking the image above.
You won’t be disappointed! And you don’t want to miss the last challenge where I made over our master bathroom with just paint.
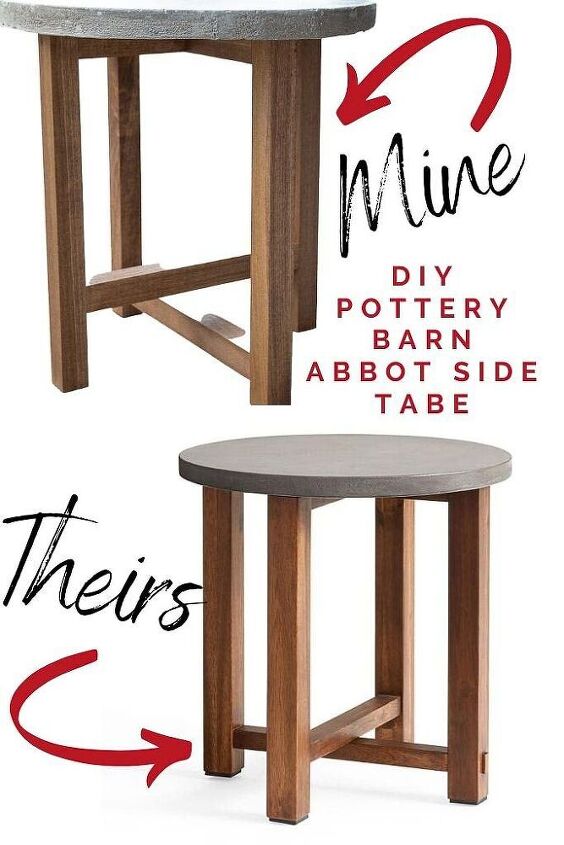
My inspiration for our outdoor concrete tables
I’ve been wanting to add some outdoor side tables to our deck for a while now. Truthfully, because I have nowhere to set my wineglass when I’m trying to relax (I know poor me).
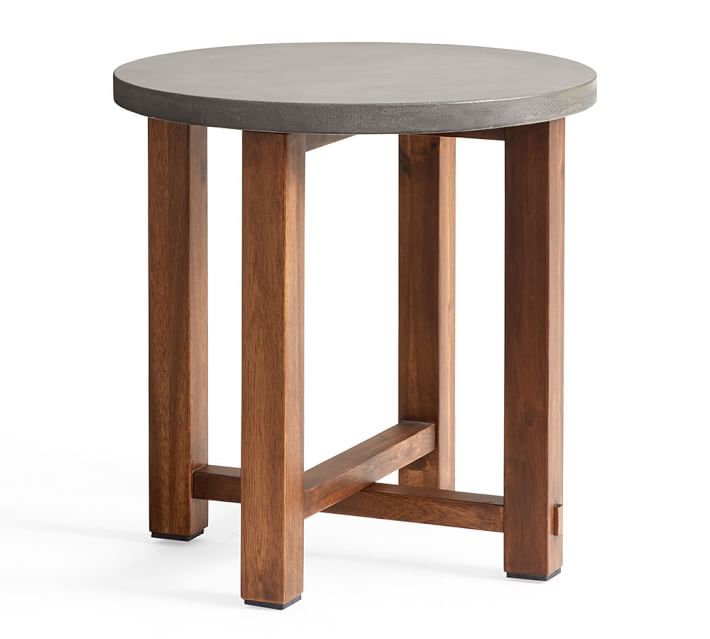
But seriously, I’ve been trying to add to our patio furniture gradually without breaking the bank. So as much as I loved this Abbot side table from Pottery Barn, this mama doesn’t have $600 to drop on a set right now with all our home repairs going on.
And honestly, it just didn’t look that complicated to try to replicate if you’re up for that sort of thing. Plus, I’ve been itching to try my hand at building something for the first time so it seemed like the perfect opportunity.
Now, I consider the hubs and I pretty good DIYers, but building something for the first time took a lot of practice to get it right.
So even though we failed at our first attempt, I chalked it up to a learning experience and a chance to share with you how you can get it right. So let’s dive in!
DIY Concrete Table Supplies
Material for (1) table
- Countertop concrete mix
- Melamine panel
- Melamine board
- Wood screws
- (4) 36” long 1.5” x 1.5” poplar boards
- Silicone caulk
- gloss concrete sealer
- Construction Adhesive
- Stain and sealer
Tools
- Kreg Jig and required pocket screws
- Drill
- Table saw *optional
- Miter saw
- Jigsaw
- Tape measure
- Level
- Trowel
- Paint brush
- Sanding sponge
How to build an outdoor concrete table
I’m not gonna lie, I was slightly intimidated by this little table at first. I’ve used a miter saw plenty of times and felt pretty comfortable making simple cuts. But a jig saw, a kreg jig? Umm nope. This was definitely a learning curve.
But totally fun after you get the hang of it. Even after my hubby was hovering over me the entire time laughing at how painfully slow I was going.
Start this project by creating the form for your concrete table top. This way, you’ll get the hardest part knocked out first and the concrete can set and cure while you assemble the table base.
How to make an outdoor concrete table top
Because of the large size of our DIY concrete table top, it’s 20 inches in diameter, we had to make everything from scratch to create our concrete form.
Which is why I’d definitely recommend a practice run first. And while I wish I could say you can just go out and purchase a premade concrete form. You can’t. Well, not at least in the size we needed.
Start by creating your circle base for the form.
In order to create a perfect outline for our circle we created our own little compass and attached it to the board with a screw.
We used a paint stick, but any thin spare piece of wood shim will do.
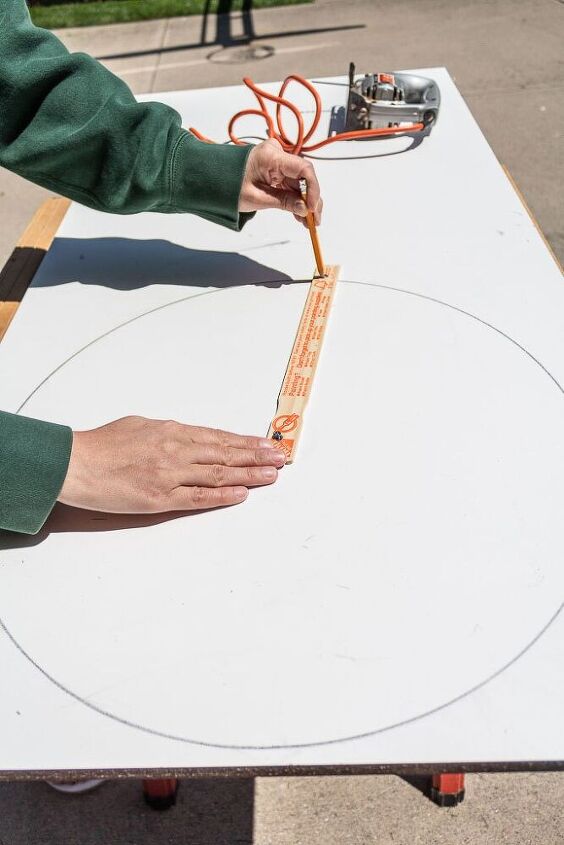
Drill two holes in your stick. One will be the base that attaches with a screw to the center of your melamine board. The other will be 10 inches apart which you will use to insert a pencil and draw your circle.
This 10 inch radius stick ends up creating a perfect 20 inch diameter circle plan to cut.
Next, remove your compass and transfer your board to a tabletop surface and use a jigsaw to slowly and carefully cut along the outline of your circle.
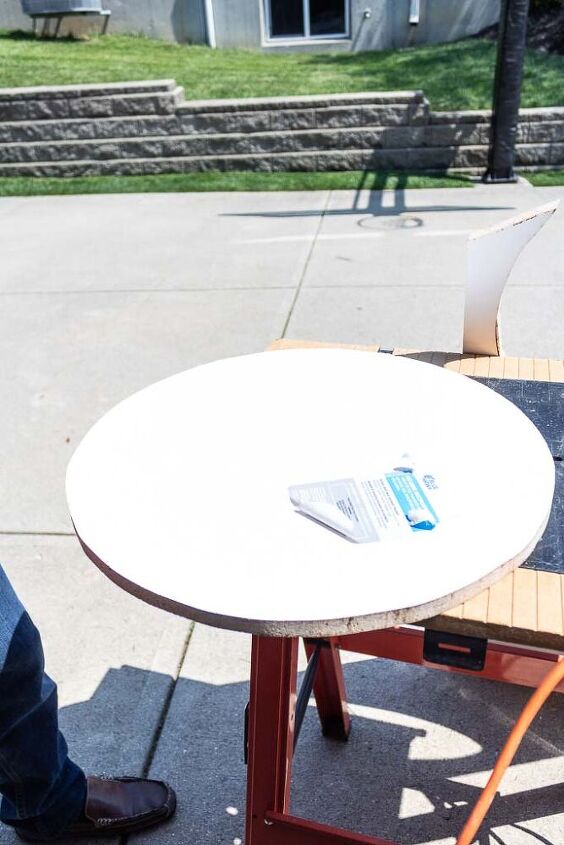
Remember, go slowly. These saw aren’t the easiest to use. And if you’re like me, the first time around will leave you with a jagged uneven shape. But, hey. Practice makes perfect right?
Create the sides of your form by cutting a 2-inch-wide strip off the longest side of your melamine sheet.
This is a 2-person process that involves using a table saw, so if you’d like to skip this step you can also kindly ask your local hardware store to rip the sheet for you.
Then, trim this strip to roughly 63 inches long and wrap it around the circumference of your circle base for a dry test fit. You’ll probably need to trim it just a bit for a snug fit.
Once you’re confident the length doesn’t overlap at the ends you can begin securing it the outer base of your circle with wood screws. I’d recommend placing the screws about 6 inches apart to avoid the round form from cracking.
Finally, caulk the inner seams of your circle along the base and where the ends meet to seal your form.
Pour the concrete for your tabletop
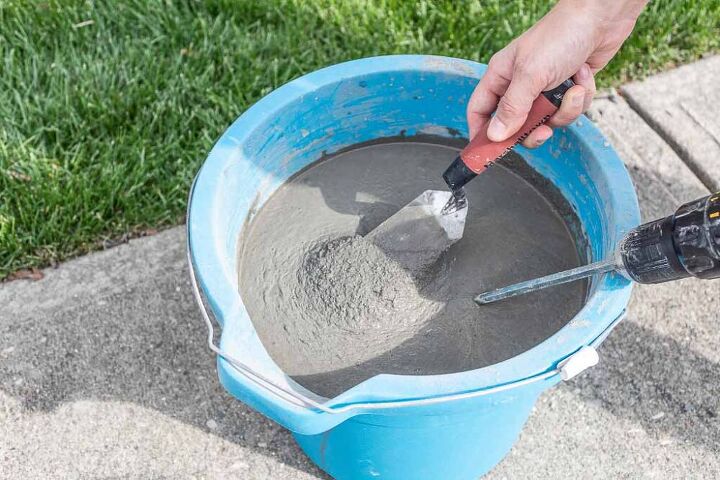
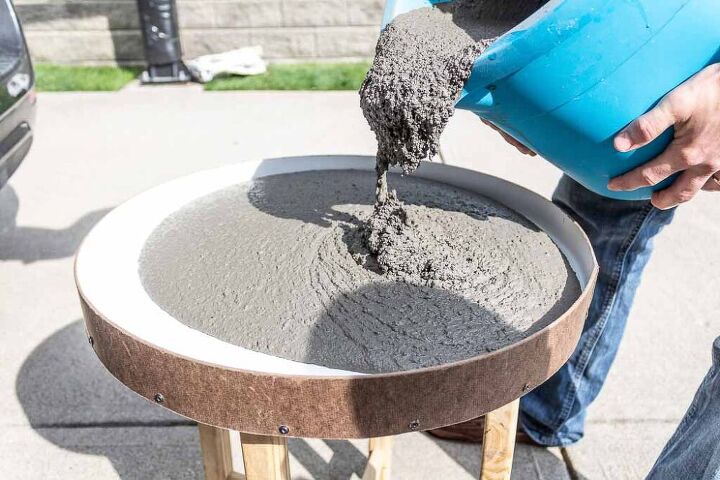
Now you’re ready for the magic. It’s time to pour your concrete countertop into the form. Start by preparing your concrete as instructed on the bag. And don’t give up trying to find countertop concrete mix like I did and settle for the regular stuff. It won’t turn out pretty and polished.
See what I mean? Jagged, rough sides and visible gravel. Yeah, I’ll chalk this one up to a test run too.
Our local Home Depot and Lowe’s didn’t have the countertop mix in stock, but luckily Menard’s did. So we just poured another form as I’m writing this and I’ll have to share updated pics later. But I’m pretty confident it’ll be a much smoother texture.
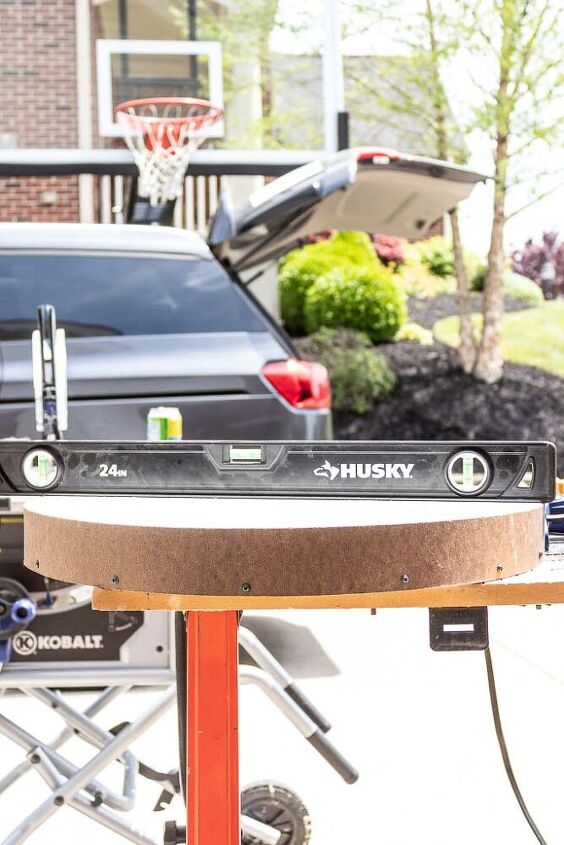
Once you’ve mixed your concrete to a thick liquid consistency you’re ready to pour. Make sure that your tabletop form is sitting on an even level surface or you’ll end up with an uneven thickness countertop. Again, another mistake we made the first time around.
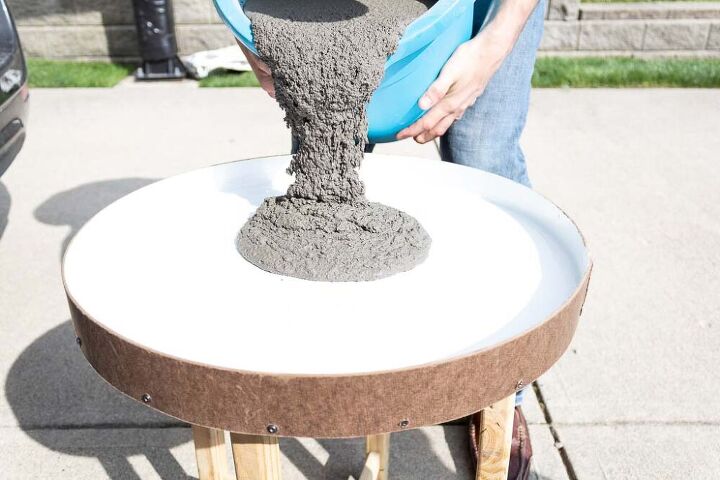
Fill the concrete to the top of the form.
Then smooth out the top surface with a trowel or board and give the sides a good tap all around with a mallet or hammer to eliminate large air bubbles. Let the concrete dry and cure for at least 48 hours.
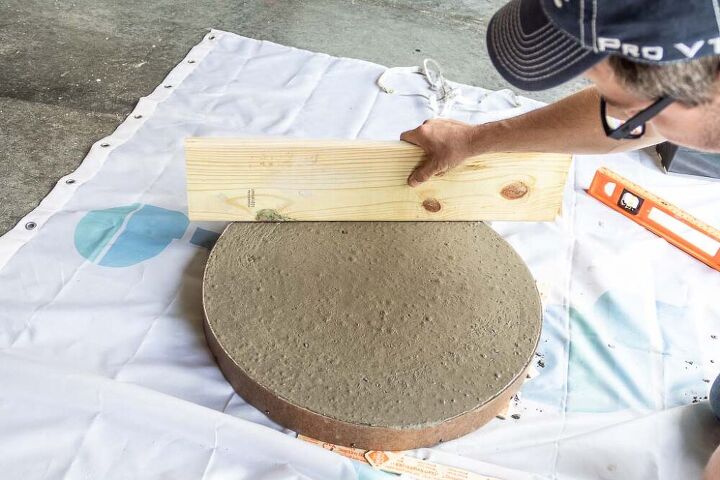
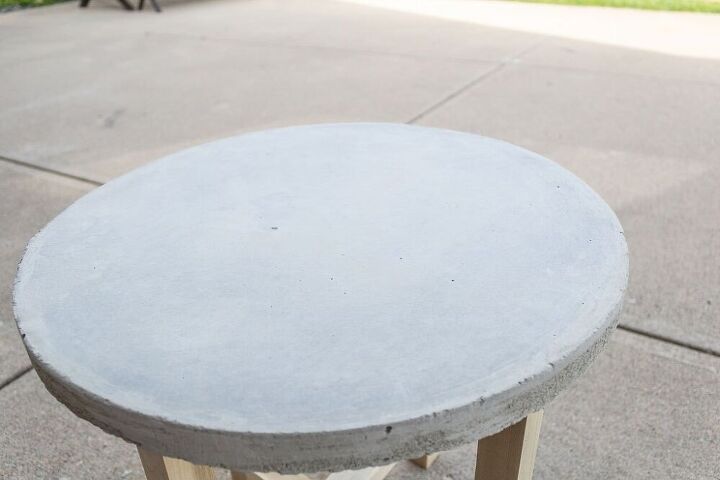
Once it’s set you can remove the screws from the side of your form and your concrete tabletop should lift out easily.
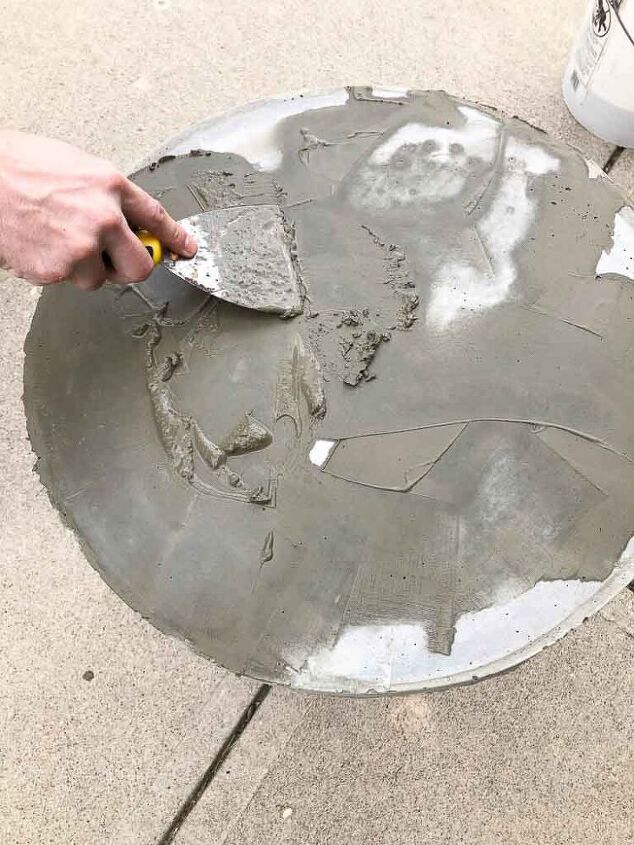
The smooth side will be the top of your table and you might notice tiny pinholes in the surface. In this case you can mix a small amount of concrete together to form a paste and smooth it over the surface with a trowel to fill the holes.
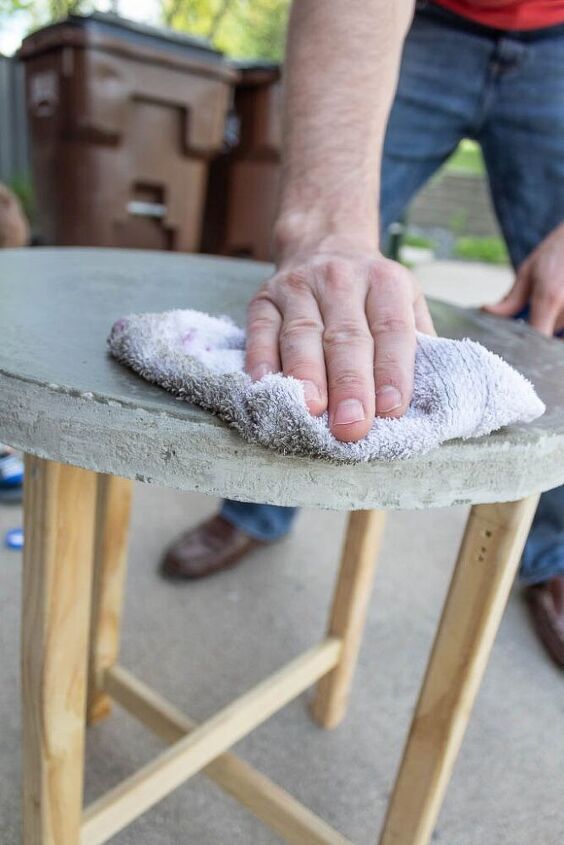
Once this dries you can add a little water to the top and sides of your concrete tabletop and sand it smooth with a sanding sponge. You might need to repeat this process once or twice depending on how smooth of a surface you’d like.
How to seal your outdoor concrete table
The final step to the DIY concrete tabletop is to seal it with a gloss concrete sealer. This type of sealer leaves a wet look finish and glassy smooth surface that’s much nicer than plain concrete.
This process is fairly simple, and you can paint it directly onto the surface with a paintbrush or roll it with a knap roller. We opted for two coats to seal and protect ours and dried pretty quickly.
Now you’re ready to move on to assembling the base of your table!
Assembling your concrete patio table
This was probably my favorite part because I got to use a kreg jig for the first time. It kinda made me feel like superwoman so now I want to go on and do crazy things like build a porch swing, so stay tuned.
I’ve put a cut list below for your poplar boards to make it easier before we jump into building this bad boy.
Cut list for your poplar boards
- (4) 19” pieces – Table legs
- (3) 13 3/4” pieces – Horizontal supports
- (2) 6 1/8” pieces – Top horizontal supports
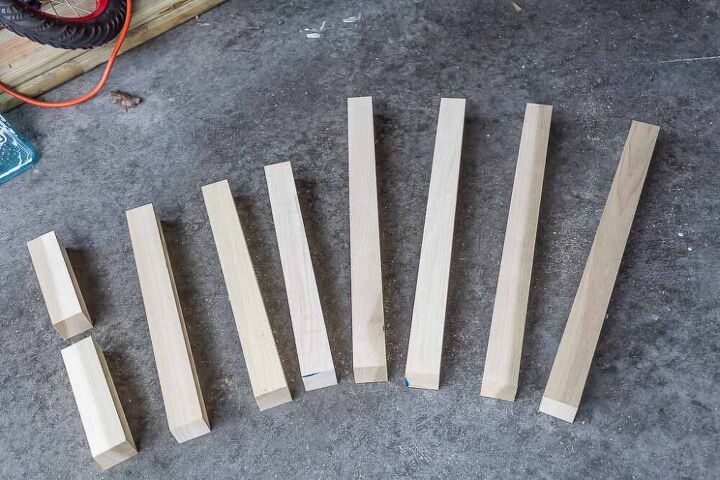
Once you’ve made your cuts, you can begin assembling the concrete table base. So that we don’t have any visible screw holes we’ll be assembling the table upside down and all screw holes will be on the underside pieces of the wood.
1) Assemble the first set of legs
Boards needed
- (2) 19” pieces
- (1) 13 3/4” piece
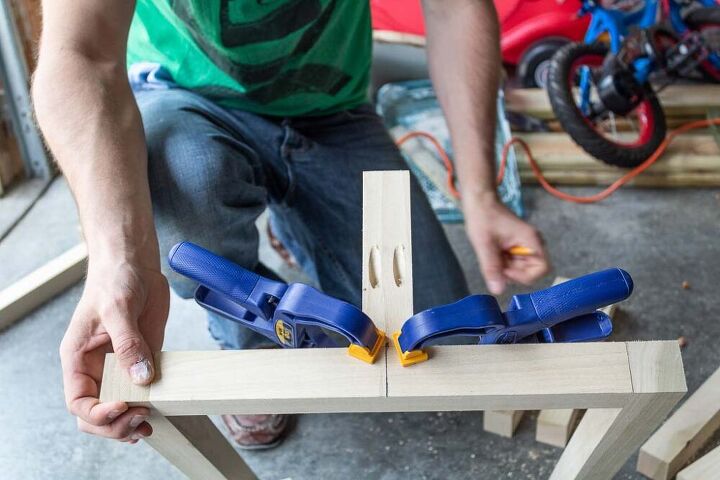
Using a kreg jig drill 2 pocket holes in both ends of your 13 3/4” piece and join them to both of your table legs using 2 ½” pocket screws.
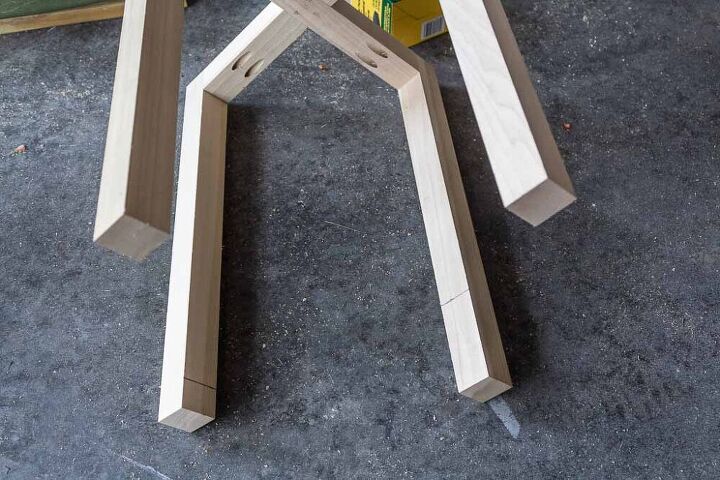
2) Assemble the second set of legs
Boards needed
- (2) 19” pieces
- (2) 6 1/8” pieces
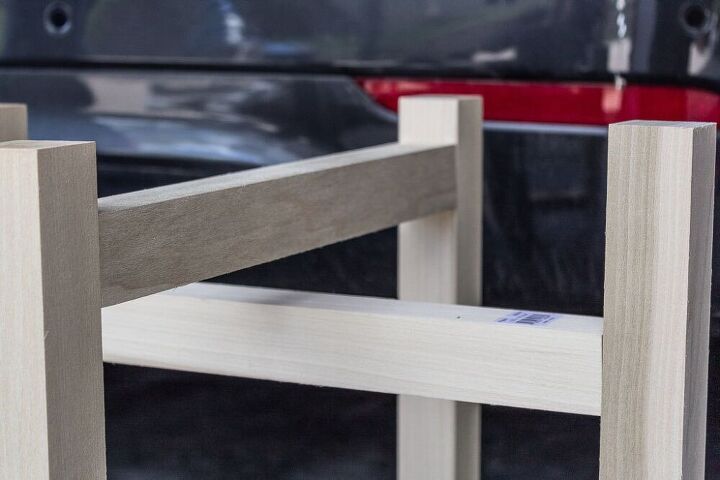
Use the kreg jig to drill 2 pocket holes in one end of each side (top left and bottom right) of your 6 1/8” pieces and join them to the existing horizontal support using 2 ½” pocket screws.
Due to the size of the wood, these holes will be on the top sides of your wood, but won’t be visible because of the concrete top.
3) Attach your first lower horizontal support
Boards needed
- (1) 13 3/4” piece
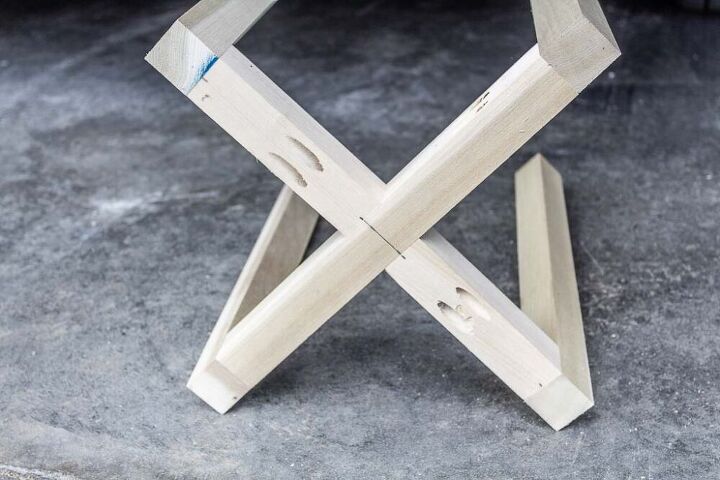
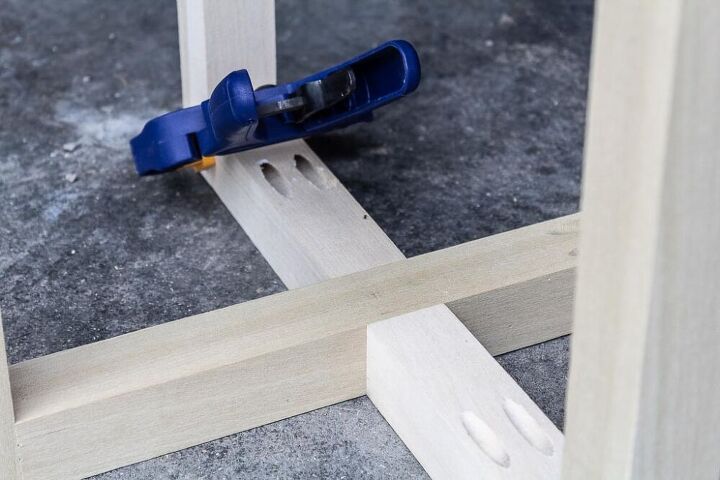
Use the kreg jig to drill 2 pocket holes in each end of each of your 13 3/4” piece. While your table base is still upside down position your support approximately 4 inches up from the bottom of your table legs and connect it with 2 ½” pocket screws.
*It doesn’t matter which set of legs you choose to position your first support to. It will look the same no matter where you place them.
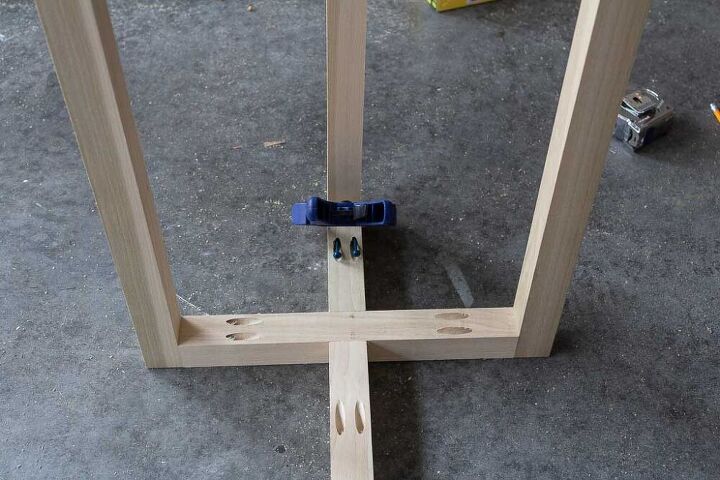
4) Attach second lower horizontal support
Final time to use the kreg jig. I was so sad. Drill 2 pocket holes in each end of each of your 13 3/4” piece.
And again, while your table base is still upside down position your support approximately 1.25 inches up from the bottom of your table legs and connect it with 2 ½” pocket screws.
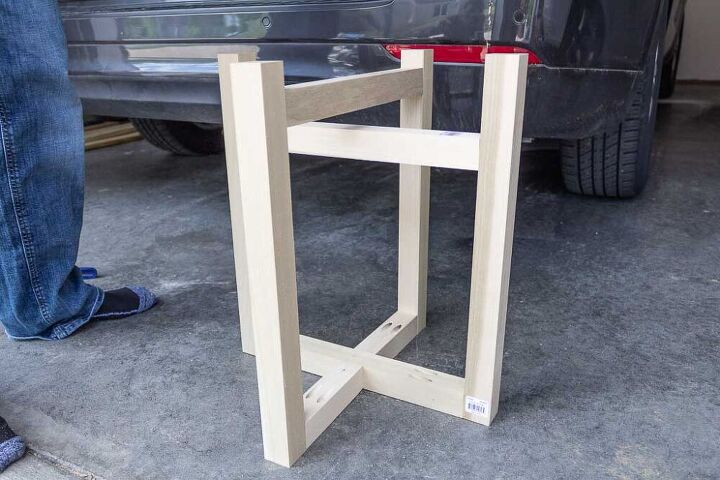
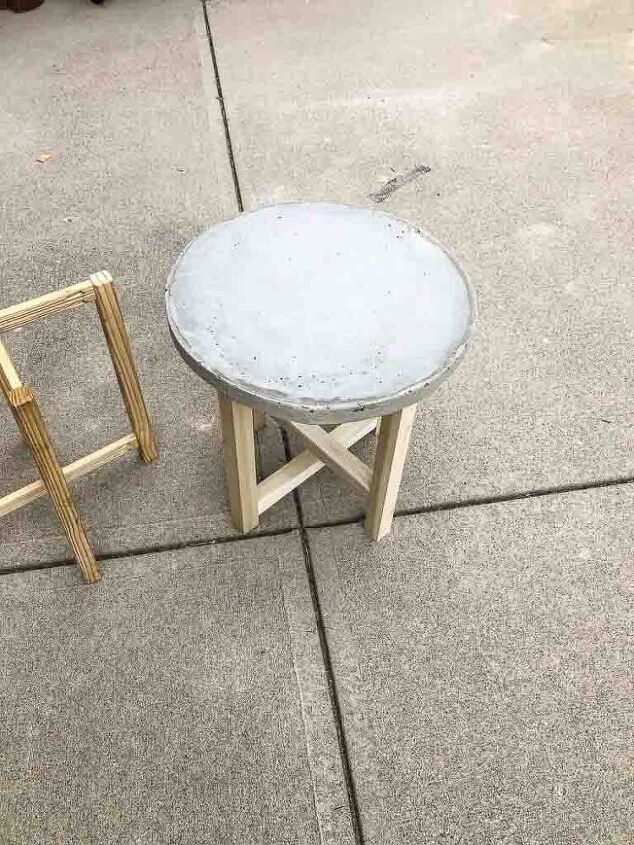
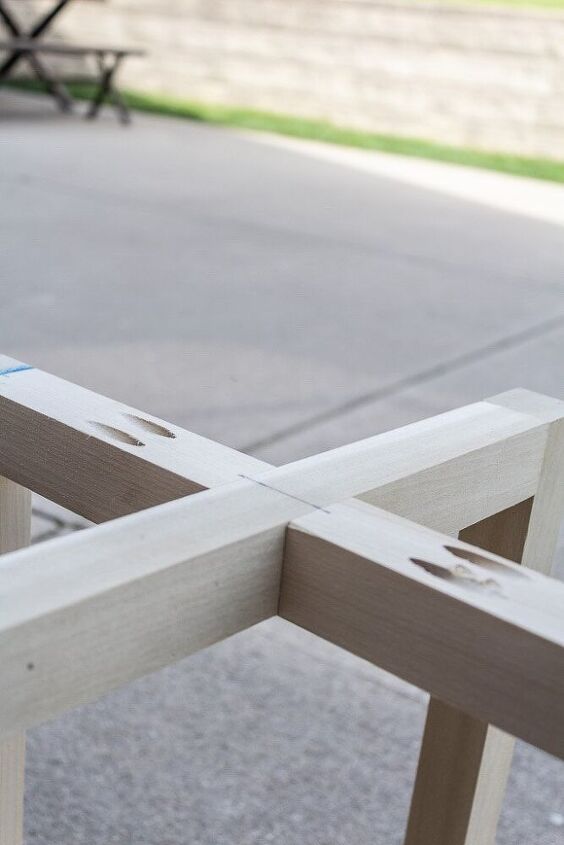
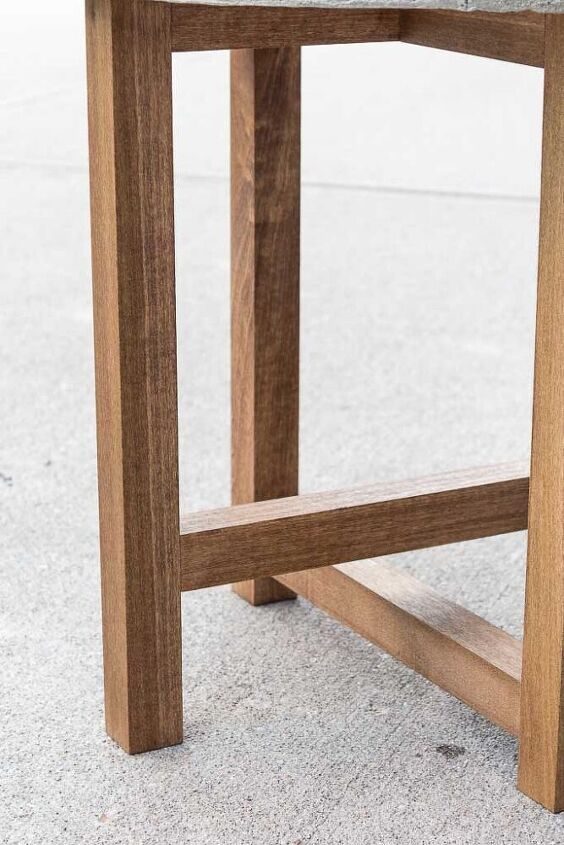
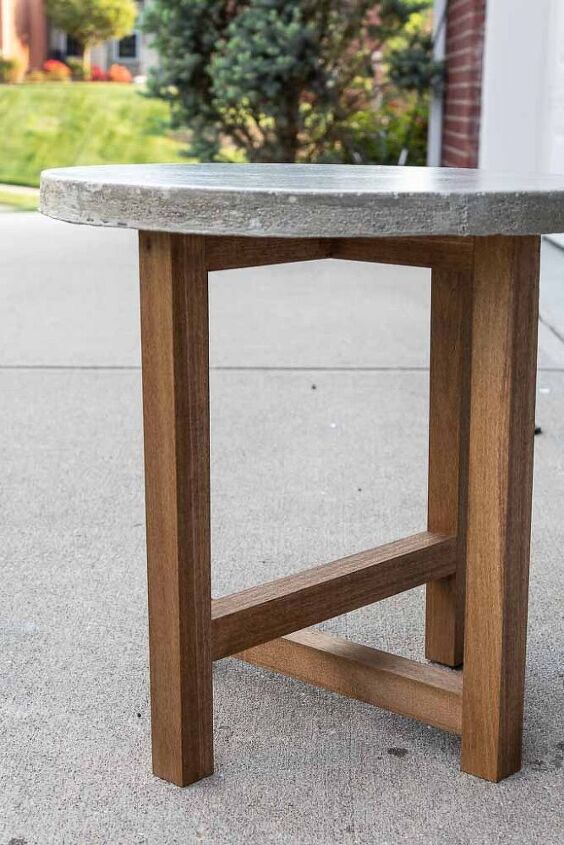
I’m super happy with how this base turned out, and I’m glad I let the hubby talk me into using nicer poplar wood. I love the chunky symmetrical look of the legs.
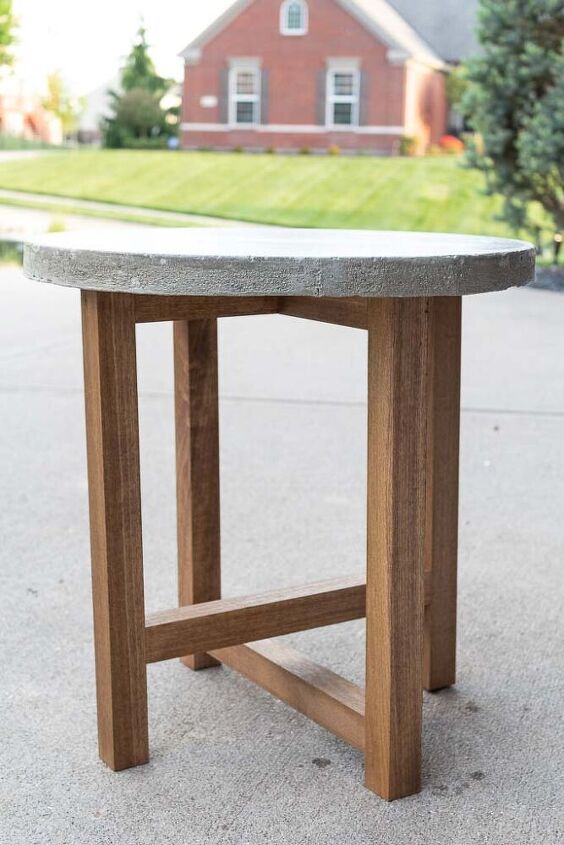
We finished up our DIY concrete patio table by staining the legs in a special walnut finish and sealing them with a clear coat for protection.
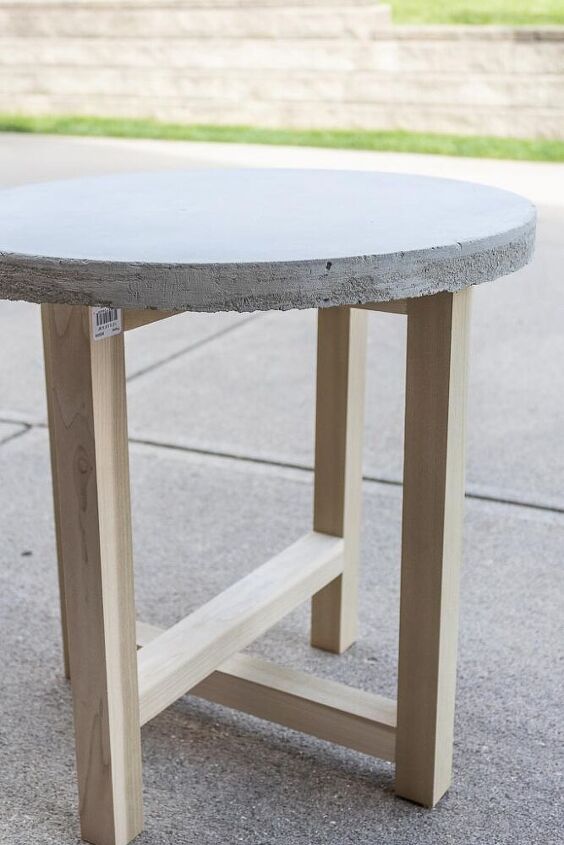
I dry fitted the concrete tops to show you how the finished product looks, because like I mentioned before I’m still waiting for the new top to cure using the countertop mix.
But once you’re ready to set your top all you need to do is apply a bead of construction adhesive along the top horizontal supports and place your concrete.
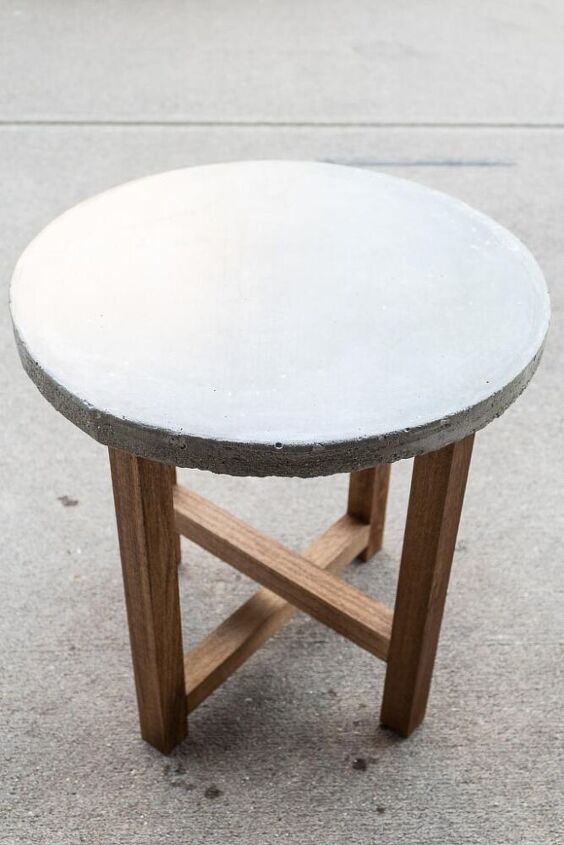
I couldn’t be happier with how this table turned out and for a total of just $50 for the wood and concrete I couldn’t beat it for a pottery barn look alike.
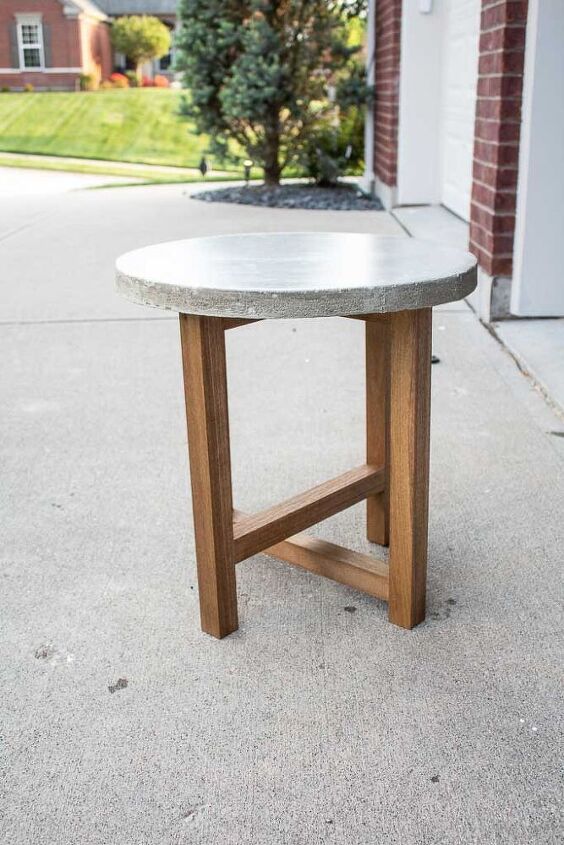
If you liked this pottery barn dupe then you’ll love this easy Farris lamp knockoff I created using a pair of thrift store lamps!

Resources for this project:
See all materials


Comments
Join the conversation
-
The Pottery Barn tables are made of Teak Wood, that's what makes them so expensive. They are made to last a lifetime.
-
Wow - so impressed! Thanks for sharing.


Frequently asked questions
Have a question about this project?
Would pre-made concrete pavers be too small?