


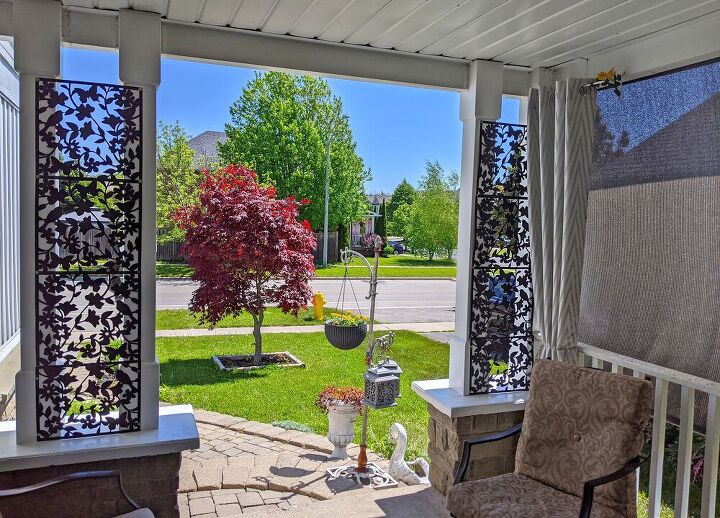
Porch Privacy - the Easy Way!

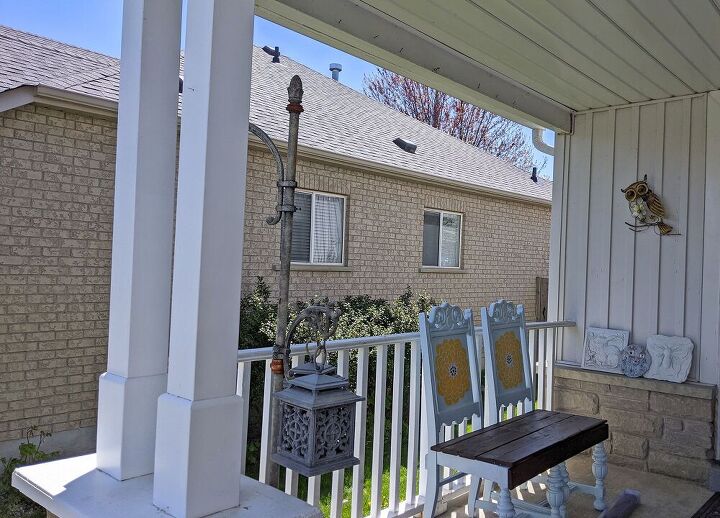
Our front porch had no privacy, it faces the neighbours' windows on one side and the street on another. Also, because it was so open, the patio furniture often got wet from rain and faded from the sun. I’d been mulling over the easiest way to address these issues and after eight years I finally tackled it.
My first thought was to install lattice, but because they come in 8 x 4’ sheets there was no way they would fit into my car. So I decided to go a different route, where I would be able to complete this project without help.
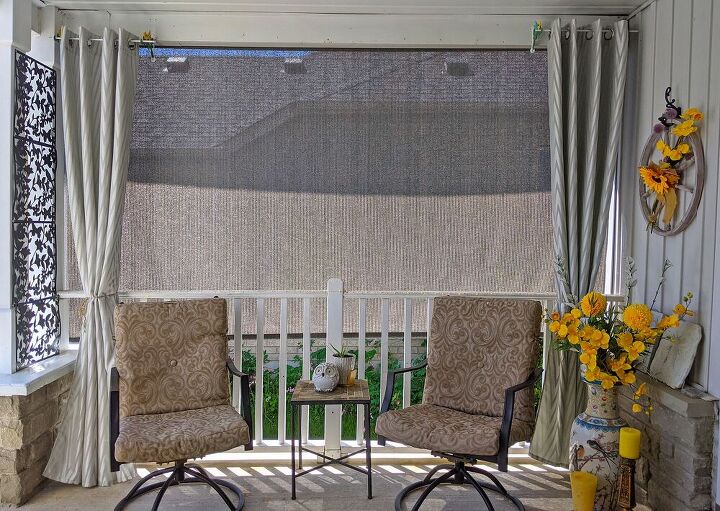
STEP 1: Sun Shade
I measured the opening on the neighbours’ side, it was 10 feet wide. Then I went online and searched for a sun shade to fit. I found one at Home Depot and picked it up curbside.

I was planning to install the blind right in the center of the opening, but apparently the size of the shade is actually the size of the fabric and doesn’t account for the space required for brackets. So I attached it to the outside of the bulk head, following the instructions in the package.
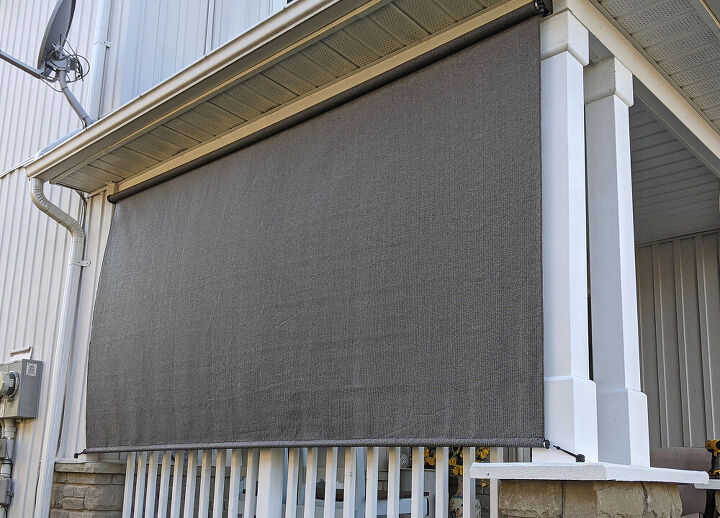
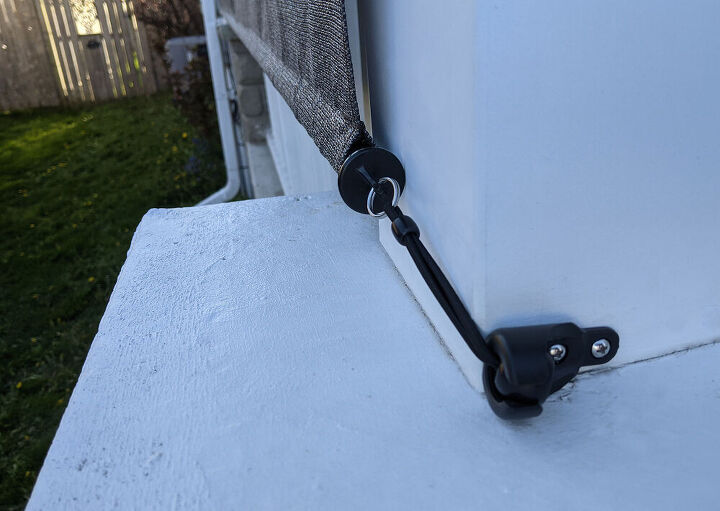
I attached the clips at the bottom that prevents the shade from blowing around in the wind. They slide in and out easily, for opening the shade.
STEP 2: Curtains
I had recently picked up a set of curtains on marketplace and though they would cozy up the space. I didn’t have a 10 foot curtain rod, but I really didn’t need a full length rod because the curtains would be gathered at the sides only. I found a set of cheap dollar store rods in my garage and to hang them I repurposed plant hangers. I cleaned the hangers and spray painted everything flat white.
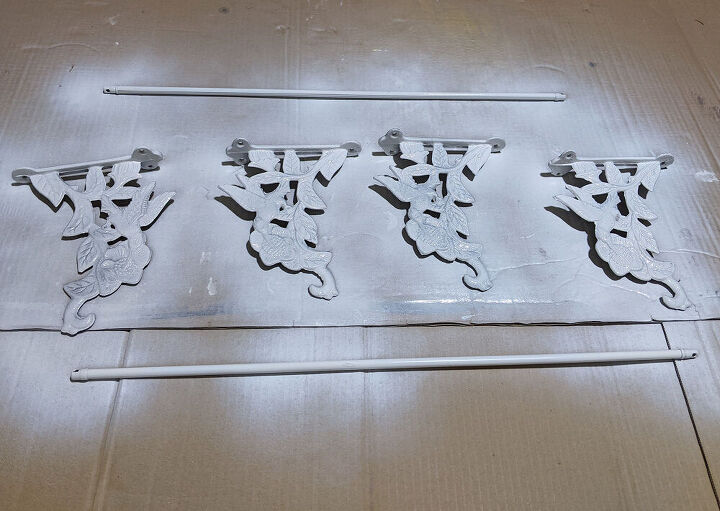
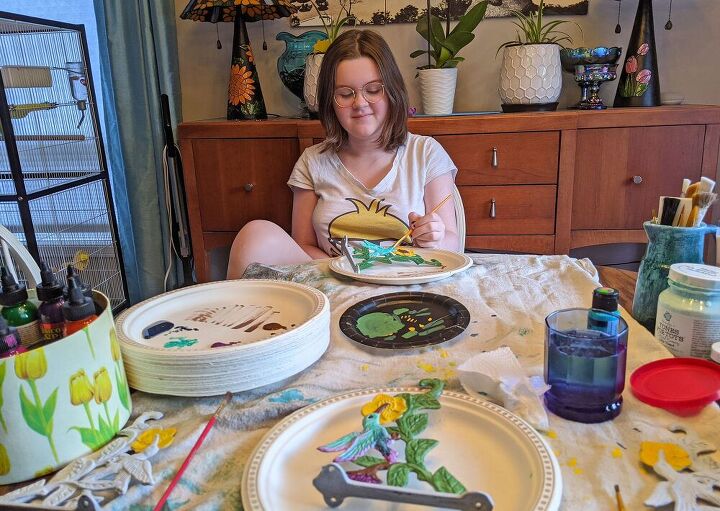
I thought painting the plant hangers would be a fun lockdown project for my daughter and I. :)

I hung the curtains and gathered them with jute. I attached the jute to the railing using cable clips, so they won’t slide off in the wind.
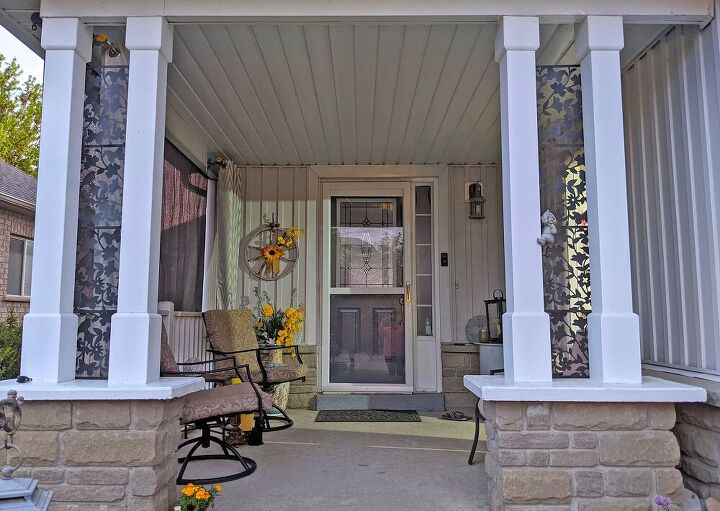
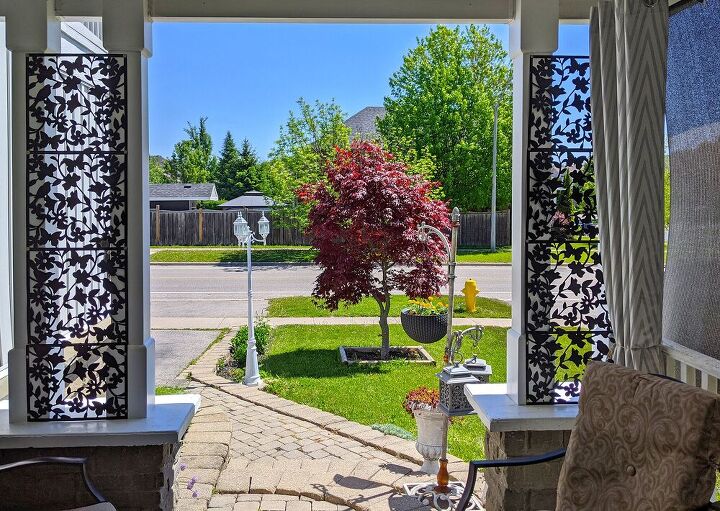
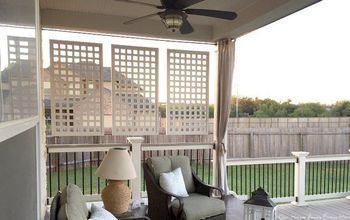
STEP 3: Panels
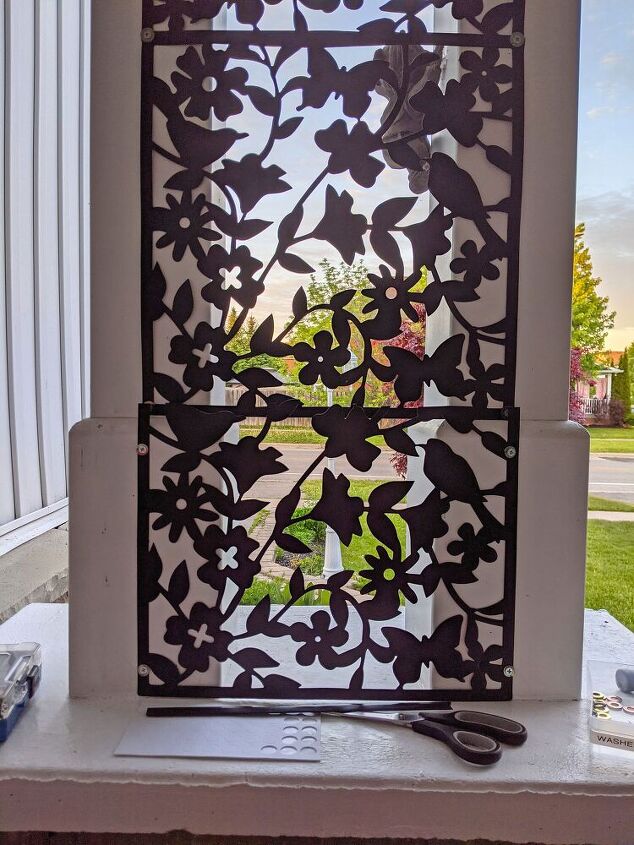
I also wanted to provide a little more privacy facing the street. I ordered a set of PVC waterproof room divider panels from amazon. They are very lightweight and easy to handle. I drilled them into the pillars, overlapping each panel. I used washers as well to help prevent them tearing when the wind is strong. They also came with little double-sided tape circles, which I used on the edges for extra security.
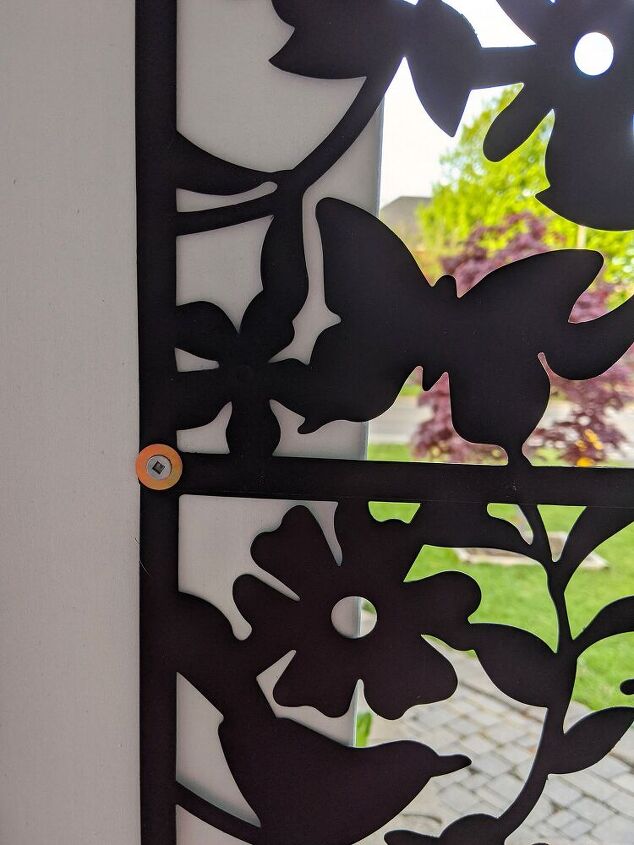
There is molding at the bottom of the pillars so I attached three panels to the space above the molding first. Then I attached one to the molding and trimmed it with scissors to overlap with the others.
And done!
This project was super easy! The only tool I used was a drill. We lounge on our porch a lot more now. Hopefully if you’ve been struggling with porch privacy and weather protection, you’ll be inspired to tackle your own. 😊

Resources for this project:


Comments
Join the conversation
-
Very very nice!😎
-
I don’t think I’d do on front porch. Front porch’s invite neighbors in; if only to acknowledge their humanity and existence. But backyards totally different; that’s your fair weather family room and these tips would be helpful


Frequently asked questions
Have a question about this project?
Wow what a difference! Your a very creative person and so smart to come up with all the things you came up with laying around your house not being used to save money. I especially love your pretty plastic decorative panels. I was wondering could you not get your shade in a longer length so it would come down to your porch floor level or did you plan on it only coming down as far as it did? In any case you pulled everything together beautifully.
Love, Love, Love this! super cute with layering -