


Tips for Planting a Flower Container

One of the easiest ways to add color and interest in your yard is with flower pots and containers!
One of the benefits of using containers is that you can move your containers if you find your plants need more/less sun or shade! OR if you just want to move them around.
Last summer I spent a lot of money on premade containers full of flowers from the local nursery. They were gorgeous, but for the cost of one flower pot I could have bought A LOT of flowers and did it on my own. So, with that in mind this year, I used the inspiration for flowers I wanted to use this year...but I was determined to do it on my own and more budget friendly.
PLEASE NOTE: There are many ways to plant containers and everyone has their personal preferences & budgets. Do what works best for you! I am sharing what tips I personally use to fill my containers and have had great results with. I hope it will give you ideas for your containers. 😊
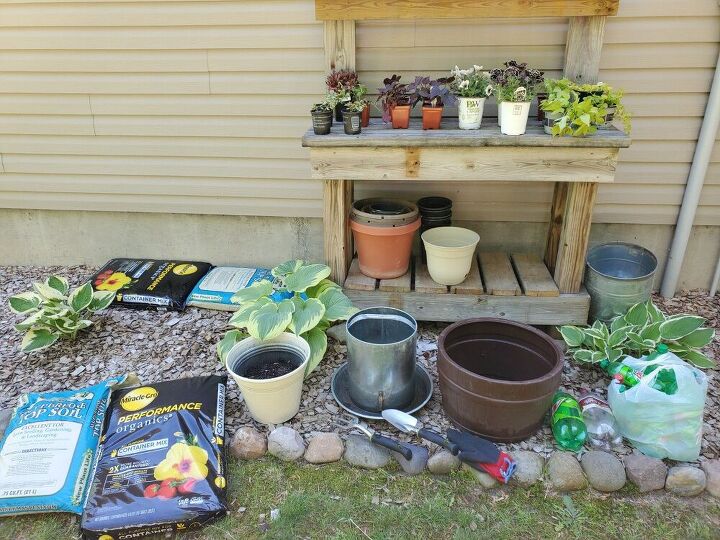
Material List:
- Flowers and plants
- Top soil
- Container potting soil
- Flower pots
- Garden tools
- Garden gloves
- Empty plastic pop bottles
- Small Rocks
TIP # 1:
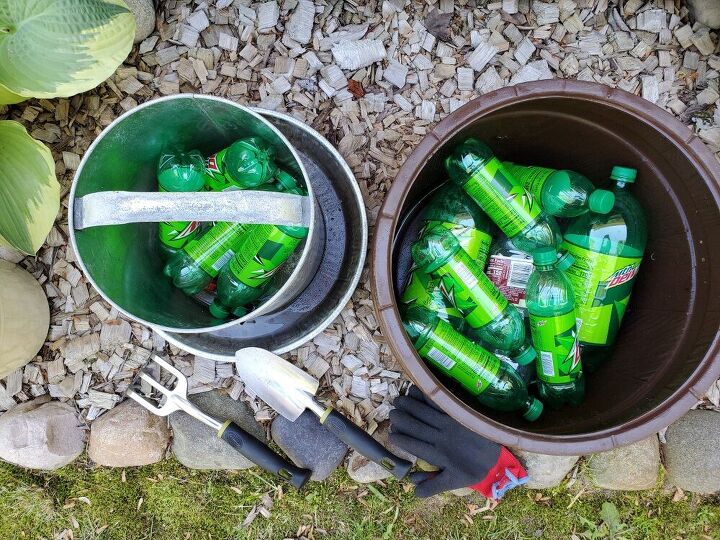
I use empty plastic bottles in the bottom of my large containers. Doing this will aid in drainage and to help keep my containers from weighing 200 pounds.

In smaller flower pots I used small rocks for drainage.
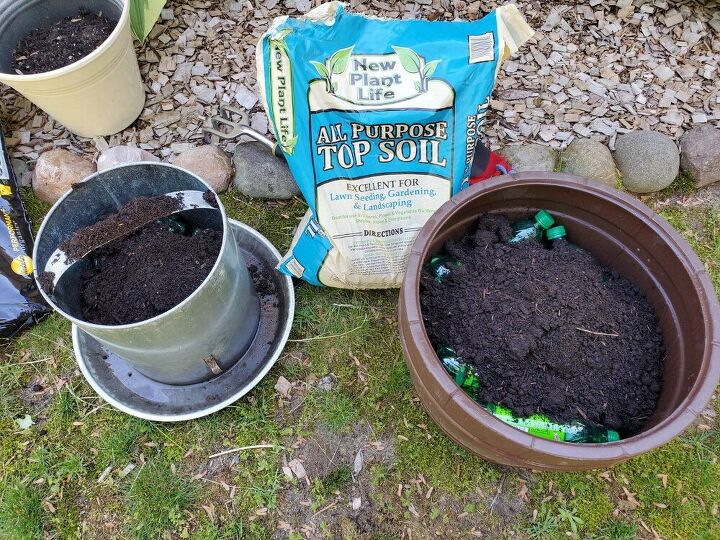
TIP # 2:
After adding the bottles, I added a cheap top soil. This is strictly to help keep the cost down. This bag of top soil cost me $2.
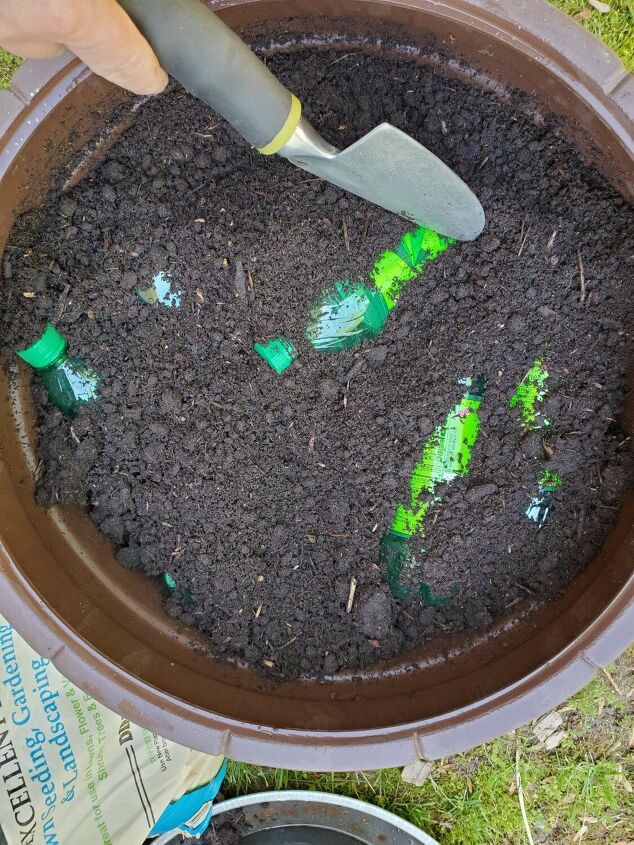
I make sure to get the top soil all the way to the bottom of the container and around the bottles.
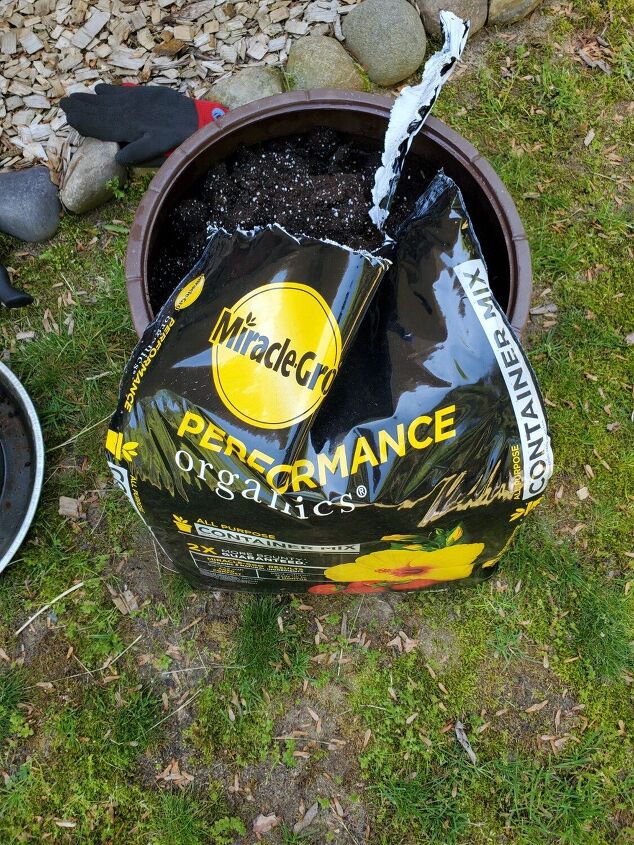
Then I add the more expensive container mix soil on top. I chose this soil because it has aged compost and feeds your plants for 3 months. This bag of soil cost $12.
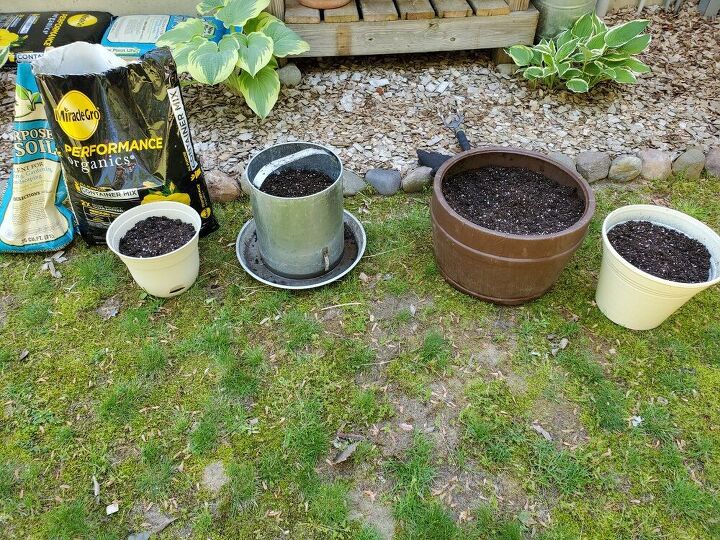
As you can see in the photo I did not fill the containers to the top with soil. I left 2-3 inches from the top of the containers. You'll need space for all the soil and root systems that comes from your plants. You can always add more soil if needed once the plants have been placed.
Also, please note I used one bag of each soil for these 4 containers.
TIP # 3:
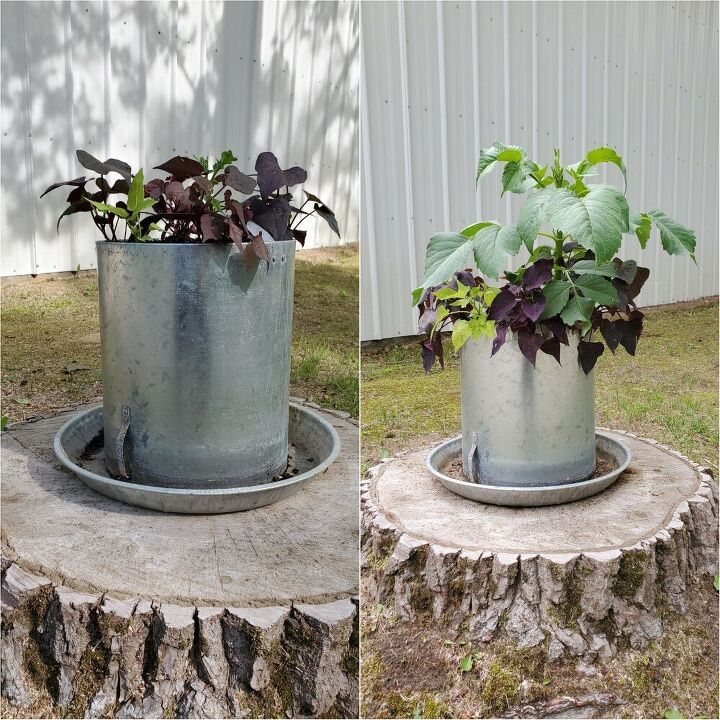
Think outside the box when deciding on containers! Old galvanized pails, tubs, etc. PS- It's okay if they have holes, that just helps with drainage!
We use to raise chickens, so I decided to use the old waterer and it worked perfectly! Another idea...We just replaced our mailbox with a larger one and I plan on using the old mailbox for another container in my flower bed.
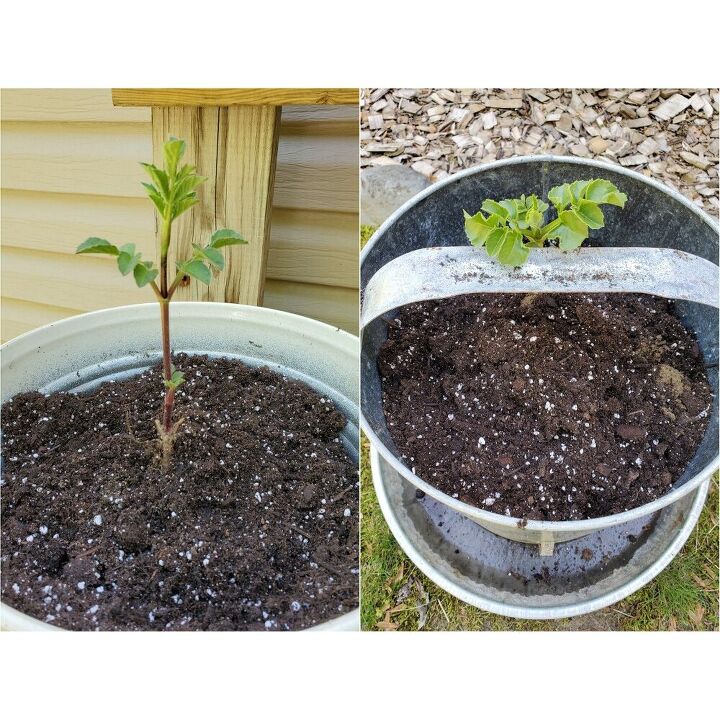
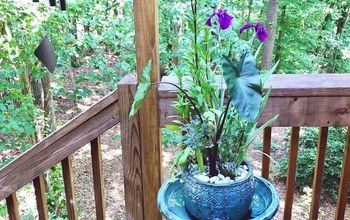
In 2 of my containers I used a Dahila's I grew from tubers. I place each Dahila plant in the center of the container as a focal point.
TIP # 4:
Save some money and use bulbs or tubers in your containers. I purchased a package of 2 dahlia tubers and they were way cheaper than purchasing Dahlias that were already blooming.
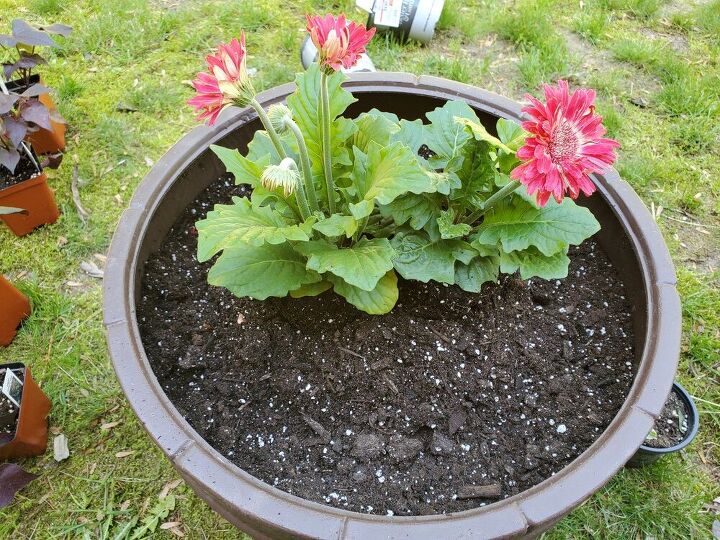
For the barrel container, I used Gerber Daisy's as my center focal point. Use any flower you love that can become a showstopper in your container.
Once the center plant is placed you can start to fill the containers with your other plants.
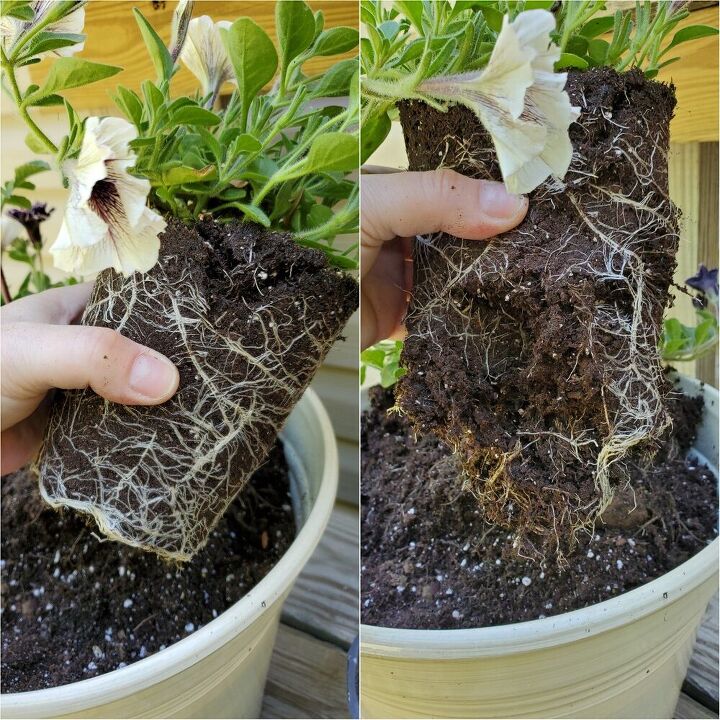
TIP # 5:
You may notice a lot of roots once you take the plant out of the store container. I always break up the root ball before planting. I do so with my fingers if possible but for some extreme roots you may need to use a garden trowel.
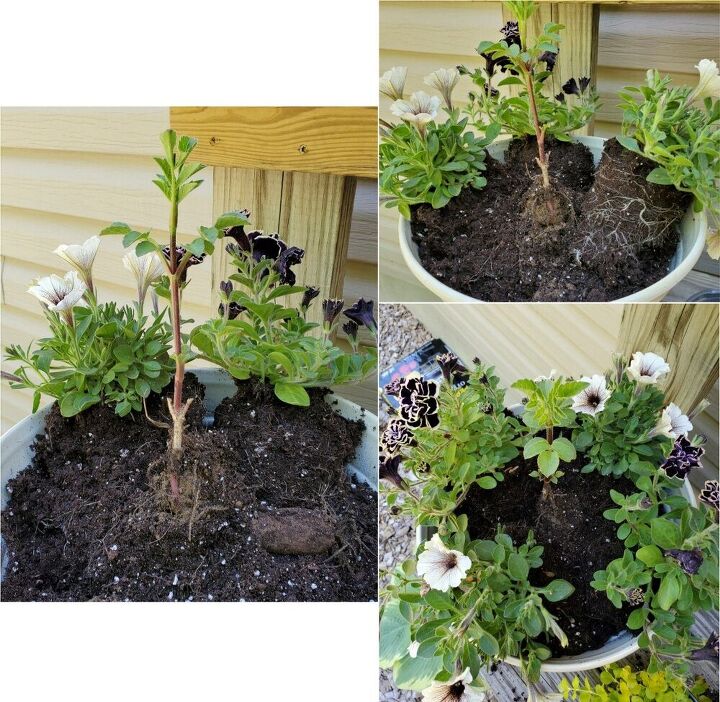
In this series of photos you can see that I started placing plants around the edge of the container. Once that is done you'll see there is a lot of open spots. I decided to fill in my pot with Creeping Jenny's.
TIP # 6:
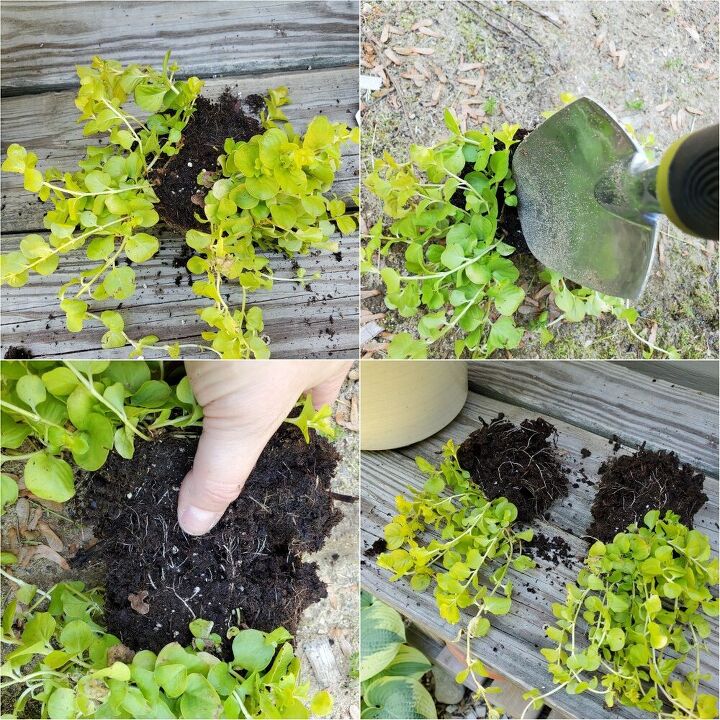
Save a little more money and split a larger plant in half, thirds or fourths to use in your containers (depending on the size of your plant and needs).
I had a large creeping jenny from last year that I split in half to fit my needs. Another idea is to see if family or friends have plants they need to split. Maybe you could do a flower/plant swap and get a few new to you varieties.
I hope these tips give you some new ideas for planting your containers and help you save some money as well. Enjoy the following photos of my containers growth.
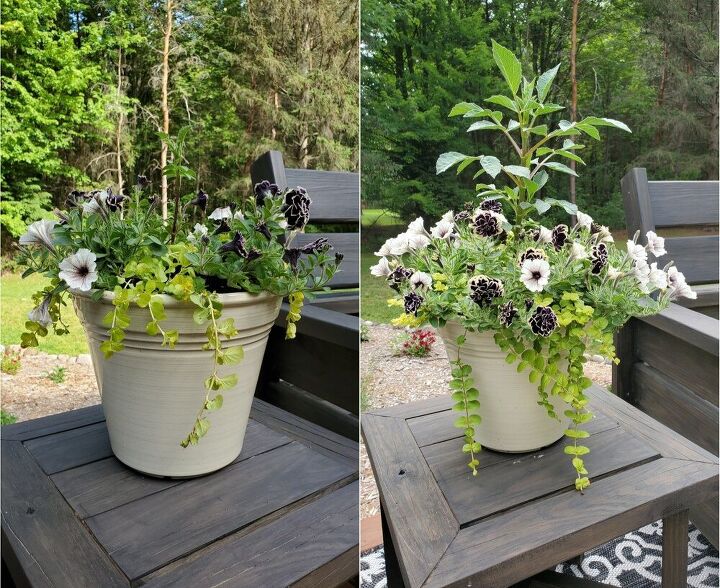
The following are all the containers I planted and the growth they have made. The photos show how they looked on day 1 and day 24 (May 30 to June 22).
Plants included:
1- Dahlia (center)
2- Creeping Jenny (neon trailing vines)
2- Midnight Gold Petunias (purple)
2- Supertunia Latte Petunias (white)
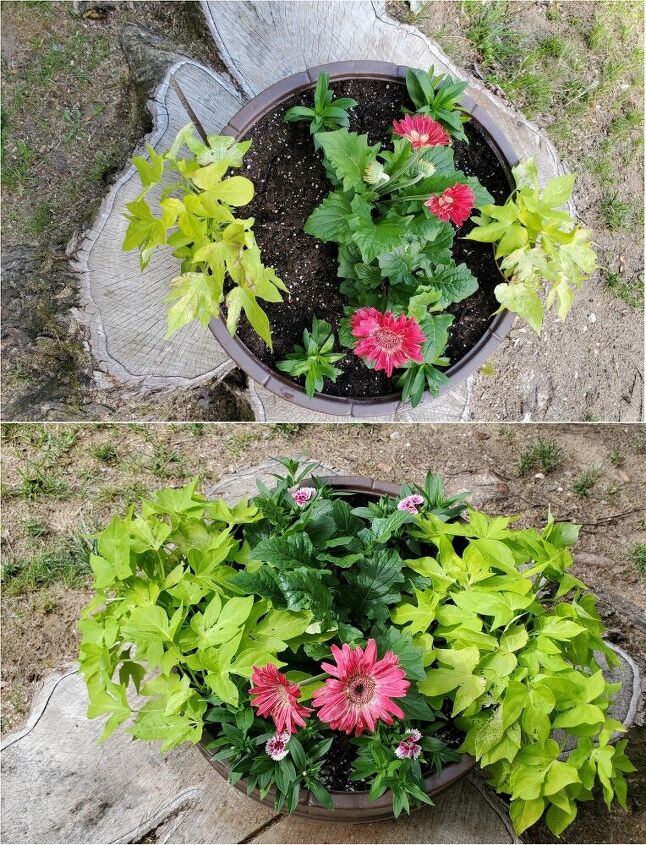
Plants included:
2- Gerber Daisies (center)
2- Sweet Potato vines (neon green color)
4- Strawberry Dianthus (small pink flowers)
Plants included:
1- Dahlia (center)
5- Sweet Potato Vines (1 neon & 4 purple)
Plants included:
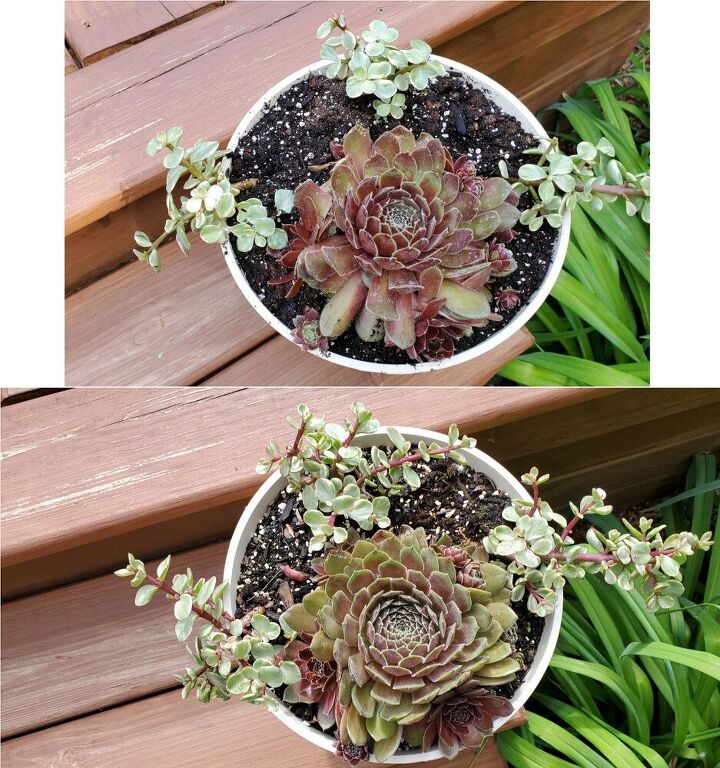
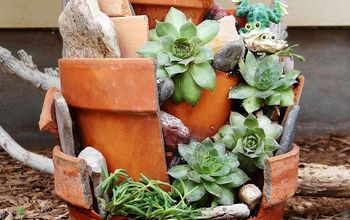
1- Hen & Chicks succulent (front)
3- Succulents (unsure of their variety/name)
Resources for this project:
See all materials


Comments
Join the conversation
-
I must do too many pots since I could not come up with enough plastic bottles. I ended up slicing a pool noodle. It worked great. Since I rarely reuse my dirt from the containers, it's easy to take the pool noodles pieces out of the root ball and save them for next year.
-
Instead of rocks (heavy) in the small planters, I use bottle caps. It takes a little time to make sure they are all cup side down, but they are free and light weight. Then I cover them with 1-2 wet coffee filters to keep them in place as I add the soil. Just had the thought that small plastic bottles would work too. (like perhaps medicine bottles)


Frequently asked questions
Have a question about this project?
Darn it! Really wish I knew this a few months ago when I did several containers. The amount of soil I used was pretty expensive and yes, makes them very heavy! Funny thing is, is that I have a trash bag full of small coke bottles. Like 10 oz, which would be perfect, had I known. We will be doing window boxes soon, and it would be great to have less weight pulling on our siding. How deep should containers be to do this? And do you do that for both annuals and perennials? Reason I ask, is bc I am wondering if the bottles need to be changed each season. Maybe they get moldy? 🤷♀️