


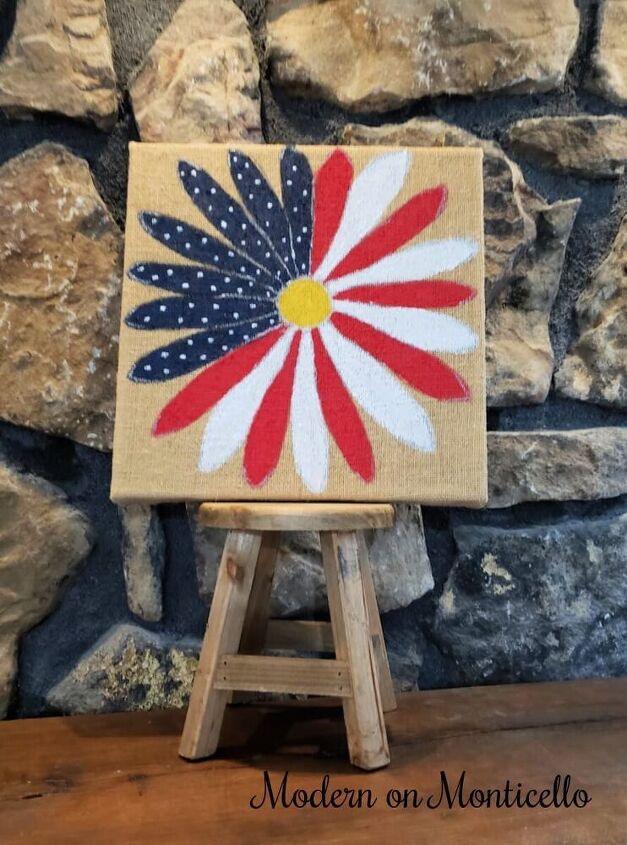
Patriotic Flower Painted on Burlap

Paint an American flag on anything in any shape and it immediately becomes fun patriotic decor. With a small burlap canvas and paint, I created a flower shaped flag art for my mantel.
Each season, I make a new wreath for my mantel. This time I decided to try something a little different.
This rustic patriotic flower painting is really supposed to mimic a patriotic wreath.
I used a square 12″ x 12″ burlap canvas I had in my craft stash, some painter’s tape, and a pencil to outline and create a festive patriotic flower.
The design of the flower is easy to recreate with things you already have on hand.
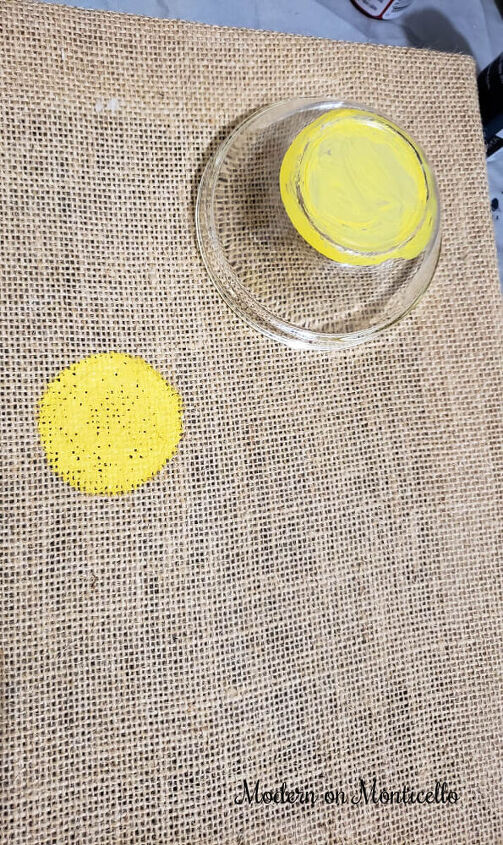
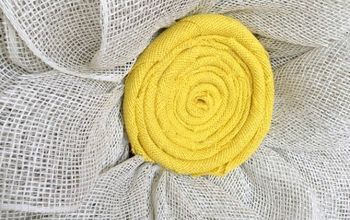
To start the center of the flower, I painted the bottom circle of a small bowl with golden yellow acrylic paint to start the design. By pressing the painted image of the circle on the burlap, it easily created the center of the flower. I filled in the circle image with several layers of the paint and allowed it to dry.
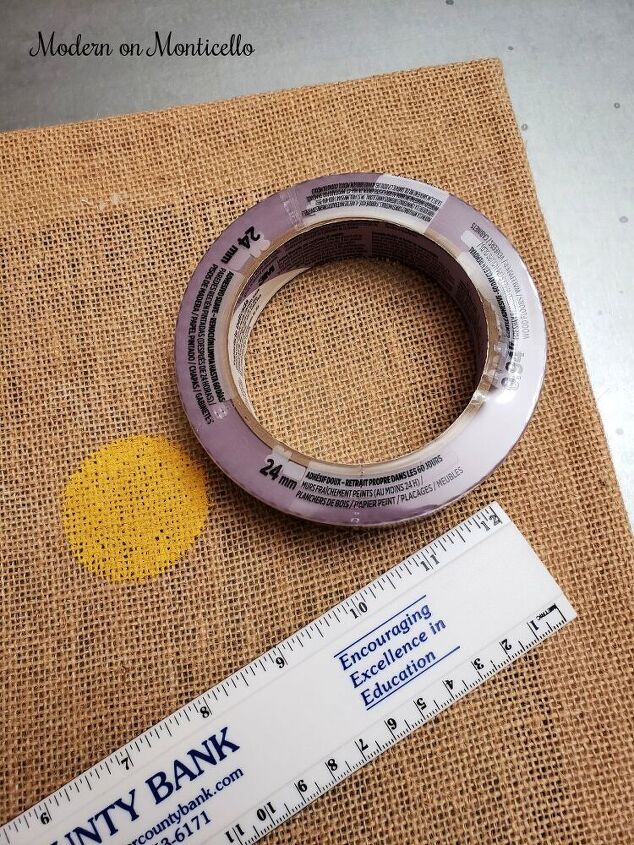
Knowing I needed at least 20 petals around the center to make the design, I decided to use 24mm wide painters tape (.94 inch) to create the shape of the flower and the petals.
If this step you will need easy to remove painter's tape and a ruler.
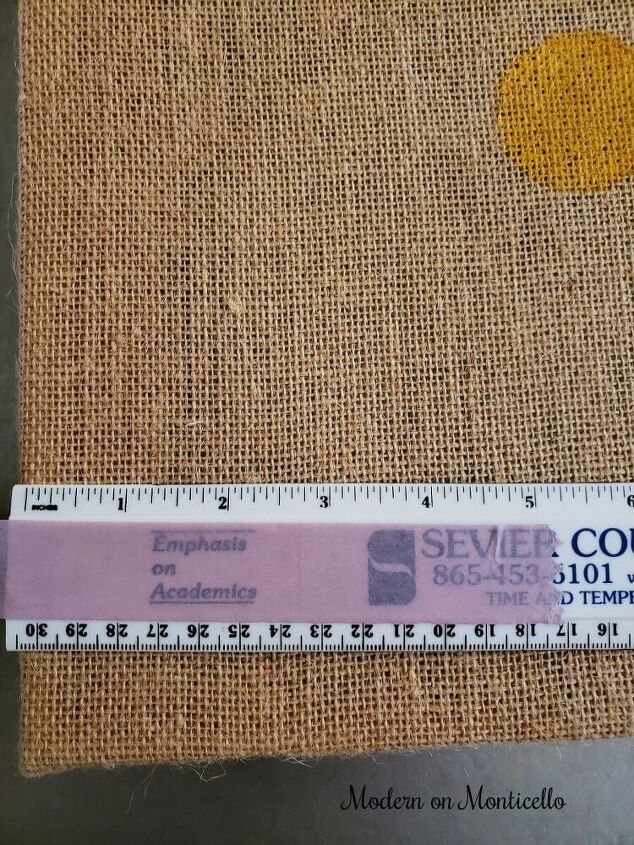
The next few steps were needed to find the size and placement of each petal.
Since I wanted the flower design to resemble the American flag, I needed enough petals for the navy blue section, and exactly 13 petals for the red and white petals around the center.
To make the flower look balanced with the right amount of red, white and blue petals, I decided the flower needed 20 petals in all.
To determine the length of each petal, I measured the space from the yellow painted circle to the edge of the canvas and found that each petal could be between 4 and 5 inches long.
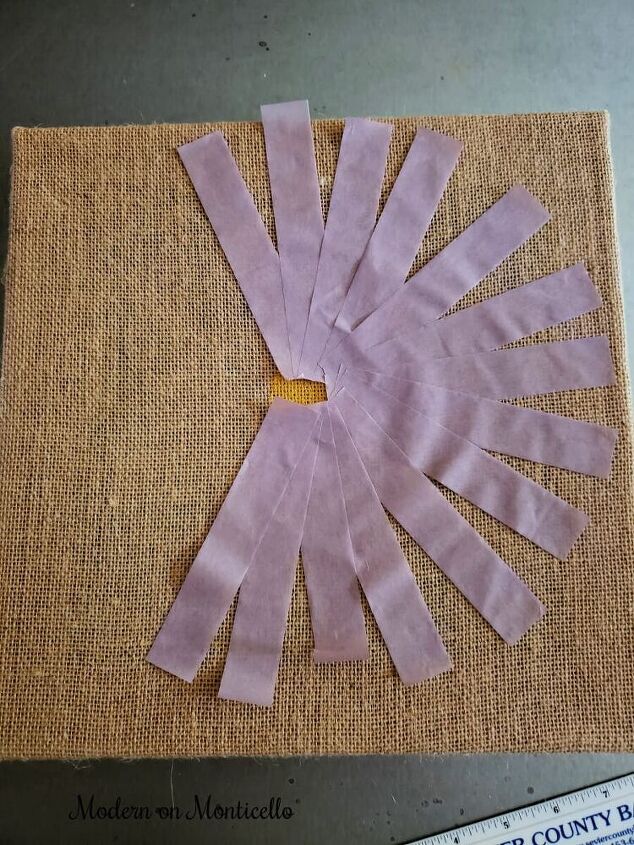
Use the tape strips as a guide to create the placement for the flower petals.

Once all of the painter’s tape pieces were in place as a guide, I started at the piece on top of taped pieces, traced along the edges of the tape with a pencil, and then joined the two lines at a point to form the outline for the first petal.
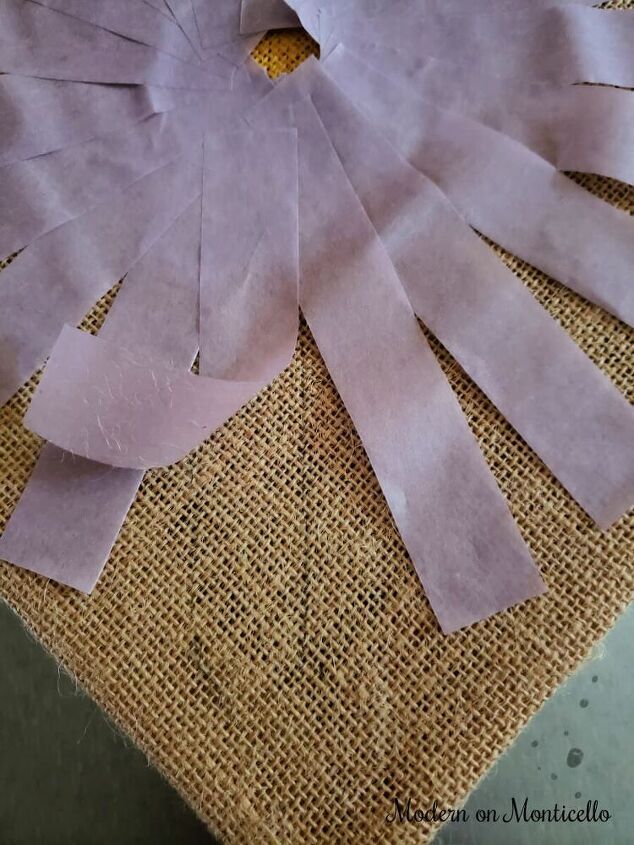
Once I created an outline for one petal, I removed that piece of tape and then traced the outline of the painter’s tape piece next to it and followed the same step to create a pointed petal design.
The tape helped to create the size of the petal and the placement of the petal around the center of the flower.
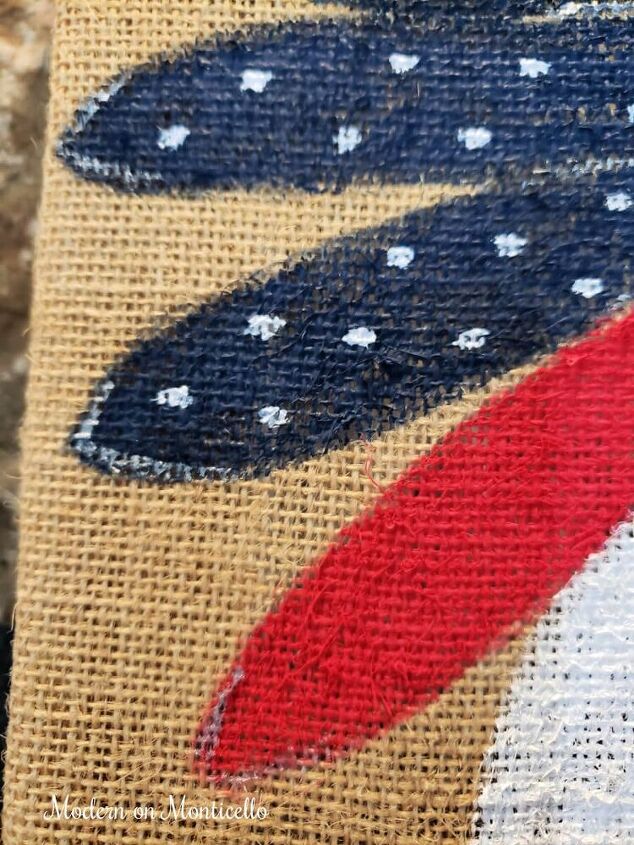
With 20 petals traced in, it gave me 7 petals for the blue, and 13 petals for the alternating red and white colors.
I first painted over the pencil outline of each petal in the colors and then filled them in with two layers of paint in each color.
Since the red and white petals were so close together, I painted the red petals first, and allowed them to dry before painting in the white petals.
Finally, I used metallic acrylic paint in silver and added lines and details between each petal and around the golden yellow center.
The final silver accents were added to the end of each petal. It was just what this painting needed to finish it off.
This patriotic flower painting will now be part of my Summer mantel display.
I just love the blend of red, white, and blue for the summer months so intend to leave this mantel display up until Labor Day.
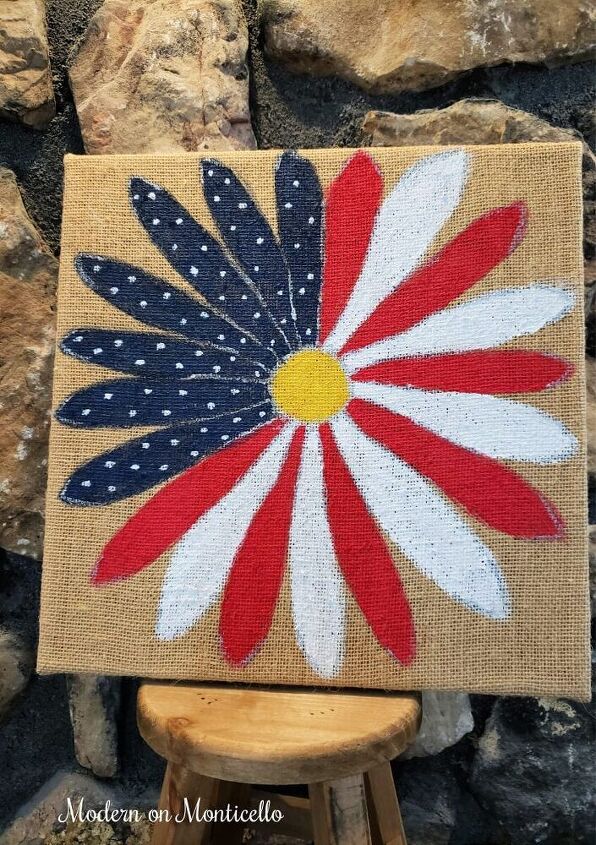
I like how this painting mimics a patriotic wreath.
Resources for this project:


Comments
Join the conversation
-
Really cute and such a great idea!!!
-
Love!!!


Frequently asked questions
Have a question about this project?