


3 Easy Patriotic Wood Projects Anyone Can Make and Probably Won't Cost
I grabbed some extra wood that I had and everything I could think of that was red, white and blue. Let's see if we can make some cute things from all of this mess.
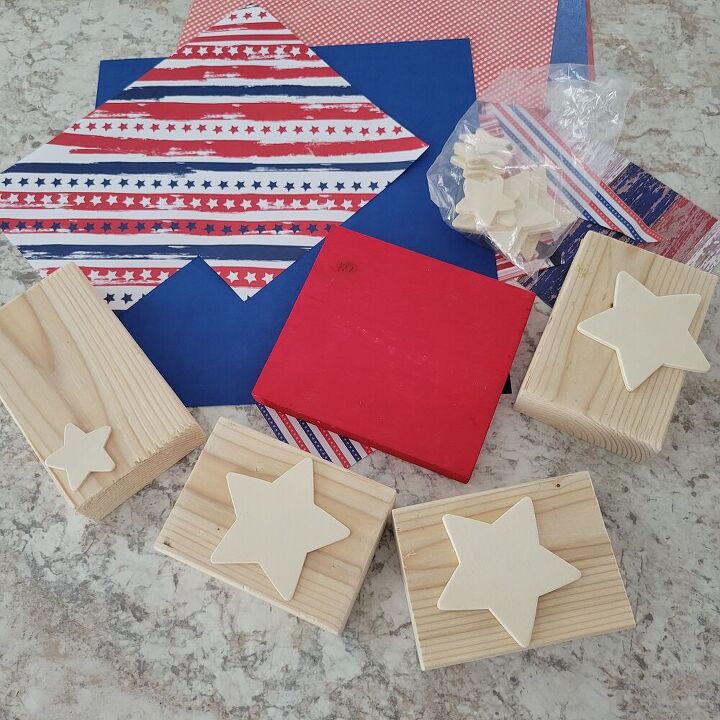
Remember how I've mentioned before I don't throw much away?? Well, I still had some pieces of scrapbook paper from other projects, these stars, I even grabbed some fabric I thought I might use. You just never know if you don't have a plan, and I really didn't. I have 2 places in my living room that could use a little patriotic item of some sort. They would need to be small, so hopefully these wood pieces are just the thing.
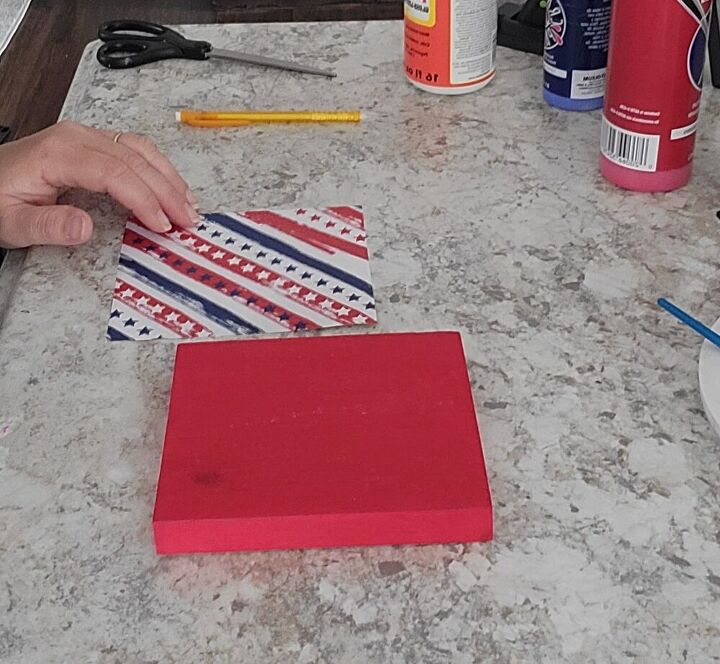
The first piece I started with was this block that was already painted red... from what? I have no idea! Obviously, in true crafting fashion I started a project and didn't finish it. Today, this block will become a patriotic hat. I picked a piece of left over scrapbook paper and cut it to the size of my block. A little mod podge here and there and I'm ready for the next step.
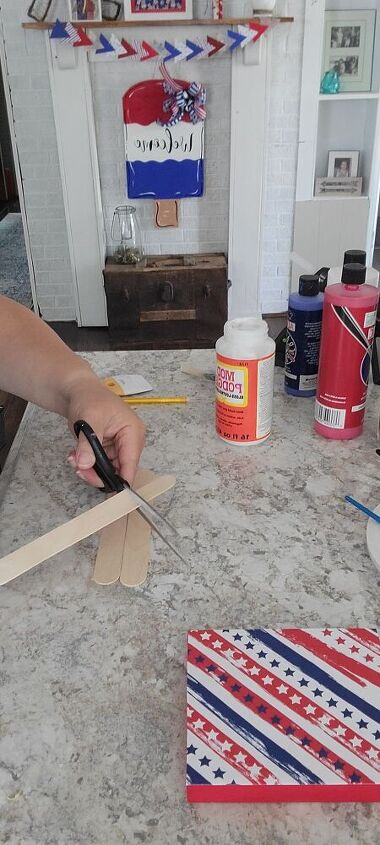
I am using 3 popsicle sticks to make the brim of the hat. I put two together and cut up the third one. I cut 3 pieces and glued them to the back of the original two and hot glued it together.
Link to adorable patriotic popsicle : Summer popsicle door hanger, patriotic door hanger, popsicle door hanger, summer | Under a Cottonwood
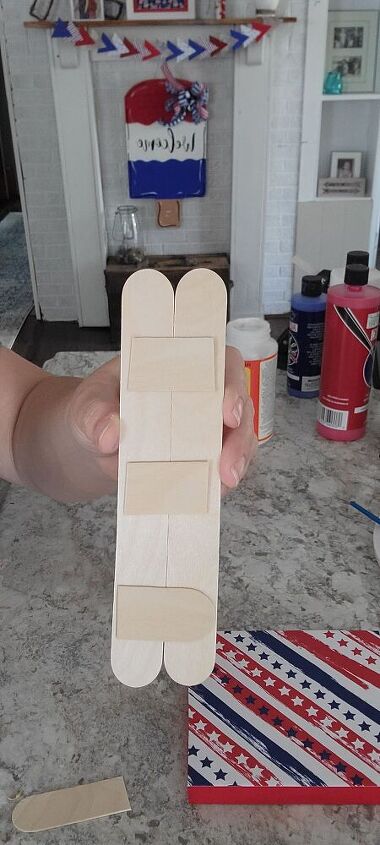
Here's what it looks like when it's ready for the next step.
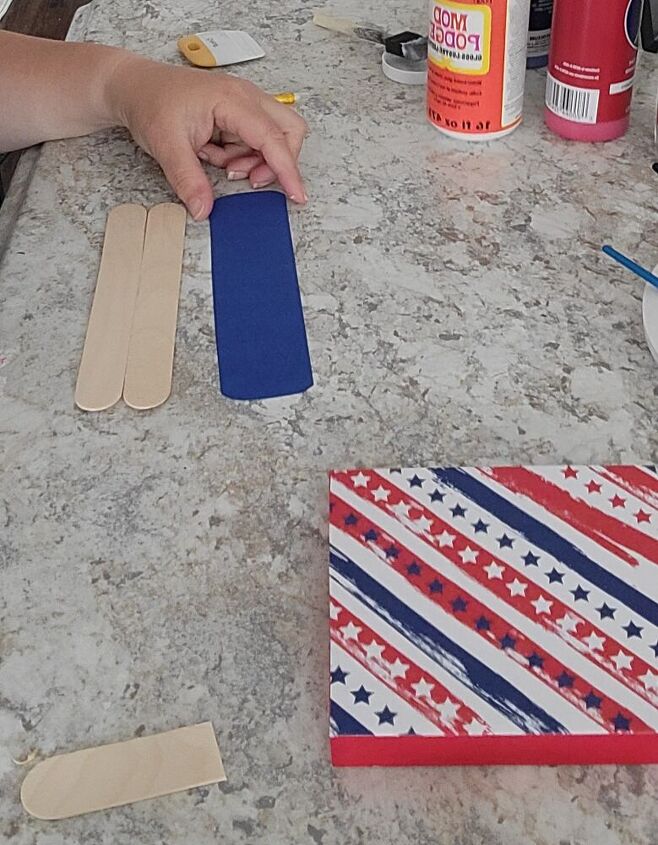
I traced the shape on to a piece of navy cardstock. I used mod podge to cover the popsicle sticks with my paper. Now, I will attach the blue brim to my first block to make the hat.
Amazon link to mod podge: https://amzn.to/3pdDUeF
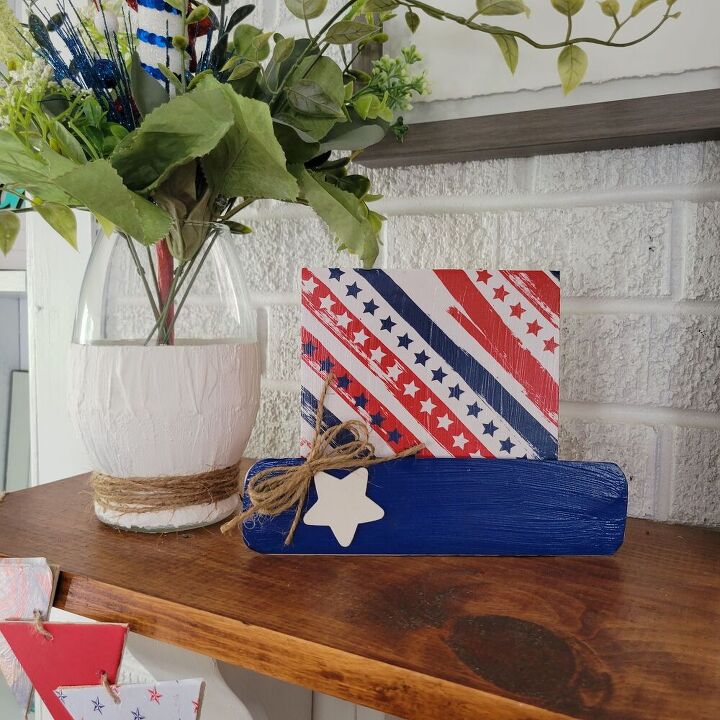
I painted a little wooden star white and tied a cute little twine bow and attached both with hot glue. First project done! A very patriotic 4th of July hat! On to the next.
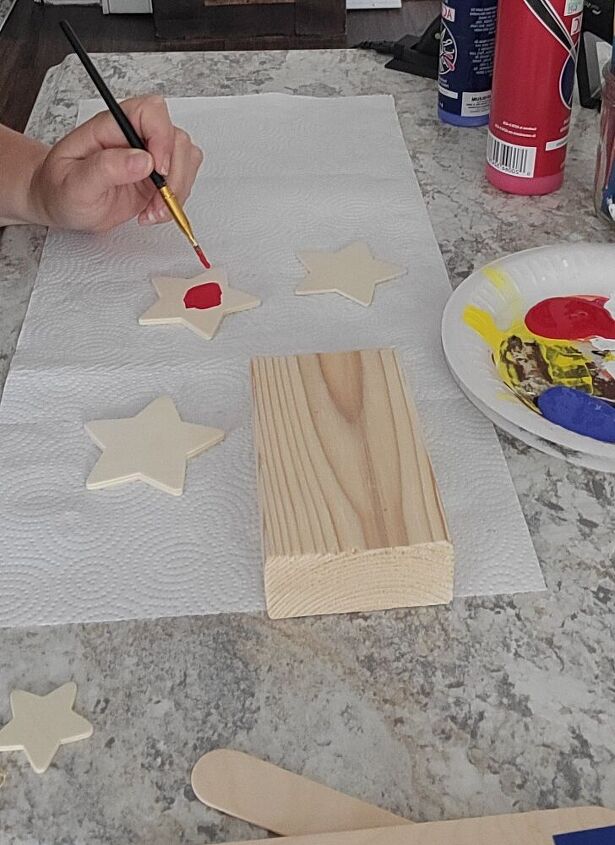
I went ahead and painted 3 of the larger wooden stars red, white and blue. I kind of had a plan for them and the other 3 blocks. This long block here though, as soon as you look at it, it is the perfect shape of a flag. But I want it to be a little rustic, not traditional looking.
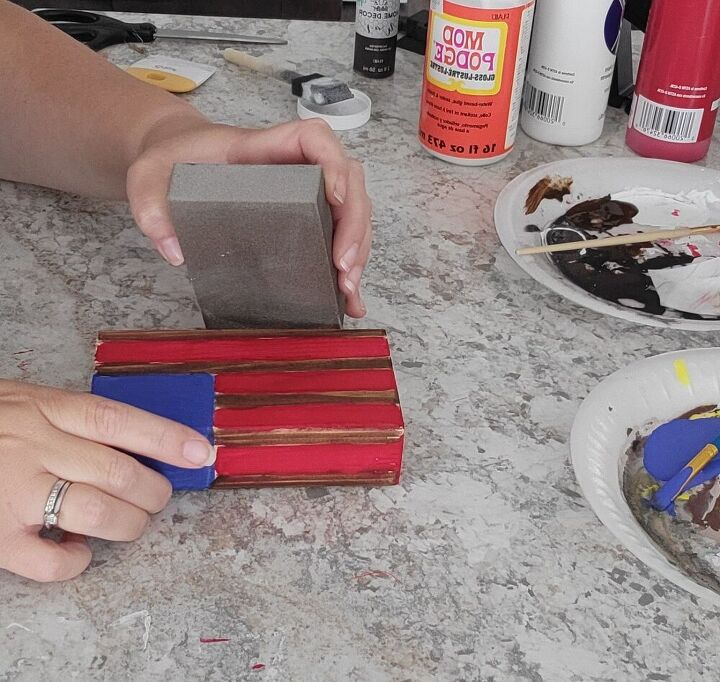
I started painting the block the traditional way, blue in the top left corner then red stripes. Instead, of white I used a wood stain paint. After it had dried really good, I took my sanding block to it to rough it up.
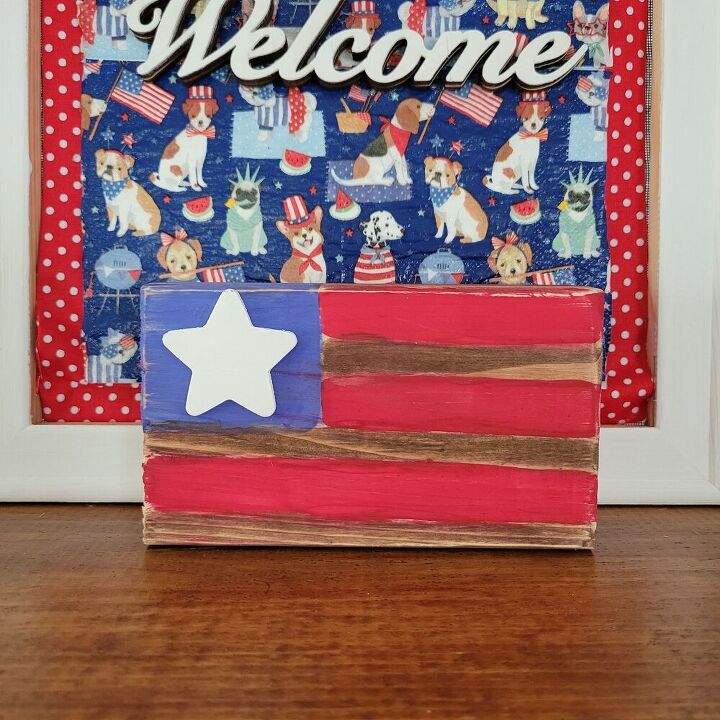
I had another white star I added and it finished it perfectly. It's not perfect at all, a little rustic and I love it! The shape is perfect!
Now, here's a trick you'll want to take notice of! Painting with baby wipes. Maybe you've tried or already know about this, but it's a game changer. That is how I painted the wood stripes on this block flag.
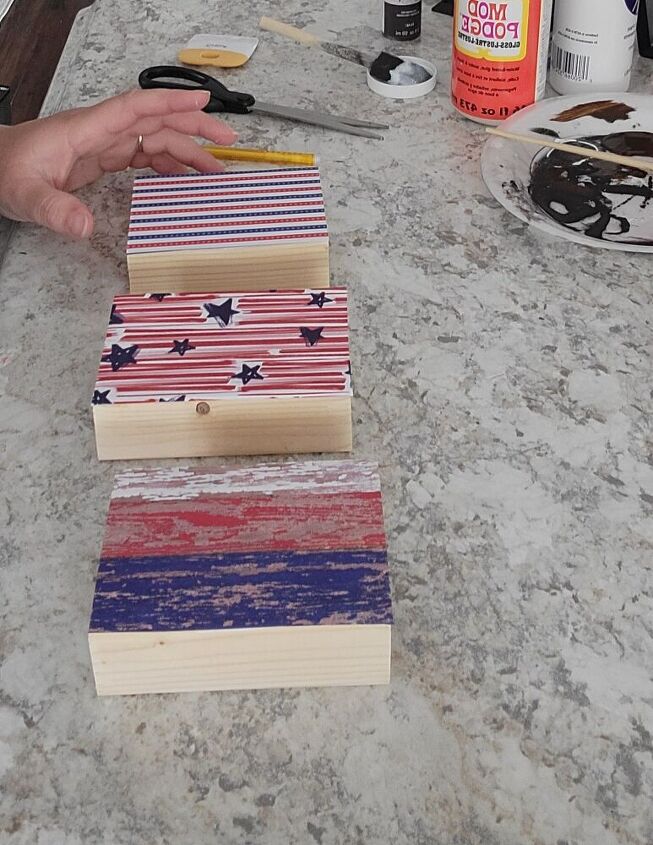
This last project was using these 3 wood blocks. I traced and cut a piece of the scrapbook paper I had and mod podge onto the wood. I've already got the 3 wood stars painted and drying. I want to paint the sides of these blocks but I don't really want them colored. Here's where the painting with baby wipes comes in, it's so fast! Get a cheap package next time your at the store and try this. You'll want it to be fairly new so they are pretty damp, if dried out add some water.
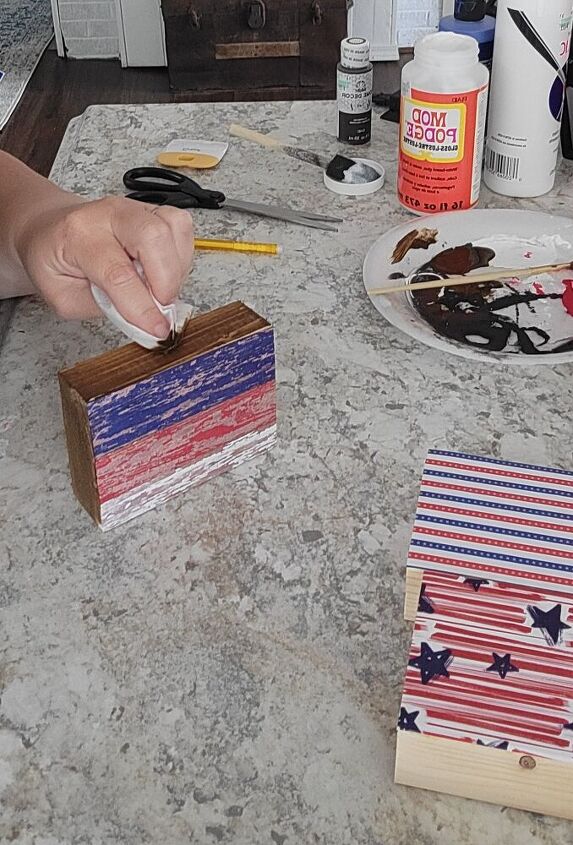
I've done this trick with colored paint, but this time I am using the stain wax to get the wood look. Simply take your baby wipe, dip it into the stain and brush over the wood. I did a simple one coat, but if you wanted it to be darker let the first coat dry, then go over it again.

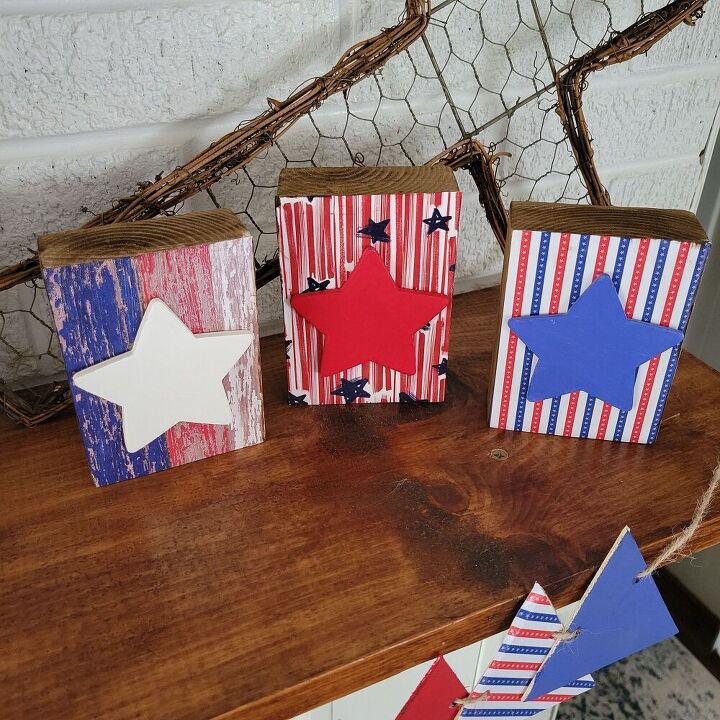
I glued my stars onto the block and this is how they look. So cute and festive. This was a $0 project for me. I had all the wood pieces and left over scrapbook paper and the wooden stars from other projects. I love that in one setting I got 3 new designs! That baby wipe trick is a game changer, it's such an easy way to paint different projects.
I hope you enjoyed these little cuties, I'm thrilled to add them to my décor.
Happy Crafting Friends!
Jill
0 views0 commentsPost not marked as liked
Resources for this project:
See all materials


Comments
Join the conversation
-
So festive, love the welcome sign !
-
thank you, you've inspired me to try this. I love it and I have plenty of left-over wood.


Frequently asked questions
Have a question about this project?