


Organizer From a BBQ Grill Rack

Turn old BBQ parts into something glamorous.
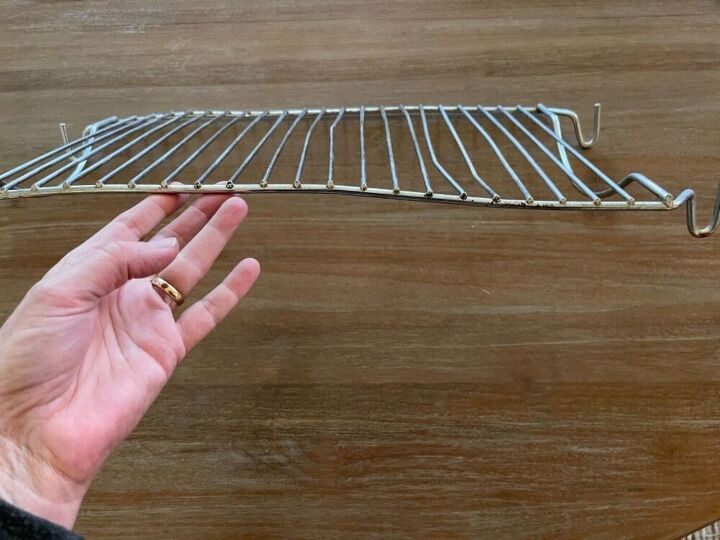
I don't exactly know which of our numerous defunct braaing (BBQing) contraptions this rack is from but it looks like a whole cow fell on it.
A bit of stomping and bending with pliers got it a bit straighter but definitely not perfect.
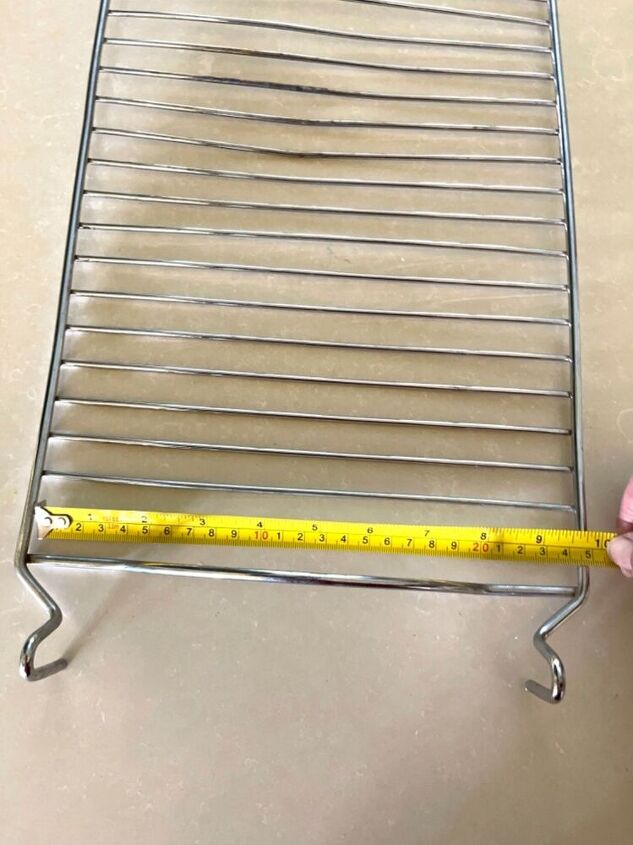
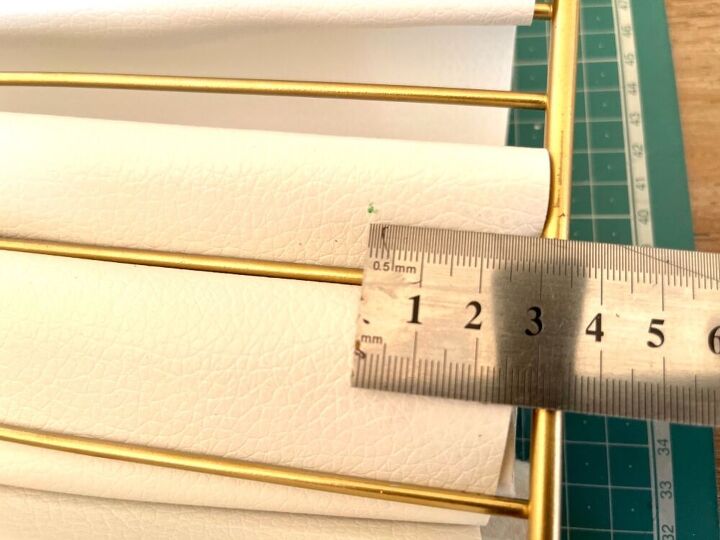
After giving it a thorough scrub, I measured it's width.
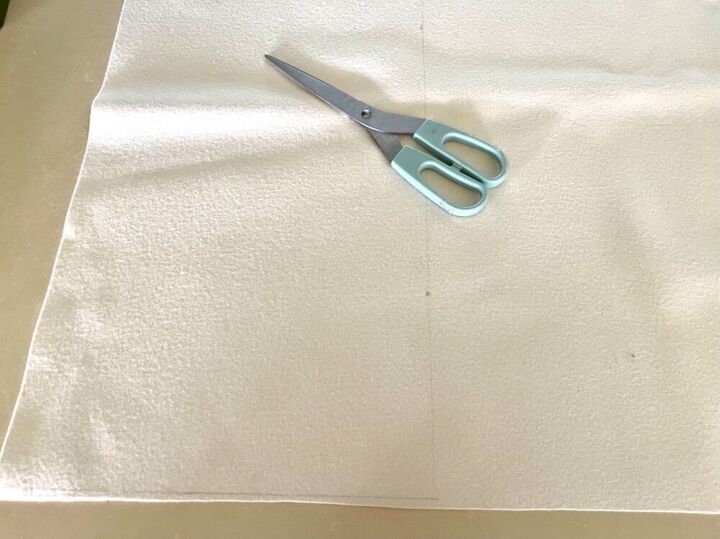
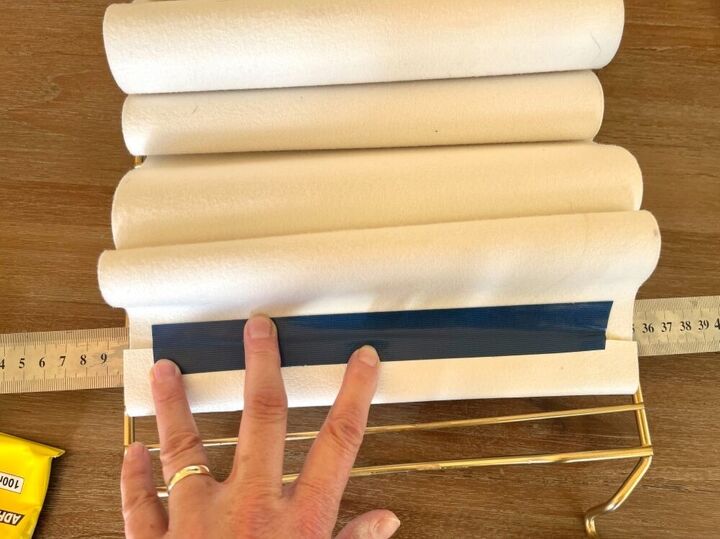
And cut some fake leather to fit. To tell the truth, I didn't really know how long to cut the leather because I wasn't sure how big the pockets of my planned organizer would be. It ended up being about 4 times the length of the rack.
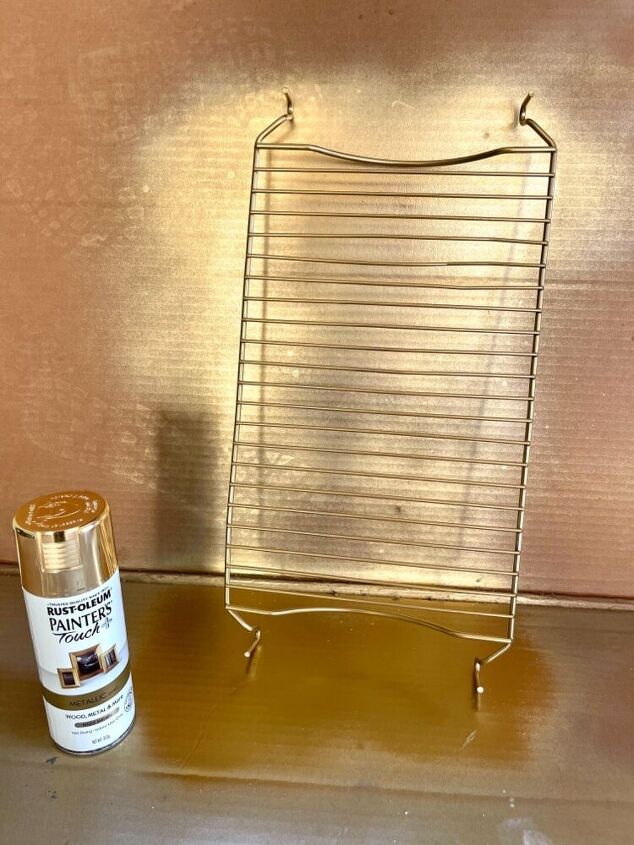
The metal received a coat of gold spray paint.
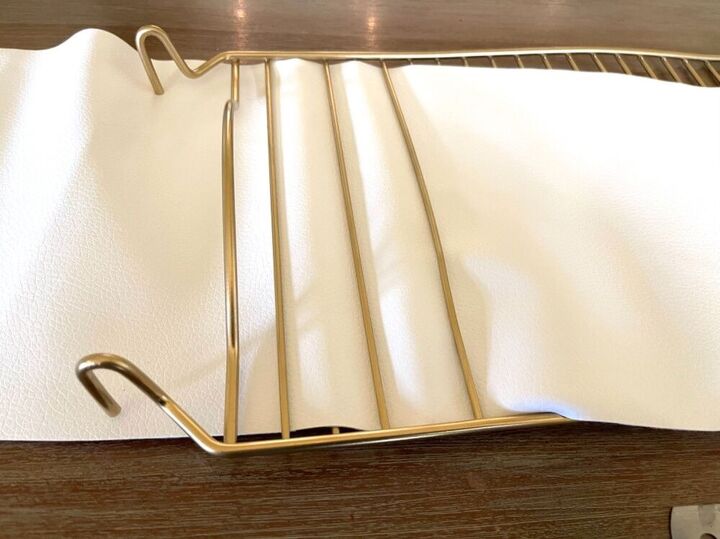
Once thoroughly dry, I threaded the leather through the rack keeping the leather part forward and the fluffy side to the back. The thinner the leather/vinyl the better because it may create a thick bunch at the back, depending on the pocket size and number, which will ultimately push it away from the wall. There are many ways of solving this such as mounting the organizer a little further away from the wall, adding spacers or letting it lean against the wall on a desk.
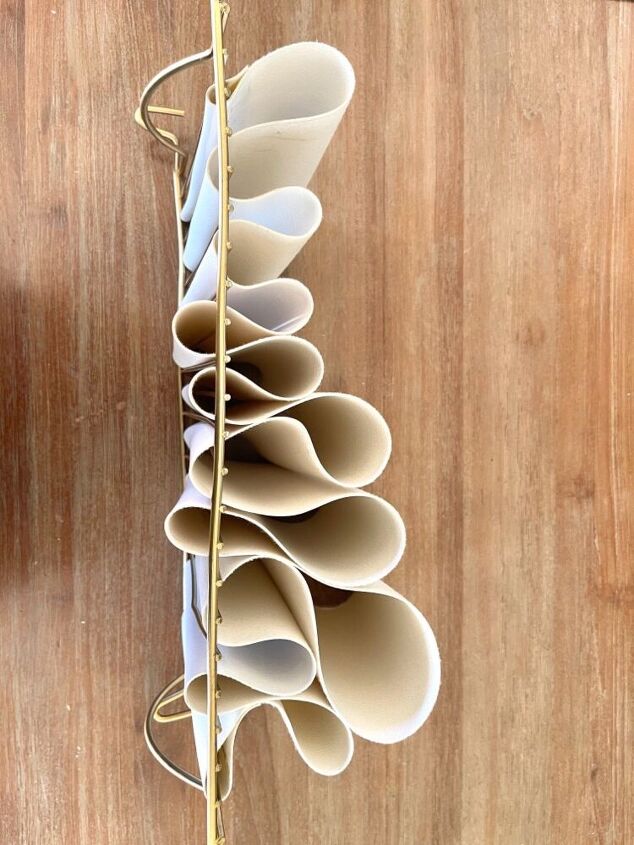
Once the leather was threaded, I pulled it into differently-sized loops as a mock-up. Most organizers I've seen have evenly sized pockets but I thought it would be more fun (and a lot less measuring) if I winged it. Besides, this one would make provision for variously-sized items.
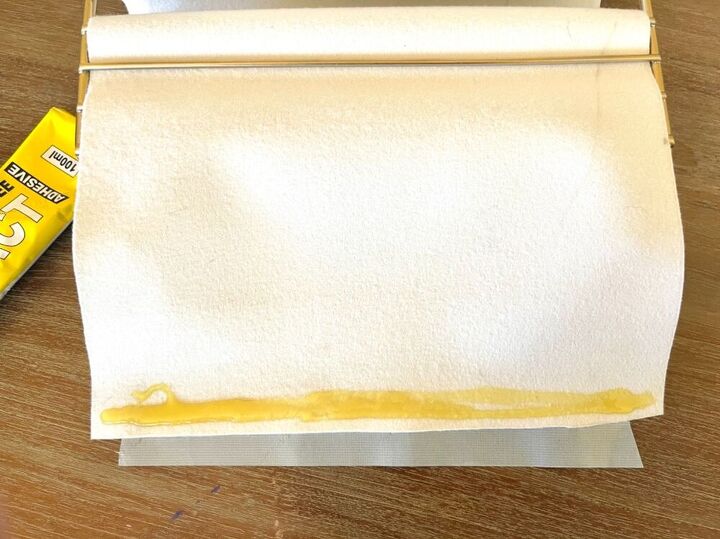
I put a strip of tape facing upwards on the outside part of one end of the leather and added some contact adhesive to the fluffy side. The tape was just to keep the leather in place whilst the glue dried and would be removed at a later stage.
A hint: don't use anything that will leave a residue otherwise you may have to hassle with acetone and cloth to get the residual stickiness off. Instead of gluing the end sections, you could also treat them the same way as the rest of the pockets and attach them with file binders. It's just that I was unsure of my design at this stage and thought it would give me more room to maneuver if I glued the ends in place. Because once the holes were punched, there would be no going back...
After pulling the leather back to the actual, planned position, I folded the glued edge over the last metal cross-bar that I wanted to use, effectively creating a hem around the bar. This was not necessarily the very last bar because I didn't want too many pockets. And also not just necessarily around only one bar but lets not talk about that.😳
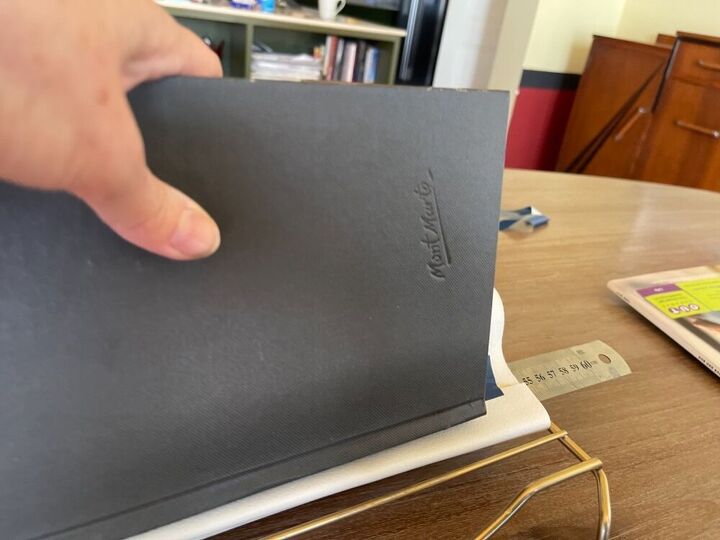
Even with tape to stick the two sides together, I still had to slide a ruler under the fabric to act as a solid backing against the glued sufaces. I used a book to press down from the top so that the parts connected - a slight complication of using contact adhesive. Perhaps you could think of another type of glue that would be easier to work with. Contact adhesive is cheap and gives me time to adjust any mishaps. I repeated the process on the other end, which meant that both ends of the leather were now secure.
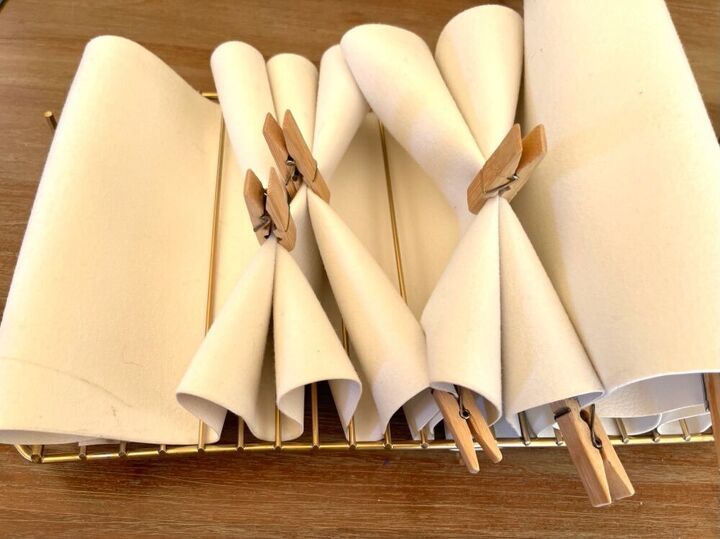
Now to make the pockets: Pulling on one part whilst shaping one pocket means that the ones next to it are pulled too and I was having a hard time keeping them all in place. The solution was to peg them down. As mentioned, my pockets were of varying sizes which meant there was no meticulous measuring needed.
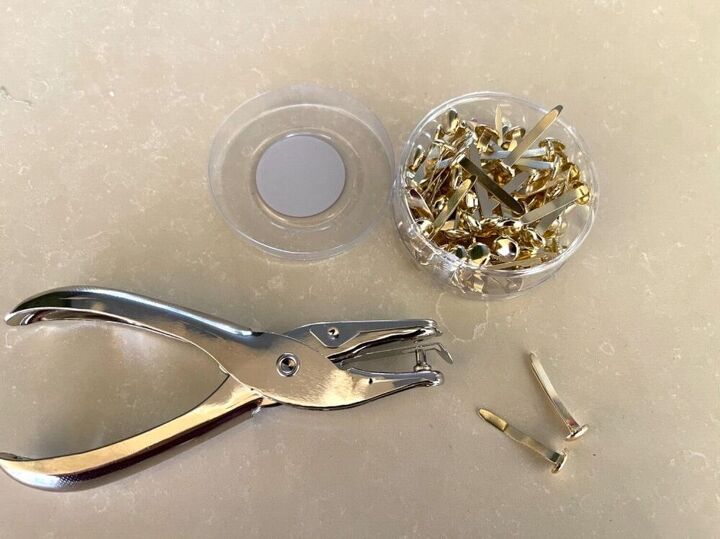
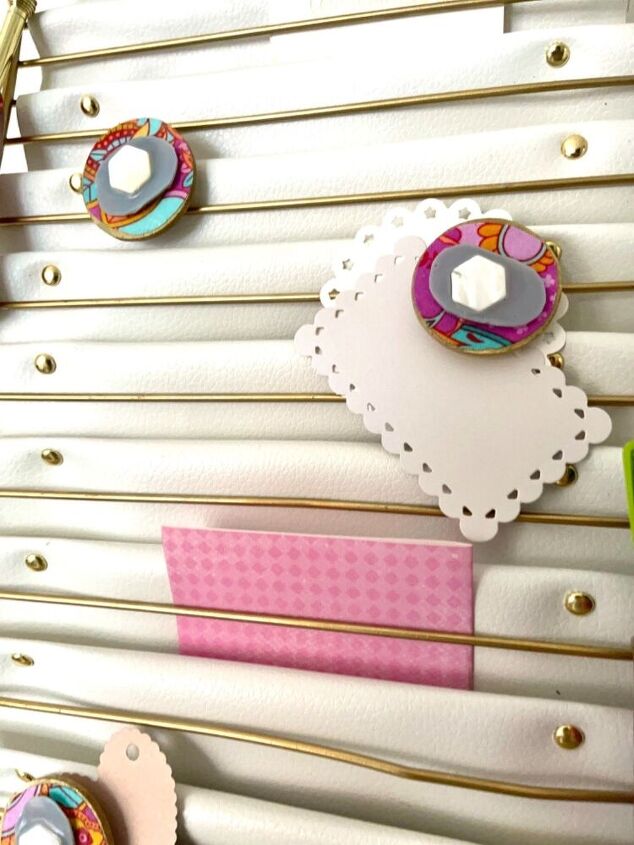
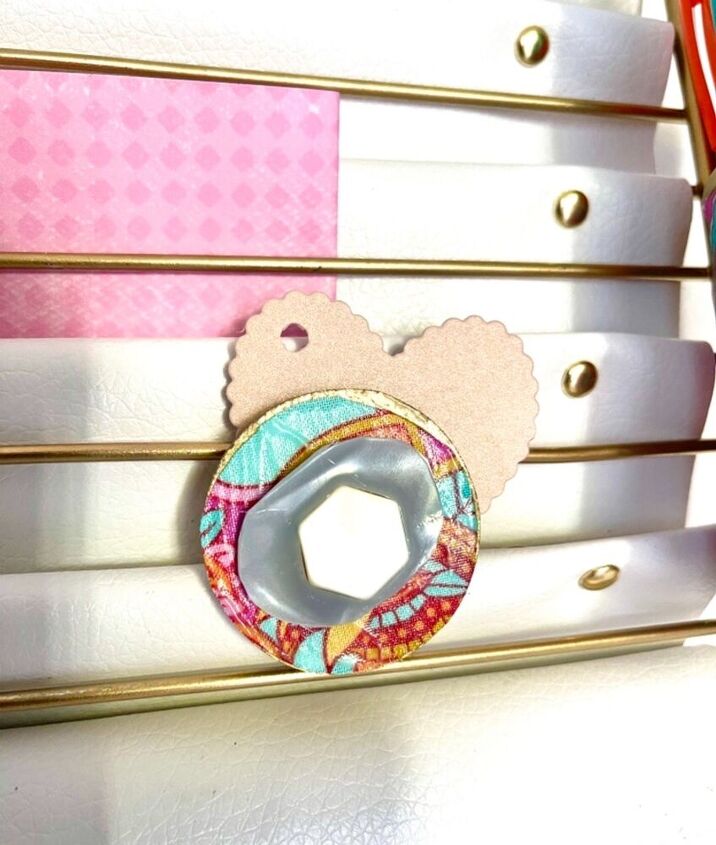
The one hole paper punch and gold file binders were bought at the stationers. I know that you get special grommets and things but this seemed to be a much easier solution. You may want to trim the ends of the binders so that they are not so long that paper catches in them. I started doing this with scissors and then got lazy and just used them as is.
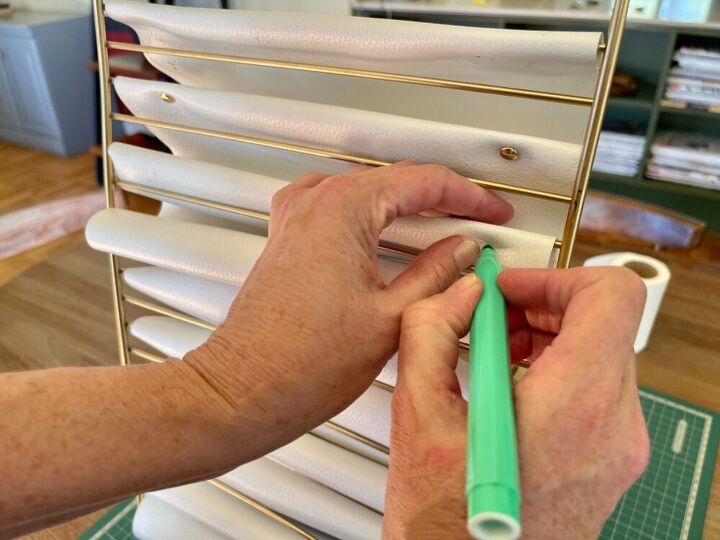
Now came the part that I was dreading the most - punching perfectly aligned holes without making proper marks ahead of time. The easiest way was to measure a set distance from the side edge of the leather and make a tiny mark with a removable marker.
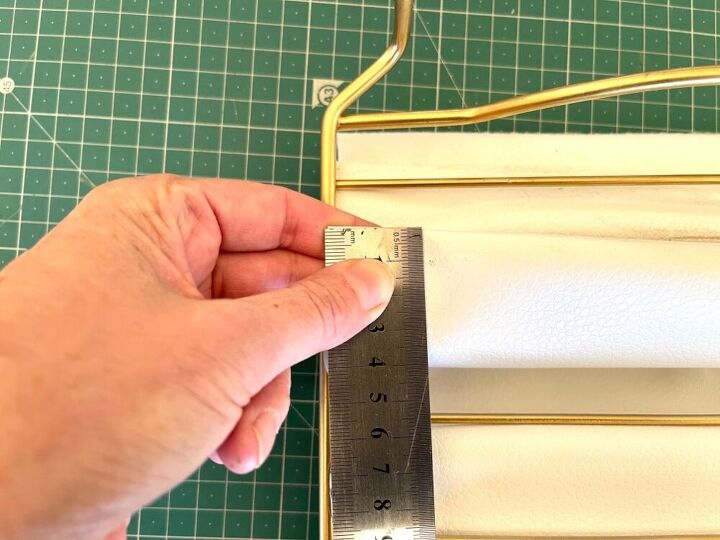
Then, with the leather folded double, measure a set distance from the edge of the fold vertically, making an allowance of the metal bar. To do this, the leather had to be folded tightly over the cross-bar in the final position I had planned.
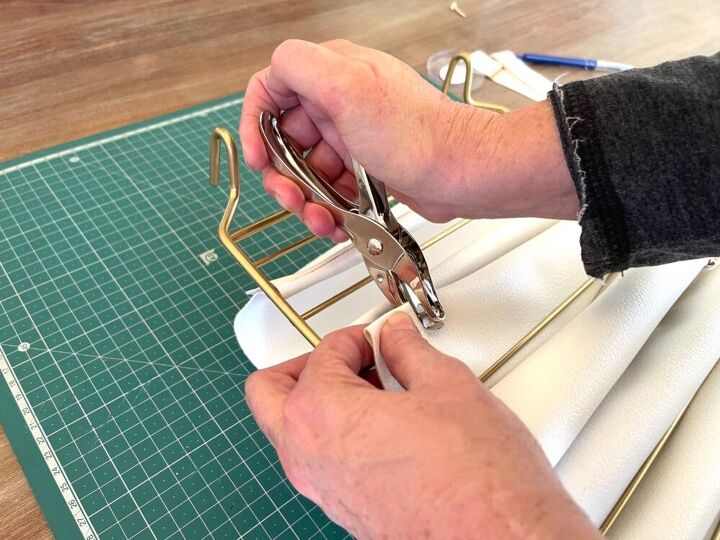
Then, pinching the fold whilst moving it up and away from the metal, I punched a hole on the mark. Repeat the process on the other side, keeping the two holes aligned.
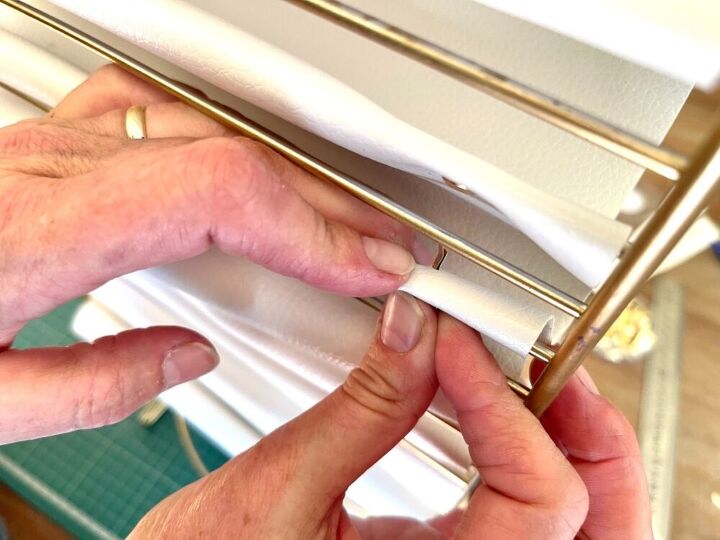
Once a set of holes has been punched, slide the fold over the metal bar and attach the file clip, spreading the prongs apart.
Continue measuring, punching and attaching file clips whilst checking the alignment.
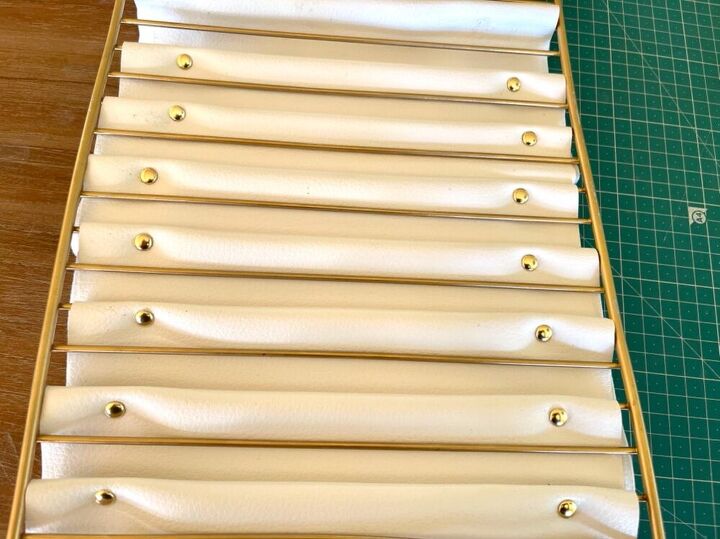
And the most difficult part was done!
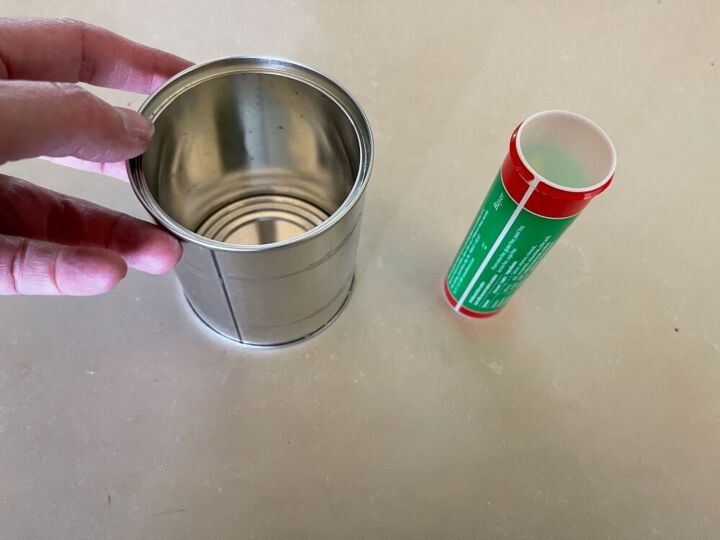
To make holders, I took a cute little tin and short plastic lozenge holder and sprayed then gold. Note that you may have to use plastic primer so check your paint can.
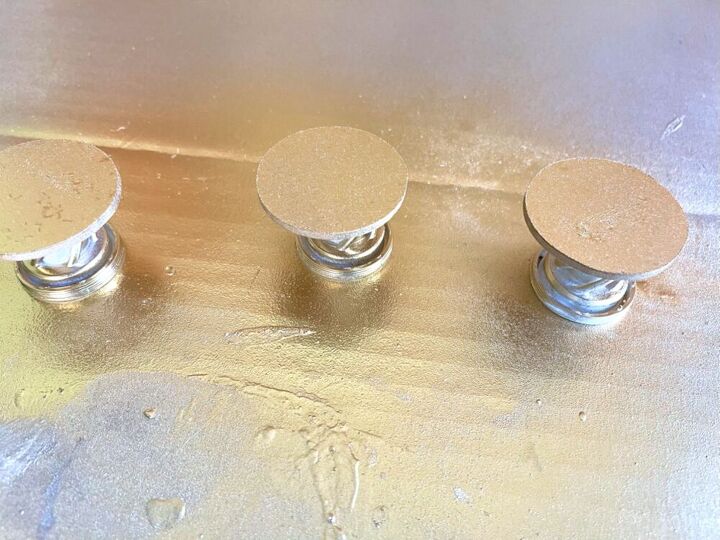
To make magnets, I also sprayed some wooden craft disks.
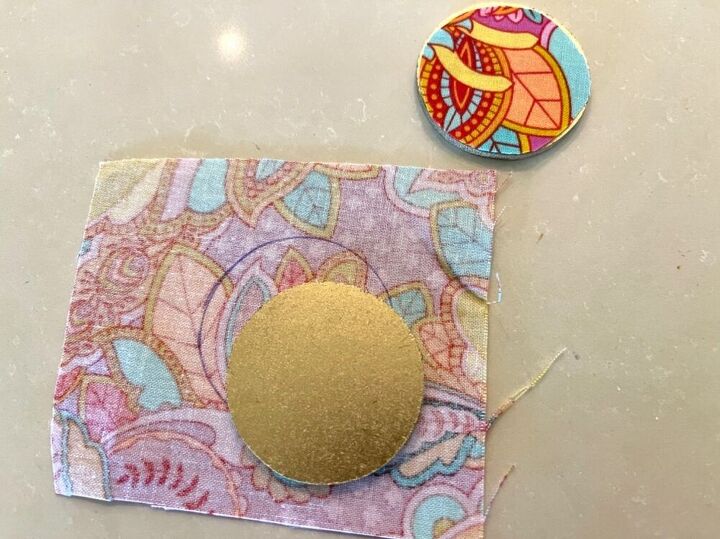
To get the Anthropologie look, I cut some bright fabric disks sightly smaller than the wooden disks...
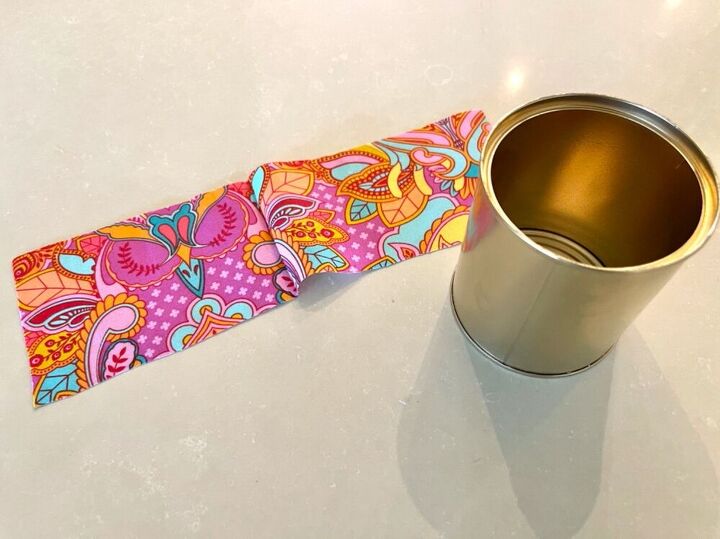
As well as strips to go around the tin and the lozenge holder.
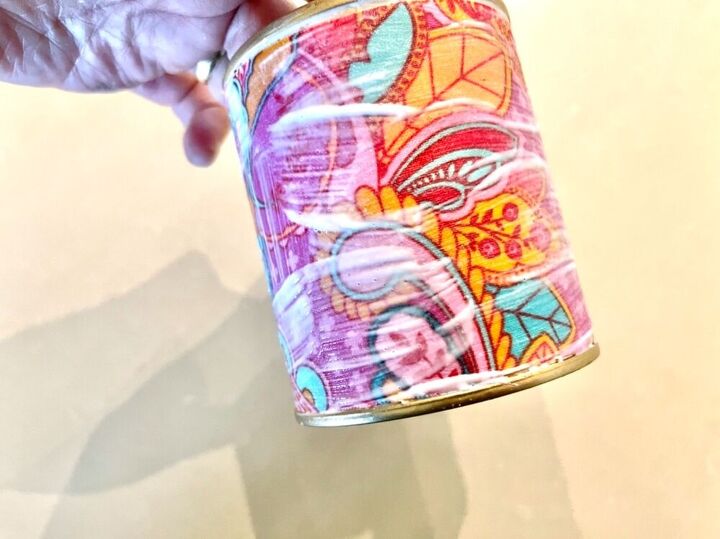
Using modge podge, I stuck the fabric to the painted loose parts and then spread more podge over the surface. You may want to even out those streaks, although they don't really show once dry.
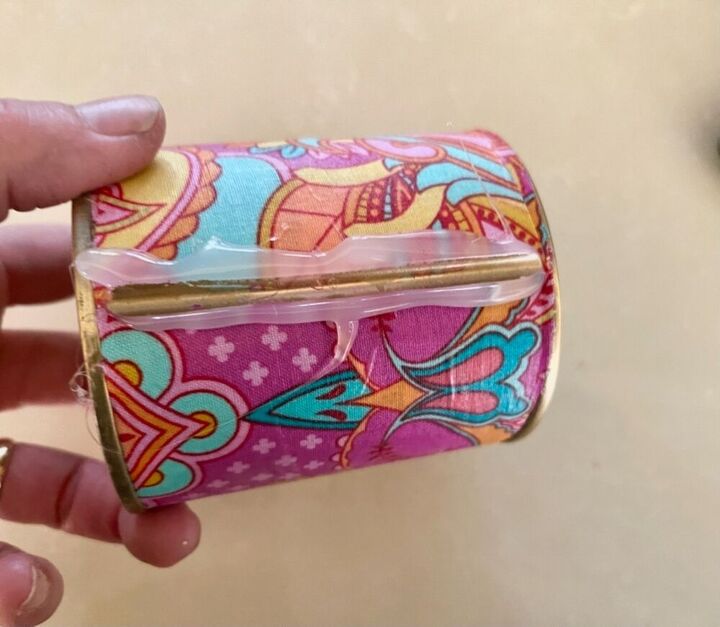
I planned (not!) a hot glue furrow in the shape of the metal (by sticking the tin with wet hot glue onto the frame and then pulling it off carefully once dry. Okay, it fell off actually.) and then filled it with superglue and stuck it to the metal again.
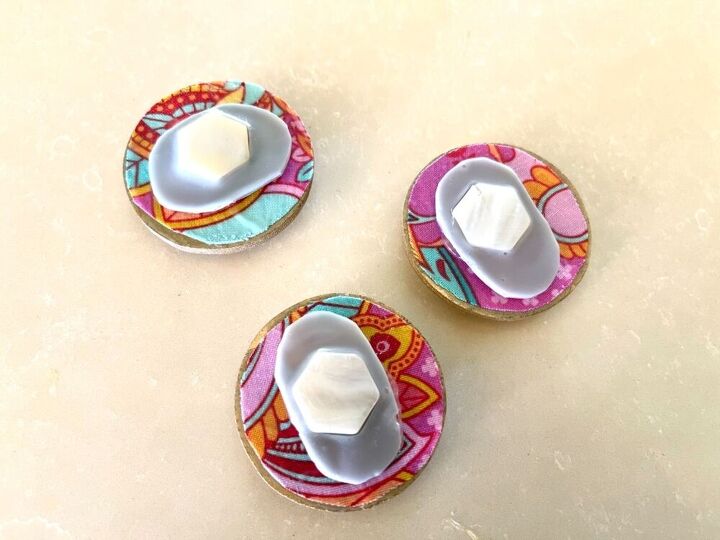
I stuck magnets and more Anthro-style mother-of-pearl decorations to the disks.
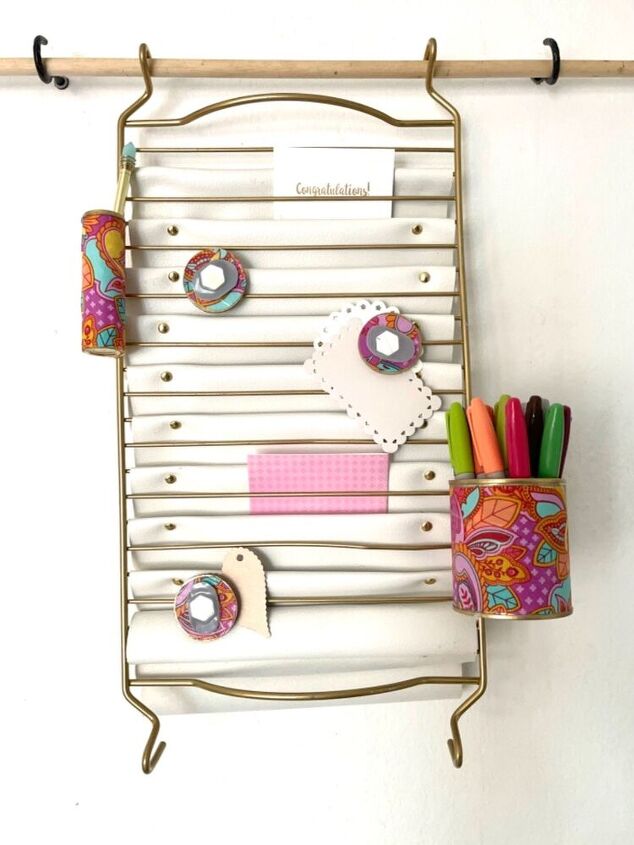
My rack already had some hooks that I could pop over a dowel but you could always add a pretty chain to hang yours by.
Do you think my creation would pass as coming from Anthropologie?
Resources for this project:
See all materials


Comments
Join the conversation
-
Great idea a nd quite classy
-
I think this would have been understood better if you had told us what you were making first. It was very confusing without any idea what the result was going to be.
Nice idea though.


Frequently asked questions
Have a question about this project?
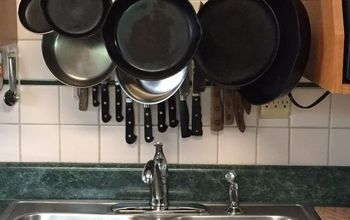
What is this for?
Wow. You have quite the imagination to come up with that from an old grill rack.
Hmmm, I'm wondering, if the pockets are deep enough, and the rack is spaced far enough apart on the sides, if this could hold paper plates in my camper? Thoughts? I might have to change the configuration and anchor the pockets on the rack, but have the pockets all facing in the front...hmmm. Thank you!