


Patriotic Flag Decor
With the Fourth of July right around the corner, I had this idea for a little patriotic flag decor…
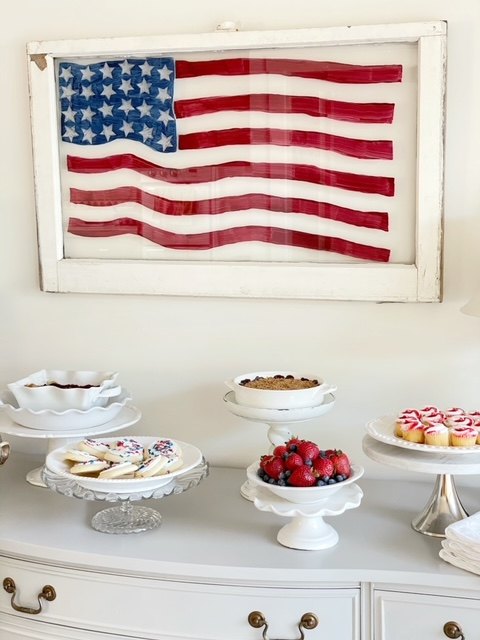
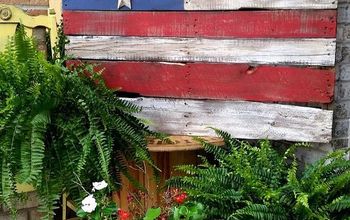
I painted a flag on the back of a vintage window!
It wasn’t hard to do and it only took a couple of hours.
Here’s how you do it:
I used a 36 x 22 vintage window that I already had
(Get ideas for other things to make out of vintage windows HERE)
(You could use a large picture frame with glass, or even paint this on a wooden board.)
First, clean both sides of the window really well with a little alcohol and water and a microfiber cloth.
Then turn it over to do the painting on the back side.
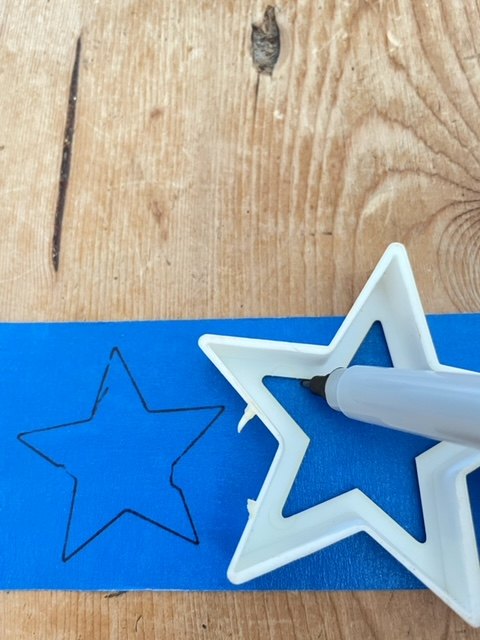
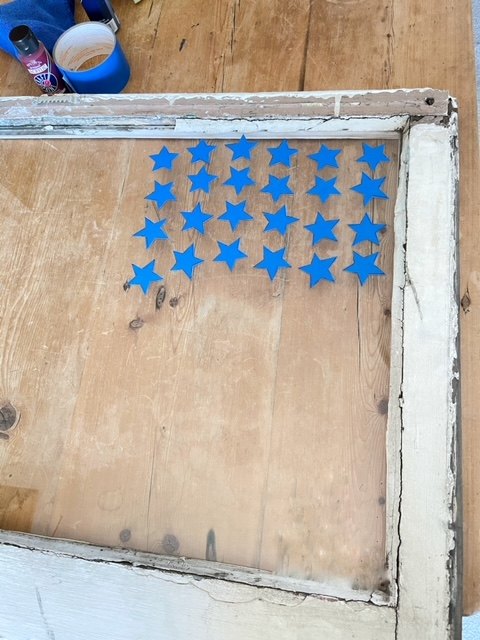
Draw or trace about 24 stars onto blue painter’s tape
I’m not very good at drawing stars so I used a mini star cookie cutter to trace the shape onto the tape. (They don’t have to be perfect)
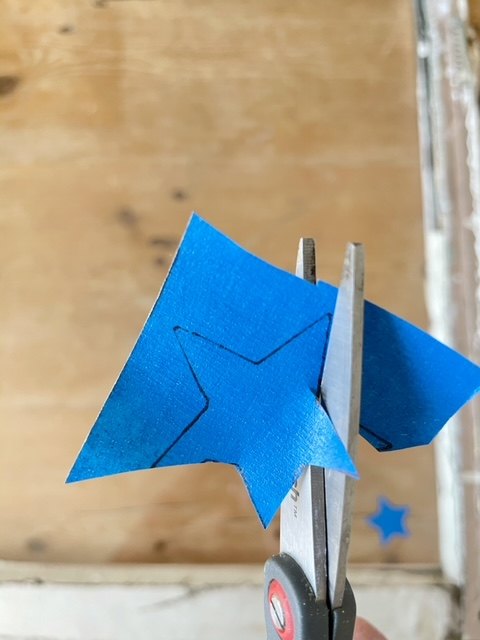
Then cut all the stars out
Don’t worry about cutting them out perfectly — I think they look better if they’re all a little different.
Now remember you’re doing this on the back side of the glass so everything is going to be the opposite:
Tape the stars onto the upper right corner of the back of the window
You can place them in a straight row or randomly. I put mine in rows but with a little ‘movement’ so it looks like the flag is not just completely flat but actually moving just a little.
Make sure the stars and all the tips are pressed down firmly so they don’t wrinkle up when you paint over them.
Now you’re going to paint the star field.
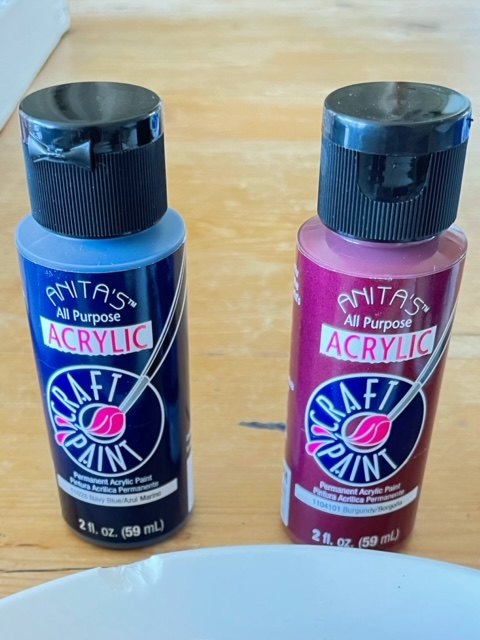
I just used regular acrylic craft paint in Navy Blue
Mix some of the blue paint with a little bit of water. You want it thin enough to paint on smoothly but if it’s too watery, it’ll lift the tape up. I used about 7 - 10 drops of water to about 1 1/2 tablespoons of paint.
If you can, practice on another piece of glass first. (I used a piece of glass from an old picture frame to practice on.)
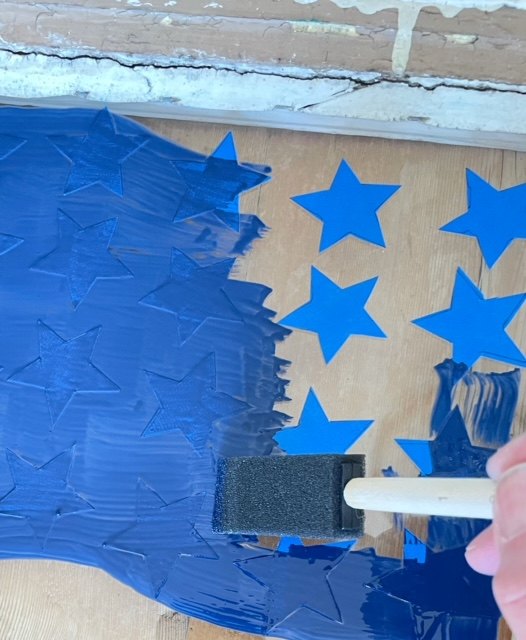
Now use a foam brush to paint the star field all around and in between all the stars. Be gentle when you paint over the stars so they don’t lift up. Don’t worry if you get a tiny bit of paint seeping under the stars — that just adds to the effect! And don’t worry that the paint isn’t even and shows brush strokes.
Allow the paint to dry naturally. Don’t use a blowdryer — it'll lift up the tape (I learned that the hard way!)

Mark the stripes on the glass
Using a dry erase marker, mark the outlines of your stripes. Start just below the star field and mark an inch down following the curve of the blue paint and continuing across to the other side of the window. This is the ‘white’ stripe that’s actually going to be clear glass.
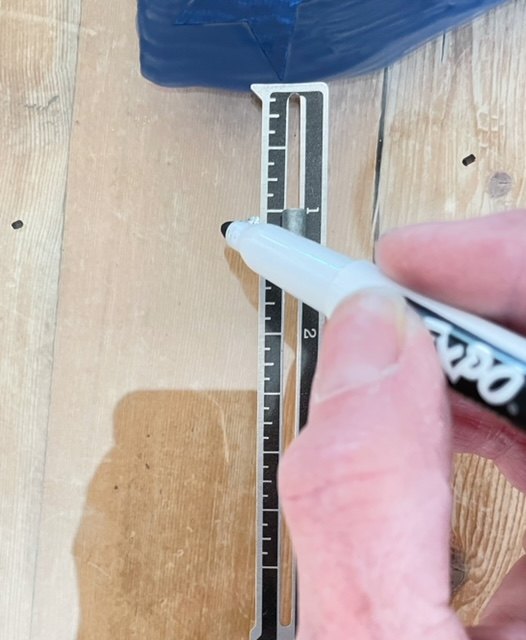
Next, mark the line for the red stripes.
Mark your next line 1 1/2 inches down from the first line. You’re making the space 1 1/2 inches wide so you have room to paint without hitting the marker lines with the paint.
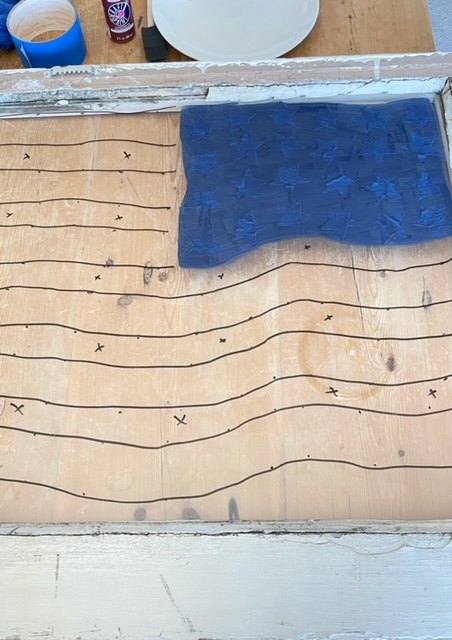
Now draw your lines for each stripe.
Connect the dots and make the lines for each stripe, alternating between 1 inch spaces and 1 1/2 inch spaces. Your stripes should have a little ‘movement’ that follows the star field shape.
Mark an X in each 1 inch stripe space that will be left clear so you don’t paint it by mistake.
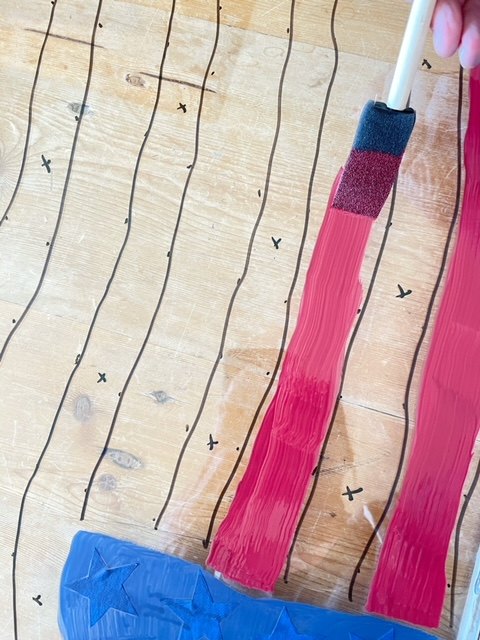
Now paint the red stripes
Thin your burgundy red paint to the same consistency as you did the blue paint and paint your stripes. The paint will be uneven and show brush strokes but that’s okay — it gives it character. You should be able to easily paint the stripes without running into any of the marker lines.
Now let everything dry really well. If you get impatient — you can put a fan set on low to blow on it.
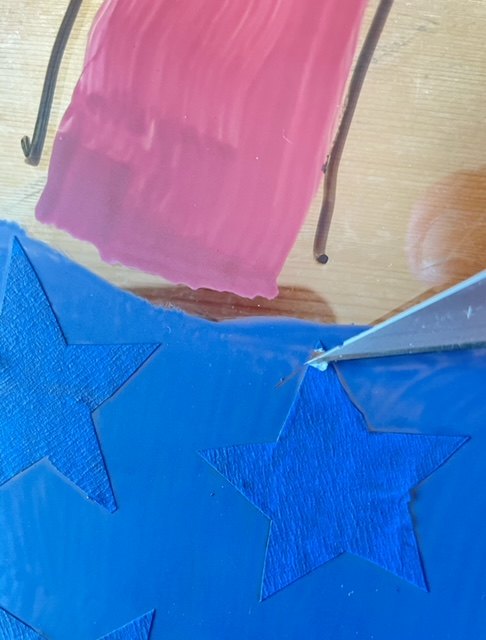
Once all the paint is completely dry, it’s time to lift off the stars
Use a sharp Exacto knife to lift up the very tip of the star being careful not to scratch off any of the paint
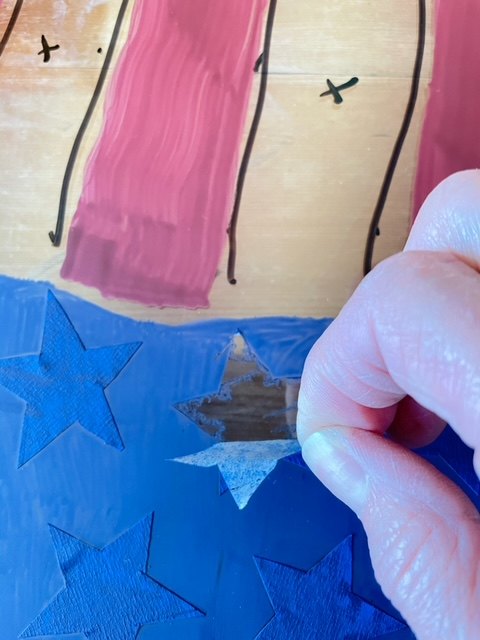
Lift the star off of the glass
Gently lift the whole star away from the glass. Use the Exacto knife to loosen some of the edges if needed.
You can see that some of the paint has seeped underneath the tape — but that actually just adds more character!
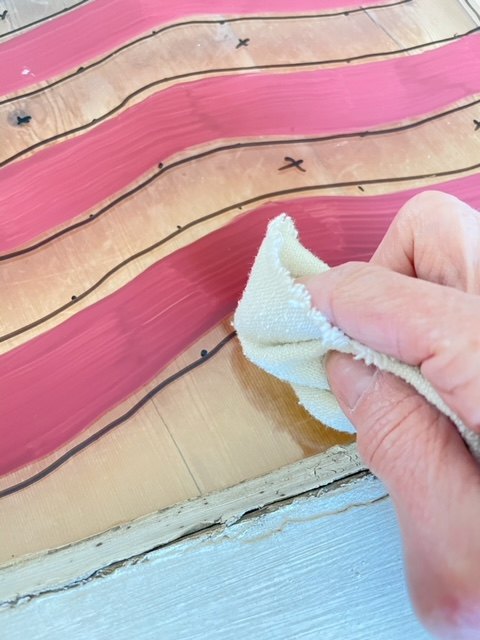
Remove the dry erase marker
Using a dry clean cloth, wipe off all the dry erase marker from the window.
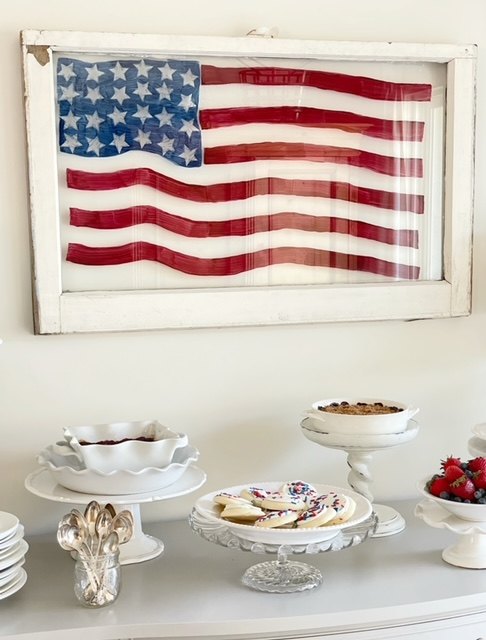
Now flip it over and…
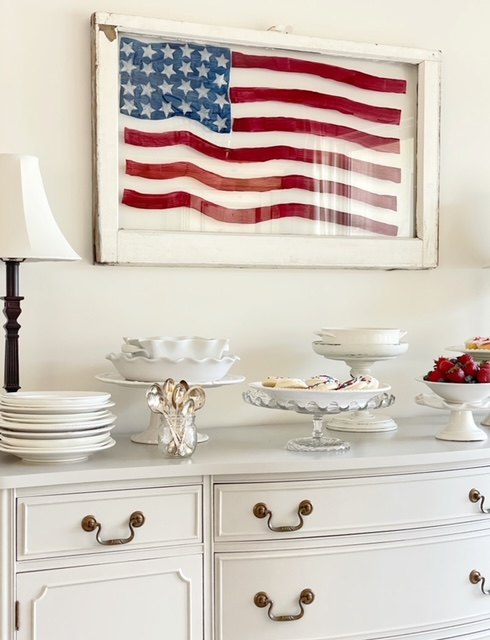
Admire your flag decor!
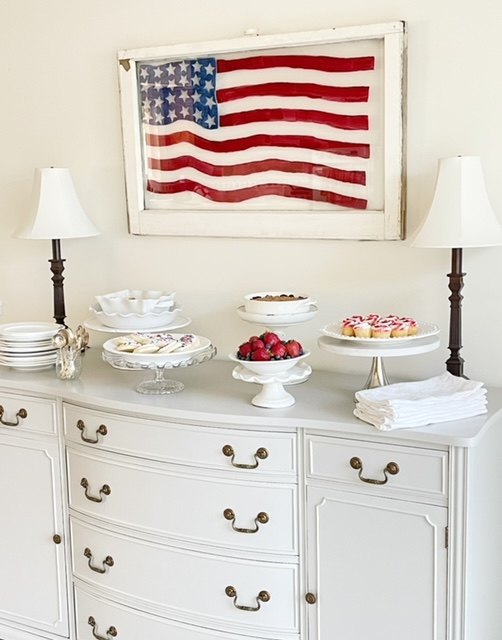
See this buffet transformation HERE
Resources for this project:
See all materials


Comments
Join the conversation
-
Very pretty. I'm 'saving' this one.
-
I love this!
 Thank you!


Frequently asked questions
Have a question about this project?
Beautiful project and outcome. Did you test the paint for lead ? Home Depot, Lowes have inexpensive test kits. SMH