


DIY Stock Tank Pool

So my hubby made my dreams come true this summer by helping me make a stock tank pool in our backyard! If you’ve been wondering how to make one too, I am going to outline all the steps for you here. It’s definitely not as hard as you think it may be! I was honestly surprised because I thought this project would be a little out of our DIY range. But it turned out to be just fine and it only took us a couple of weekends to finish. This is the perfect solution if you don’t have a neighborhood pool to enjoy this summer. Keep on reading to see just how easy and simple this DIY stock tank pool is!
This post contains affiliate links. Click here to read my disclosure policy.
Materials Needed for DIY Stock Tank Pool:
Here is everything you need to order if you are planning on making a stock tank pool yourself. This is exactly everything we used:
- Stock Tank (we picked ours up at Tractor Supply Co)
- Paver Sand
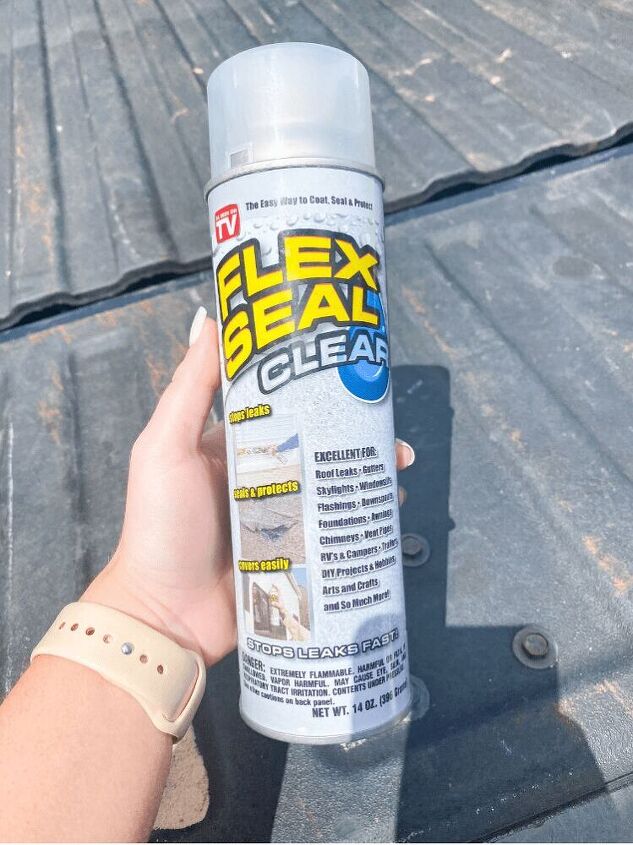
- Flex Seal
- Flex Glue
- Intex Pool Pump (The following list below will need to be ordered as well to go along with the pool pump. These pieces are not included in the kit so therefore need to be ordered separately. I ordered these from the Intex website directly.)
- 1072 Strainer Grid
- 10256 Strainer Nut
- 10744 Threaded Strainer Connector
- 10747 Plunger Valve
- Carbide Hole Saw (70mm/2.75″ Cutting Dia for Stainless Steel)
- Clorox Pool & Spa Small Pool 1″ Chlorinating Tablets 1.5 lb
- Mini Tablet Spa Chemical Dispenser (For the Chlorine Tablets)
- Chlorine Test Strips
- Pool Skimmer
- Intex 25006 Large Strainer Rubber Washer and Ring Pack Replacement Parts
- Replacement Filter Pump Cartridge (3 Pack)
- Submersible Underwater LED Pool Lights (Optional)
Pick Up The Pool And Order Supplies
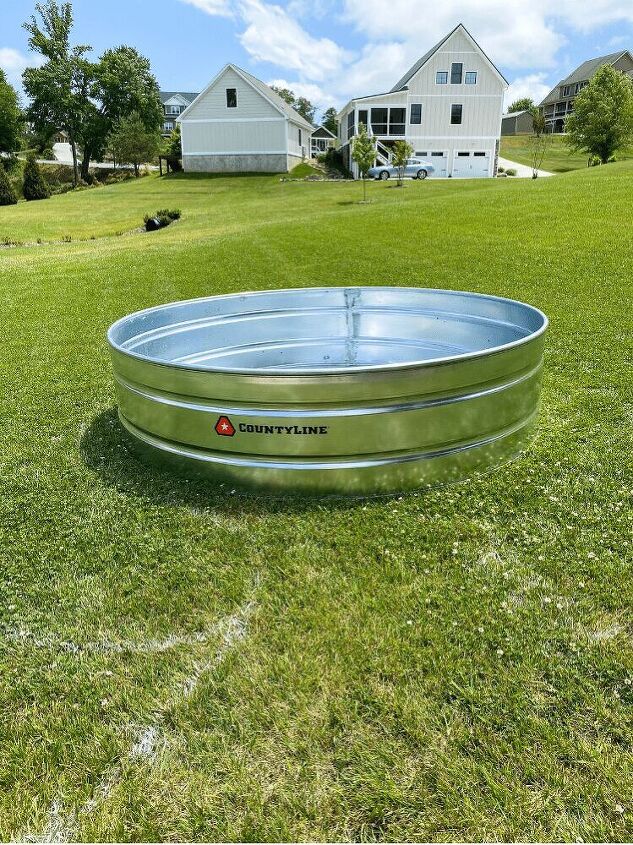
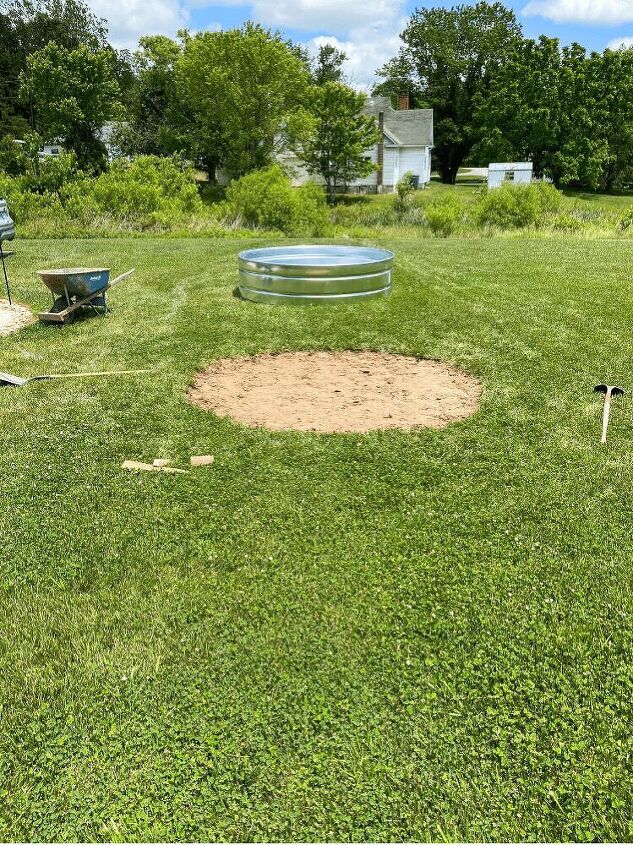
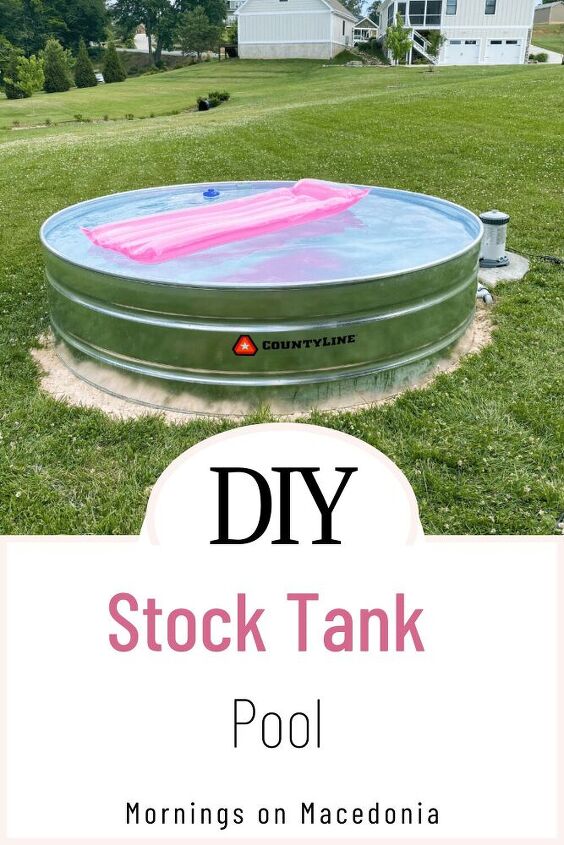
As I stated above, we purchased our stock tank from Tractor Supply Co. A lot of times, they will not deliver this because it is such a big piece. So you need to make plans on how to bring it home. Thankfully, my hubby was able to get one of his friends with a flat bed truck to come with him to pick it up. But, I have also seen people who put it on top of the bed of their trucks and tie it down. Here are the dimensions to the one we got: 8 ft. W x 2 ft. H x 8 ft. L. Also, my hubby sprayed flex seal all over the seams and cracks of the stock tank before doing anything with it. This is totally optional, but we wanted to take every precaution to make sure it doesn’t leak on us during the process.
Also, if you are serious about doing this, it is probably best to order the supplies ASAP. I was reading that a lot of retailers sold out of these materials during the middle of summer last year. So that may be the case for this year too. We ordered everything towards the end of May this year and got it within about two weeks. So thankfully we didn’t experience any major delays in our progress!
Level The Pool
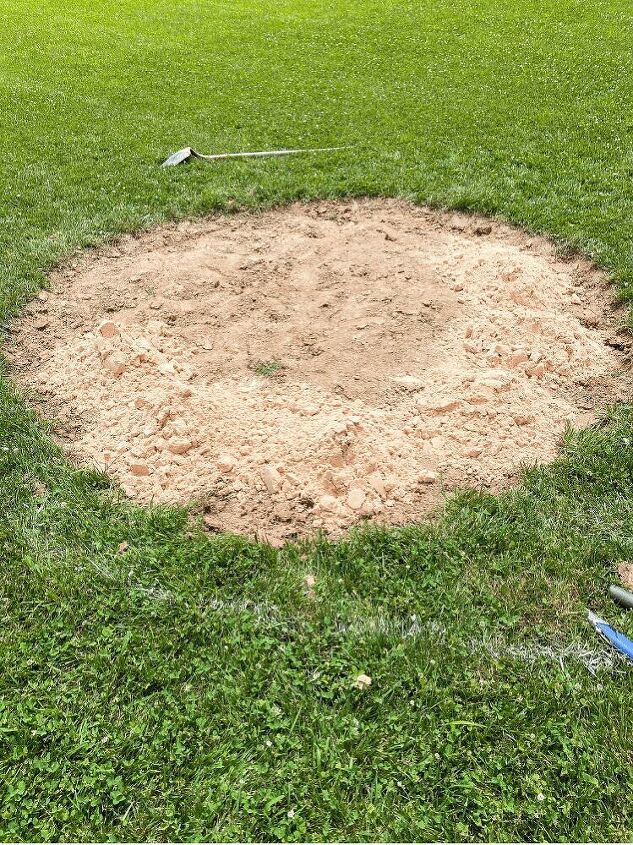
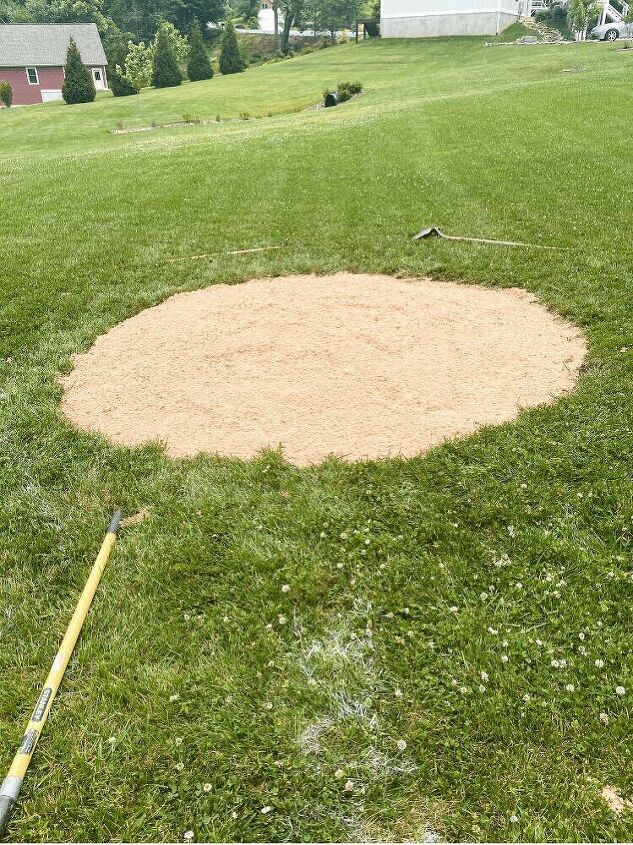
The next step in this DIY Stock Tank Pool Project is to make sure the ground is level. You obviously don’t want it to be uneven on the ground or else the water will spill out. Thankfully, we have a pretty level spot in our backyard. It just needed a little adjusting to make it perfect. We just dug a little out of the ground and had to dig more on one side. My hubby spray painted the yard so we could see the exact dimension that we needed to dig out.
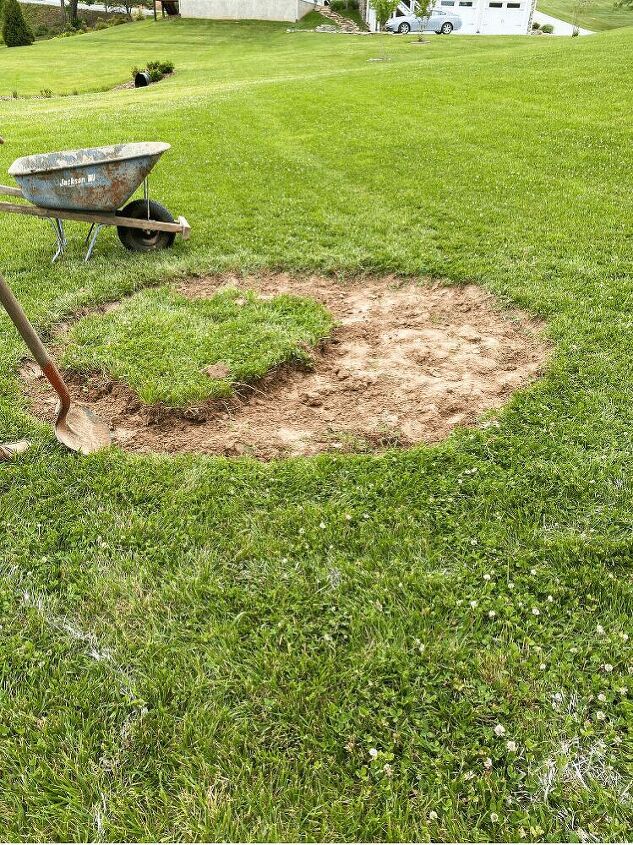
After we dug up all the grass, we added in some paver sand. You don’t want to put the pool on gravel because it may make it not level. We are planning on adding in some river stones around it to make it look better. But we didn’t add any underneath it. I think it took us a total of 20 bags or so to finish the area. We just used a rake to make it as level as possible. Once we had the paver sand all out, we placed the stock tank on top.
To check to make sure if it was level or not, we put a piece of lumber on the rim of the stock tank. Then, we set the level on top of the lumber to check. We got it pretty close but it’s not 100%. However, it was good enough because the water will not be constantly spilling out.
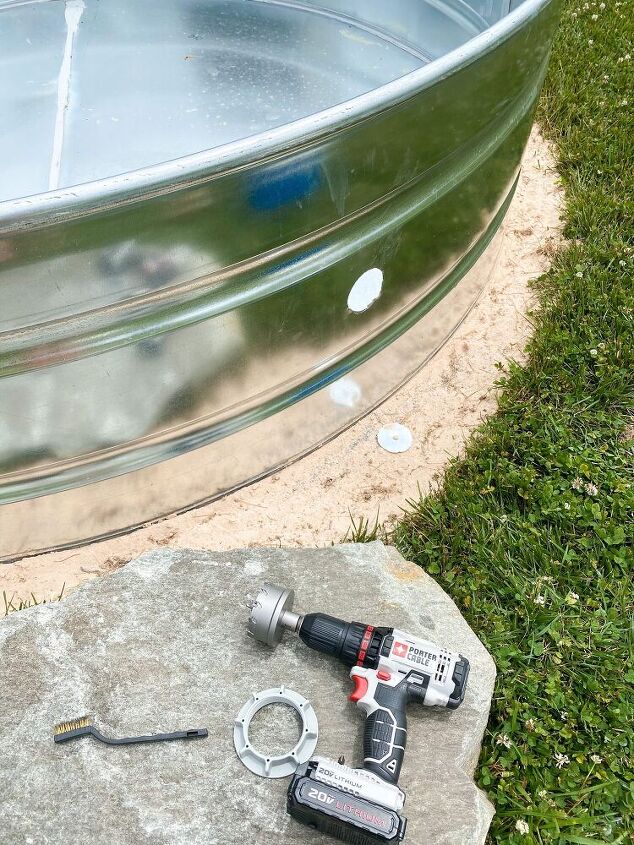
Drill The Holes For The Pool Pump
After you have the pool all level and set, now it’s time to drill the holes in the side of the pool for the pump. You will need two because the pump has two hoses. One for sucking in the water and one for spilling it back out. Be sure to choose a spot on the side where it is completely flat. You can see in the photos below how there is a little ridge in some places to the stock tank.
Obviously, if you drill your hole there it will not seal properly and cause a leak. My hubby first drilled a small hole with a regular bit (as you can see in the first photo) and then attached the hole saw to his drill to drill out the full sized hole. The one I have linked for you is the perfect size for this pool pump attachment as well.

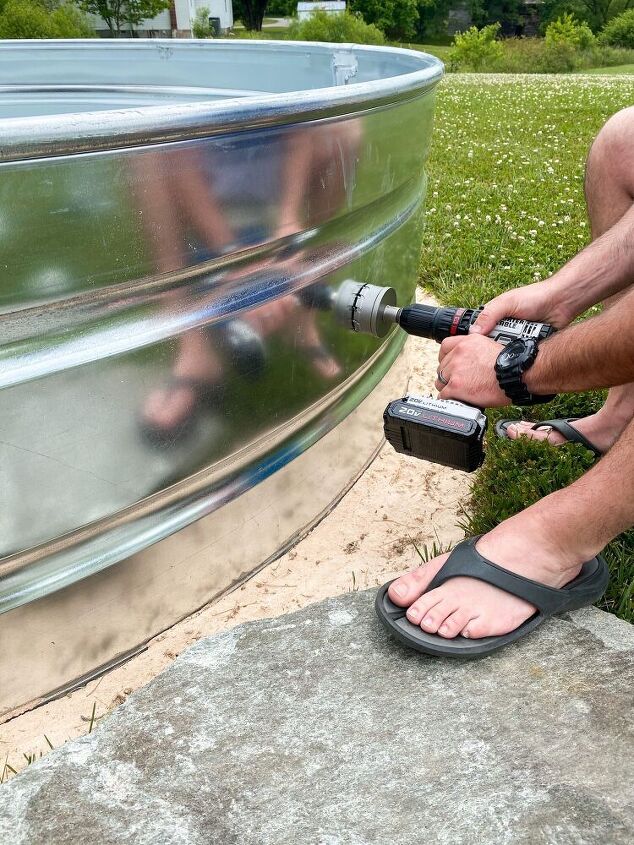
Im not going to lie, this was probably the hardest part of the whole project. Just mainly because he had a hard time drilling the hole in evenly. We had to stop and start it a lot but we finally got it. It wasn’t a perfectly smooth circle, but that was fine. It just needed to big enough for the pool pump attachments to go through. So it turned out perfectly! He also used gloves to remove the circular piece when it was cut. Be careful with this step because it will be sharp. Also, be sure to vacuum out the pool after you drill the hole out. I just used a shop vac to clean up any sharp metal pieces that fell inside.
Attach The Pool Pump
The next step to this DIY Stock Tank Pool, is now to attach the pool pump! This part was kinda tricky too, but after watching a few YouTube tutorials, we were able to figure it out! Also, the kind of pump you order should have it’s own directions included and it is pretty straightforward from there. However, the pool pump we ordered did not come with enough rubber washers. That’s why I included the replacement washer parts pack in my list of materials above. We didn’t use all of them included, but we did use the two larger black ones. I believe our pump came with two in the box, but we needed two more. So be aware of this and be sure to order ahead of time so you have everything.
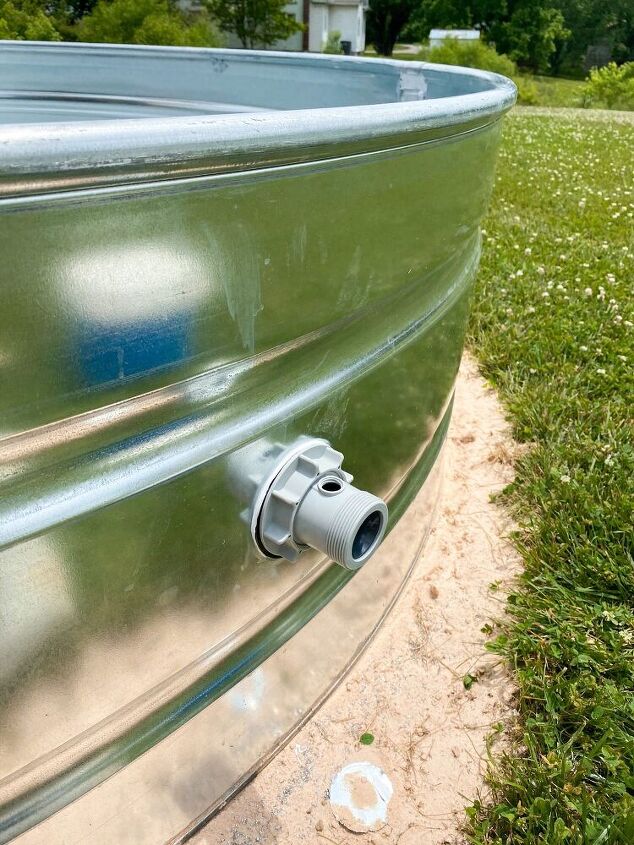
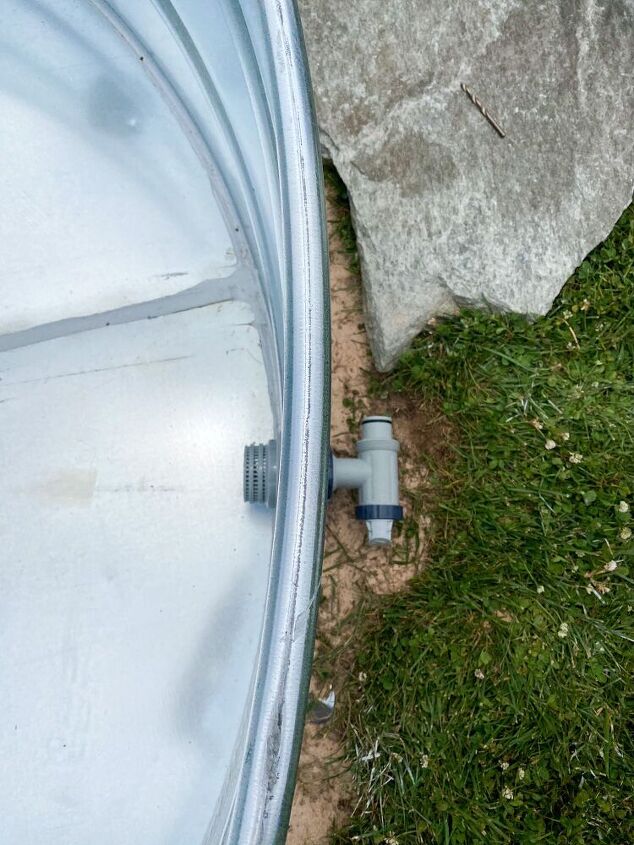
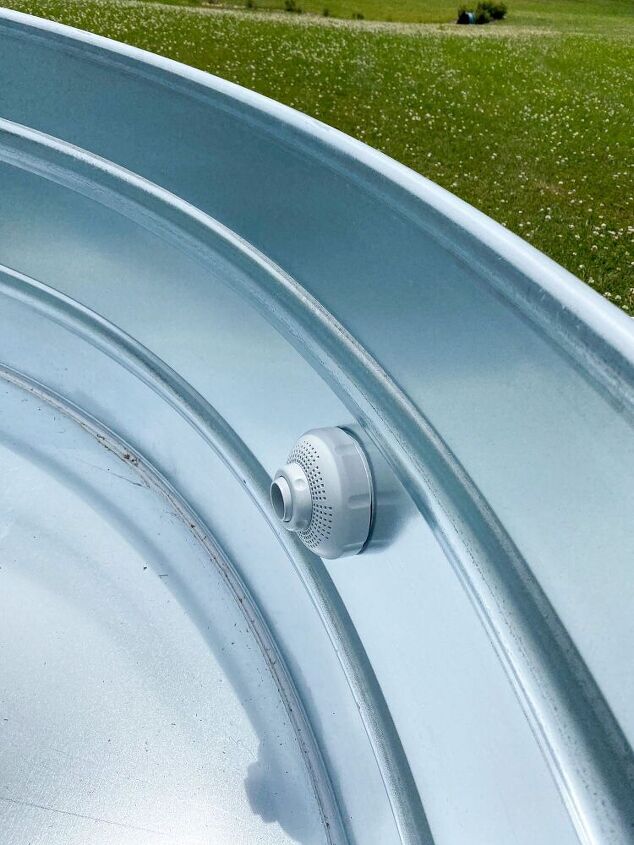
You attach the rubber washers to the vacuum attachment and jet attachment for the pool pump. This just ensures an extra tight seal. And to make it even more secure, we used Flex Glue around the attachments before adding the rubber washer on top. It’s important to take these extra precautions to avoid any leaks you may have in the future if you don’t! Once all your attachments are added into the pool, you can then attach the hoses!

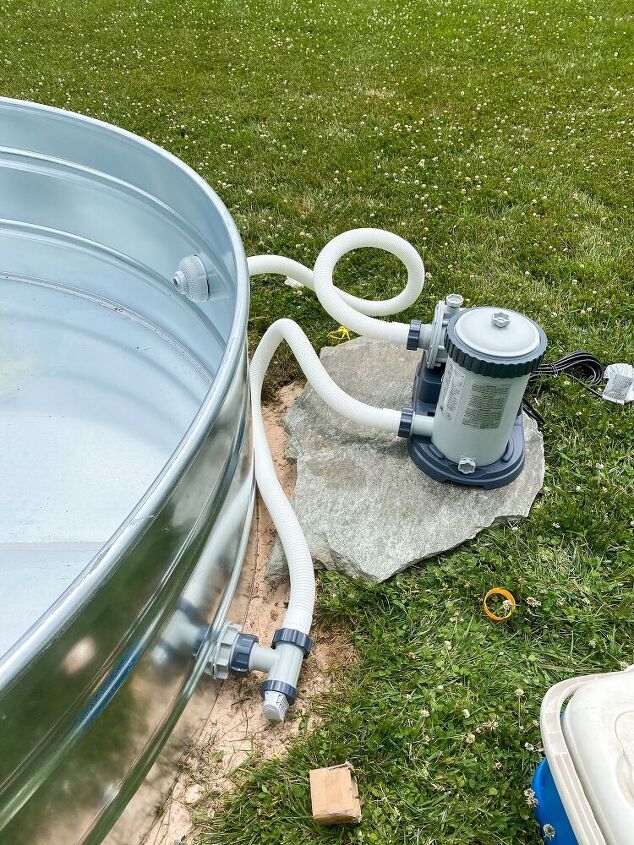
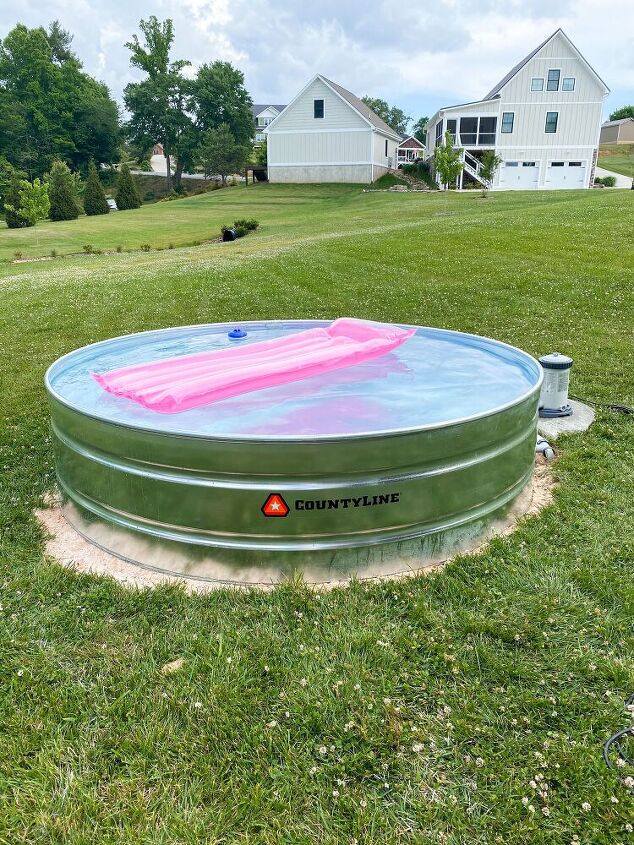
As you can see here, it doesn’t look very pretty right now. But it’s functional and it works! We are wanting to build a small deck with steps leading into the pool in the future. So that would hide this pool pump and make it look more like a pool area instead!
Fill Up The Pool
After you have your pool pump all set up, now is the fun part! Fill her up! Now, keep in mind this is a 700 gallon stock tank pool. So it will obviously take awhile to fill it up completely. I want to say it took us maybe like two and a half hours to get it completely full. We were worried that our pool pump wasn’t working right because we thought once we filled the water to the first attachment (which is the vacuum) that it would work.
Some of the YouTube tutorials we were watching showed that happening. But it wasn’t working with ours. We had to wait until the water came up to the second attachment (which is the jet ) before it would work. It turns out it just depends on the model of pool pump you get. If you order the same one I did, then just know that you need to fill your pool up almost all the way before it will work!
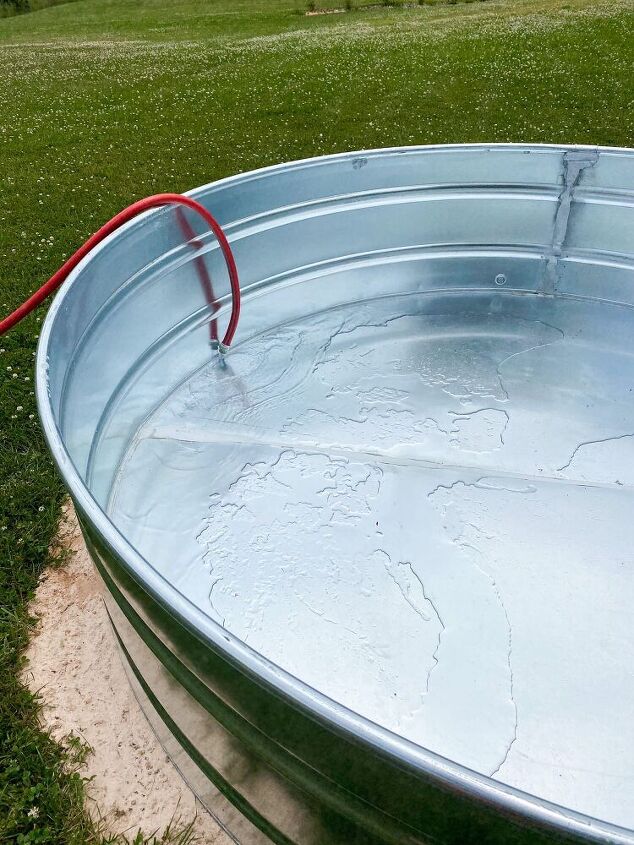
An important step to this DIY Stock Tank Pool is to make sure you don’t have any leaks. Since we have a little bit of that paver sand peaking through on the bottom, it was fairly easy to see if we had any leaks coming from the pool pump. And thankfully we didn’t! We did have a small leak coming from the back of the stock tank, from one of the seams back there. But we just added in a little Flex Glue and it stopped the leak instantly! That stuff is amazing! After you have made sure you don’t have any leaks, you can then add in the chlorine.
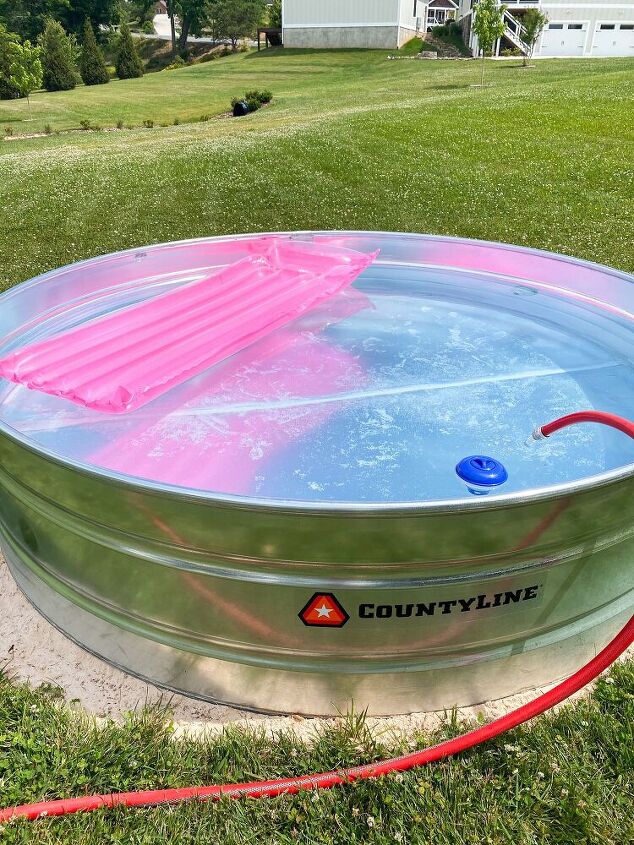
I got a small floating chlorine dispenser. To use, I insert a chlorine tablet into the top and just let it float around to distribute the chlorine evenly. Right now, I am only using about one tablet per week. But once we get to the heat of summer here (probably around July) I will start adding around two tablets per week. I also ordered chlorine test strips to make sure the levels were okay. For a small pool like this, you want to keep it on the low side. There is an adjuster on the side of the dispenser to determine how much chlorine you want to spill out. I usually keep it on the lowest setting here.
Enjoy Your DIY Stock Tank Pool
Well, this was definitely a crash course in the making of a stock tank pool! I hope you enjoyed reading this and learned a lot from it as well. If you made it this far, then you deserve a nice float in your stock tank pool then! Be sure to let me know if you have any questions about this process. I tried to explain it as easy as I could, although I know some of it can be a little confusing. Feel free to send me a message and I will try to help out in any way that I can!
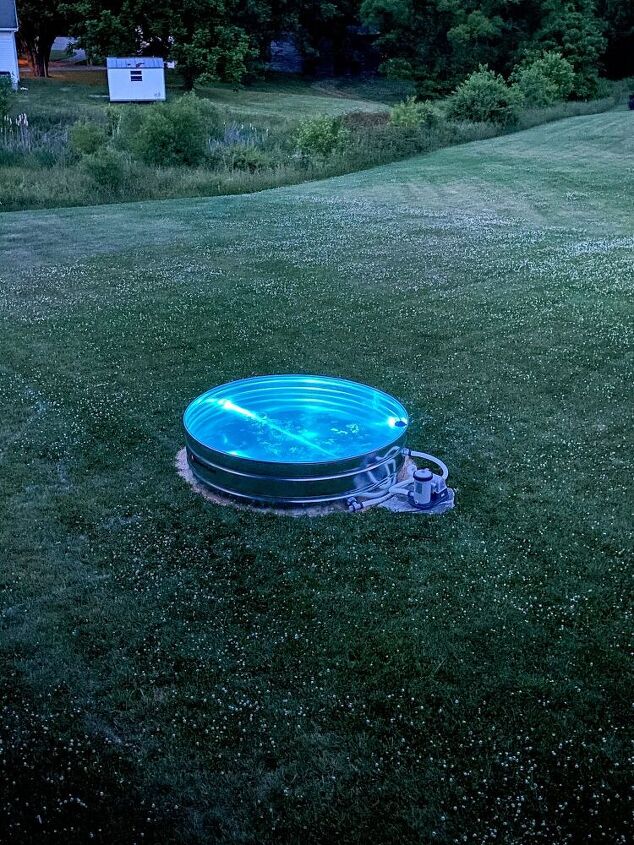
We are also planning on adding in a few more fun items around the pool such as some loungers and maybe an outdoor table. We also want to do some patio lights strung around the area, kinda like what we did at our camper this past summer. So be sure to keep checking back for some more fun things we will be adding to this space. But, as you can see in the photo above, we did add in some cool underwater LED lights! And the cool thing is you can control it with a remote and change colors too!
Thanks for checking out my DIY Stock Tank Pool! Have you guys ever tried to make one yourselves?! I can’t wait to enjoy it all summer long and I am so happy that we were able to get it done this early in the season too!

Resources for this project:
See all materials


Comments
Join the conversation
-
You made it look very inviting. In ground pool owner here. Without trees our pool would be too hot to enjoy. Does your water get too warm to enjoy on hot days? How do you clean pool? How to winterize? I like idea because typical above ground pool looks typical. Your seems to integrate into surroundings. Don’t forget sunscreen and enjoy
-
That’s all you do to winterize? I’m jealous! After a half hr of digging leaves, sticks and acorns out then we start winterizing. (End of October). Nothing like a refreshing dip on hot days. We love our own pool over neighborhood pool. Costs to operate same as membership and we can swim anytime of day or night, suits optional, many times during heat wave pop in in t shirt and undies. All sleep well after a nighttime dip


Frequently asked questions
Have a question about this project?
I'm humbled that you did this. I've been eating a pool for my entire life. I told my husband that if I had all the money I've spent on pools, I could have had a real in ground pool! Is there a reason besides cost that you do not put in a unite pool? My goodness, you have such a beautiful large lawn! I was really near getting a cocktail pool as I only have 1/3 acre but our neighbor said you have to be 10 feet away from power lines. And I think I'm too close. But I put in a bocce court and pergola. Still longing for a pool :(. We eve3n being to a country club but too much effort to drive down.
Why so far away from the house?
Great idea! Now that you’ve had it a year, are you still liking it? What changes would you make? How’s the water temp? Does the metal get hot?