


How To Install a Hexagon Bathroom Floor Tile a Beginner’s Guide
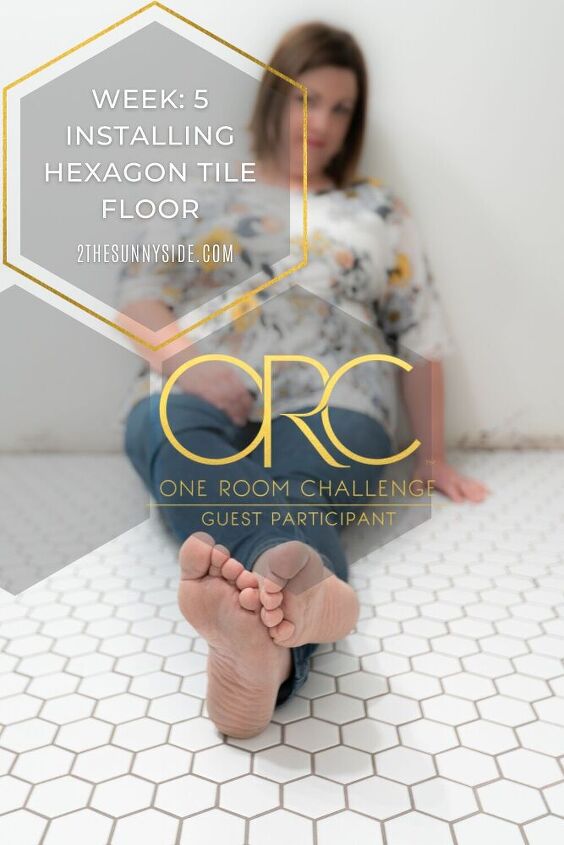
Welcome to week 5 of the Spring 2021 One Room Challenge! In this post you’ll learn How To Install a Hexagon Bathroom Floor Tile.
If you’re new here, WELCOME! You can learn more about us here. As a reminder you can easily navigate through each week of this coastal inspired bathroom project.
-1st week: The Design Plan
-2nd week: How To Install Shiplap the Easy Way
-3rd week: How To Tile a Shower
-4th week: How To Grout Tile stress free!
-5th week: you are here!
-6th week: How To Make an Affordable Barn Door
Here is a list of basic supplies needed to install and grout tile. Specific products will be based on the type of tile installed. (Size of notched trowel, sanded vs. unsanded grout, etc.) Consult the pros at your local tile supply store to help you gather the correct supplies needed for your job.
This post contains affiliate links for your convenience. As an Amazon Associate I earn from qualifying purchases. See our disclosure for details.
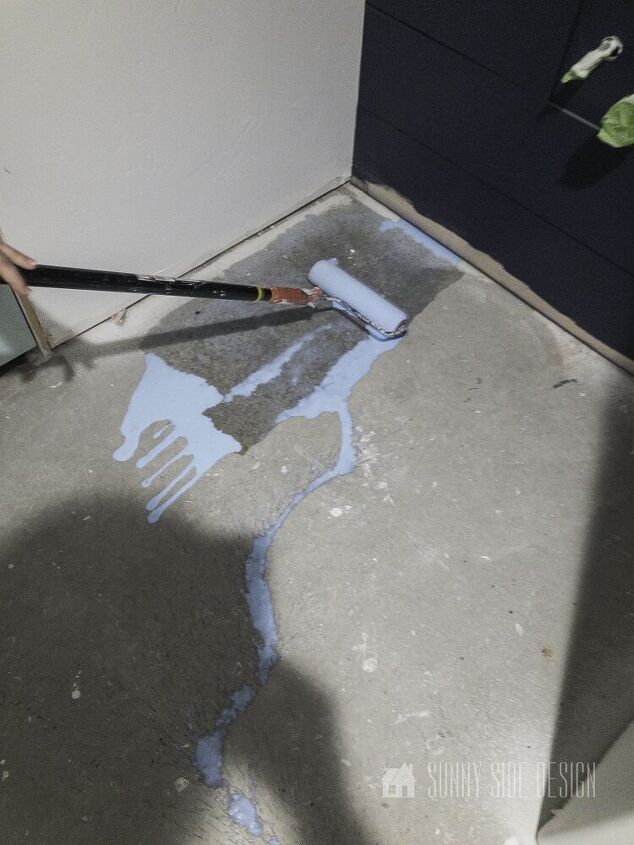
Before installing tile flooring you’ll want to make sure the floor is level. In our case, most of the cement flooring was level.
However, we did fill in a low spot in front of the tub.
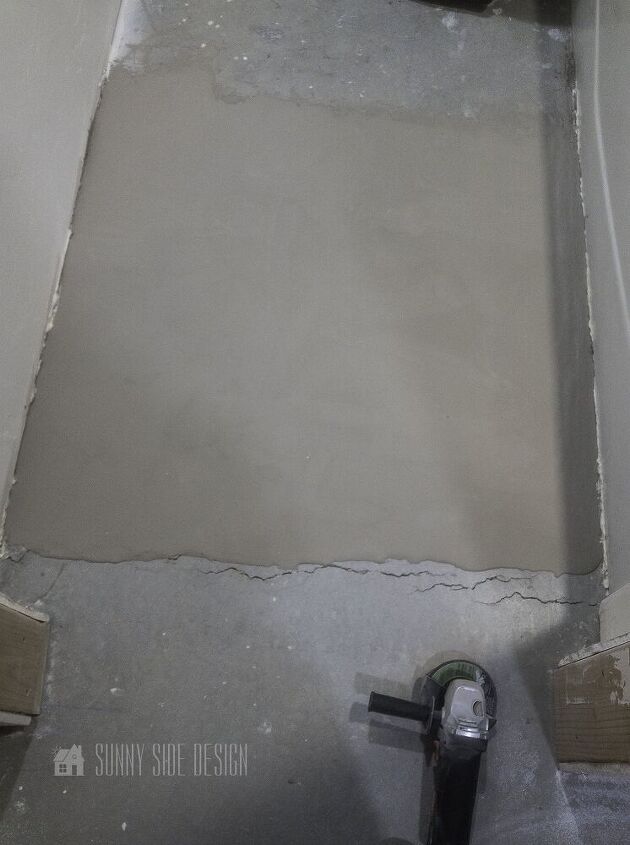
First, we primed the cement, then applied self leveling cement. After pouring cement, use the straight edge of a trowel to guide it to the low areas. From there, it will self level as it dries.
Once completely dry, use a grinder tool to smooth the edges for a nice transition to the other cement.
In addition to applying self leveling concrete, you may want to install a waterproofing membrane underlayment for your tile floor. We opted to install it because it’s supposed to help prevent tile from cracking.
If you’re interested in a tutorial for installing the membrane underlayment, please let us know.
For this post, we will not get into the details of that. To sum it up, we’ve installed it according to the given directions, and waited overnight to begin installing the tile.

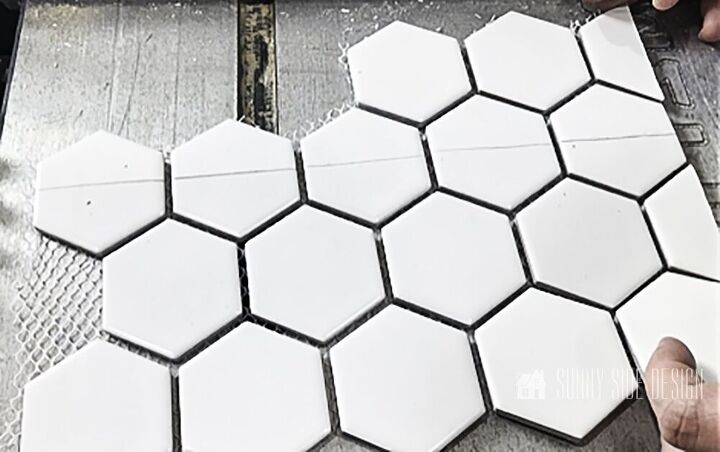
Another important step prior to installing a hexagon bathroom floor tile is to plan the layout. Place tiles over the underlayment and arrange in the desired pattern.
In addition to planning the layout, you may want to dry fit the tiles over the entire surface area of the floor. In doing this tiles should be evenly spaced. Moreover, tiles may be cut to size if needed.
Personally I think this is a brilliant idea, even though we didn’t do it ourselves! Surely if you take the time to dry fit the entire floor, it would minimize install time drastically! To make this process go even more smoothly, you could label each tile in numerical order of installation with a little frog tape and a marker. This would remove any of the guess work on tile placement during installation.
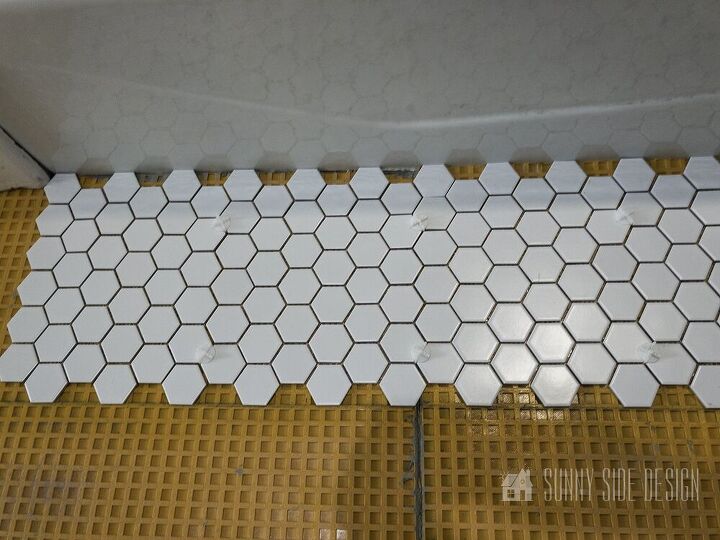
To begin, layout of our hexagon bathroom floor tile. We aligned our tiles to run parallel with the bathtub.
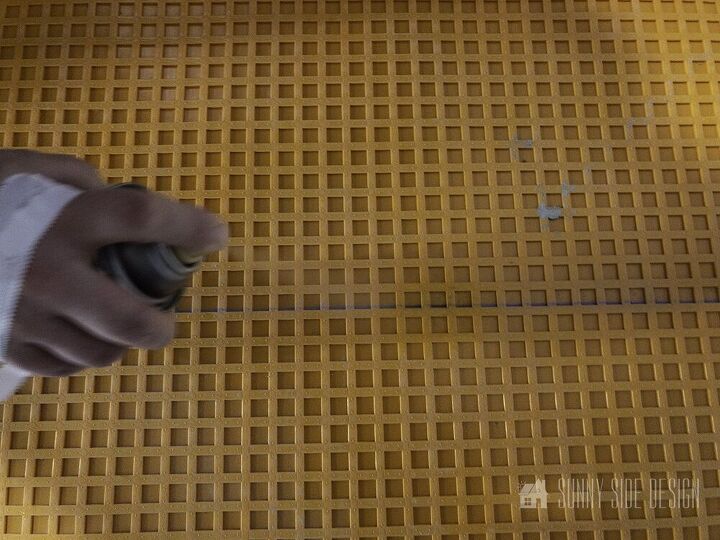
First we placed a tile flush with the tub. Then we placed a chalk line at the edge of the tile.
To prevent the chalk line from rubbing off the underlayment, we applied a little hairspray to keep it visible.
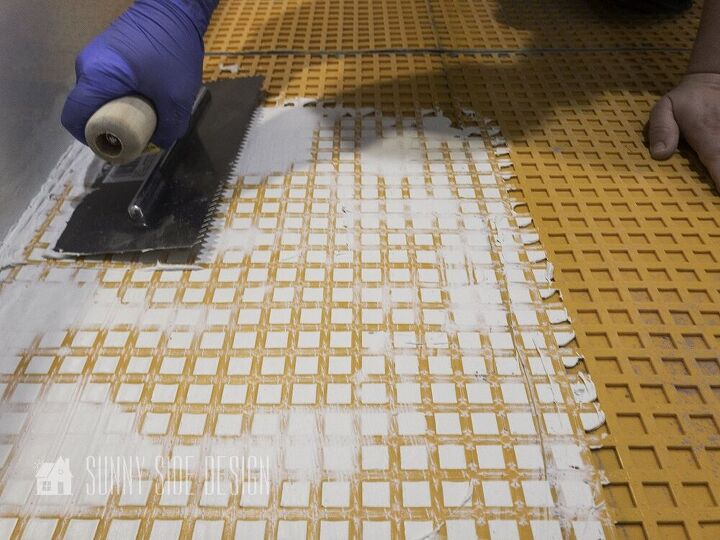
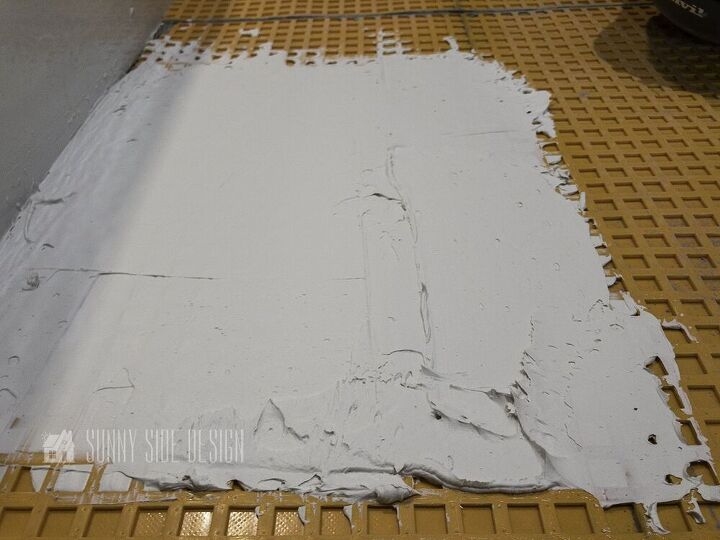
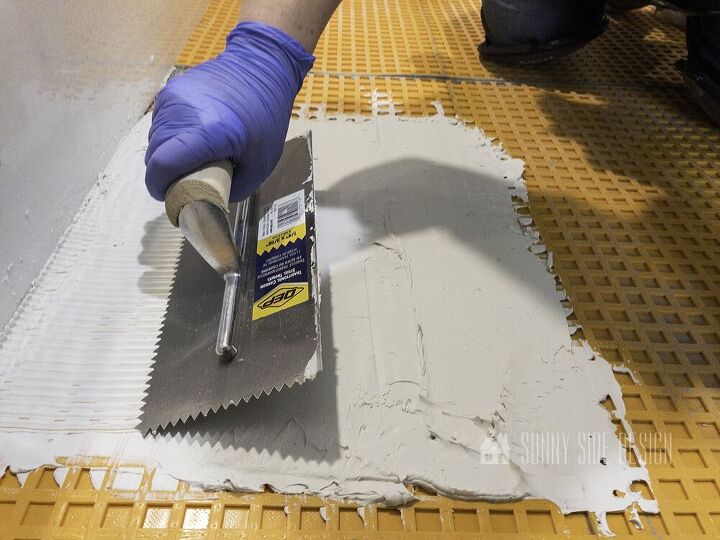
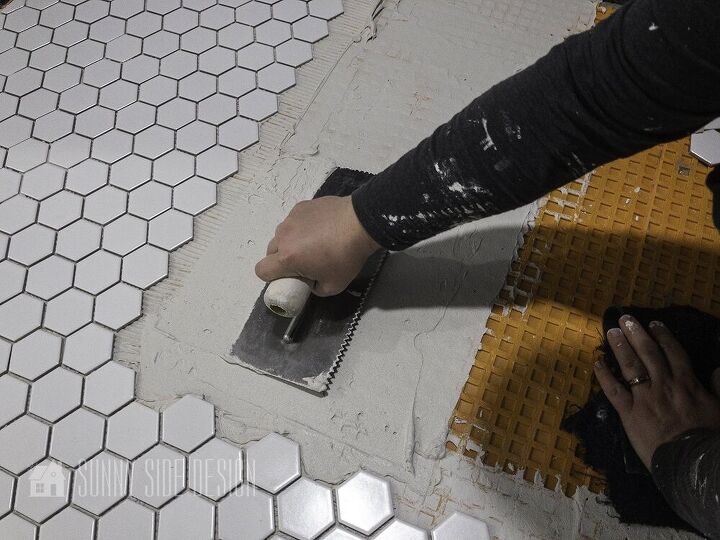
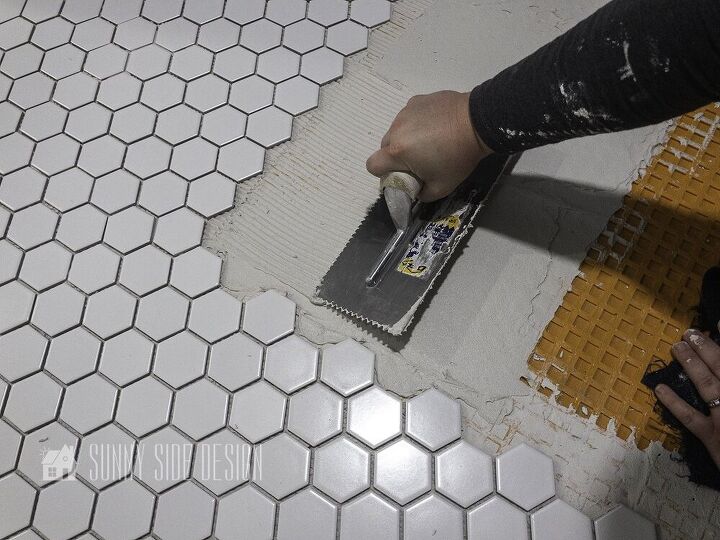
To begin installing the hexagon bathroom floor tile, firmly press thin set into the grooves of the underlayment. Be sure to work in small sections at a time.
Then apply a smooth layer of thin set over the area just worked. Then use a notched trowel to remove the excess.
Line the first tile into position. Use a laser level to periodically check that the tiles are straight.
By now you’re probably aware that we tend to learn a lot through our mistakes! Clearly, in sharing them with you, we hope you’ll be spared from making these mistakes yourselves.
Well here it is, I broke my own rules I stressed over and over again in last weeks post. Read ALL directions carefully.
In particular, I assumed the premixed thin set we used on the tile shower installation would work for the flooring as well.
I believe, we spent several hours installing approximately 1/4 of the hexagon bathroom floor tile, only to return to our work the next morning to learn the thin set had not dried.
However, right there on the container in big letters it warns against using this on top of waterproofing membrane.
After a quick call to Mapei customer service, I was informed we’d have to rip everything up and start all over!
Personally, I think words can’t express how I felt. Obviously, we’d already spent so much time installing a good portion of the flooring.
Of course, I was very discouraged and frankly frustrated with myself for assuming the thin set we had on hand would work with this application.
(Although we didn’t take any pictures of this process, you can see how we cleaned up this mess in detail in the video.)
Overall, each tile lifted easily off the thin set. Then using a small putty knife, we scraped off as much thin set as possible. At this point, we used a scrub brush and water to remove the remaining thin set.
In order to remove all the thin set, the underlayment was scrubbed multiple times. In between each round of scrubbing, a large towel was pressed onto the work area to soak up the water and thin set.
After taking a day off we began installing the hexagon bathroom floor tile again using the correct thin set over the underlayment.
The same initial steps were repeated in laying each tile.
In retrospect, even though it was frustrating to say the least to start over, installation went much more smoothly the second time around.
In fact, during our first attempt at installing the flooring, we used 1/8″ spacers in between each section of tile.
By doing this we quickly learned that each sheet of tile was not created equally. Although the tiles come pre attached to a mesh backing, not all tiles are spaced evenly.
While placing the spacers, we quickly realized it was making a bigger problem trying to fit them into place. Some grout joints were just small enough that we really had to push the spacers into place.
Moreover, in doing this, the surrounding tiles were pressed deeper into the thin set creating an uneven floor surface while excess thin set oozed to the surface.
Therefore, on our second attempt, we chose to lay each section of tile without using spacers. This worked much better, however tile placement needs to be precise to maintain equal spacing throughout the floor design.
In spite of making mistakes, we did take the time to learn from them. Despite the fact that we had to start over, we learned a few tips that made installation go more smoothly.
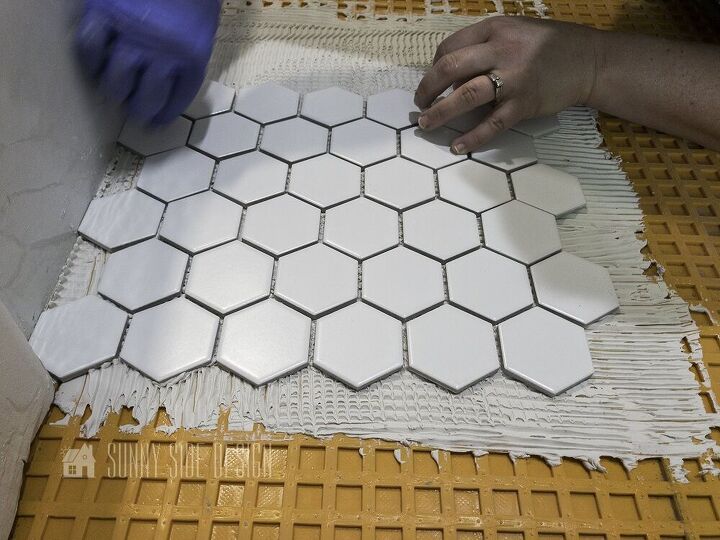
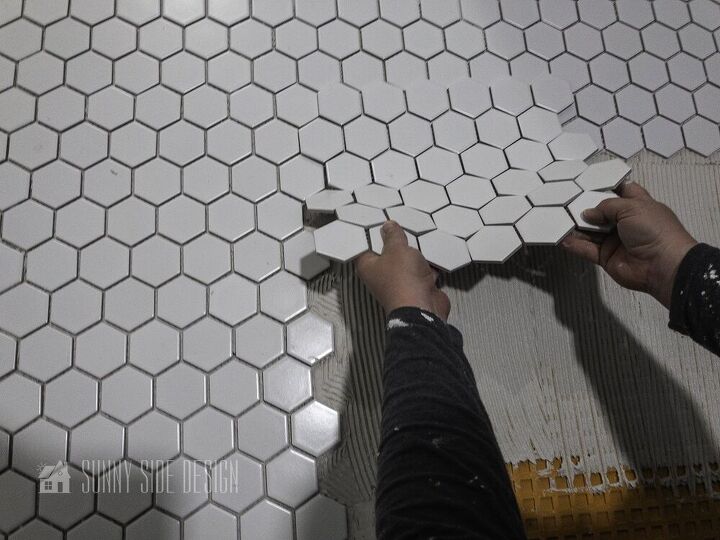
First, I stumbled upon an easier method for placing each section of tile.
Rather than holding the tile above the desired area and lowering into position, I began placing the section of tile on the row previously installed. As a result I was able to slowly slide the tiles into place.
Not only did this make it easier to achieve equal spacing, but it was also much more clean!
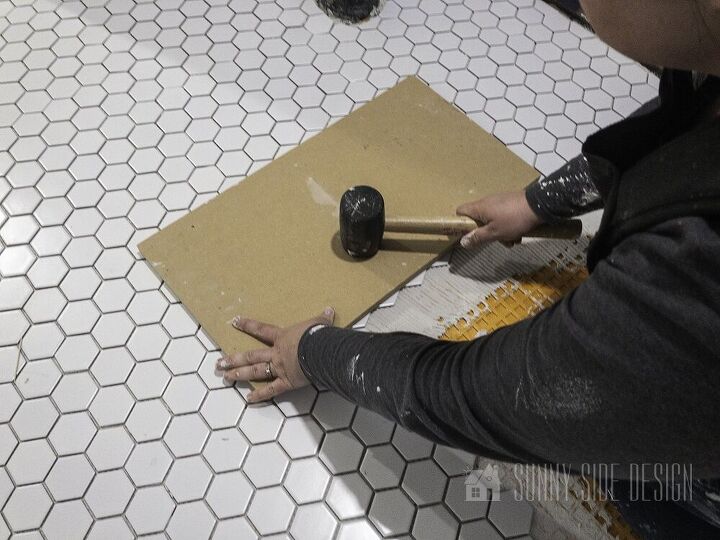
Second, it actually paid off to read the installation directions on the tile packaging…go figure!
Rather than pressing the tiles into place with my hands, I used a scrap of wood and gently tamped the surface with a rubber mallet.
Doing this the tiles were pressed into the thin set more equally resulting in a more unified and level surface.
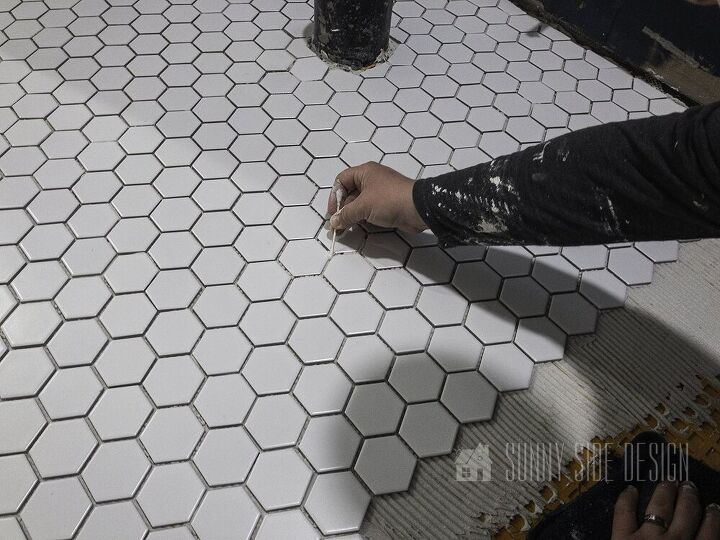
Third, every now and then excess thin set will ooze out between the tiles. Rather than using a wet rag to try and wipe the excess material out, we found that using a q-tip was much quicker.
In fact, it fit easily into the spacing between the tiles and gently pushed the excess out.

Similarly to installing the tile shower, a wet saw is an option for making tile cuts. Although we found it a little difficult with the tiles attached to a mesh backing.
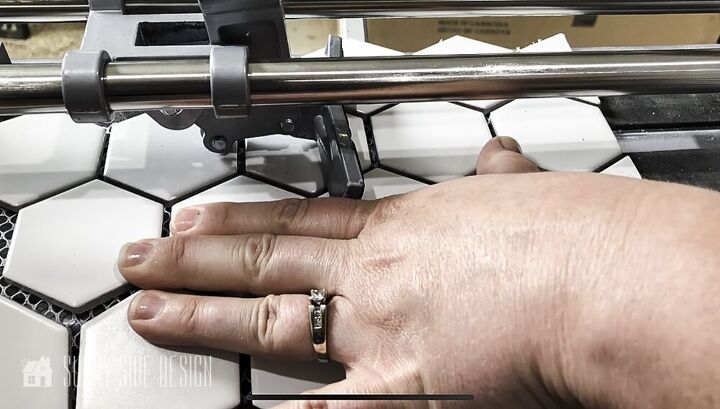
Alternatively, a tile cutter can be used. In our opinion, we found this to work a little easier in this application.
Begin by accurately marking the desired cut location. Then line up the marks to the tile cutter and score each tile.
Also, this may need to be repeated a time or two.
After the tiles have been scored, press down on the handle to apply pressure to each tile. If properly scored, the tiles will snap and break on the scored line.
If using this type of tile cutter on small tiles such as theses, we found it helpful to place a small piece of wood about 1/8″ thick on top of the tile before pressure was applied to the handle. This aided in resulting in clean cuts.
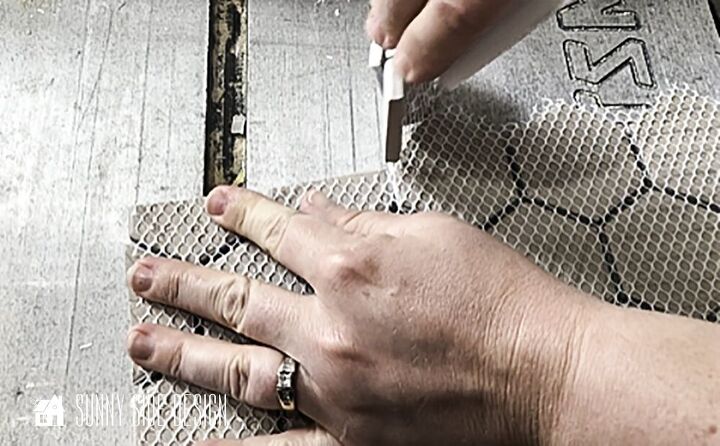
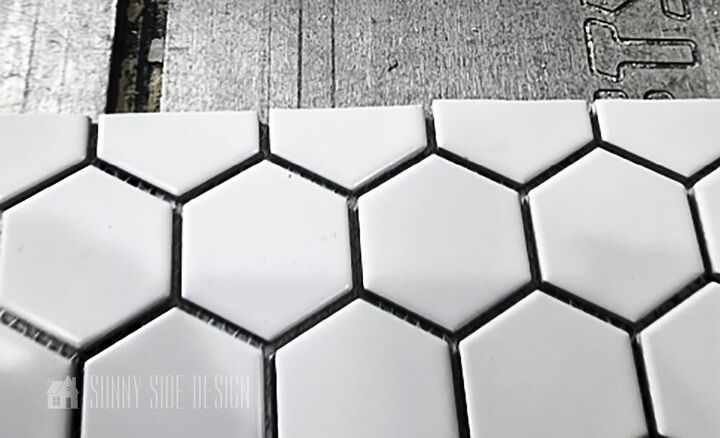
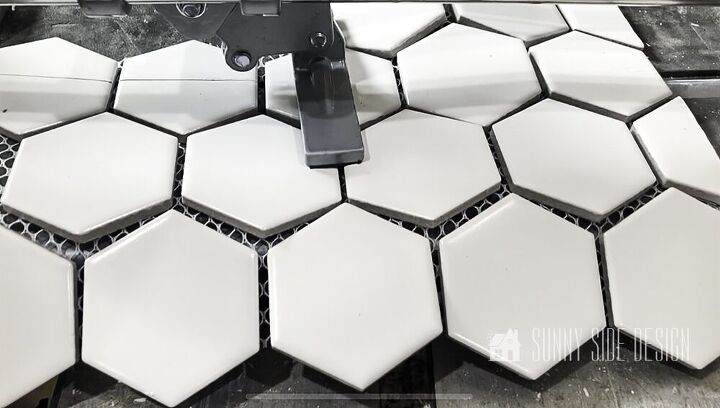
After the tile has been cut, then use a utility knife or scissors to cut the mesh backing. Remove the undesired pieces of tile and you’re left with a nice clean edge.
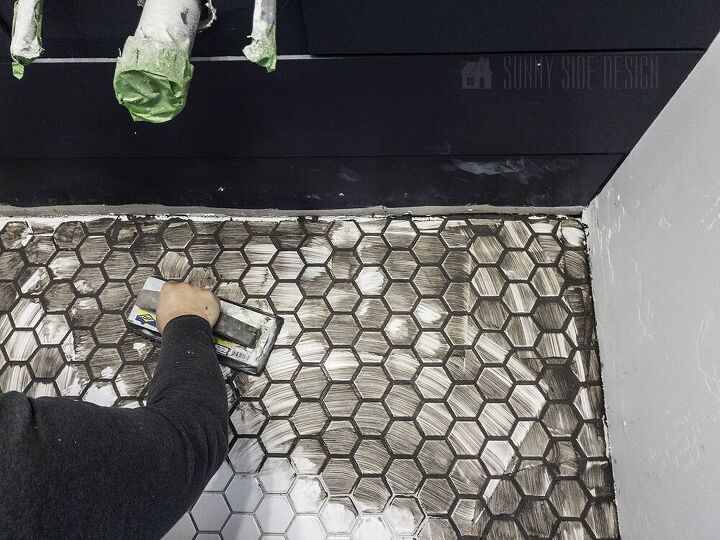
To achieve a successful grout job, specific steps need to be carried out. We used the same method to grout the hexagon bathroom floor tiles as we did for the shower tile. Although these same steps were followed, you can refer to that tutorial for more specific directions.
- Gather materials needed ahead of time.
- Read grout directions FIRST.
- Mix grout to the right consistency.
- Work in small sections at a time.
- Apply grout diagonally at a 45° angle.
- Periodically check for gaps or bubbles in the grout.
- Allow proper dry time.
- Wipe off extra grout with a wet sponge.
- Buff away remaining haze.
- Seal corners with silicone caulk. (In this case caulk was placed along the edge of the tub)
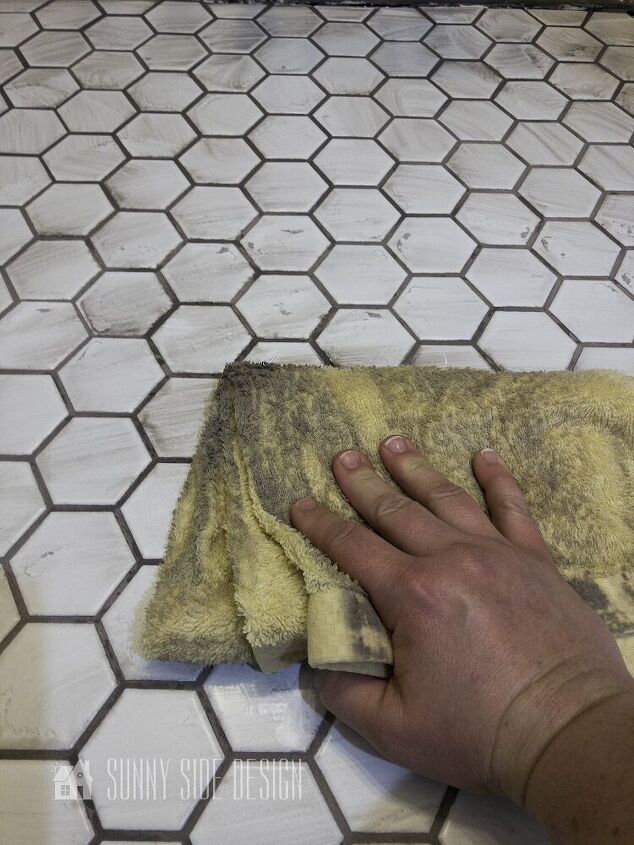
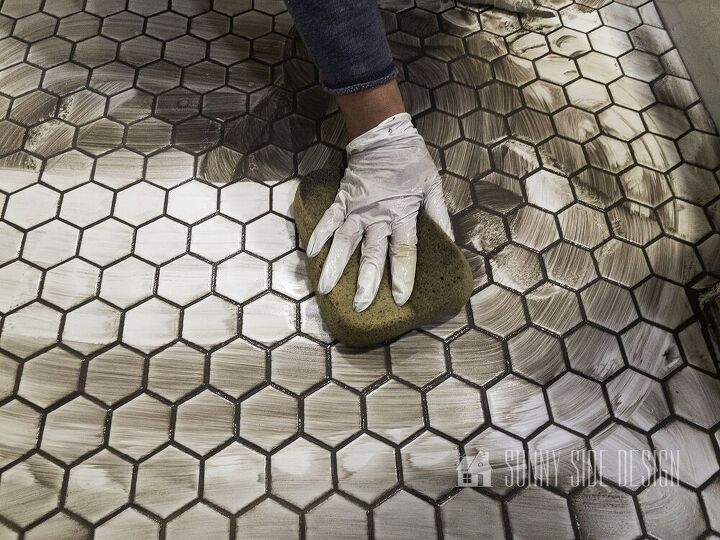
While the same steps were taken to grout this floor tile, the haze was not as easily removed. I believe it’s because these are matte tiles rather than glossy like the shower tiles.
Even so, all of the excess grout and haze was successfully removed.
Rather than buffing the haze away with a dry cloth as before, I used a wet cloth to wipe away all of the excess and haze in this situation.
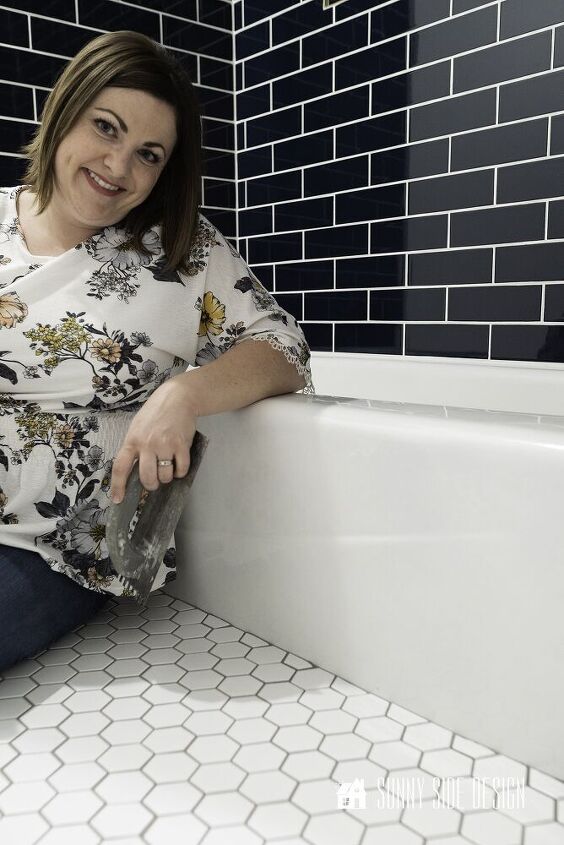
Despite the mistakes we made and the fact that we had to start over again, I’m truly pleased with the final results! Definitely we now have a better appreciation for expense of a tile setter!
Particularly we experienced the wear and tear this type of work puts on your body.
With this in mind, hats off to all the pro tile installers out there!
Actually, I don’t know how you continue to do this kind of work day in and day out!
What are your thoughts? Are you swayed to try your hand at installing your own bathroom floor tile? Or is it worth paying a pro to do the job?
Please comment and ask any questions below, we love hearing from you!
Please PIN and share with your friends!
And as always here at Sunny Side Design
WE HOPE TO BRING YOUR HOME TO THE SUNNY SIDE OF THE STREET!
Be sure to follow us on Pinterest for even more home decor and DIY ideas.
To see what we are working on before it’s on our blog, follow us on Instagram.
You can also find our video tutorials on our YouTube channel.

Resources for this project:
See all materials


Comments
Join the conversation
-
Love the final result!
-
Fantastic job looks great


Frequently asked questions
Have a question about this project?
I really hope you are still monitoring this link. I am redoing my laundry room and kitchen (they are open to each other, unfortunately) and I am trying to decide if it will be better to use 8x9 or small hexagon tiles on the floor. Can you help? I want to recreate a pattern that I saw where the room was hex on the floor that fed into wood flooring in a random pattern. I am doing hex on the laundry and kitchen floors, that feed into wood on dining room floor connected to the right of my kitchen all open one space but the kitchen is 9.4x8 laundry 4.5x8 and the kitchen is galley, ugh.... So, should I be using 8x9" hex or small mosaic hex on the floors? Thanks, Tonya