


Fourth of July Craft – No Sew Patriotic Pillow Cover
I’ve enjoyed using scrap fabrics to create these unique, no sew pillow covers. I’m a big fan of ticking fabric for a farmhouse feel and therefore, love how this latest patriotic, no sew pillow cover, turned out.
Fourth of July Craft Supplies
- Red & White Ticking Fabric (less than 1/4 yard)
- Blue & White Ticking Fabric (much less than 1/4 yard – scrap pieces will work)
- Small scrap of White Fabric – I used some scraps from an old chenille bed spread.
- A Pillow Cover 20 x 20
- Permanent Fabric Glue
- Straight Pins
- Card Stock or Card Board for Template
- Black Sharpie Marker
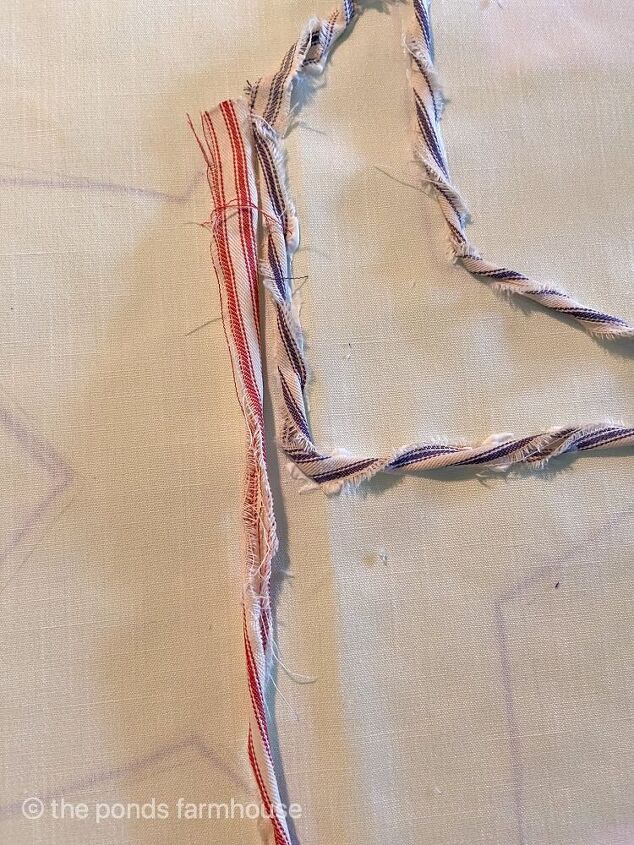
Note: Be sure to use real ticking fabric. The stripe is sometimes printed on fabric instead of woven into the fabric. You can tell because the back of the fabric will be white. You want to see a stripe on both the front and back sides. I purchased my fabric from Hobby Lobby.
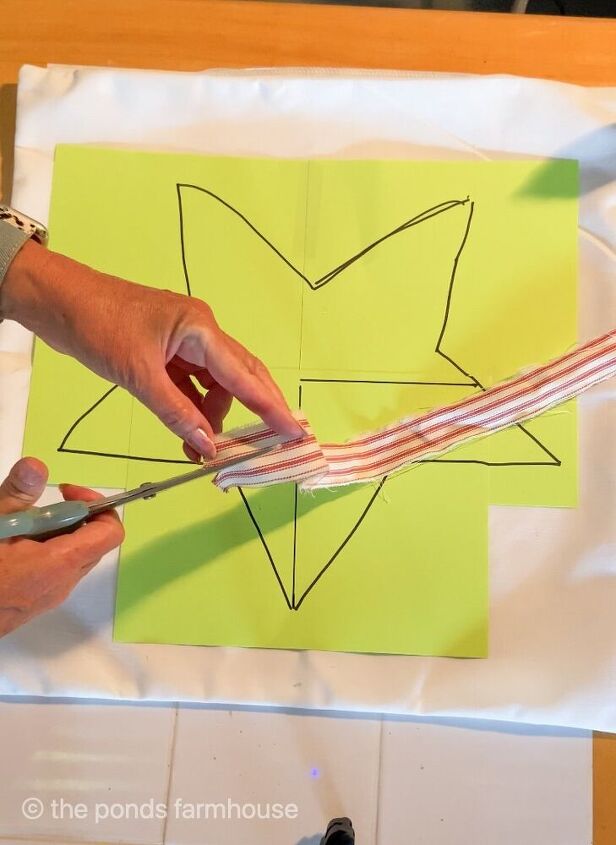
Gather your supplies and begin preparations for your Fourth of July craft project. First, draw a template of your design. I taped 3 pieces of card stock together and drew a large star with a black sharpie, as you can see below. The template will also serve as a protection between the two pieces of fabric.
Next, strip your fabric by cutting a notch in the ticking fabric approx. 1/4 inch wide and then hold both ends and pull. This will tear the fabric and slightly curl it. Be sure to follow the grain of the fabric.
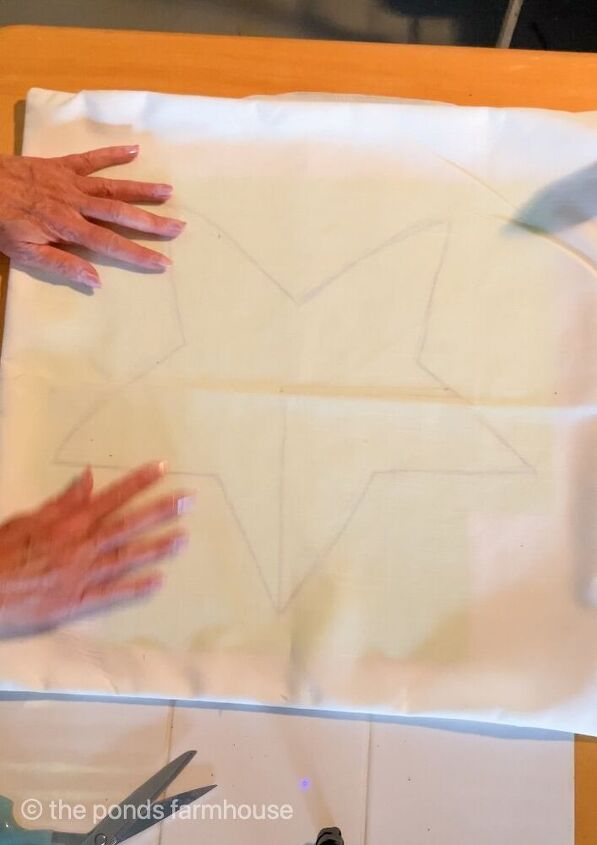
Place your template inside the fabric cover and pin in place. You will be able to see the star pattern through the fabric, to use as your guide. If you use a dark colored pillow cover, you will need to draw the pattern onto the front. However, you still need to insert a protective barrier to prevent the cover fabric from sticking together.
Glue the fabric to the pillow cover
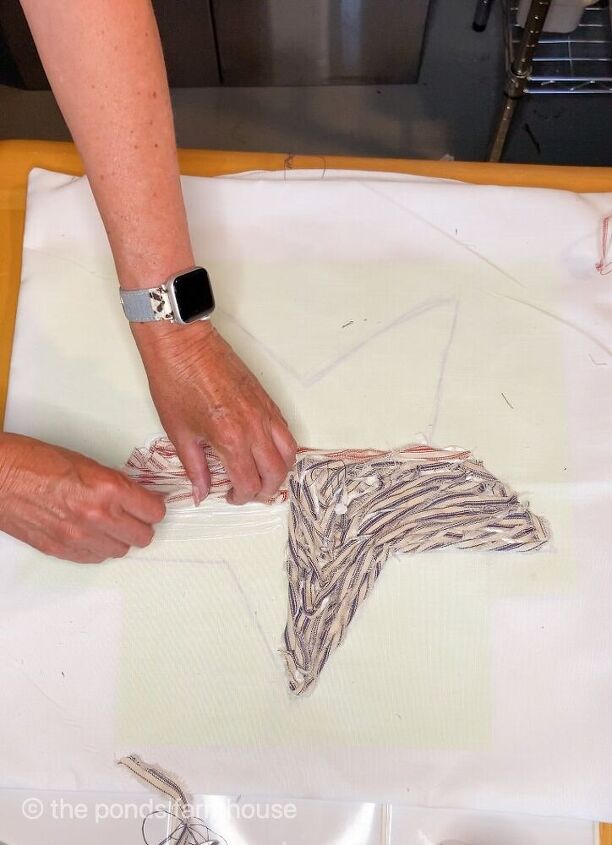
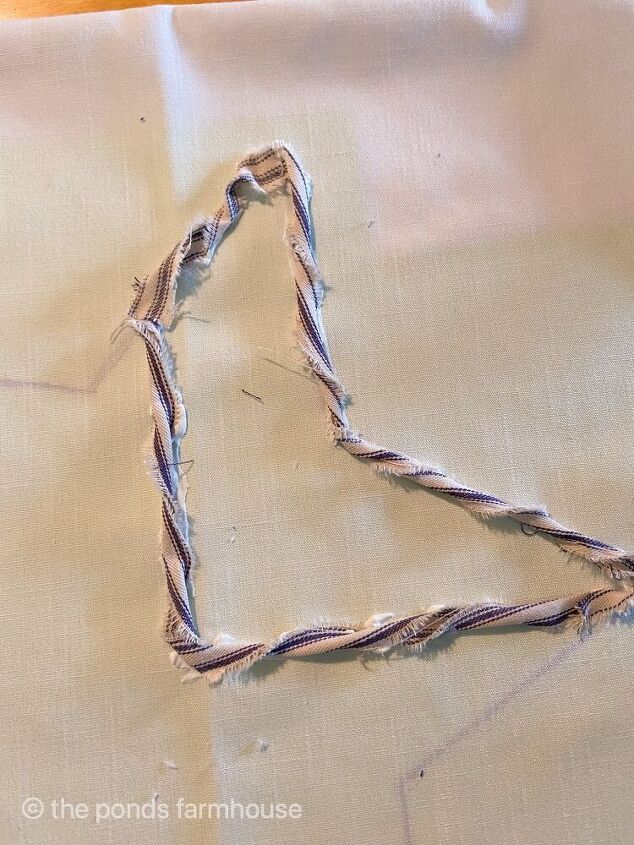
Begin with your blue fabric and apply a bead of permanent fabric glue to the line drawn to divide the star. Twist the fabric as you press it into the glue and continue until the divided section is filled with blue and white ticking.
Apply glue in small sections at a time. Otherwise, it will dry out before you get the fabric applied. If you have trouble adhering the fabric, you can use straight pins to hold in place until the glue sets. Remove pins before glue has completely dried.
Next, begin adding the red and white ticking in the same matter to create your stripes on the patriotic pillow cover. To start creating a stripe pattern, it’s easiest to begin just under the blue and white section. Then go back and forth until the entire area is filled with the red and white fabric keeping the strips running horizontally.
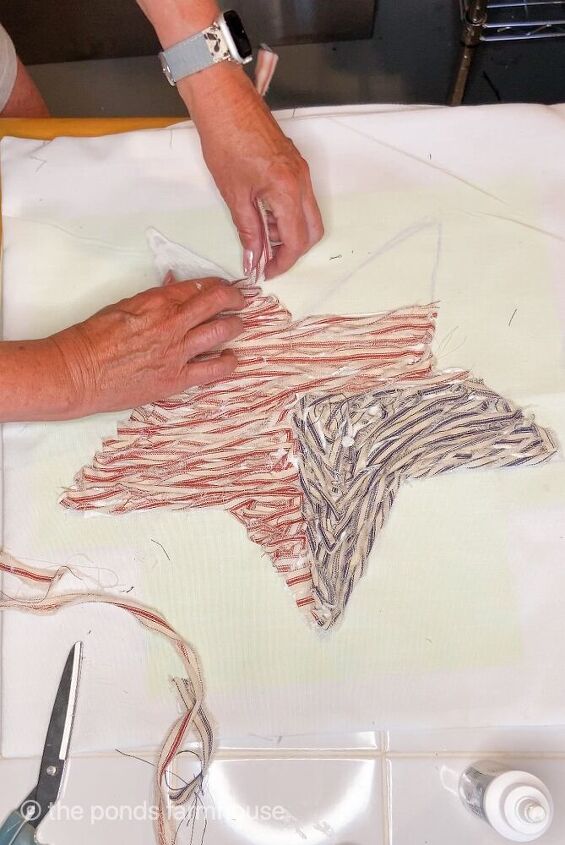
Occasionally, place your hand inside the pillow cover and gently lift the fabric slightly away from the card stock pattern. This will prevent the card stock from being permanently glued to the inside of your pillow cover.
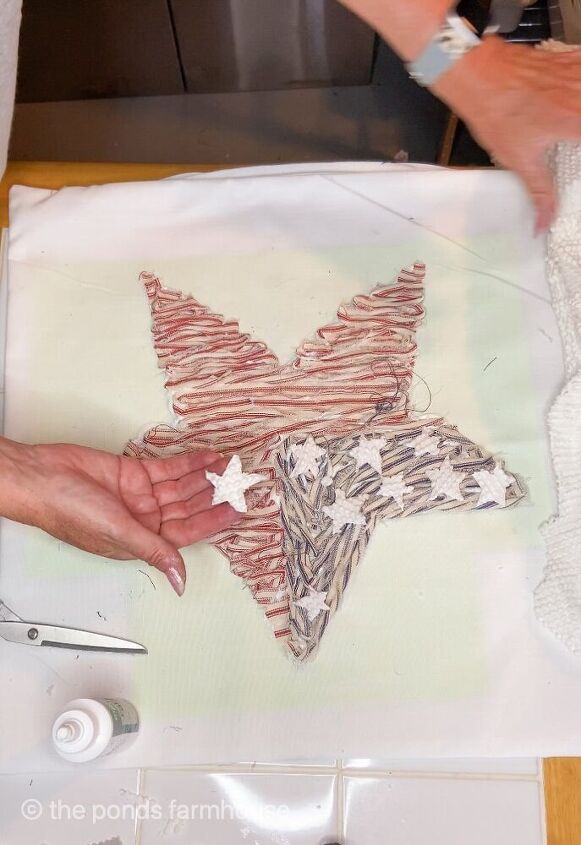
Stars for a Fourth of July Craft
To finish, you need to cut some stars using your white fabric. I drew the stars on the backside of the fabric to get them shaped correctly. I used some scraps of an old chenille bedspread, left over from some other pillow projects. You can use white felt or any other slightly thick white fabric. If it’s very thin, you may see the ticking fabric underneath.
Using the fabric glue, attach the stars on the blue and white section of your star. You can add as many stars as your space will allow.
Finally, check to be sure all the fabric is adhering to the pillow cover and add additional glue to any necessary spots.
Allow the glue to complete dry before placing a pillow insert into the pillow cover.
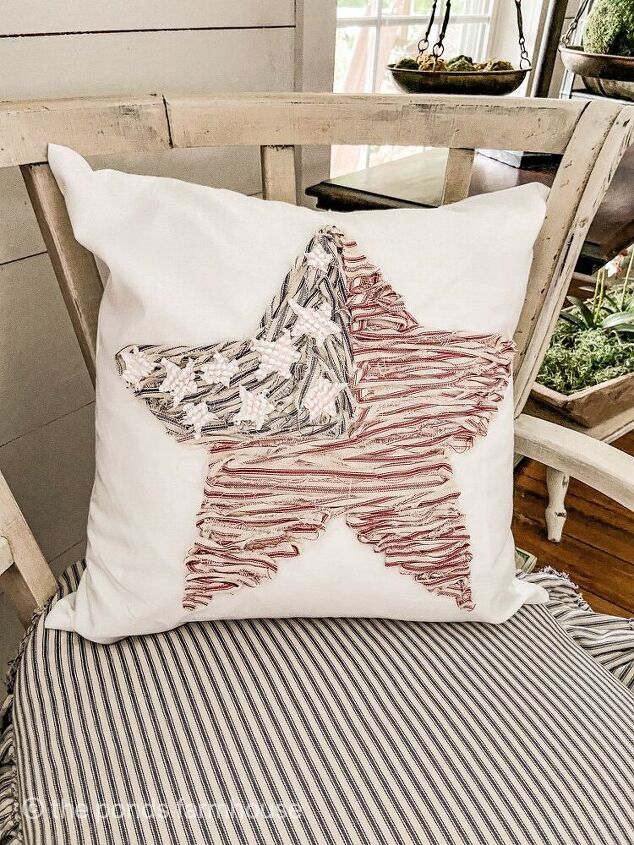
The no sew patriotic pillow is perfect decor for the up coming 4th of July.
Did you see this tutorial for a scrap fabric pillow? Here is the link.
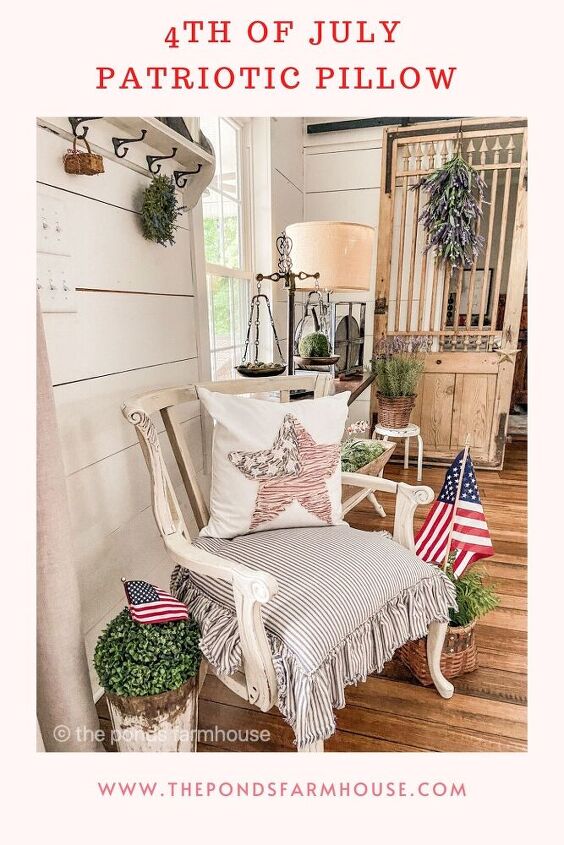
You can see this deconstructed chair tutorial on this post.
Resources for this project:
See all materials


Comments
Join the conversation
-
Love it! and the chair it's setting on! :)
-
Adorable!😍


Frequently asked questions
Have a question about this project?