


Painting Floors With Rustoleum – Three Daughters Home

I can't wait to walk you through our amazing hallway/powder room transformation by painting our floors! Keep reading, and if you like this post and want to see more home projects & DIYs, check out my blog site and subscribe! You'll also receive my 'Top 10 Tips for Refreshing a Space' as a thank you for subscribing!
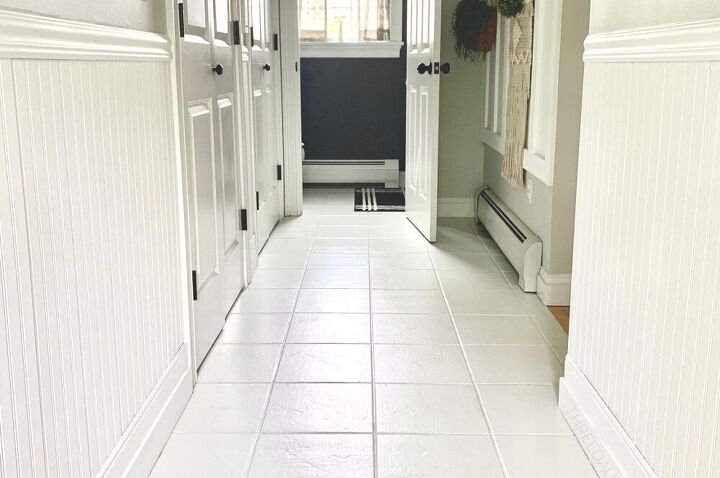
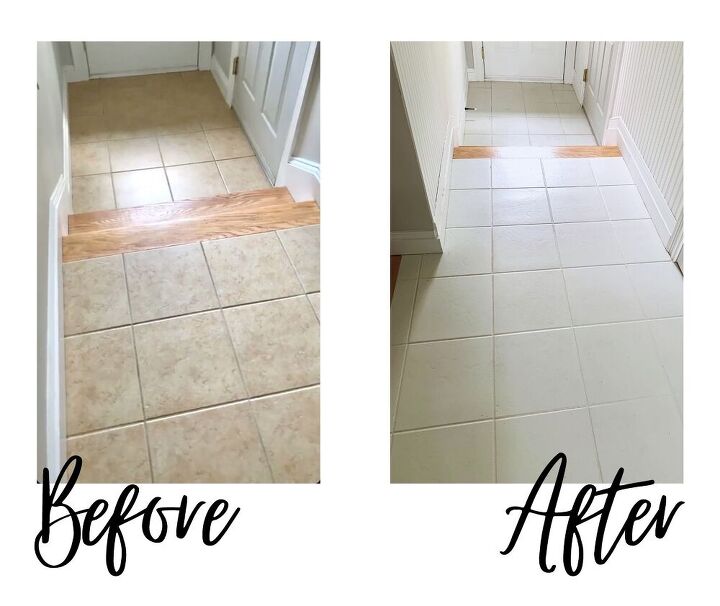
Do you have flooring in your home you hate but don’t have the budget to rip it all out? *raises hand* I could not stand the brown tiles in our side entryway and sought to find another temporary solution until the day we can re-tile. Enter Rustoleum RockSolid Home floor paint — You heard right, folks! Floor paint – who knew that was a thing?! The product is a two-step application that transforms your floors with no nicks or scratches (or so it claims… we’ll come back to that.) It works on tile, linoleum, wood, vinyl, and concrete floors (per the Rustoleum website) with no primer needed. Sold! **I should also note that this is in no way a paid or sponsored post in partnership with Rustoleum. I am writing this based solely on my experience as a customer of the product.
What You’ll Need:
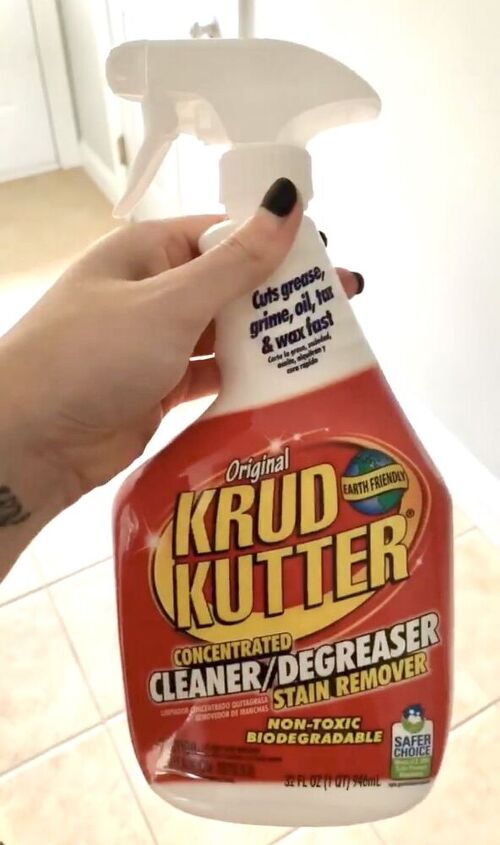
-Krud Kutter cleaner/degreaser spray
-Rustoleum RockSolid Home Base Coat in color of choice (I used Steam Gray)
-Rustoleum RockSolid Home Top Coat (I used Matte)
-painter’s tape
-3/8″ Paint roller for base coat
-1/4″ Paint roller for top coat
-paint roller handle
-paint roller tray*
-angled paint brush*
*You can buy two of these or you can just clean in between.
How To:
Step 1: You’ll want to clean your floors really well before starting. I used Krud Kutter, a spray cleaner, which removed all the gunk and grime from my tile. The tile I was painting happened to be in an entryway, so if you are painting in a high-traffic area, it’ll be extra important to get the area sparkling clean.
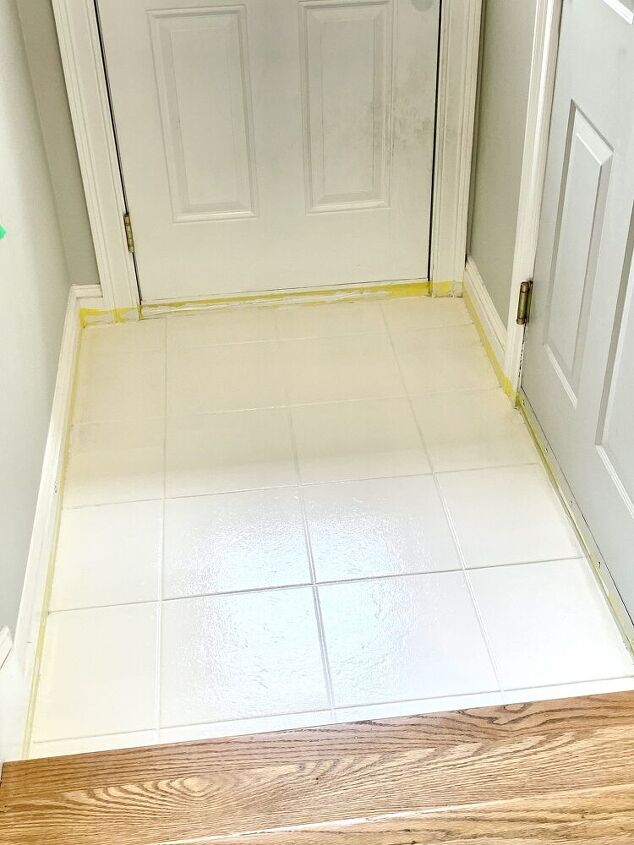
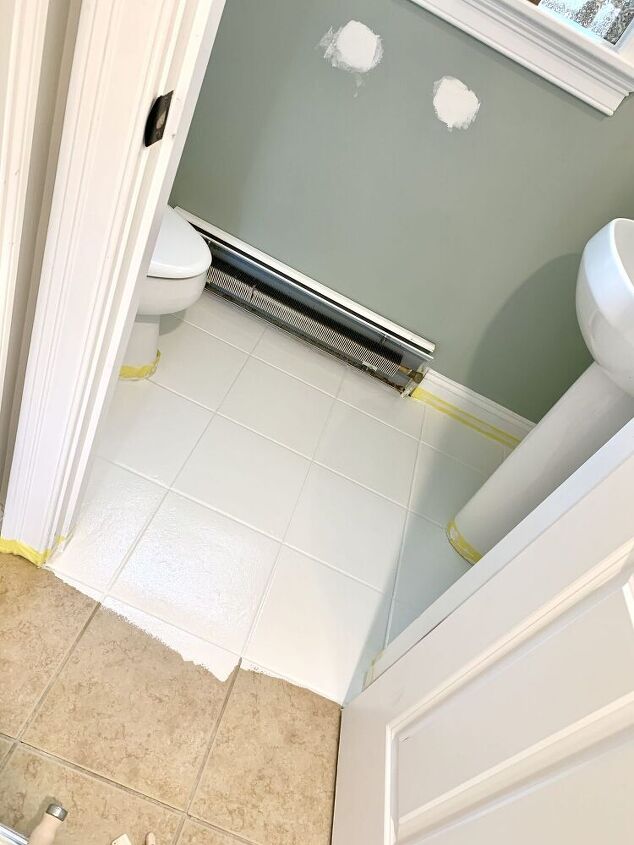
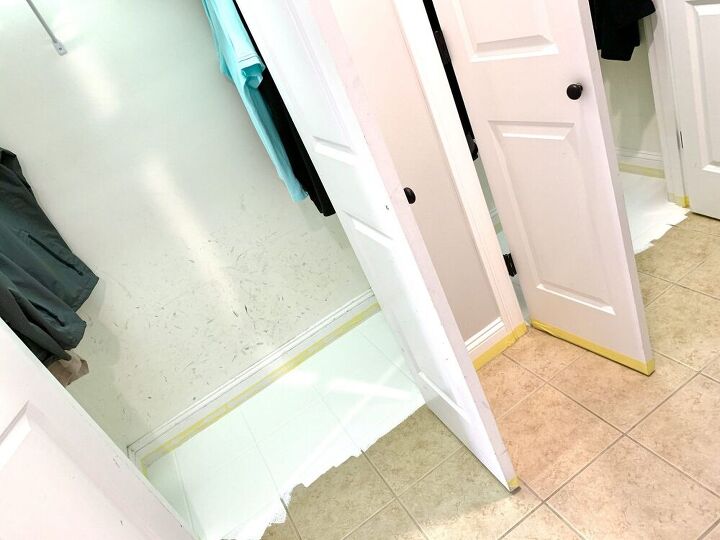
Step 2: Using painter’s tape, you’ll want to tape off all around your base boards/where the floor meets the wall. The trickiest part of this project for me was going around the toilet and pedestal sink, but just be patient. Honestly, the taping will be the most time consuming part, but once it’s done, painting should go pretty quickly.
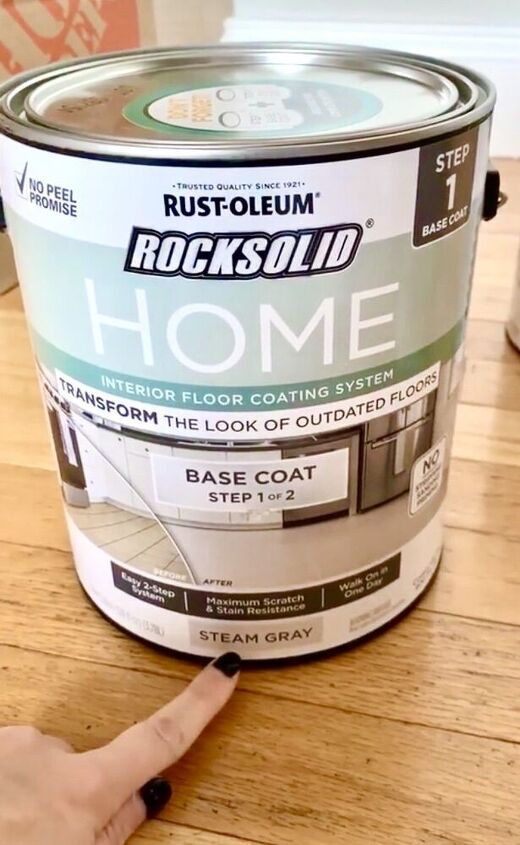
Step 3: Next you will shake up your can of base coat to make sure the product is well mixed. Pour some into your paint tray. (Note: The base coat is the colored product of the two. The top coat will be clear.) I recommend using an angle brush for all your edges and then go in with your roller. Paint medium size areas at a time and — this is important — work your way inward. For example, if you’re painting your bathroom floors, you’ll want to start on the wall furthest from the door so you can get out without stepping in wet paint, lol. For example, I started near our entryway door and moved my way backwards. Once I got to the opening to my kitchen, I started on the other end of the hallway (in our powder room) and worked my way back to the kitchen.
Step 4: You’ll want to let the base coat dry for at least 6 hours. I let mine dry overnight to be safe. Now, the product does not call for a second coat of the base paint, but mine clearly needed it. The color also looked a bit uneven after the second coat, but it evened out once totally dry. Use your judgement. If after one coat it looks fine, then move onto the next step. Otherwise, go ahead and repeat step 3. Step 5: Top coat time! You’re in the home stretch! You’ll paint the top coat just like you did the base coat, starting with the angle brush then switching to your roller – the only difference is that the top coat is clear, making it a littler harder to see. There are a few spots I missed hitting with top coat, and those spots ended up yellowing in time. Being diligent with the top coat will be the key to making your floors last. Step 6: Let the top coat dry for at least 24 hours. I know it seems like a lot (and it is), but the paint needs to cure completely before you begin walking on it. Once it’s dry, you can remove your painter’s tape and walk on it safely. You’re done!
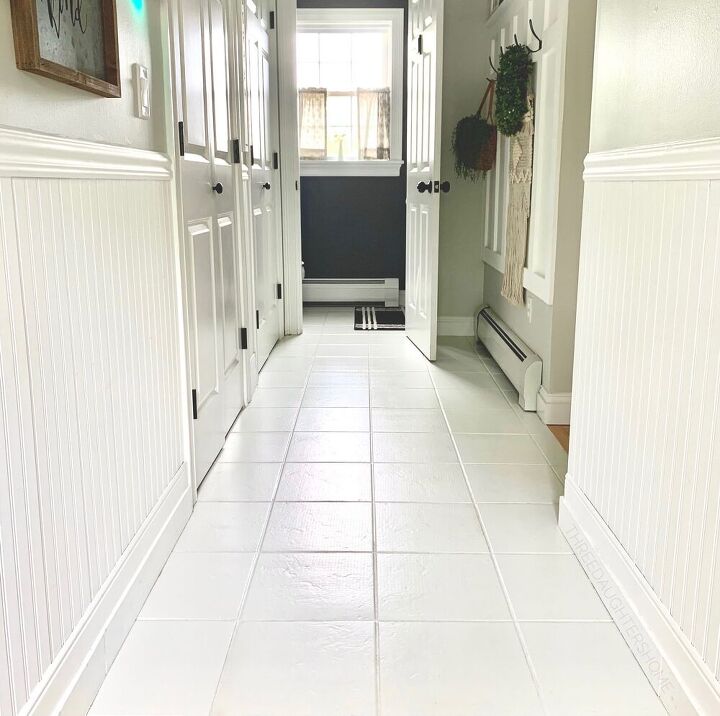
Now, when I shared this project on my Instagram, I got some questions on how it has held up. It’s been about a year since I did this project, and if I’m being honest, it’s held up so-so. There is definitely some noticeable wear and scratches, especially on the area right in front of our side & garage entry.

A year+ later, there is some scratching, but I also painted in a high-traffic area (our entryway). I sort of half expected this since it is such a high traffic area. We have since added a runner to the hallway, which has helped, and our powder room has virtually no scratches. If I had to do the whole process all over again, I would in a heart beat. It still looks WAY better than the ugly brown tile that was there before and I still have a ton of paint leftover if I want to ever touch it up. If you decide to try this project, please let me know! I’d love to hear about your experience and results.
If you like this post and want to see more home projects & DIYs, check out my blog site and subscribe! You'll also receive my 'Top 10 Tips for Refreshing a Space' as a thank you for subscribing!
Resources for this project:
See all materials


Comments
Join the conversation
-
Great cost effective idea.
-
Loved that you did a product update on how it held up.
Thank you for your time in posting all the pics.


Frequently asked questions
Have a question about this project?
Great job. What I’m curious about is if there are areas that scratch and wear do you have to do something before it’s touched up? I guess because there’s a sealer I’m thinking you have to first remove the sealer and paint from that area before you repaint it
in step 3 you said the base coat is grey the top coat is clear but it sure looks white.
Why is the base coat grey and the top coat white or is it just the photos?
Are you still cleaning the floors in usual way? With floor cleaners & water, etc?
Can this be used in a shower stall? Does it also seal the grout?