


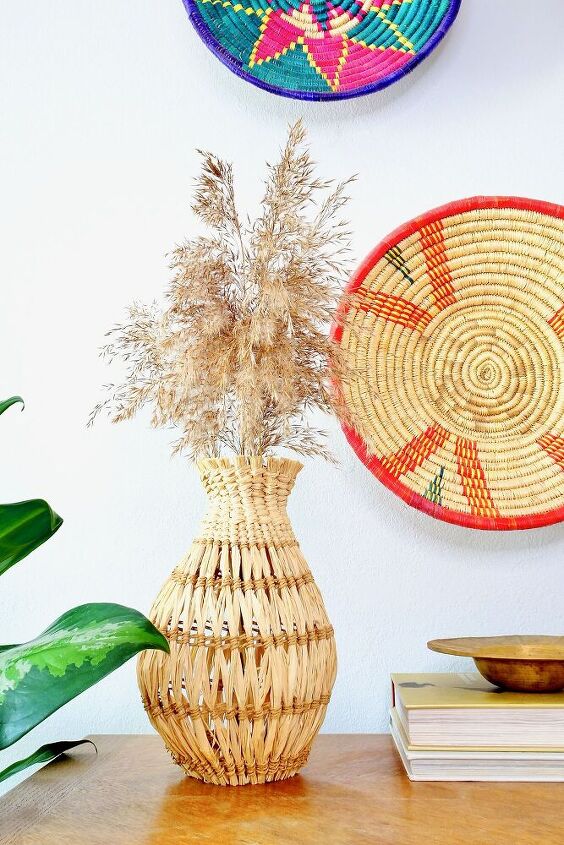
DIY Woven Vase With Raffia

I went on an experimental streak last week. I didn’t set out to create a woven vase. I just wanted to weave and started wondering what would happen if I weaved around a shape. So I grabbed a party balloon and started, blatantly winging it but carefully documenting as I went along – just in case.
Crafting “freestyle” was very soothing! I’ll show you the steps I took to create this vase below and I highly encourage you to be experimental with this tutorial.
Find the detailed step-by-step here!
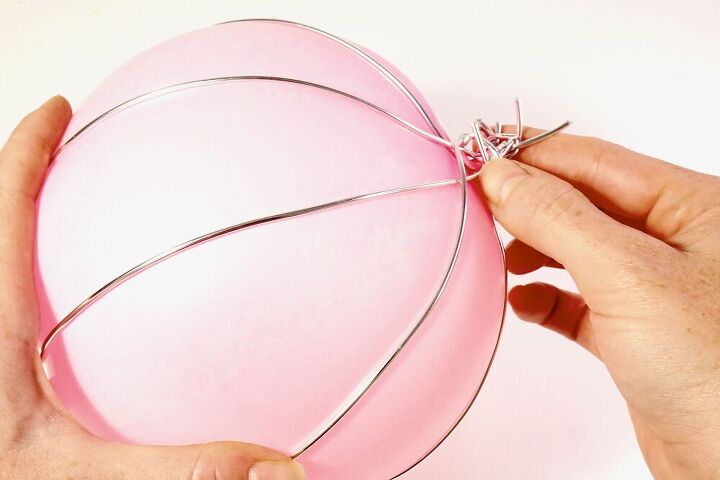
To start, inflate a simple party balloon and wrap it with metal wire to create a vase structure to weave around.

Next, create a bundle of raffia and tape the ends together with masking tape.
Spread your raffia to open up the bunch, place your balloon in the middle and tie the bundle shut again, with tape or a rubber band.
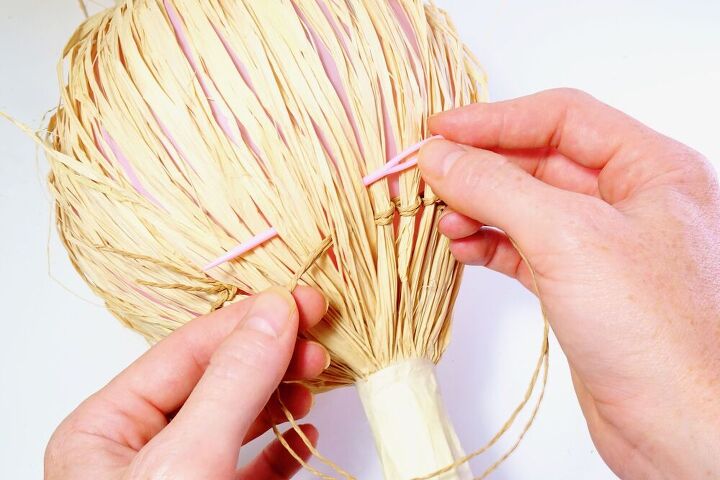
To start weaving, thread a plastic tapestry needle with a long piece of paper string or any other natural yarn. Weave around the balloon 2 or 3 times, pulling the bunches of raffia closer every time.
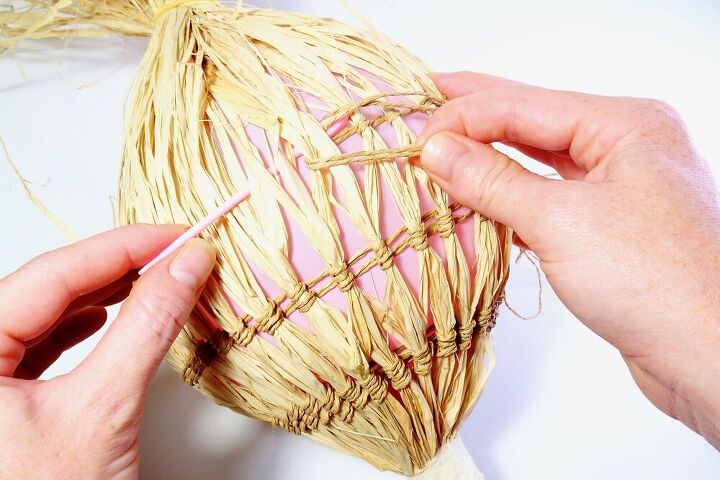
Continue weaving around the balloon at a few inches intervals twice. To reduce the space between the bunches of raffia, split the small bundles of raffia to weave around different pieces of raffia with every row. This adds a diamond pattern to the open weave.
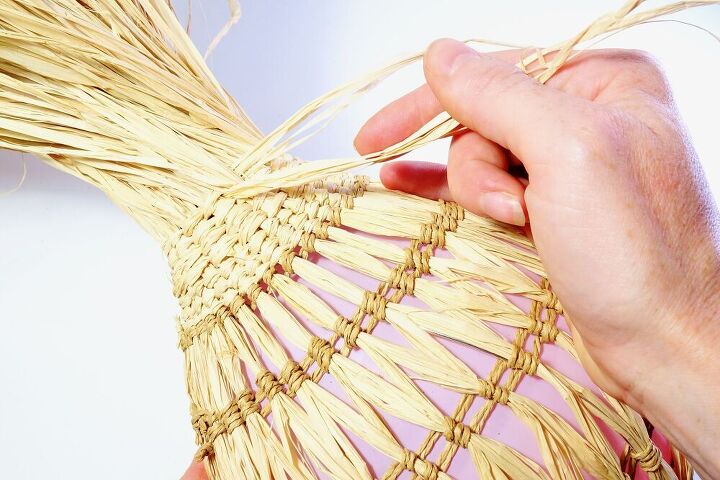
Once you reach the top of the balloon, open up the bundle of raffia and untwist the metal wire. This will give you more space and flexibility to weave the neck of the vase.
To weave the neck of the vase, weave tighter and tighter around the vase for at least 2″ (5cm). Then, spread your bundle of raffia apart to loosen it up and start weaving looser, gradually with every round, for another 2 inches. This will give the neck of the vase a gentle curve.
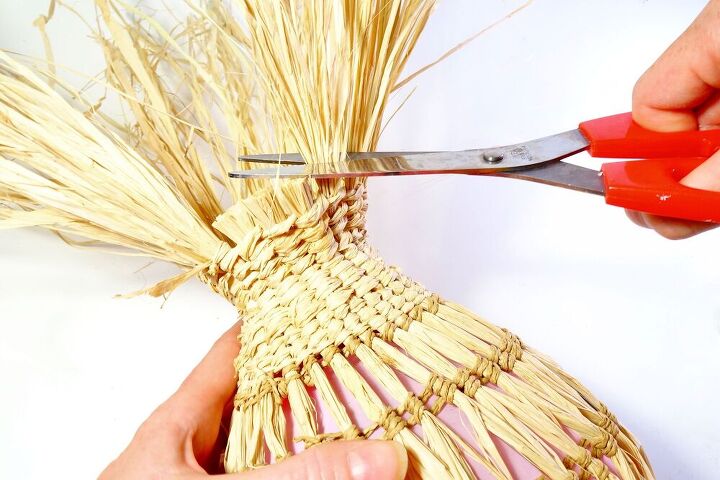
To trim the top and bottom of the vase, grab a pair of scissors and cut the excess raffia.
You now have official clearance to burst the balloon! 🎉
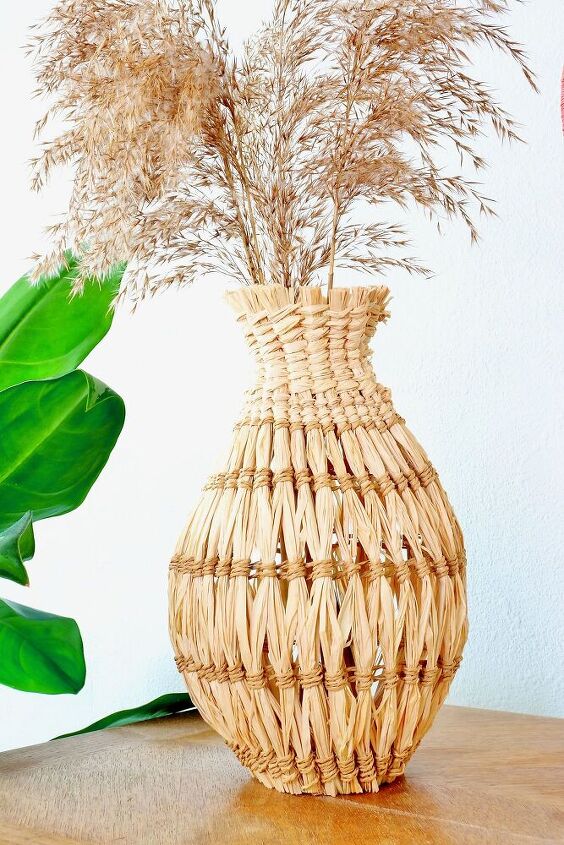
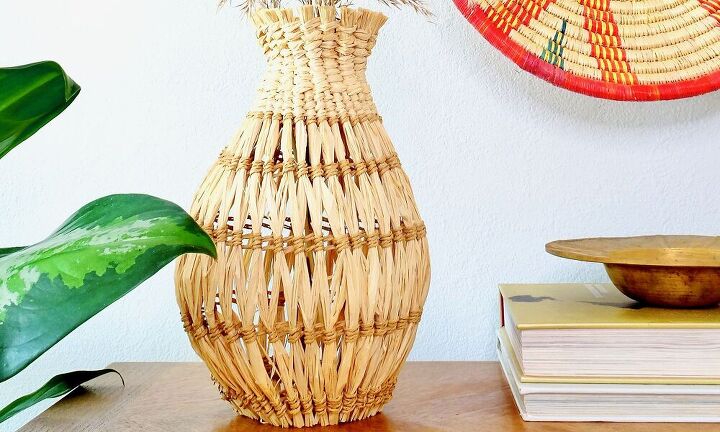
That’s all! Place your vase on a flat surface and slightly tap the bottom to adjust the metal wire until the vase stands up relatively straight. It’s fine if it has a slight wonkiness to it, it’s part of the charm 😉
Resources for this project:
See all materials


Comments
Join the conversation
-
Wow, that looks so nice. Thanks for sharing.😊 I wish my hands were better so weaving would be easier. You have talent & are creative. keep it up!!
-
Wow, that looks so nice. Thanks for sharing.😊 I wish my hands were better so weaving would be easier. You have talent & are creative. keep it up!!


Frequently asked questions
Have a question about this project?
Well done, thank you for sharing!!! Liv, did you also make the baskets on the wall??
is the paper string tied around the wire?