


Aging French Flower Pots - Vintage Society Co.
May 27, 2020
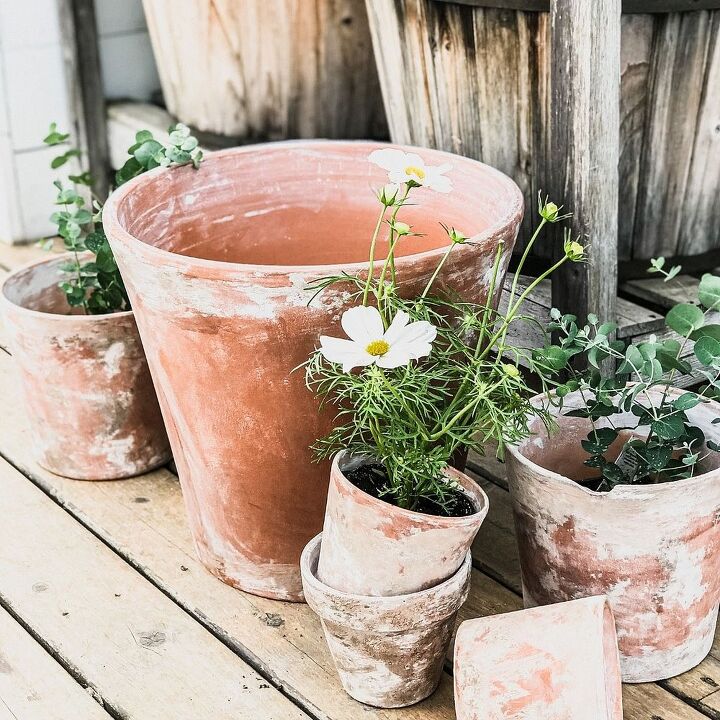
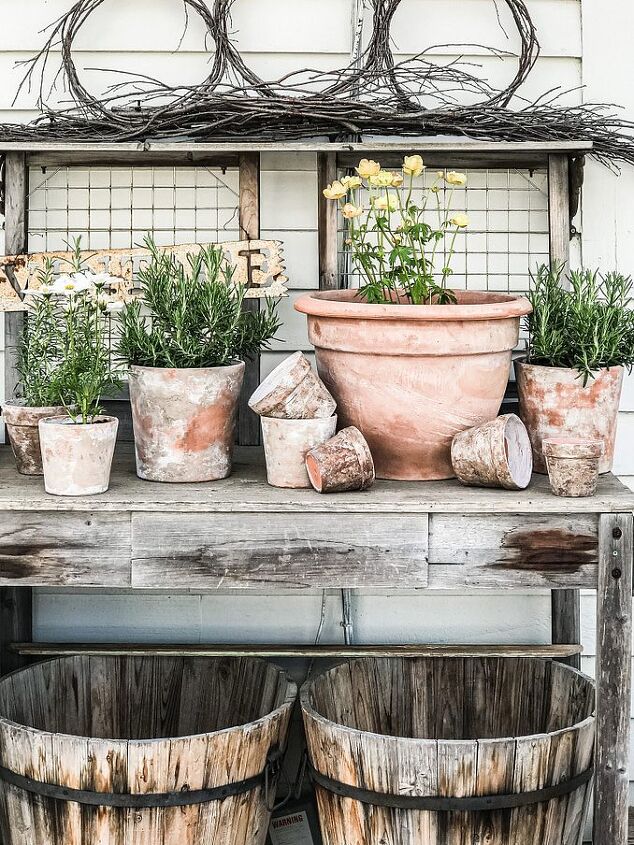
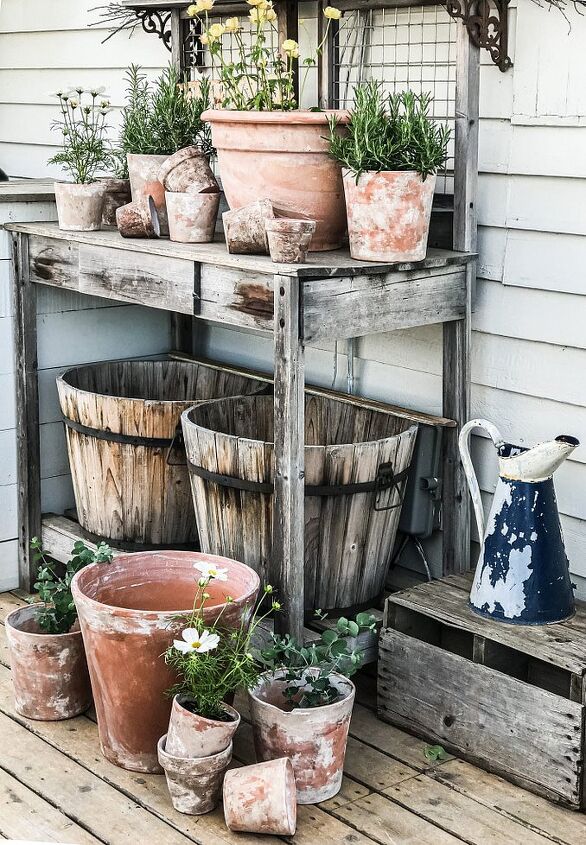
Aging Terra-cotta Flower Pots
It's no secret that we love flowers and french antiques. Since strolling through France antique shops is nearly impossible right now, we thought we would recreate the feeling of France here at home! This fun little craft of aging Terra-cotta flower pots was so much fun and the kids absolutely loved it! So grab those kiddos and let's get to it!
Deb's Aging Method
Supplies
- Terracotta flower pots of any size or shape
- Tile adhesive
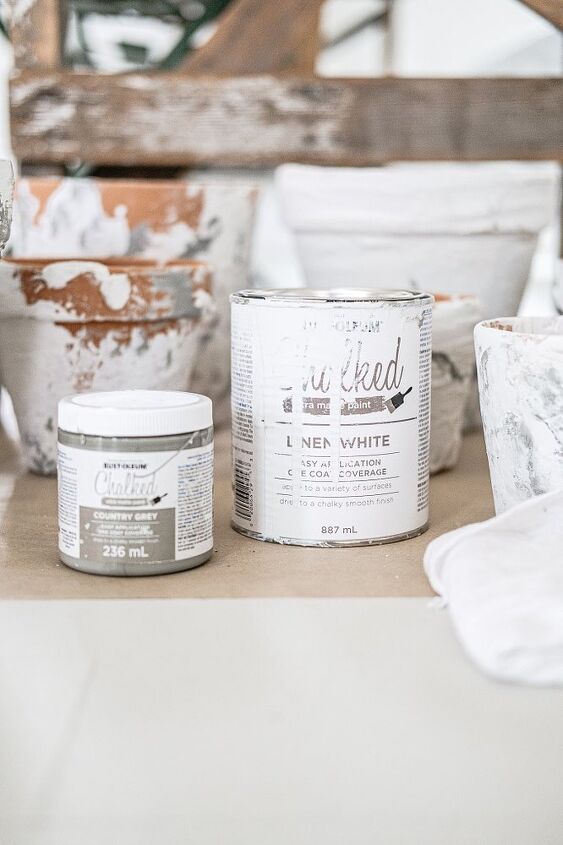
- Wood stain in a few colours, one a very dark finish
- Plaster of Paris
- Paint brush's and paper towel
Step by Step Tutorial
1. Begin by removing all the stickers and labels on the pots
2. Apply the tile adhesive in a dabbing motion using a paint brush. This will ruin your brush so be sure not to use a high quality brush for this part. You can add a lot or a little depending on how you want your pots to turn out. Remember, this will not come off so if you are looking for an authentic look, don't go overboard.
3. Mix a bit of Plaster of Paris into some wood stain to produce a watery paste like consistency. Apply this pasty paint all over the pots and let them dry!
4. Once the flower pots are dry, generously apply the darkest stain and then begin to wipe the pot using a paper towel or rag! You don't want to let this part dry before you begin wiping.
5. Continue to wipe the pots until you are happy with the look of the flower pot.
6. Optional - You could add a bit of green paint to the edges of the pot with a separate brush for a different look.
Flower Pot Project Tips
Careful not to apply to much of the tile adhesive. This adds texture to your flower pots which can look unrealistic if you use to much.
If you don't want your pots to loose any of the finished look, you can spray them with polyurethane after you are done. This will seal them up for good.
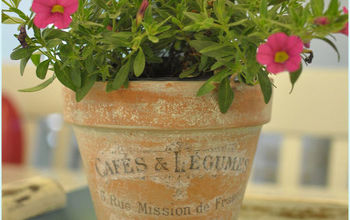
Deb looked for the pots at the store that already had cracks and chips. Then ask for a discount and save yourself some money. In the end, these pots will look the most realistic

We have plenty of french inspired and vintage antiques in the shop. Take a look HERE!
Sometimes finding an authentic home decor piece is just not practical. Britt and Deb love to recreate vintage items when they aren't able to find the "real deal."
The girls had been on the hunt for vintage terra-cotta pots for awhile but were unsuccessful a few years ago. However, while in France in 2019 they picked up a few vintage pots that they brought home. They have both come up with ways to make terracotta pots look authentic, just like the ones they saw in France!
Britt and Deb have each created a different DIY tutorial for creating some fun, unique pots using basic products from the hardware store.
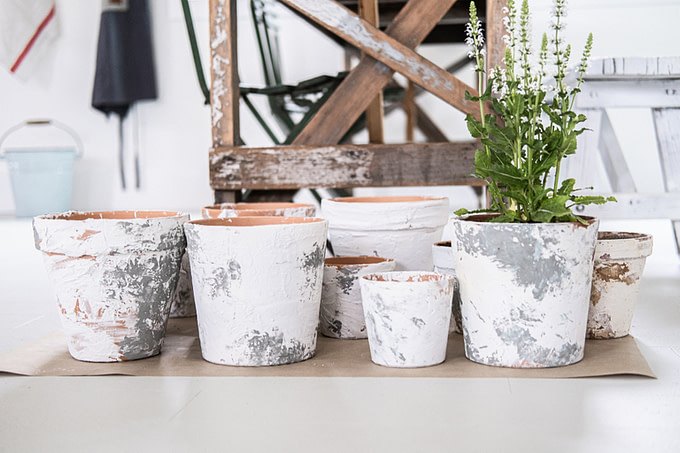
Britt's Aging Method
Supplies
- Pots - any size of shape of terra-cotta flower pot will work
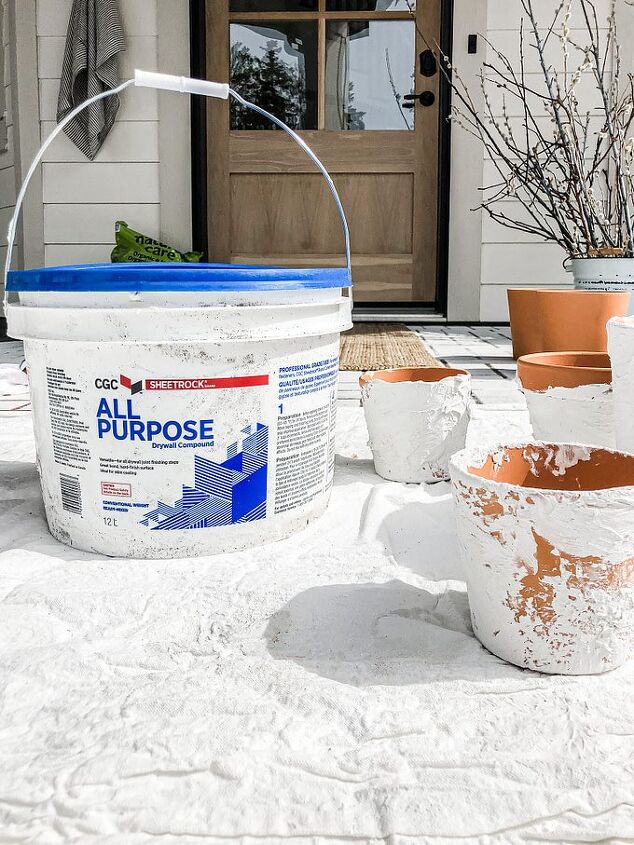
- Drywall Compound
- Paint (various shades of white, cream or green will work)
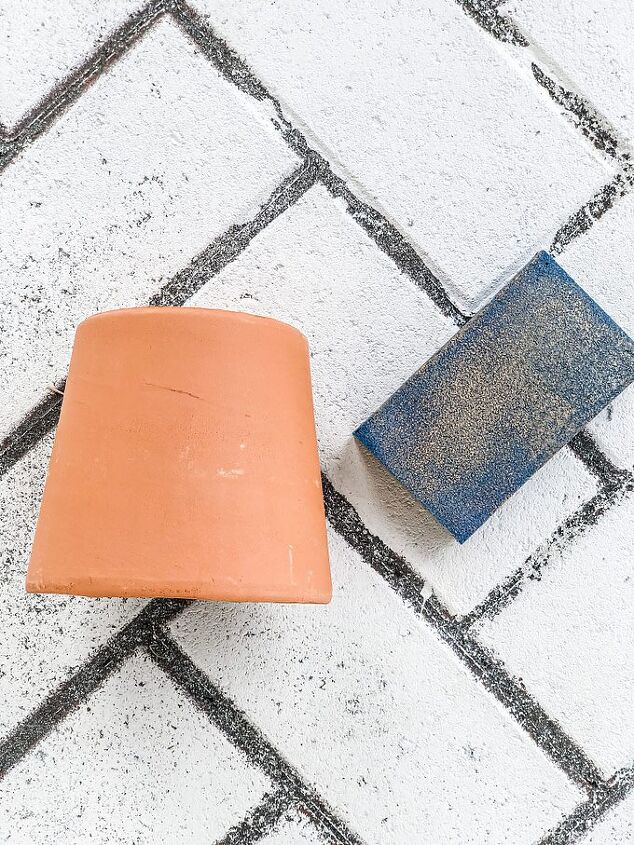
- Sanding Blog
- Rags for applying drywall compound and paint
Join the Vintage Society Community
Step by Step Tutorial
1. Take any size of terra-cotta flower pot and you may like to sand a few of the sides of the pot. If you are feeling brave you can even take a hammer and chisel and notch out pieces of the top of the pot. Of course you can easily break the pots doing this.
2. Take a rag and scoop up some drywall compound. Begin wiping the drywall compound on the terra-cotta pot. It all depends on the look you are trying to achieve with how much you apply to the pot. Britt also suggest leaving it thick it places to give the pot texture.
3. Let the pots sit and dry.
4. You can take the sander at this point and remove some of the drywall compound if you feel you put too much on.
5. Use a couple different colours of paint ... usually whites, cream, beige or olive greens will look best.

6. Again use a rag to apply the paint to the pot. Dap the rag on the pot to create a textured appearance. The different paint colours should overlap in spots to really create depth and a vintage appearance.
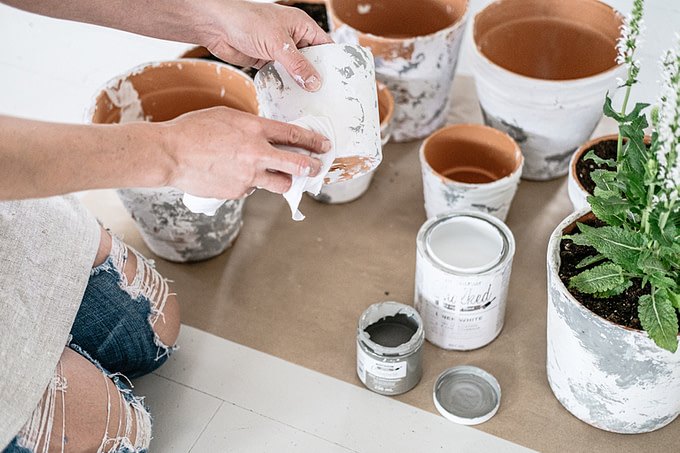
7. Let the paint dry.
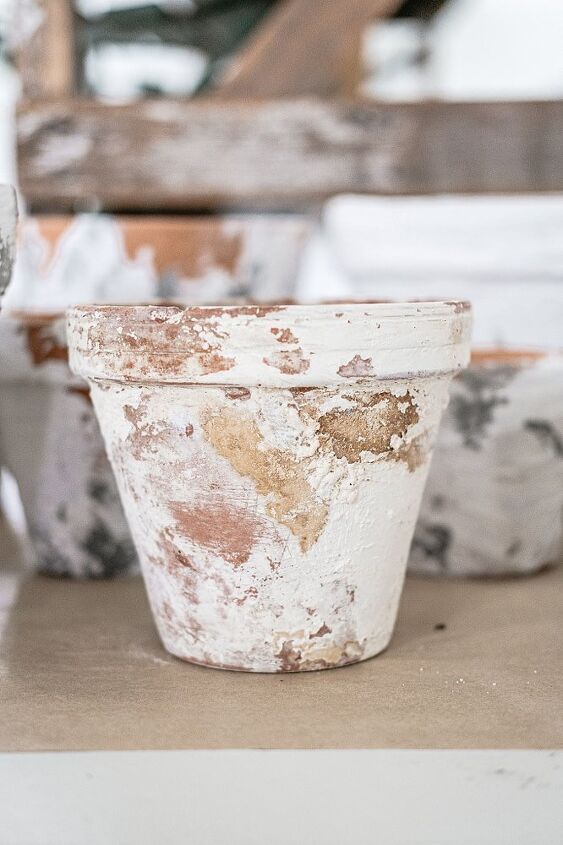
8. You can take a sander again at this point and remove some of the paint if you feel it was too much colour on the flower pot.
Get your garden on track with this FREE Garden Check list and Planning Chart
Tips for this DIY Project
- Do not get the drywall compound on the bottom of the pot as this will cause the pot to sit lop sided and also will leave marks on your surface when watering the plant.
- Let this pot "weather!" Because Britt uses drywall compound it begins to wash off with water. So letting it get rained on will cause an "aged" affect.
- You can also rub the pot in the grass to get "grass stains" on it! This also looks cool on the pot.
We hope you enjoyed our two ways to age terra-cotta flower pots. Both are super easy and come out with very authentic looking aged pots. Let us know if you try this fun DIY below! We always love to hear what you think!
Resources for this project:
See all materials


Frequently asked questions
Have a question about this project?
What do you call a canister missing its lid?
A flowerpot!