


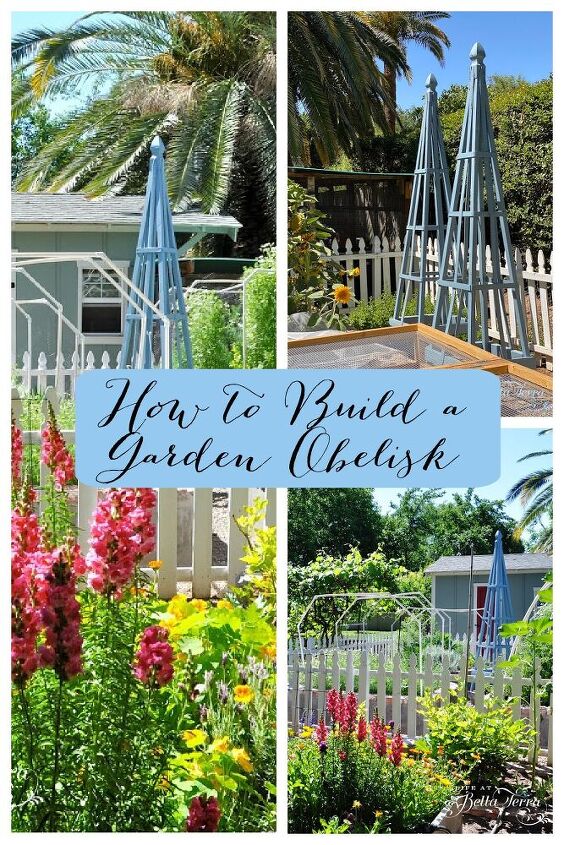
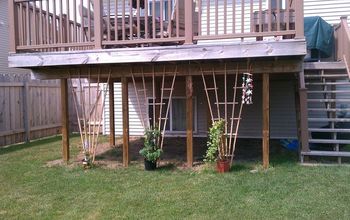
How to Build a Garden Obelisk
Garden obelisks are tall structures with pyramid tops used as garden decor and plant supports. They can create a dynamic arrangement in a seating area or courtyard garden, and they are perfect if you want to define the entrance to your garden. Obelisks can be used as a frame for climbing plants such as old fashioned roses, clematis, jasmine or honeysuckle. Want to learn how to build a garden obelisk?
My sweet husband has built a few of these for me in different sizes and heights inspired by a tutorial in Sunset Magazine in 2009. A partial article is available online, but the rest is hard to find. I did track down an online version but here is an overview. To see more about the design of my garden, click here.
List of Materials
You’ll need the following materials to build the obelisk.
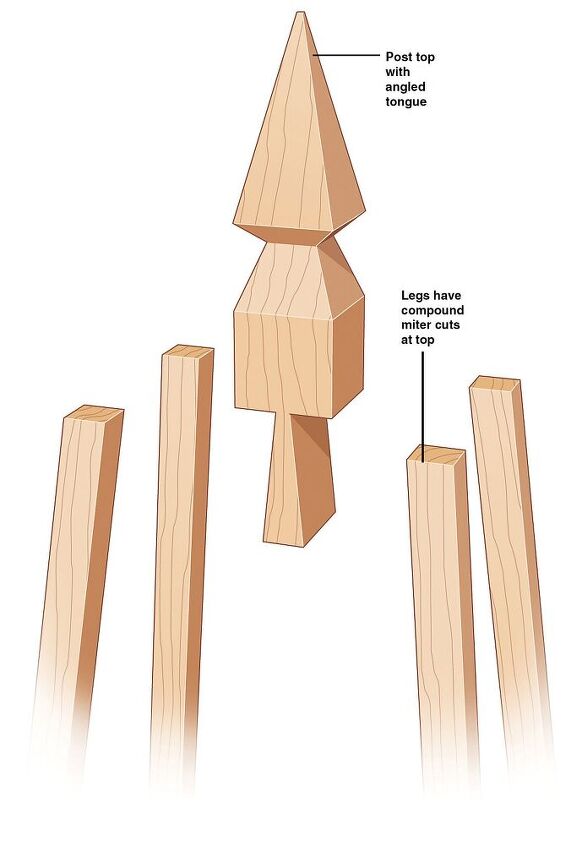
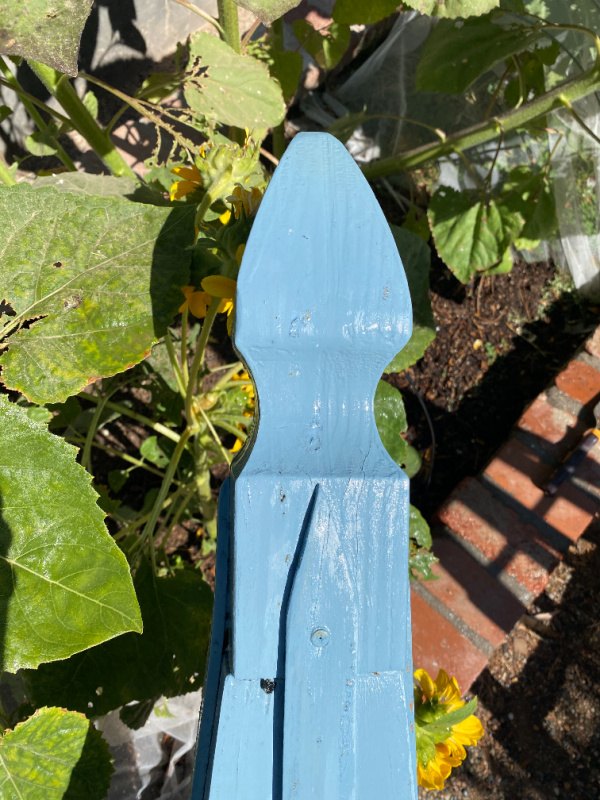
- One 4×4 fence post with finial, cut about 14″ long
- Four 8′ 2x2s for 93 1/2″ legs
- One 8′ 2×4 for four 22″ spreaders
- Four 4′ pieces of 1/4″ x 1 1/2″ lath, perhaps rip-cut from a 2×4, for: four 17 1/2″ lower crosspieces, four 14″ middle crosspieces, and four 10 1/2″ upper crosspieces
- Four 7′ pieces of 1/4″ x 1″ lath, perhaps rip-cut from 5/4 decking, for four long verticals
- Eight 5′ pieces of 1/4″ x 1″ lath for eight shorter verticals
- 1/4″ and 2″ decking or stainless-steel screws
Getting Started
Pro tip from Sunset: The importance of pilot holes
Especially when you are working with ¼-inch lath, which splits easily, countersink your pilot holes. Pilot holes seem like a hassle, but are well worth the amount of time they require. Use a drill bit that is slightly narrower than the screw or nail. The pilot holes countersink the screws, so the heads sit perfectly flush with the board for a neater appearance.
Cutting the Tongue
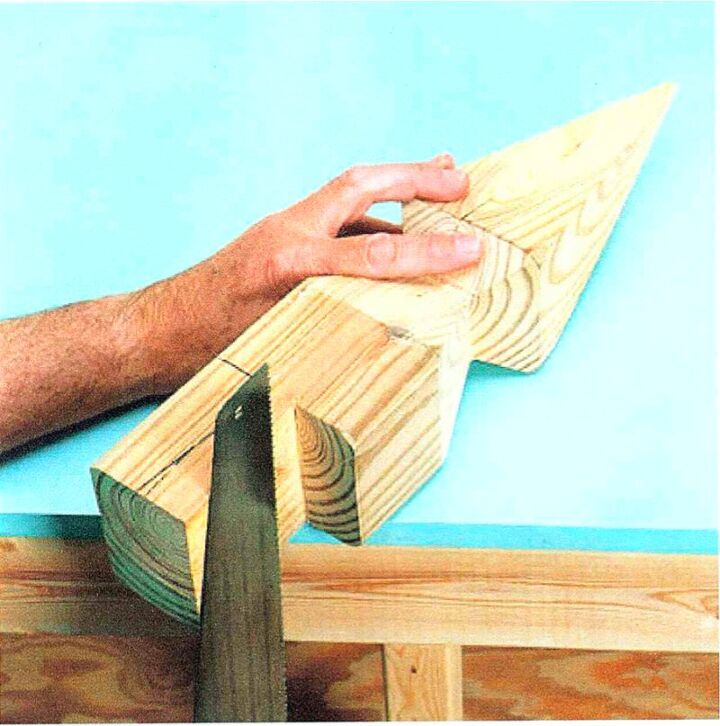
Mark the cut post top for a tongue. The tongue should be 3 3/8 inches long and wider at its base than at its shoulders. Make it 1 inch wide at the base, tapering to 1/2 inch at the shoulders.
Set a circular saw to make a cut 1 1/2 inches deep, and cut the line at the top of the shoulder. Then set the saw to full depth and cut the other (tapered) line, taking care not to cut too far.
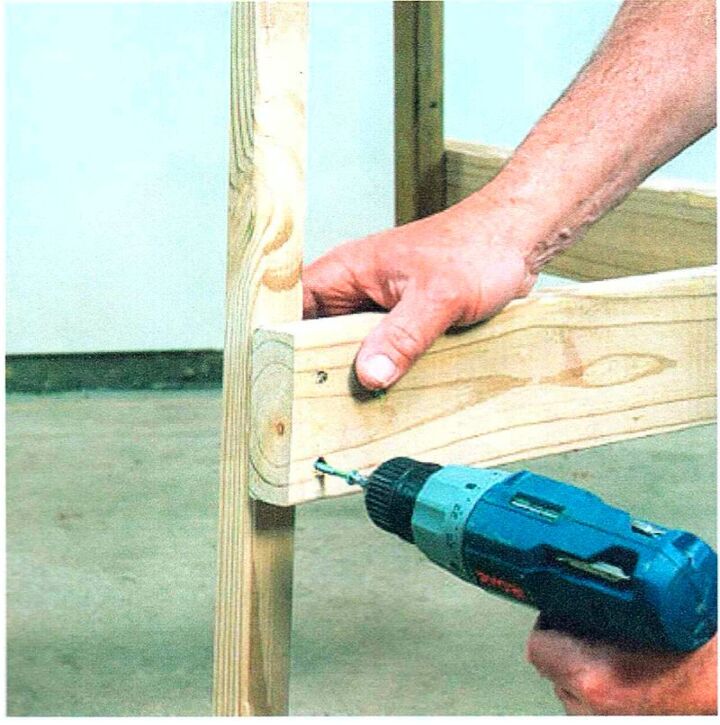
Attach the Legs
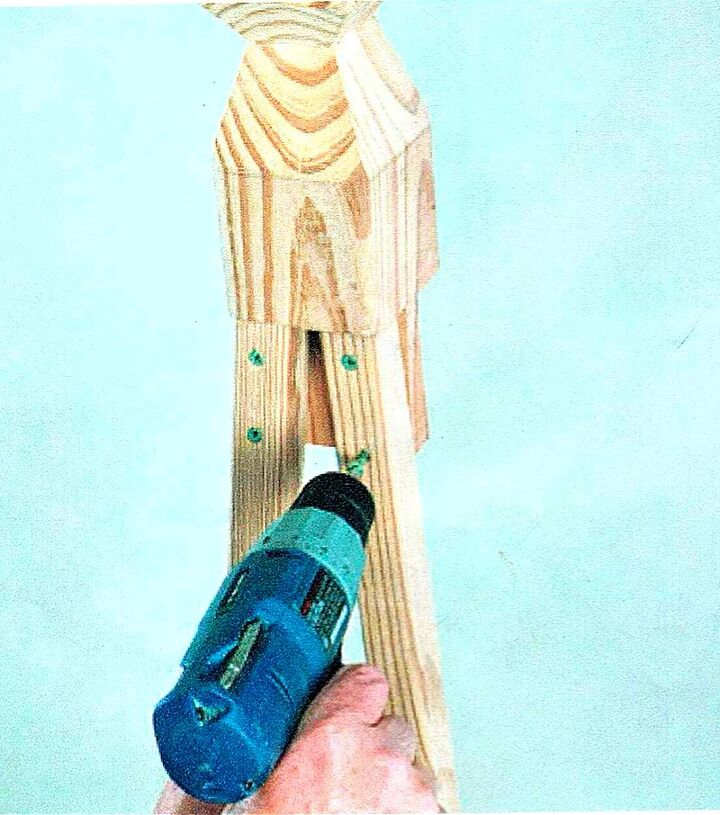
The tops of the legs are cut on a compound angle~this is, the saw blade is set at an angle, and it runs across the piece at an angle as well. The magic number is 6 degrees off square (that is, either 96 degrees or 84 degrees, depending on how you hold the square) with the blade also tilted 6 degrees.
Position the legs against the post tongue and test to see that the leg bottoms are fairly close to 22 inches apart; adjust the angles if needed.
Drill pilot holes and attach the legs to the post top with 2-inch screws.
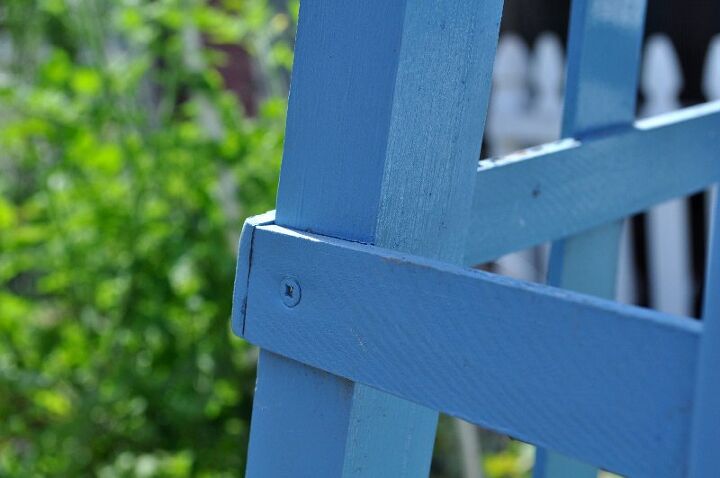
Install the Spreaders
Cut the spreaders to length, angling the ends at 6 degrees off square so they will follow the lines of the spread-apart legs. Position the spreaders about 10 inches above the bottom of the legs.
Drill pilot holes and screw the spreaders to the legs. You may need to flex the legs a little to make the spreaders fit.
Attach the Inner Pieces
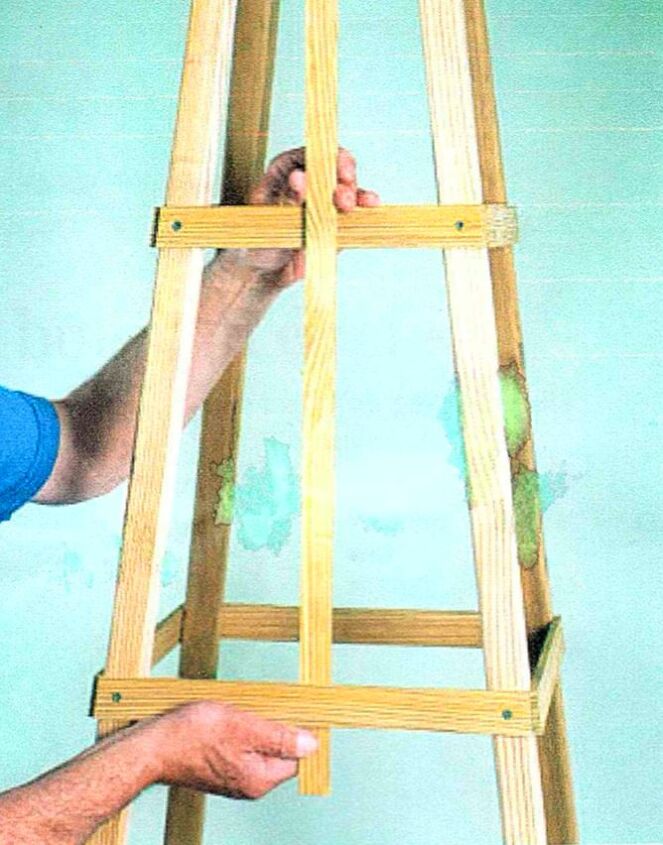
Cut the crosspieces, angling the ends at 6 degrees off square. Space them 15 inches apart on the legs, starting from the top of the spreaders.
Drill countersunk pilot holes and screw the crosspieces to the legs with 1 1/4- inch screws. Weave the verticals over and under the crosspieces. Fasten the verticals to the post and the spreaders with 1 1/4-inch screws.
Finish
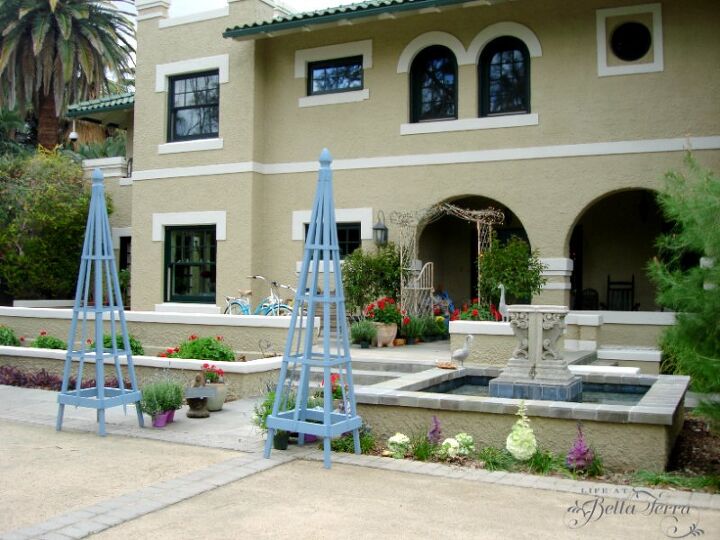
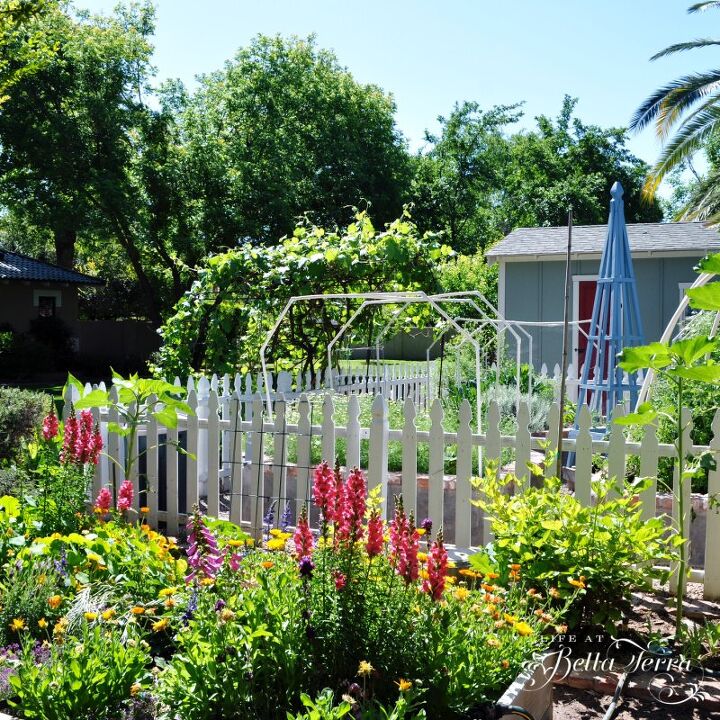
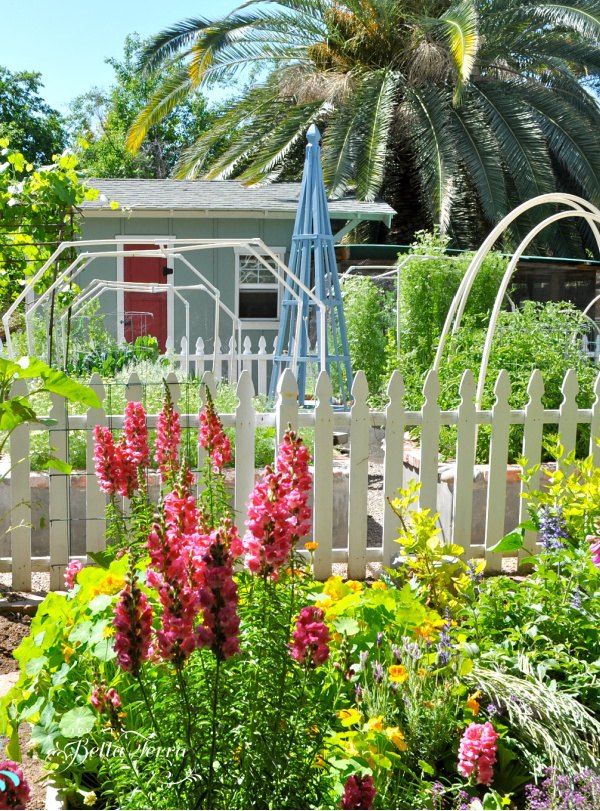
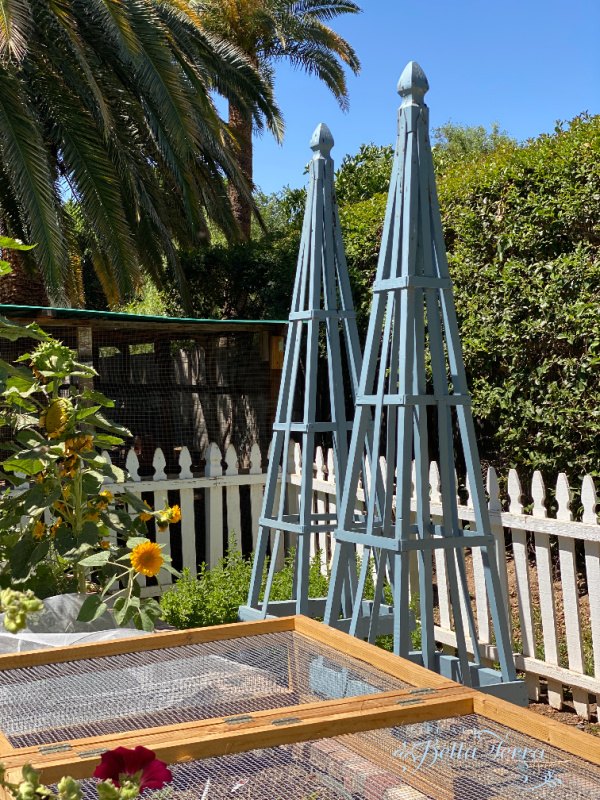
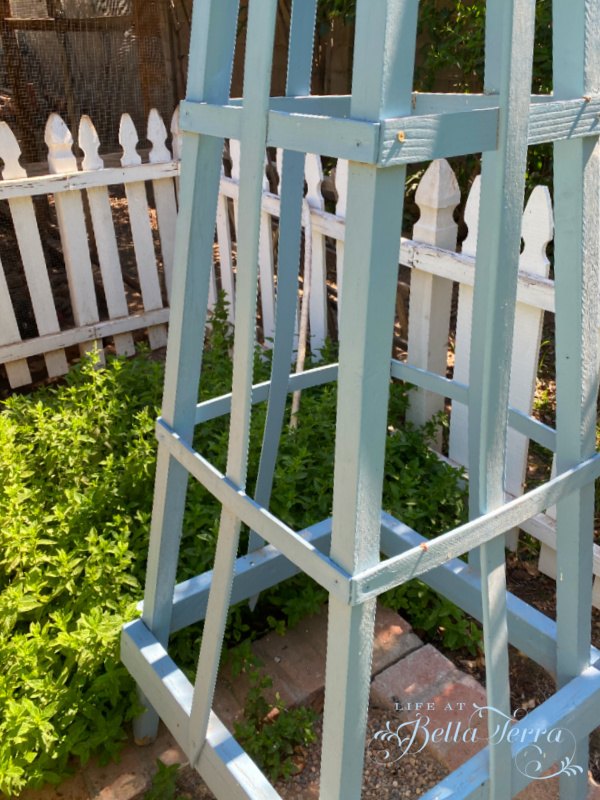
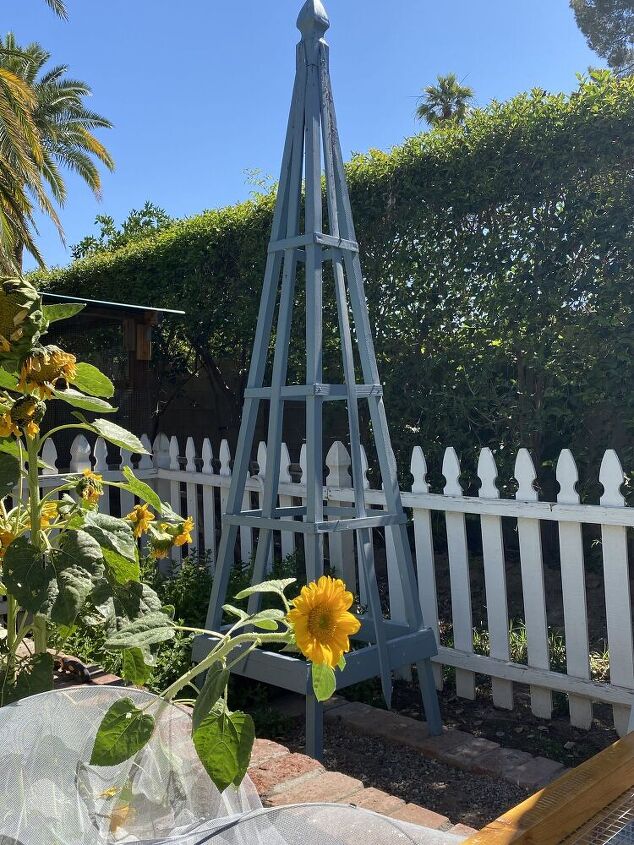
Now that you have built your own garden obelisk, it is time to finish it. I love the French blue paint used on our obelisks. Not only do they serve a purpose in the garden, but we also use them as props for entertaining. In hosting a French-themed dinner party, the obelisks mark the entrance for the guests.
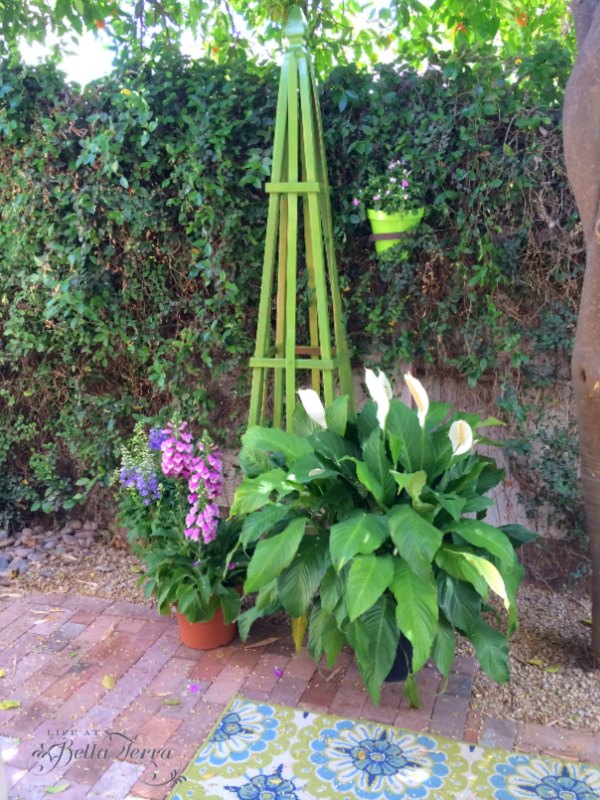
My husband loves the color green and did paint one of the smaller obelisks this shade. This sweet obelisk enhanced the back yard of one of the properties I renovated. To see more, click here.
Obelisks add a bit of glamour to your garden and not only are they attractive, but functional as well. Not only can you build your own garden obelisk, but there are many available for purchase in additional materials, from wrought iron to wood.
Amazon has a great selection of obelisks at all price points here. Happy obelisk shopping!

And now for more yard and garden DIYs from my creative blogging friends.

Niky from the House on Silverado makes this very sweet garden bench here.
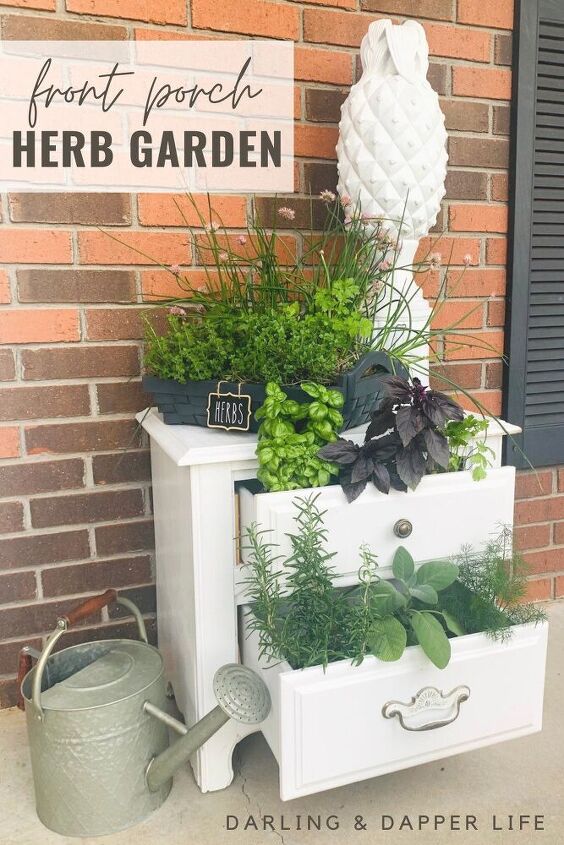
Allison from Darling and Dapper Life demonstrates how to grow fresh herbs on her front porch.
Chas from Chas Crazy Creations shows us how to create a DIY Garden Sphere (with a video too!) here.

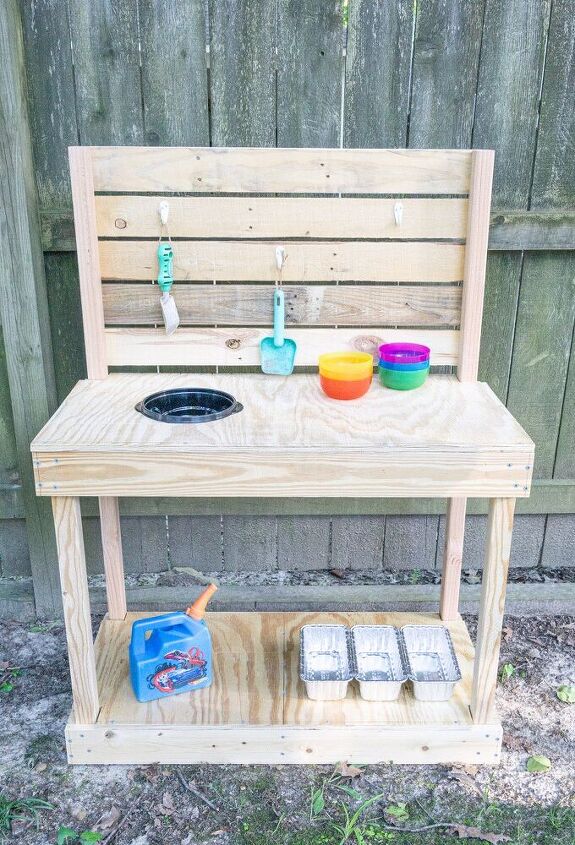
Need a playful outdoor mud kitchen? Amy from Health Home and Heart shares her DIY project here.
Look at this cute storage cubby for your garden made by Tarah at Grandmas House DIY.
This post shared with Thursdays Favorite Things
Resources for this project:
See all materials


Comments
Join the conversation
-
Carole, thank you for your nice comment. Would love for you to check out my blog!
-
Absolutely beautiful!!


Frequently asked questions
Have a question about this project?
Now you are inspiring me! We don't have picket fences much down South backwoods. We have barbed wire and hog wire fences. Could you take maybe 3 slats of picket fence and make something like this project? I'd have to use my table saw to split the top part thin enough to bend it and probably soak it in water a bit. Clamp the 3 pieces together so their edges stick out and centers are close together, maybe attach to a dowel in the center? Then basically make a tripod similar to the obelisk. Climbing roses would look amazing on your obelisk, but clematis need something smaller around to climb on.