


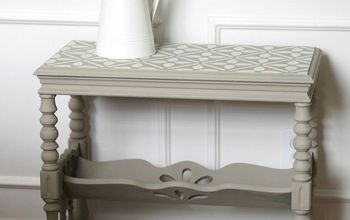
Dated Desk to Chic Console Table
Do you remember the dated desks we were given? Have you been following along waiting to see the final project we’ve made? If so, today is that day. We are sharing how we made an entryway console table out of a worn out desk.
Supplies:
Desk frame
1/4” plywood
Reclaimed wood planks
Wood glue
Black medium thick instant adhesive
Paint
Danish oil
Scrap wood pieces
Wood filler
Odorless mineral spirits
Lint free rags
Odies oil
Tools:
Drill
Table saw
Tape measure
Miter saw
Random orbital sander
120-220 & 320 grit sanding discs
Circular saw
Planer
Clamps
Finish nailer and nails
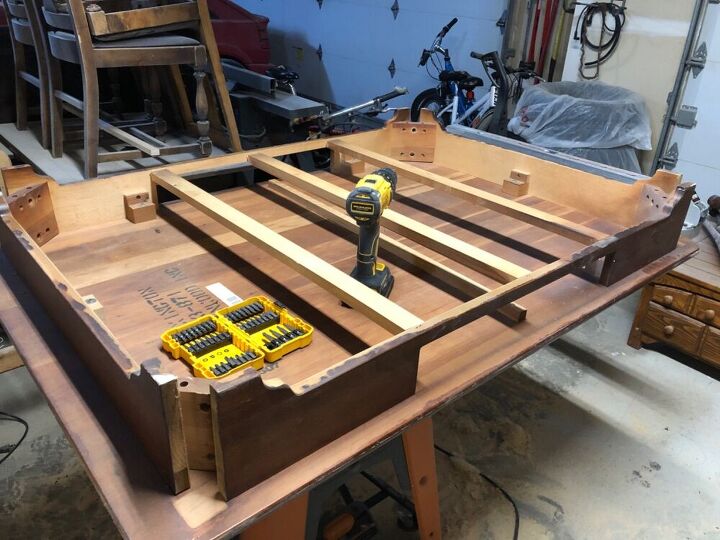
After removing the desk legs, drawers and top, I decided how deep I wanted the table, and measured from the front and rear and marked how much of the center to cut out.
This required two cuts on each side, as well as the supports for the drawers.

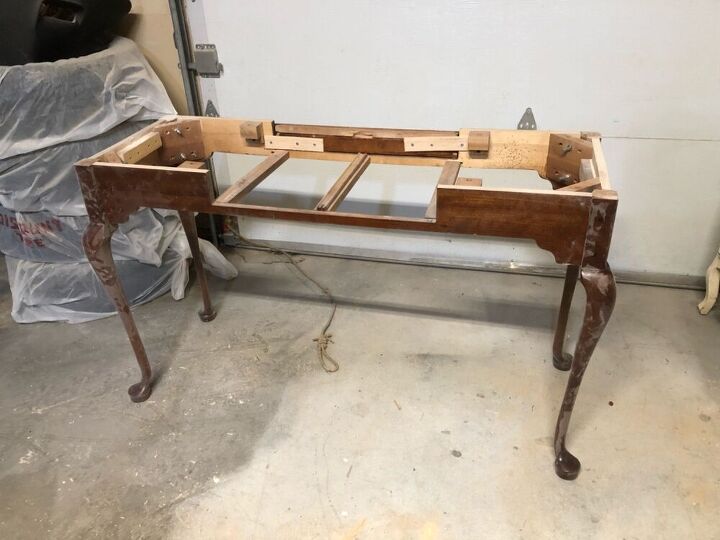
I put the legs back on, applied wood glue to the ends that would be connected, clamped them together, and used some scrap wood as bracing on the inside.
Once the glue was dry a put wood filler across the seam, joining the two halves together.
Once this was dry, I sanded it smooth with the orbital sander.
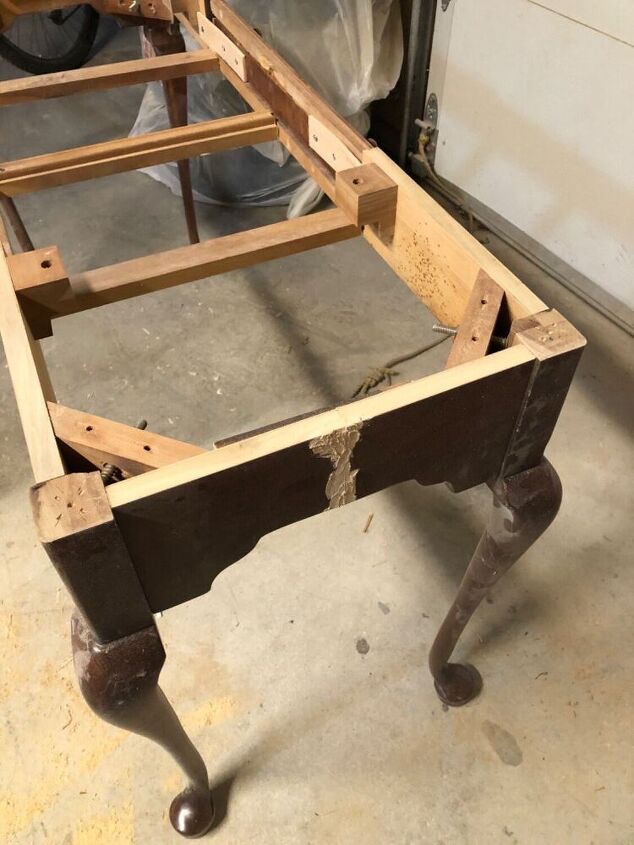
The desk originally had a drawer on each side of it. I wasn’t planning on having functional drawers, so I took the front off of one drawer and used wood glue to glue it to the desk covering the original drawer hole. On the opposite side, I kept the drawer intact and secured it in place. This will allow making it functional in the future easy if I decide too.
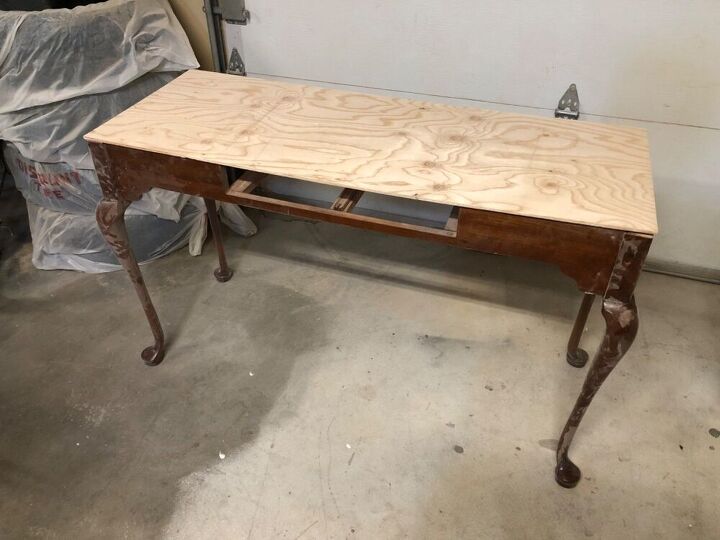
At this point, I measured the top, and used my table saw to trim a piece of 1/4” plywood to fit. The desk legs are curved, so I left about two inches extra on the backside so when the table is pushed flush to the wall, the top and legs are both against the wall.
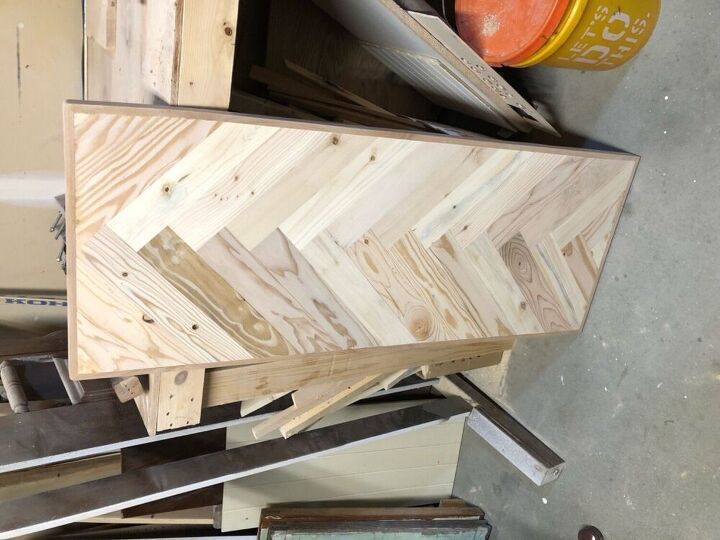
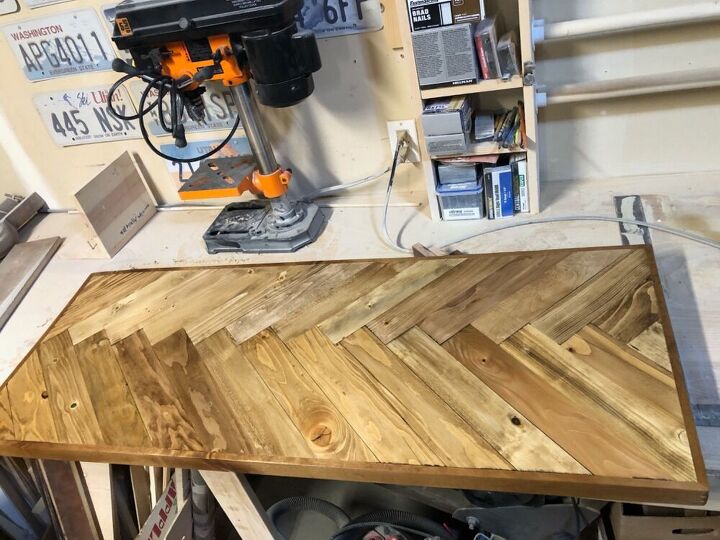
Now comes the fun. I had a bunch of reclaimed wood pieces that were different widths, lengths and depths. I wanted to arrange these in a chevron pattern for the top. I began by using my table saw to trim them all down to the same width. Once that was complete, I cut them to approximate needed length, leaving a few extra inches. Once the were cut down to length, I began sending them through the planer. Some were a little thicker than others so they took several passes through the planer.
Once I was happy with the arrangement, I applied wood glue to the bottom of each piece and placed them down, using some scrap wood and clamps to create a press. When the glue was dry, I used the circular saw to trim the top pieces to match the 1/4” plywood they were glued to.
Using some leftover wood from another project , I cut some pieces on my table saw to create a trim around the top. I attached the trim with wood glue and 1 1/8” finish nails.
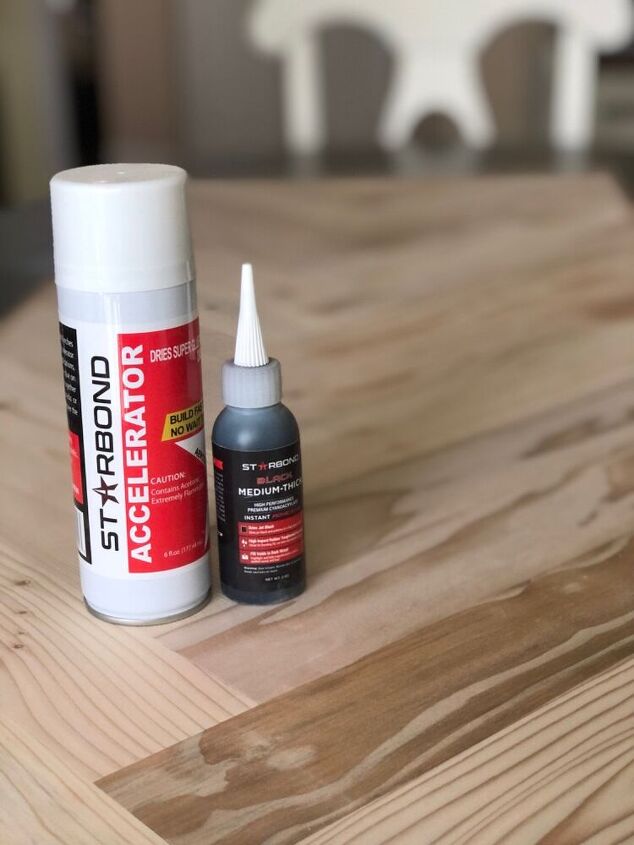
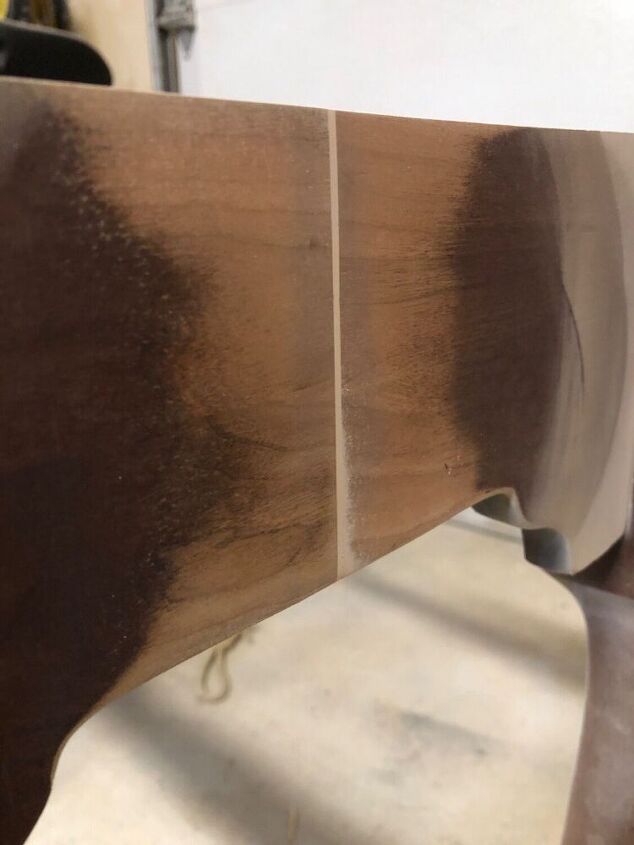
At this point the top was completely assembled, ready to finish. Some of this older wood used for the top, had some cracks and knots, as well as a little tear out from the circular saw. I used my black, medium thick adhesive to fill these cracks and blemishes, then sanded the whole top smooth.
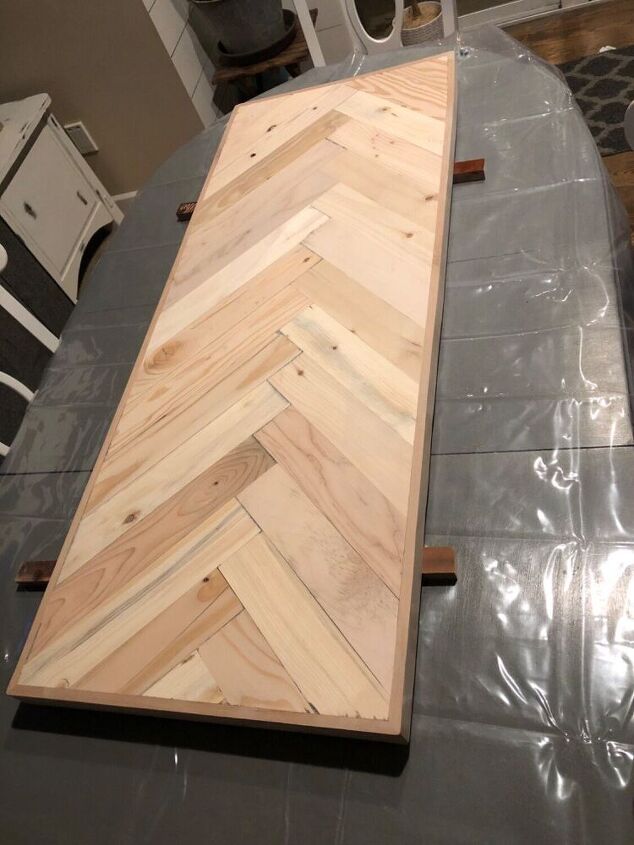
On this top I started with 120 grit sandpaper then 220 and finished with 320 grit on the orbital sander.
With the sanding complete, I wiped the whole top down using mineral spirits and a lint free rag. Mineral spirits is great because it doesn’t raise the grain in your wood. I allowed it to dry completely.
Applying the danish oil with another rag and allow to dry. As soon as the oil was dry I also applied a coat of Odies oil, and after about 2 hours buffed off any excess oil.
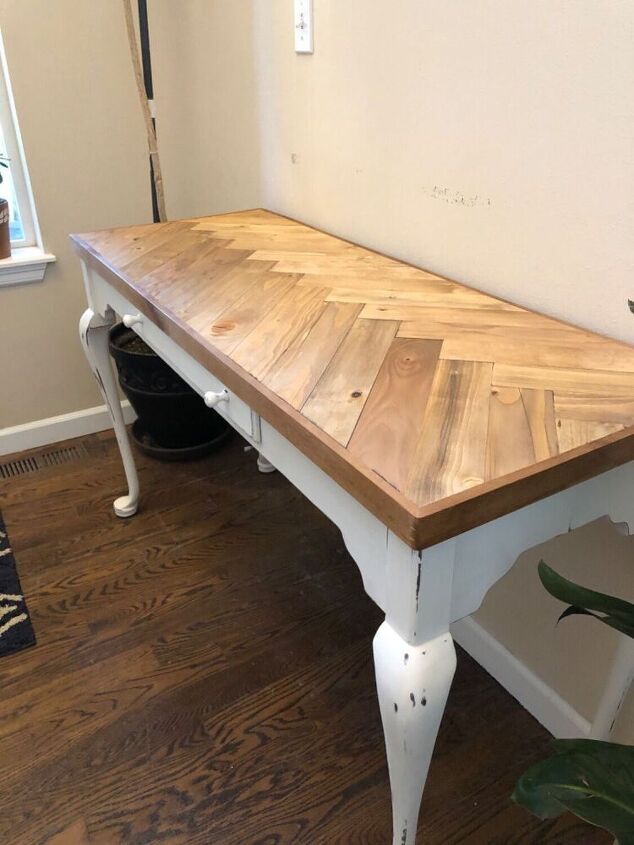
I applied three coats of white chalk paint to the legs and frame, then sand distressed it. After wiping the dust away I applied a coat of clear wax to seal it. Once everything was dry, I placed the top on the base, and secured it with 1” screws.
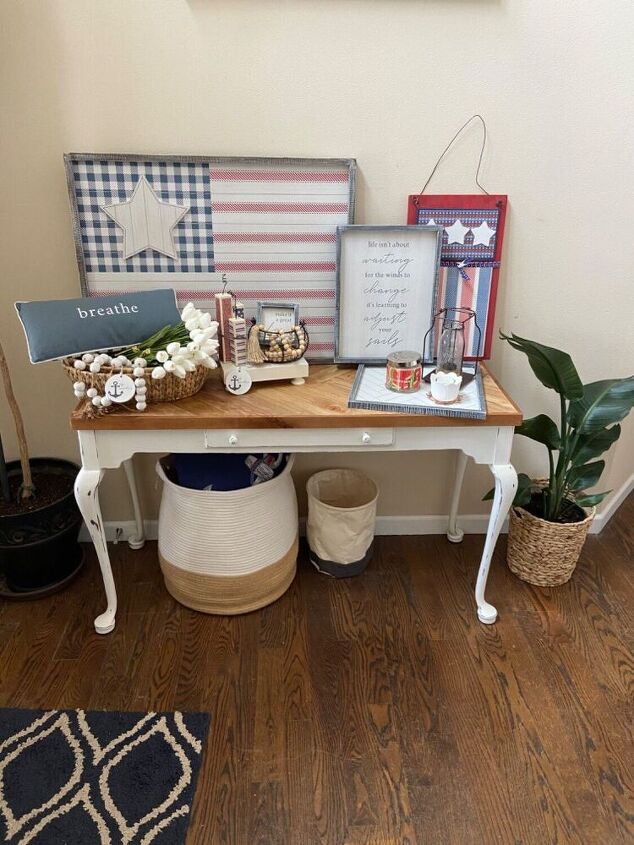
It’s been a fun addition to our entryway and we have enough materials leftover to make one more Console table. Because we were using materials from previous projects, this was fairly inexpensive. Showing you how you can take one thing and make something completely different out of it has been a fun challenge for us. As well as using almost everything we had on hand. We did purchase the screws and we did have to buy more clear wax seal. (Our estimated cost is for only the items we had to purchase, yours could be more).
Check out more of what we do and how we style our home on our Instagram page @therefininghome
Resources for this project:
See all materials


Comments
Join the conversation
-
What a gorgeous tranformation!
-
Love the Chevron top you created.... just beautiful...!


Frequently asked questions
Have a question about this project?