


How I Designed an Easy Diy Outdoor Living Wall - A Life Unfolding

Since it’s Memorial Day and the unofficial 1st day of summer today, I thought I’d share with you my latest outdoor project. I DIY’d an easy outdoor living wall!
I DIY’d an easy outdoor living wall! I have to say I am delighted with how this one turned out. I have wanted to add a living wall to an outdoor space forever, and I finally decided to go for it. I am sharing how I made it, why I choose the plants I did, and what I will do differently next year!

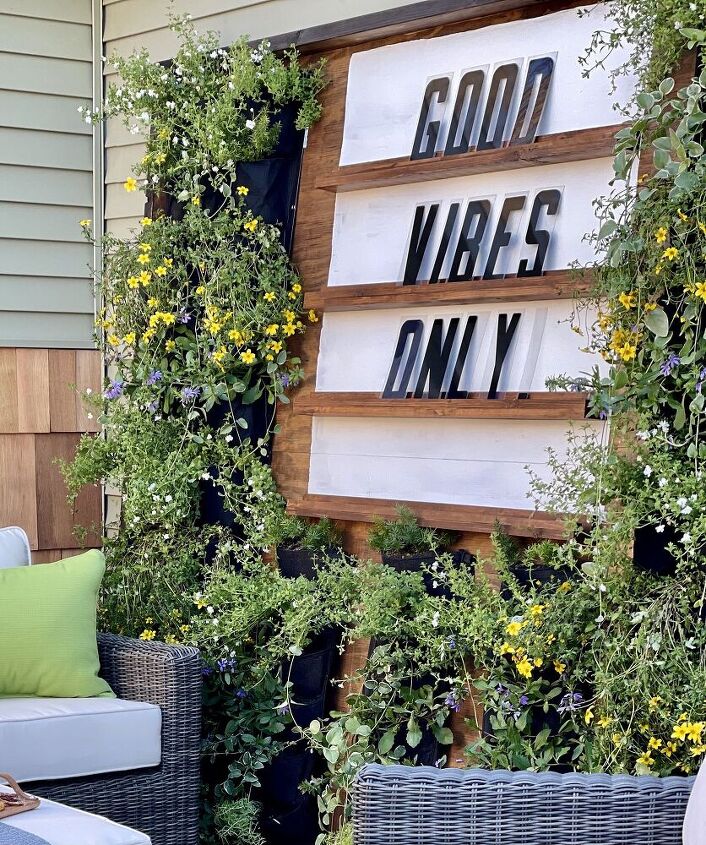
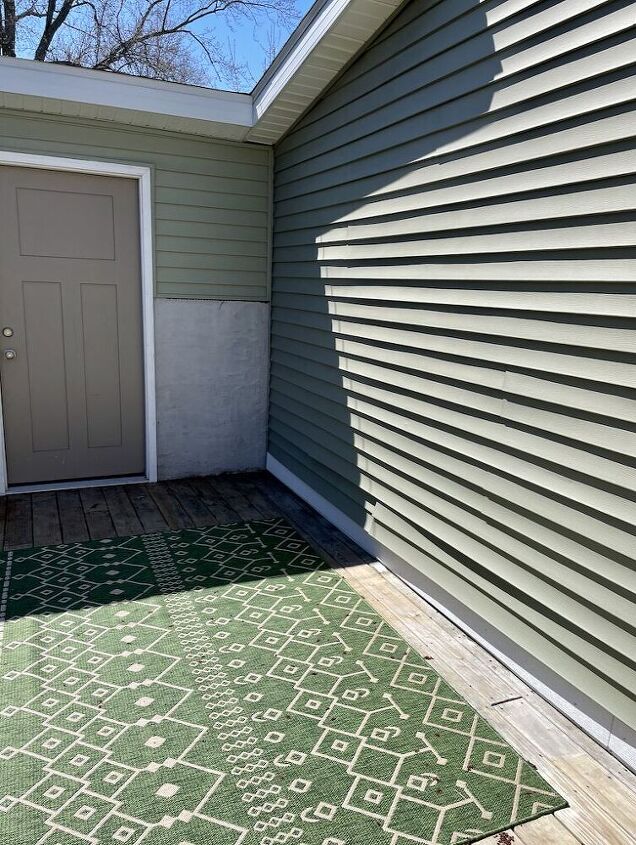
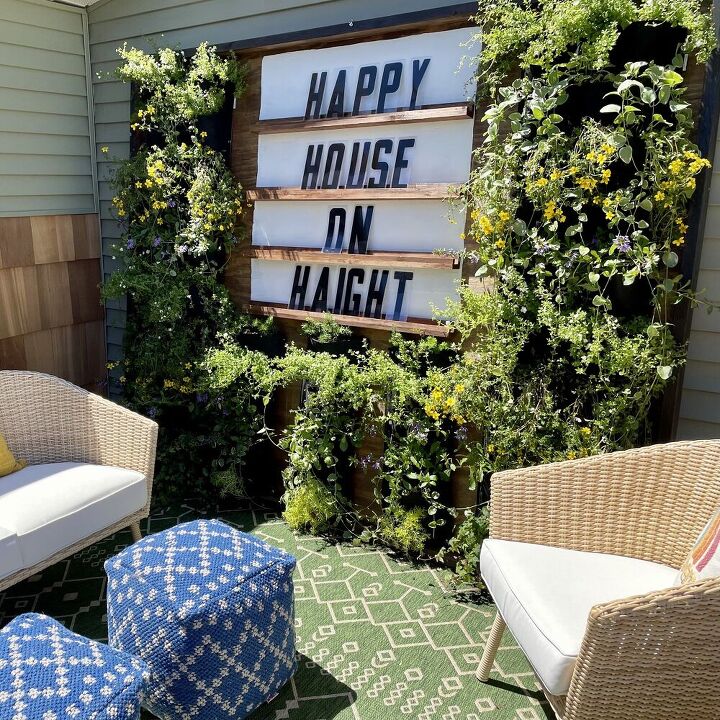
I decided to add a living wall to our outdoor space at the Airbnb because we are working on refreshing this area, and as it turns out, we had a large enough space to put it. Once I had chosen the space, I decided it would be fun for the guests. If I added a Giant Letter Board, I could leave welcome messages for our guests on it. I’ll share that portion of the DIY in an upcoming post.
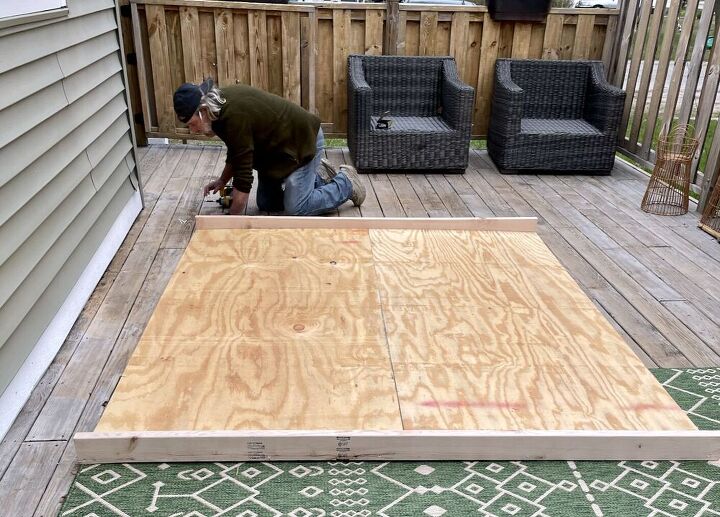
Step One: Measuring the space, so I knew how large I wanted the overall structure. I knew I did not want something permanent. So I wanted something that would lean rather be attached to the house. I wanted something we could change if we decide to sell the house.
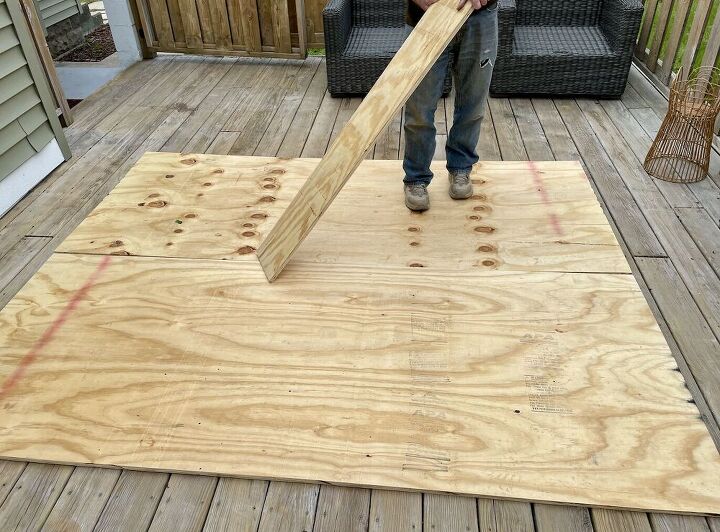
We started with 2- 4 x 8 pieces of plywood that we cut 6 inches from, giving us a frame of 7 ft x 8 ft. We then secured them together with one strip of plywood from what we had cut off the original pieces to the back of the plywood to give it some additional support.
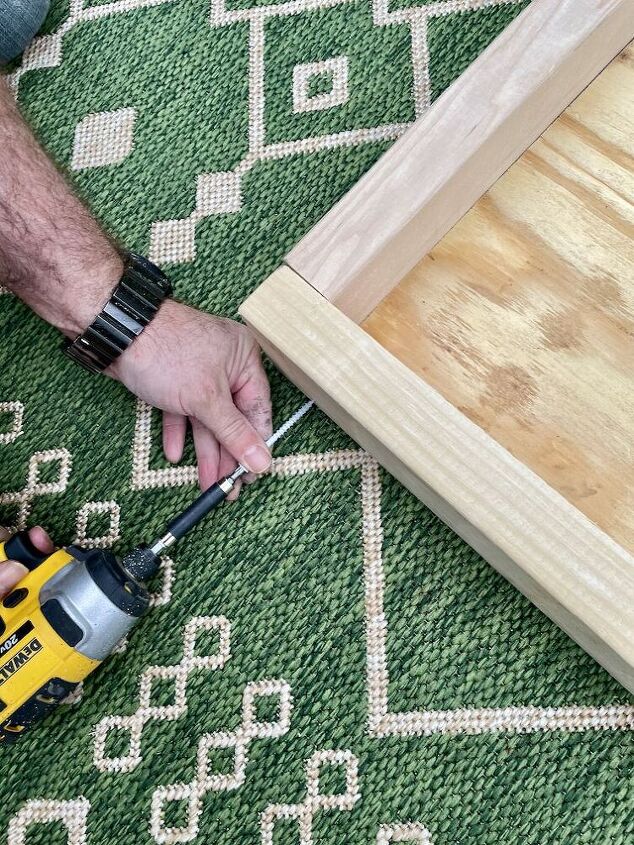
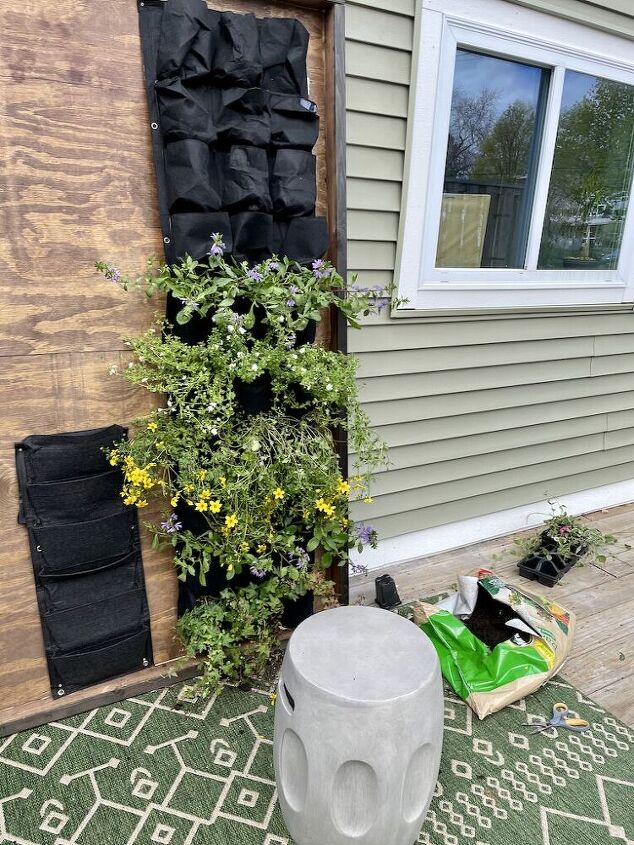
Once we had our base, we built a frame around it. I wanted the plants to sit inside a frame. We secured with screws 4- 2 x 4 x 8 pieces which we cut to size all along the outside.
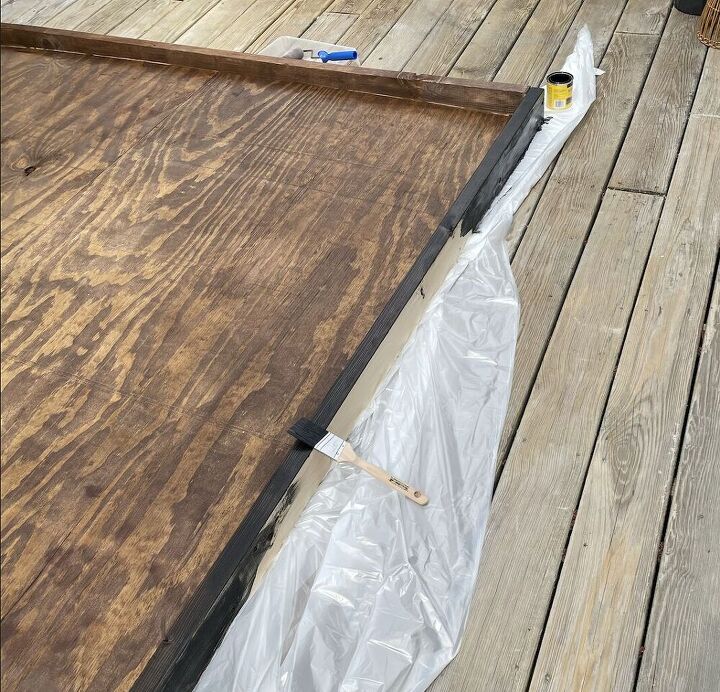
Once the frame was completed, I stained the plywood with Minwax Early American stain and the frame with Minwax Ebony a black for some contrast. Then I used 3 coats of polyurethane to seal the entire piece for added protection against the elements. I will probably add another coat in the fall.
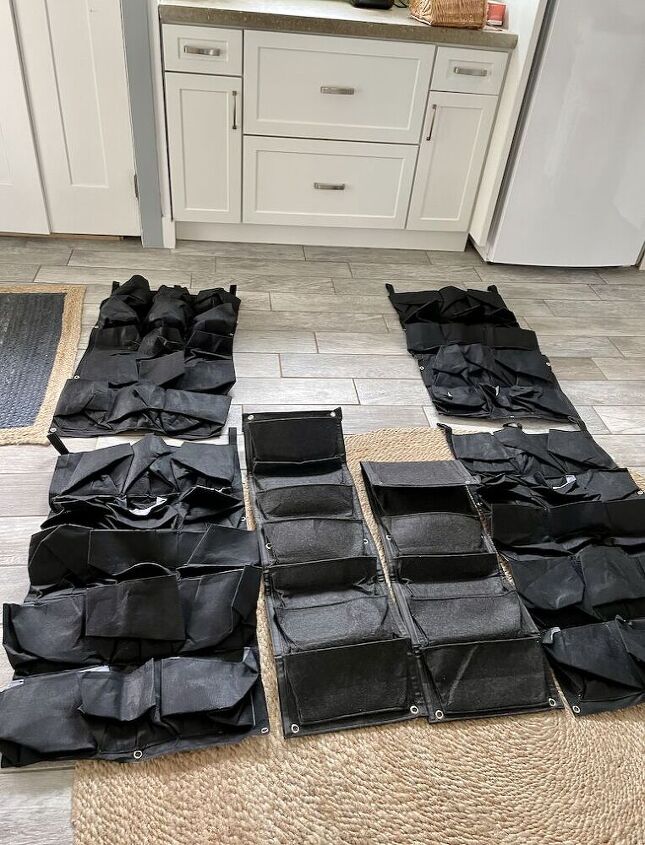
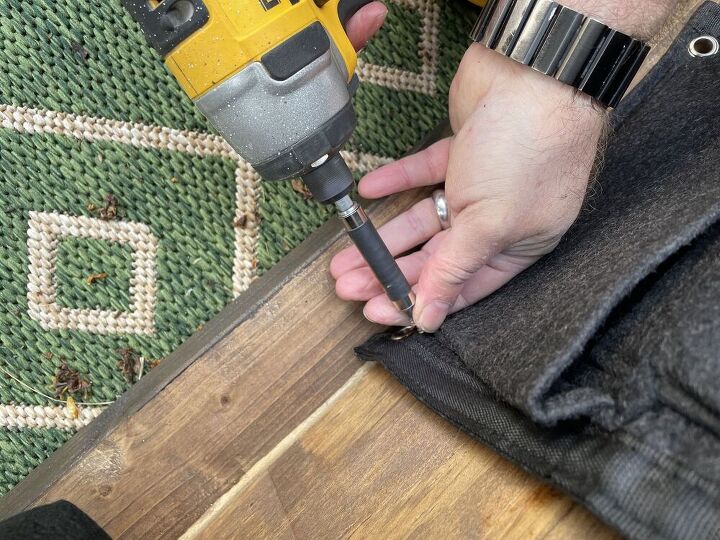
Now it was time to add the vertical grow pockets. They are made of a heavy-grade felt material. I used these large vertical wall pockets for 4.5-inch plants. I mixed a variety of the 7 pocket version and 12 pocket version. I laid them out for spacing before we secured them.
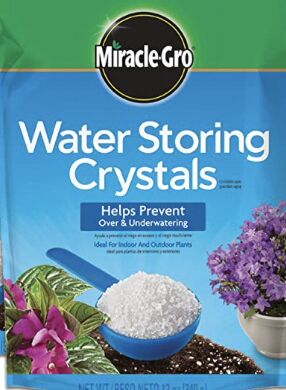
Once the vertical wall pockets were attached, it was time to plant. Since I was using 4-inch plants (which tend to dry out quickly I also used a product that I have success with in the past. Miracle Grow Water-Storing Crystals. These were very helpful with my patio containers last year, and I have my fingers crossed they save me some watering this year. When planting, mix in the crystals with the soil (I like to avoid the roots). Follow the directions when adding to existing plants. You have to be careful not to add too much.
The plants I choose: Moonbeam Coreopsis Vinca Vine Ajuga Bugleweed Campanula (white) Asparagus Fern With the help of my neighborhood nursery staff, I choose these particular plants because they are drought tolerant and will thrive in full sun. This combined with the water storing crystals will help immensely with watering this summer. Watering needs are essential to consider for a living wall.
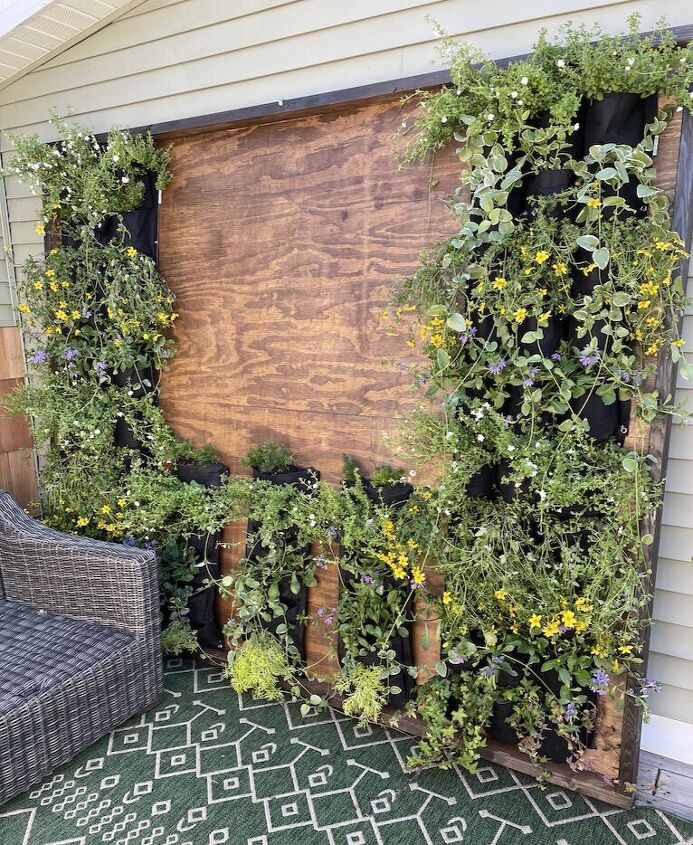
I’m excited to say the plants are already beginning to fill in nicely and we are still having frost warnings here! I post another pic once it fills in.

Our final step was securing the entire piece to the house with a large hook and eye to prevent it from falling.
We LOVE how it turned out and the fun messages and thank you's the guest have left.
See the entire Airbnb renovation here: https://alifeunfolding.com/we-bought-a-foreclosed-property-and-turned-it-into-a-short-term-rental/
And another quick and easy wall planter here: https://alifeunfolding.com/easy-diy-plant-wall/


Comments
Join the conversation
-
If on a pinch, instead of miracle grow crystals, you can soak a clean diaper in water and use the jelly like substance that soaked up the water and mix it with your potting medium. The plants use the water from the jelly , feels like the silica crystals
-
Awesome idea! Very creative .


Frequently asked questions
Have a question about this project?
It looks great, but PLEASE can you tell me where you got your outside rug, and will it hold up to a showery summer? I live in the U.K.! Thanks for sharing 🤗
That is such a neat idea n great yard filler. I have a nice spacious yard but it seems something is missing. I love love your idea. BUT…. We have long winters here in Alberta. What would I do w it in winter time?? Put fake poinsettias w lites?? 🥴