


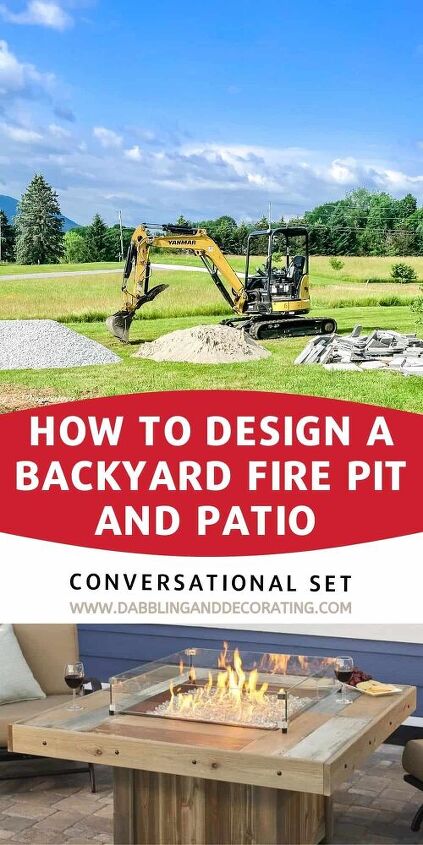
How to Design a Backyard Fire Pit Conversation Set
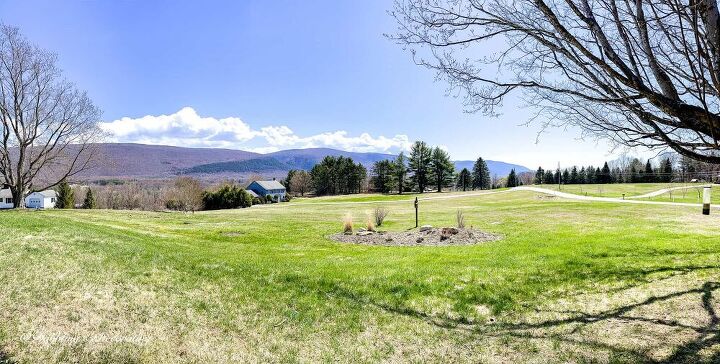
Last year we removed a great deal of landscaping from our front yard here in Vermont, as the trees and bushes that we had enjoyed here for years had succumbed to disease. It really didn’t leave us with many choices and we were quickly forced to rethink our front yard landscaping. The views off our deck overlooking the Green Mountains are simply breathtaking, and this yard deserved to be transformed into a beautiful, yet rustic outdoor living space that we could enjoy for three seasons out of the year. This is when we decided on a backyard fire pit conversation set with a natural stone patio.
Fire Pit Conversation Set Blog Series
- This is the first post in what will be a three-part series.
- The second post I will share the seating and stone stairs that we will be adding next.
- The third post will finish up with a full landscaping reveal.
- Sign up for my newsletter so you never miss a post.
Choosing a Conversation Fire Pit Set
Here in Vermont our front yard is wide open to the elements and is especially vulnerable to high winds. This is the main reason why a natural wood fire pit did not work well for us. It simply caused too much smoke and ash to be enjoyable.
What we were looking for:
- A tabletop fire pit that we could use for entertaining.
- A fire pit that would fit four comfortably.
- Easy on and off without the hassles of starting a fire.
- A natural-looking style that would match nicely with the mountain views.
- High quality that would sustain the harsh Vermont weather.
- A height of at least 24″.
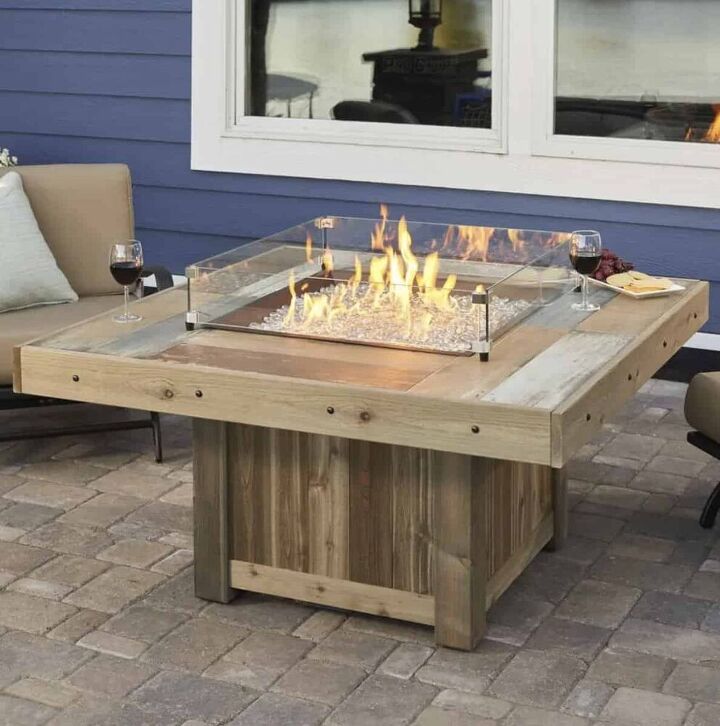
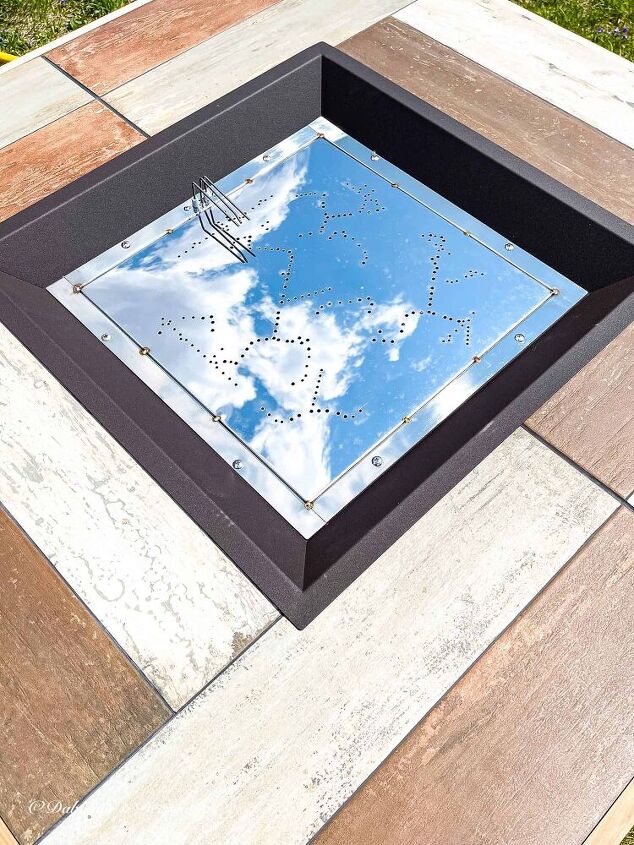
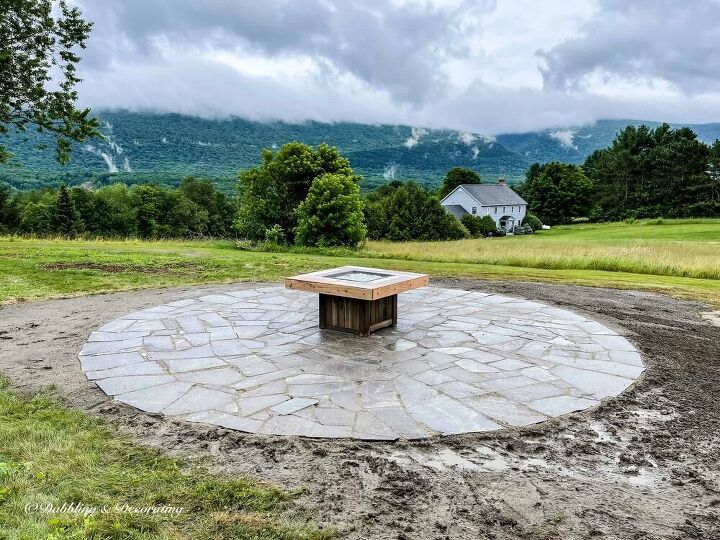
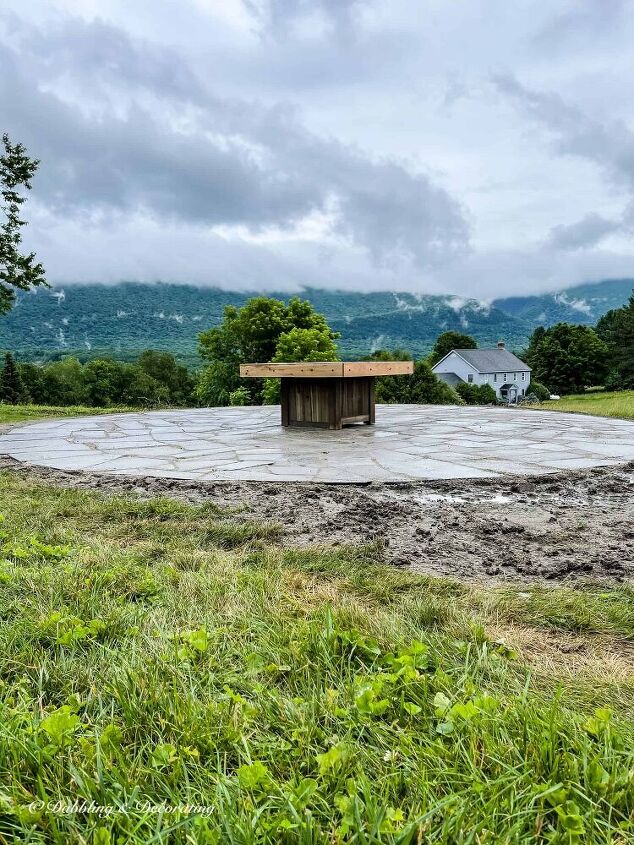
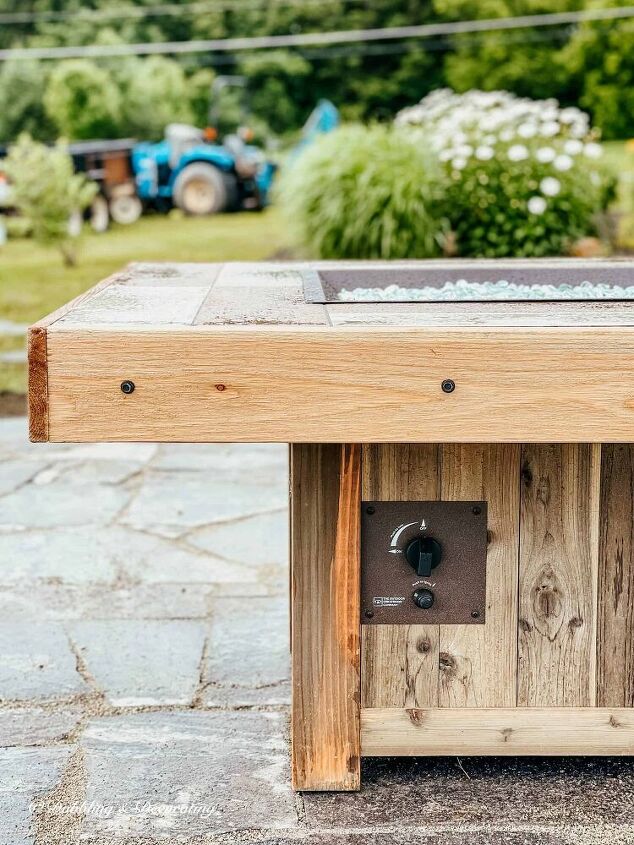
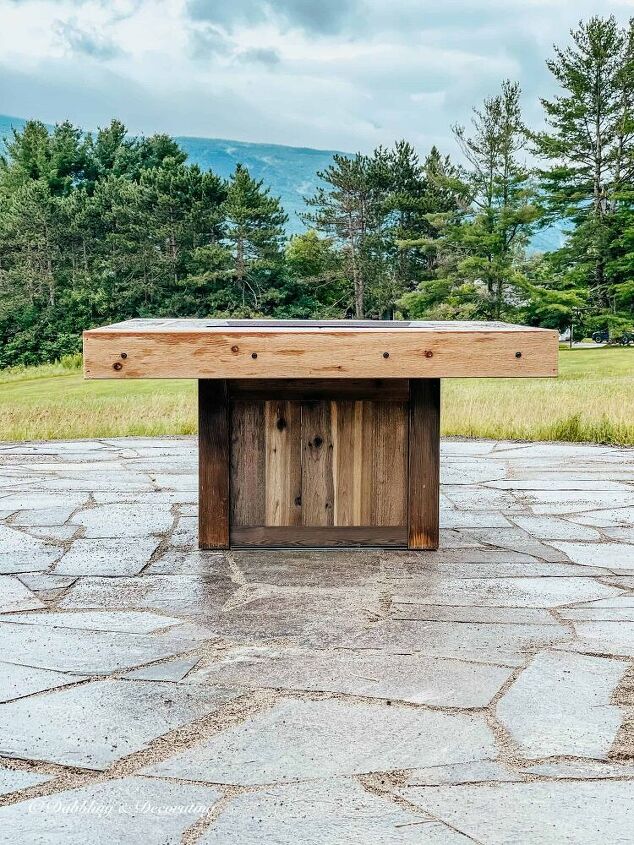
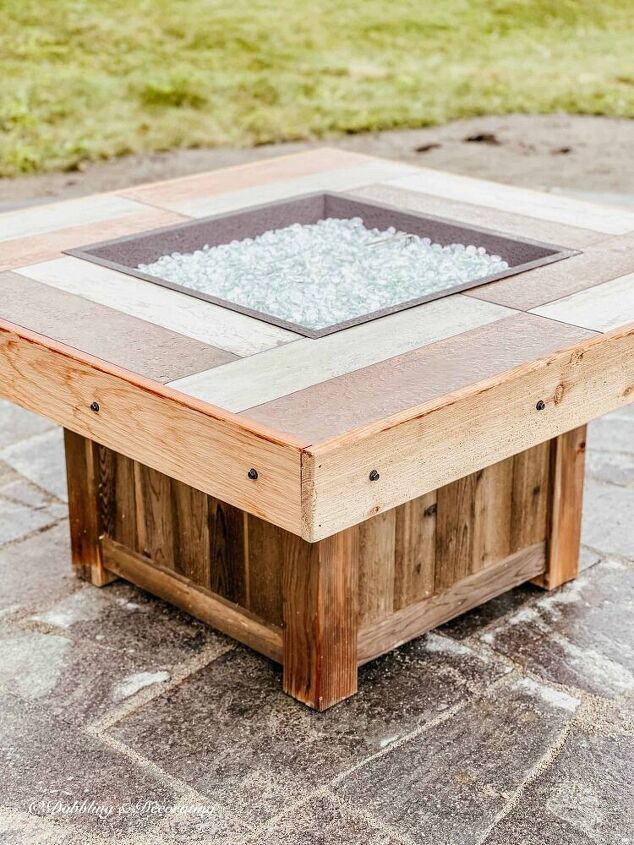
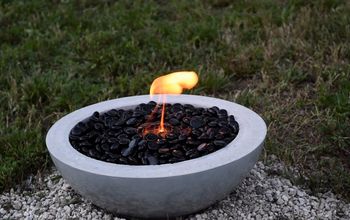
Outdoor Greatroom Vintage 48.25 Square Faux Wood Fire Table
We settled upon this beautiful square faux wood fire pit conversation set. We were so fortunate that there was one in stock and it was available to ship right away. It arrived on one pallet and weighed about 350lbs. It was very simple to put together and it will run on one propane tank for 8-10 hours, which is hidden inside the fire pit with an on and off switch. We purchased 2 propane tanks so we have one as a backup.
*This fire pit was available from various dealers at various prices as an FYI. It is out of stock currently from many dealers.
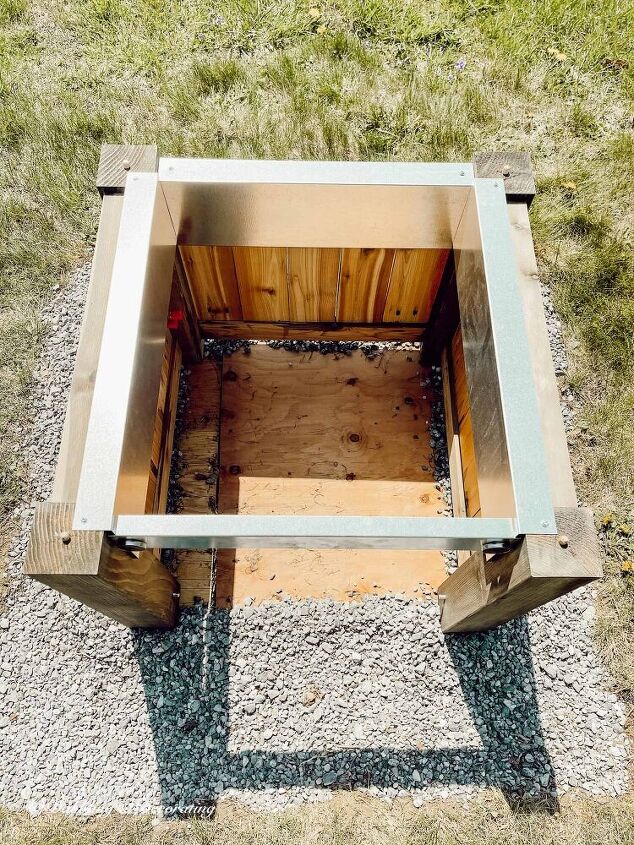
Fire Pit Conversation Set Installation
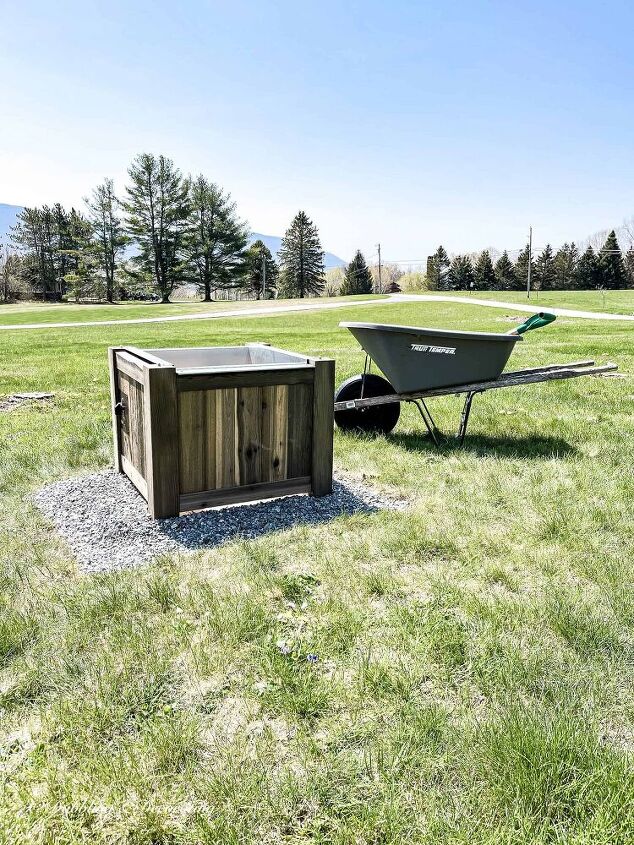
The Installation was very simple. We set this fire pit up aware that we would need to move it again when we had someone coming in to install a natural stone patio underneath it in a couple of months’ time. Here are some photos of how we set it up prior to the stone patio being installed.
- Level the ground.
- Add Stone.
- Set bottom fire pit base onto the leveled stone.
- Rest the top on the fire pit base.
- Hook up and add the propane tank. I recommend purchasing 2 propane tanks. One as a backup.
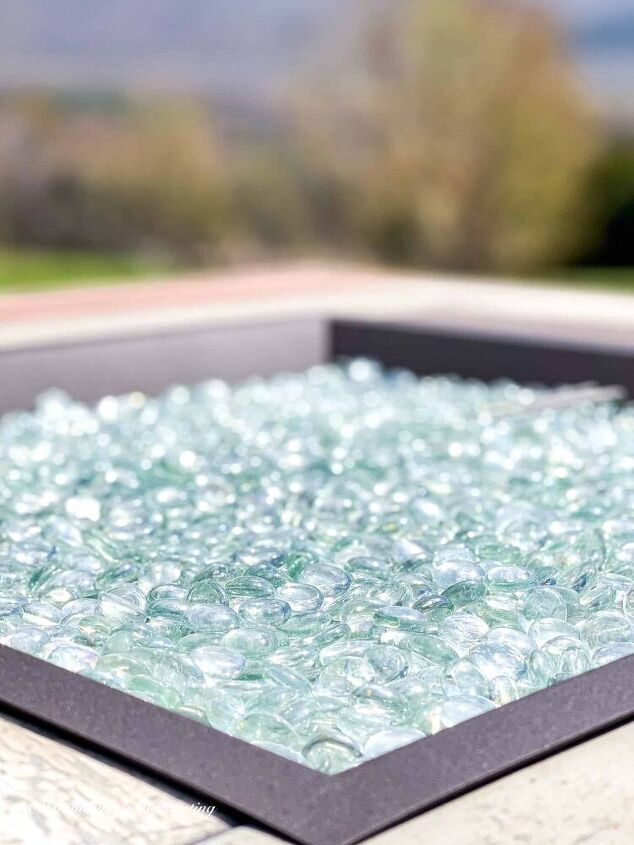
- Add fire tray and crystals.
- Add glass fire shield (optional)

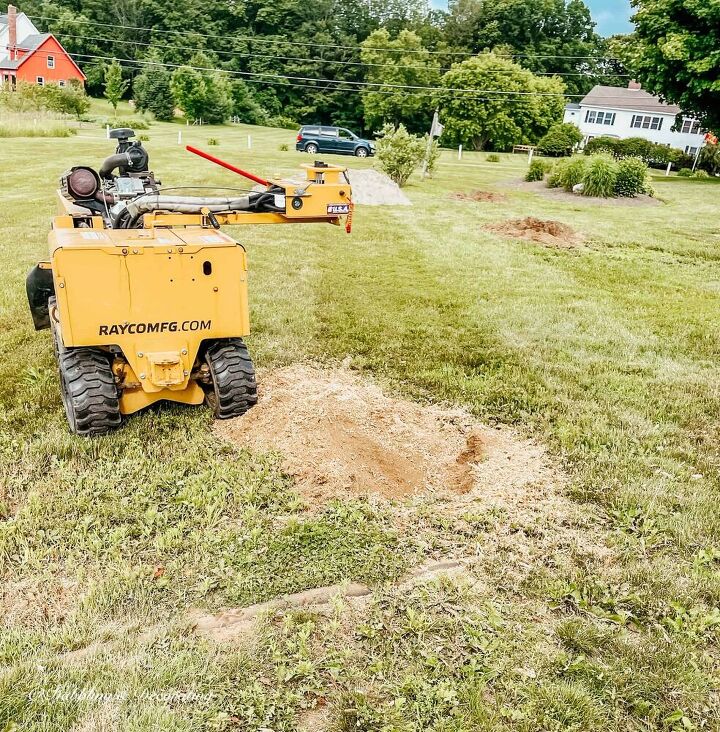
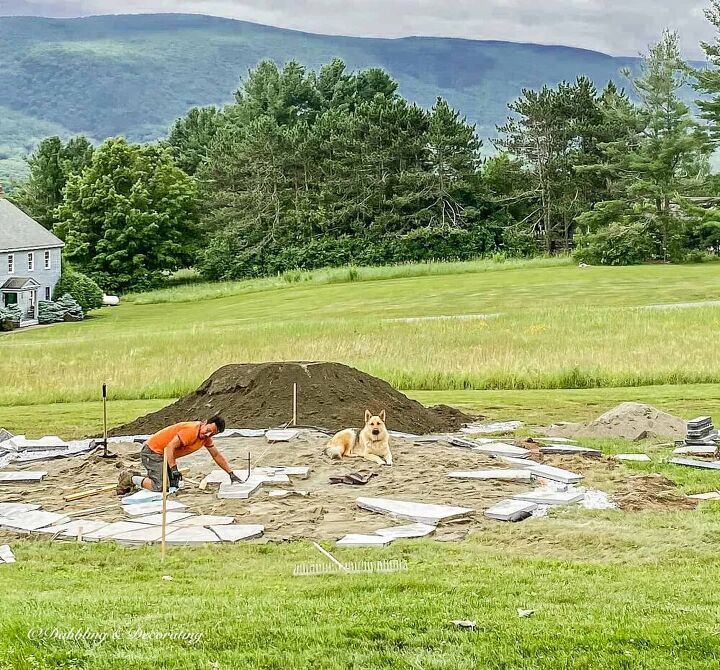
Preparing the Yard
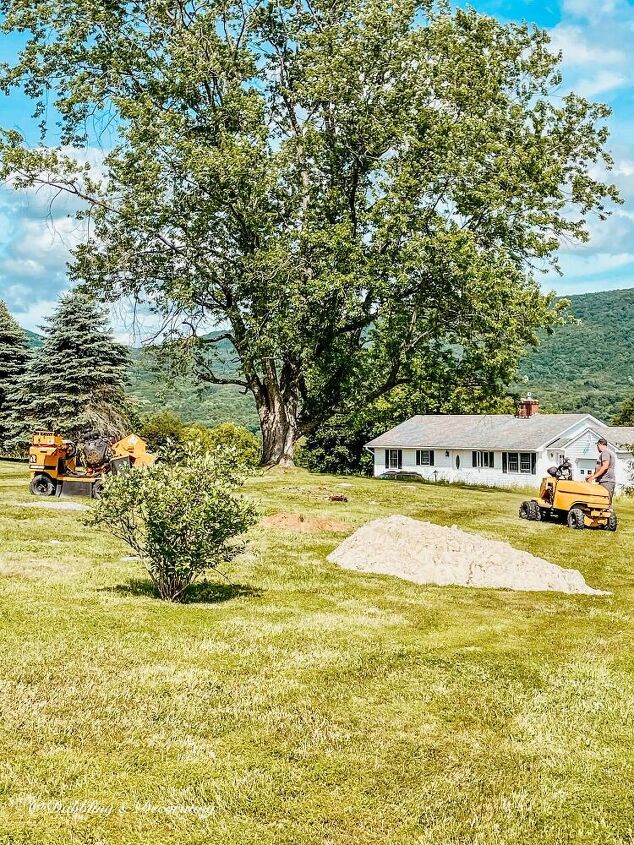
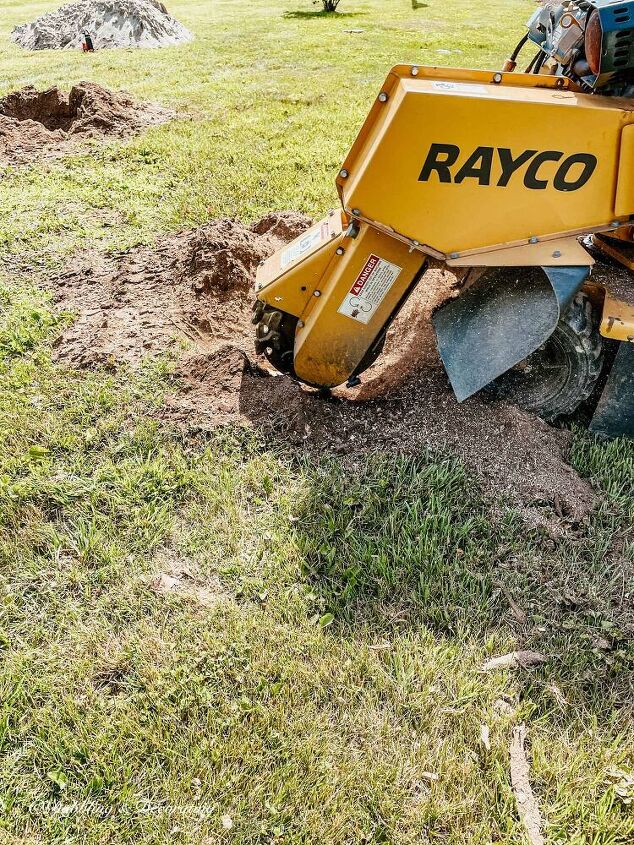
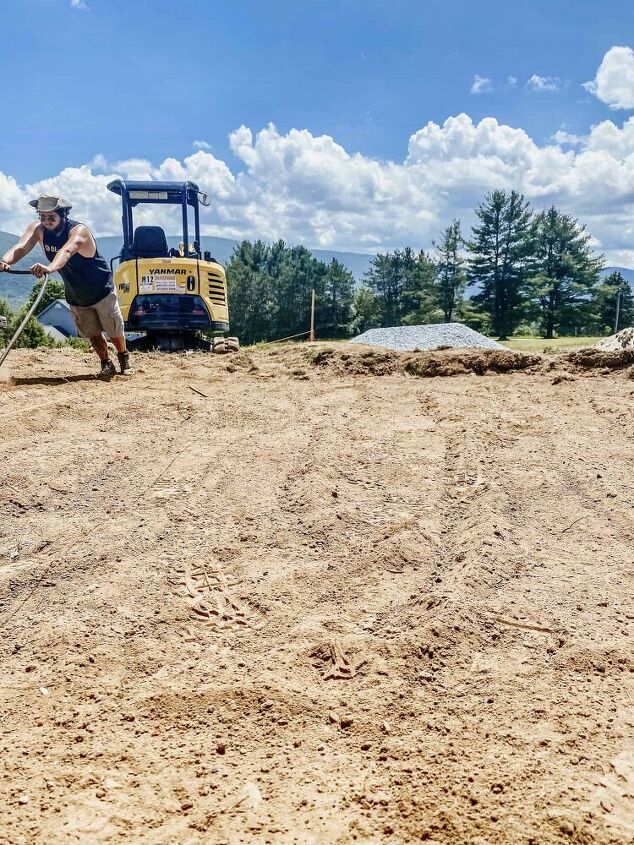
At this time we have now taken the fire pit conversation set apart and are starting to prepare the yard for the natural stone patio to be set.
The first step was to remove all the tree stumps caused by last year’s removal of the front yard trees.
This post is not meant to be an actual tutorial, but a guide as to how we designed our fire pit and patio space.
Last year we built this fire pit at our home in Maine out of stone that we collected from around the property. This yard is much more closed in so a natural fire pit fits perfectly here. Beautiful in the Fall.
This was inspired by my friend Stacy and her outdoor stone fire pit over at Stacy Ling Blog.
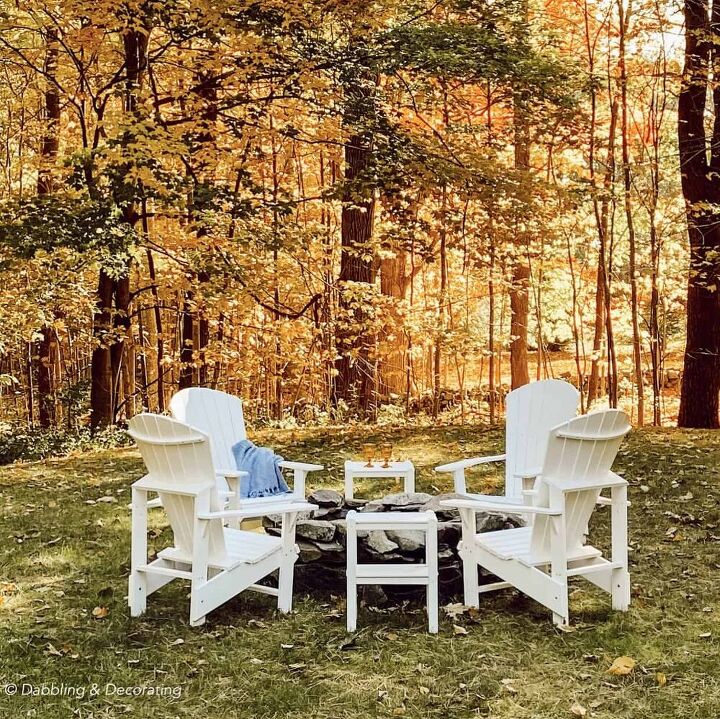
I am so in love with these white Polywood Adirondack chairs. They are super durable and will last forever. They weigh about 60lbs apiece, so we don’t worry about them blowing over or away either.
Another set of white Polywood Adirondack chairs are definitely on my mind for the Vermont fire pit conversation set too!
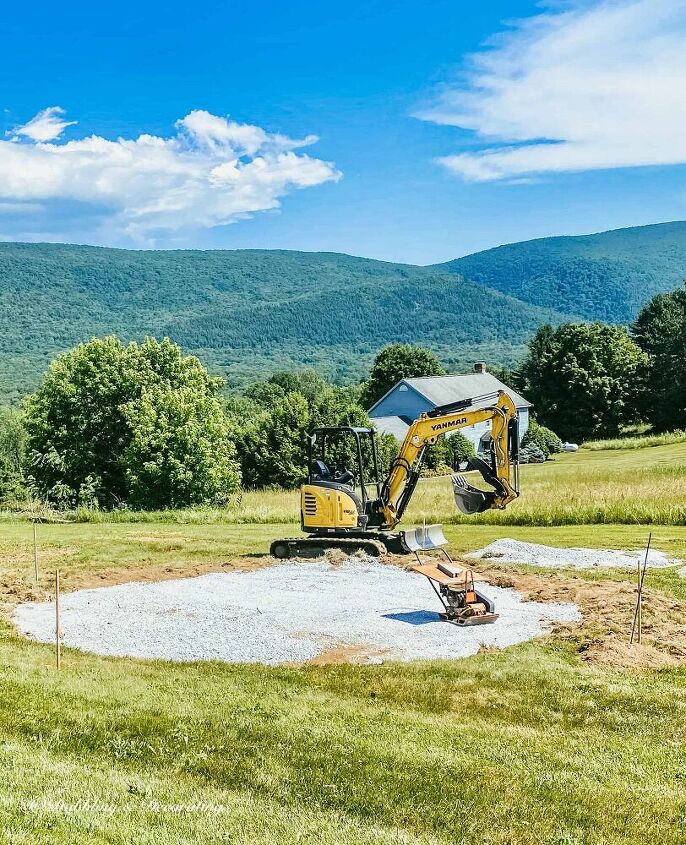
Designing the Fire Pit Patio
We hired a local stone worker, Rene’ of Ever Green Designs to create a 10′ round patio for us. From there, we calculated the number of materials needed.
- 20 yards of 3/4 crushed stone
- 3 yards masonry sand
- 350 square feet of 2″ thick Corinthian granite
- 14 yards of topsoil to tie it together with landscaping.
- landscape fabric
- Grass seed and straw to finish.
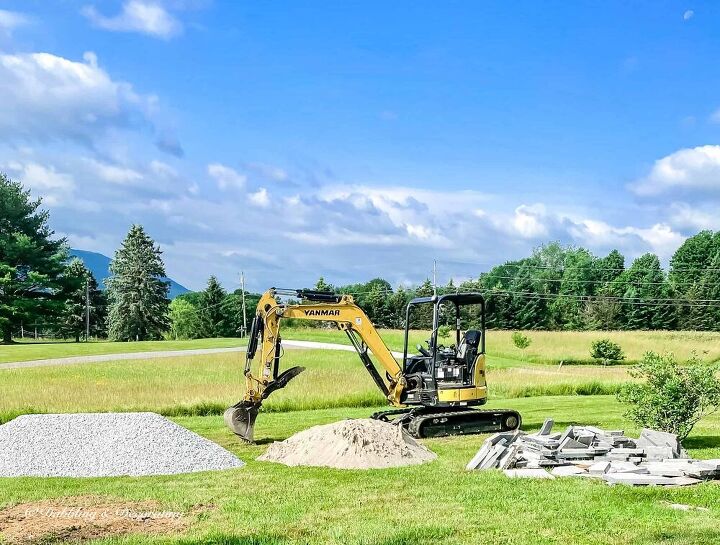
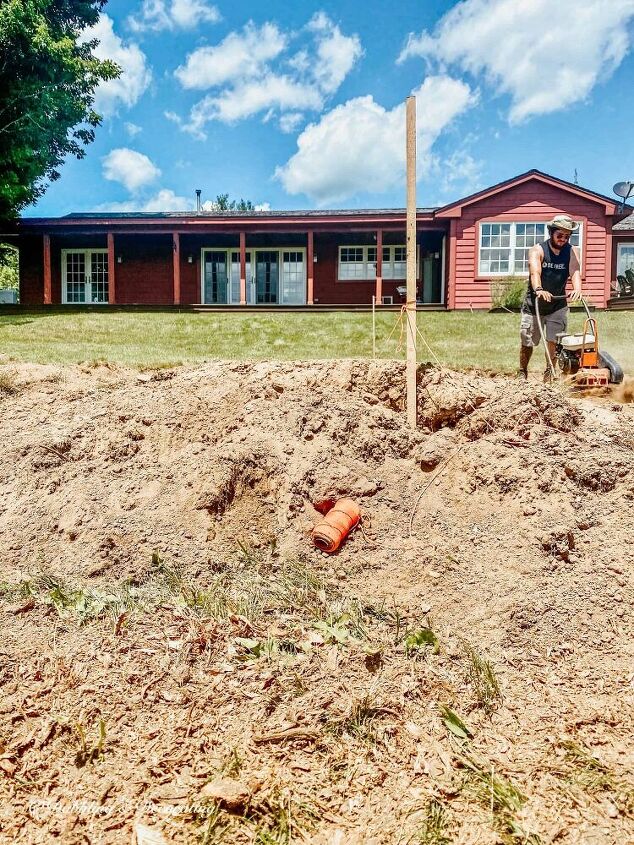
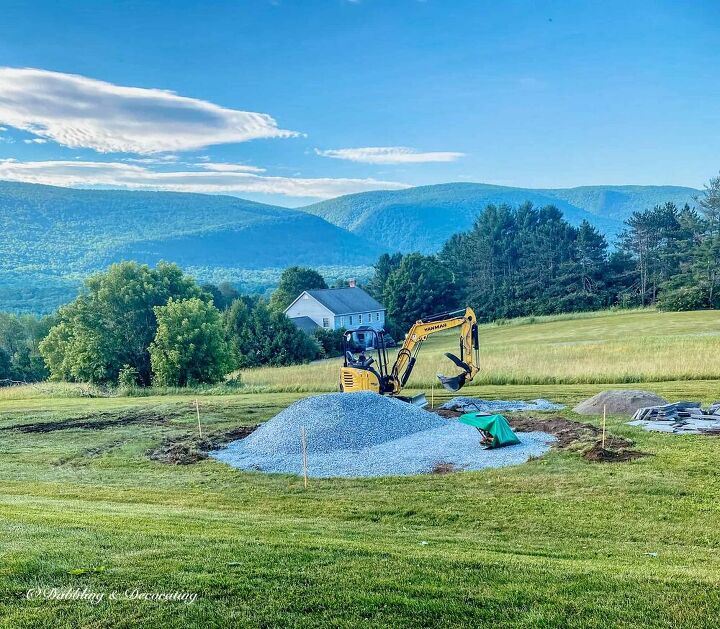
More crushed stone was needed and was delivered the following morning.
Aren’t these views of the mountains amazing? Drop by and see more of our year-round Vermont mountain views.
Designing A Circle of Granite

Rounding the Corner
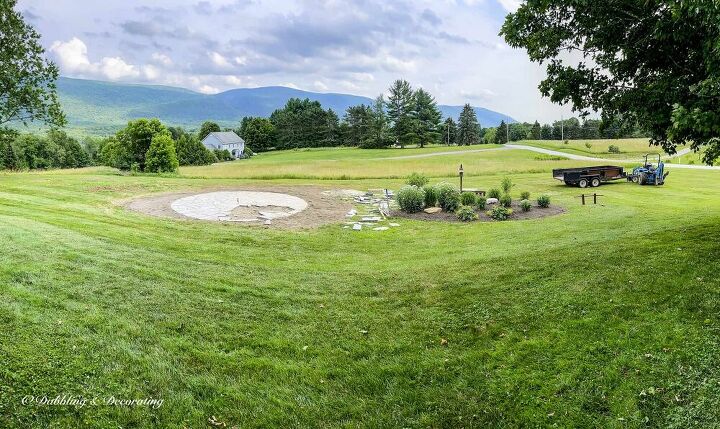
This patio took about a week to be completed and that was with endless amounts of rain friends:)
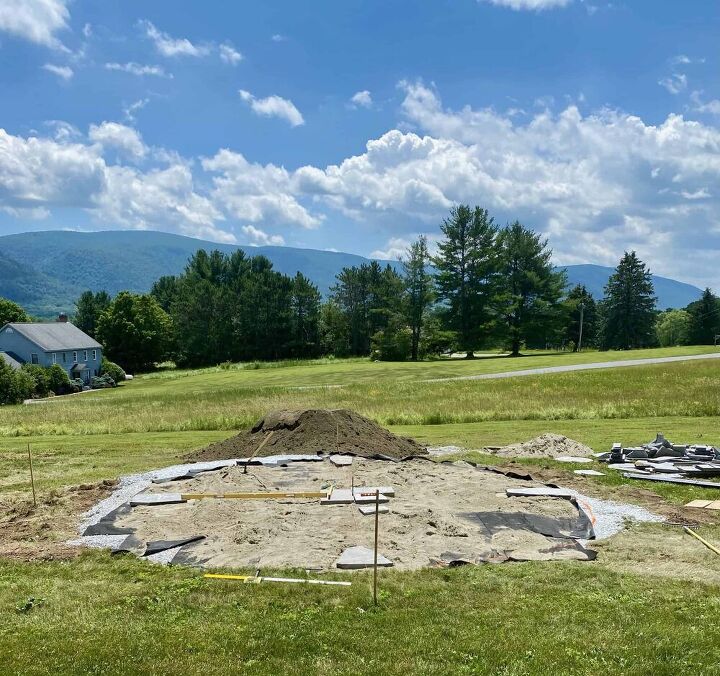
Next, we will be adding large stone steps down to this fire pit patio along with seating, followed up with landscaping.
Once the rain stops we will seed the surrounding area with grass and hay.
Be sure to sign up for my newsletter so you don’t miss the next post in this series that will include the installation of natural stone steps and seating, followed up with the last post in this series with the full landscaping reveal.
I’m so glad you dropped by today, and if you are new to my blog, welcome! I hope you enjoyed your visit with us here today at our Vermont home.

I’ve created the above custom pin just for this post! Hearing from you makes my day and your comments mean so much to me! Please join me over on Instagram & Pinterest to see more!

Resources for this project:
See all materials


Comments
Join the conversation
-
Looking forward to seeing more pictures as you add to and finish this beautiful addition to your yard. I love that you designed it with nature and your amazing view in mind, to add to it, not detract from or compete with nature's unbeatable gifts.
-
Thank you so much. This has been finished for over a year now. You may see it today in the post: Backyard Conversation Set and Fire Pit Patio Reveal


Frequently asked questions
Have a question about this project?
Where did you get your chairs? Beautiful! Excellent job and the view is magnificent!