


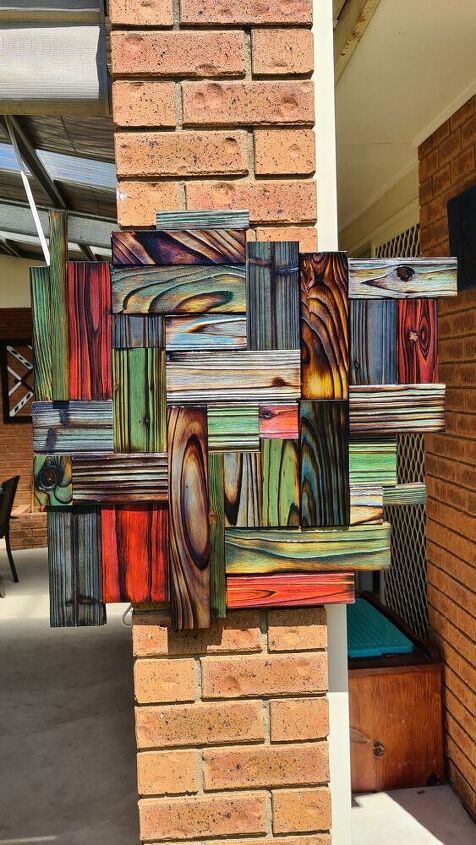
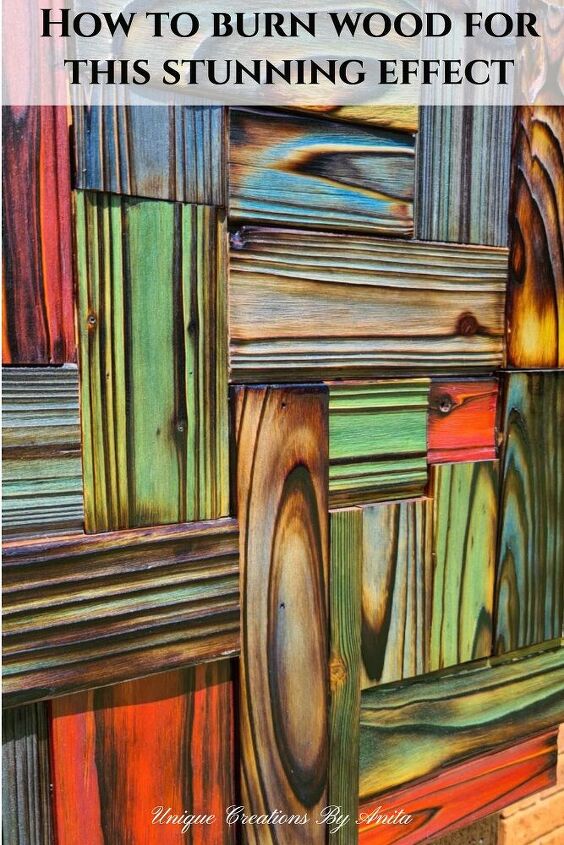
Multi-coloured Wood Wall Hanging
I have recently discovered Shou sugi Ban and I must be honest and say I am totally addicted. I have so many ideas flying around in my head for projects I want to make. The idea for this project was to create a multi-coloured Shou Sugi Ban wall hanging to go under my pergola.
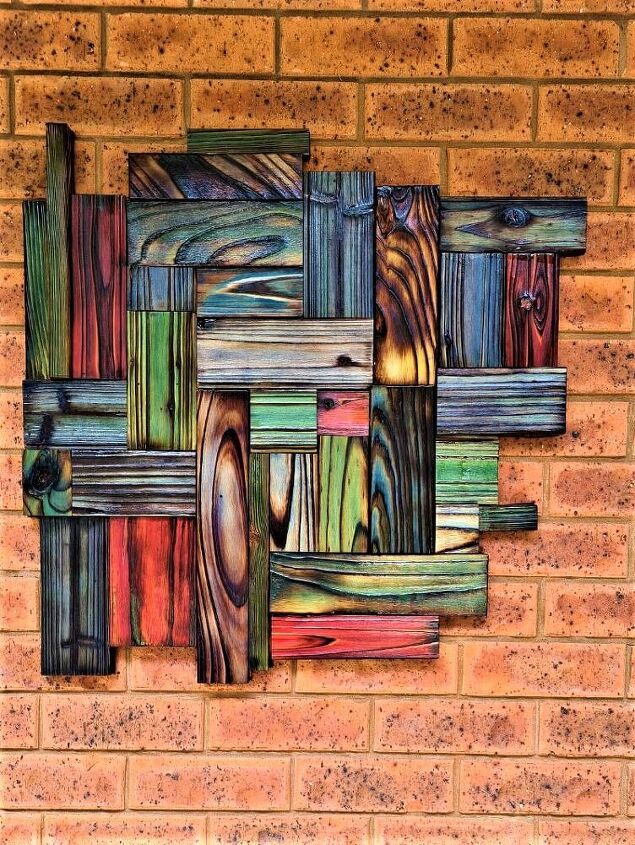
I am also killing two birds with one stone because I am also using up some of my small pieces of scrap wood. The great thing about this project is you can use just about any wood. Some woods do have more dramatic results than others, but blended all together they look awesome.
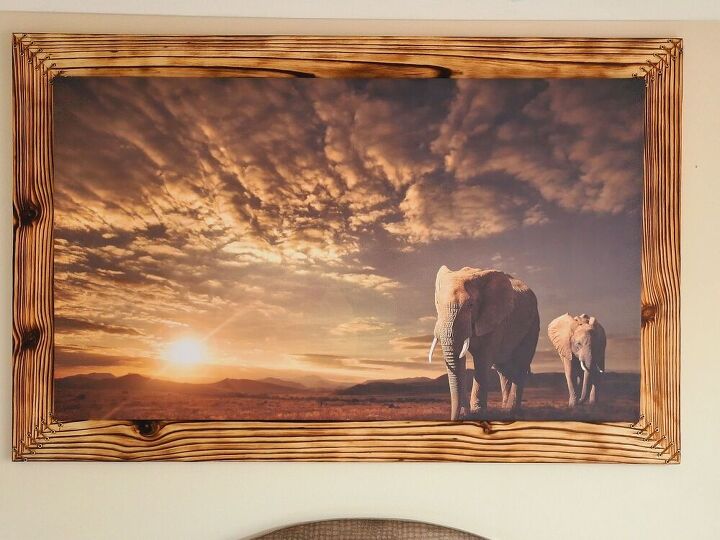
My first attempt at Shou sugi ban was this picture frame, and the results were amazing textures. I chose to leave the wood natural colour, but this project will have all the colours of the rainbow. When you add colours to Shou sugi ban wood, you have no idea what colour you will get. The colour depends on how deep you burn, the different levels of sanding, and the different ways you add the colour.
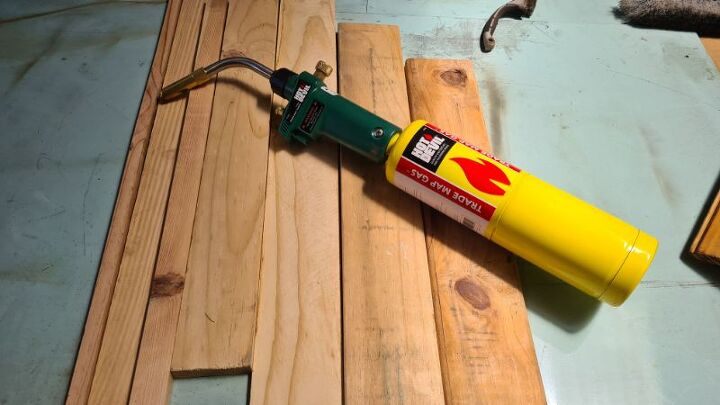
Burning the wood
This project will look more dramatic if you use a variety of woods because they all have different results. You will need a propane blowtorch to burn the wood. You will also need to make sure your area is suitable for burning to prevent unwanted fires. I used a sheet of metal over my table.
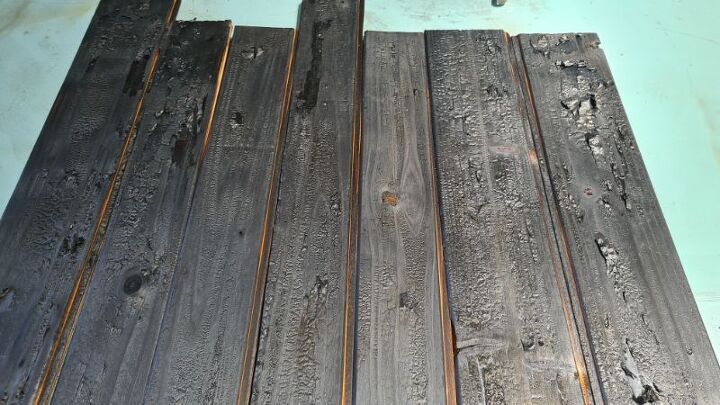
Not only did I use different woods, but I also used different thicknesses too. I was hoping the different thicknesses of wood would add to the effect. There is no special way to burn the wood. You need to blacken the wood until it starts to get a cracked effect on the surface.
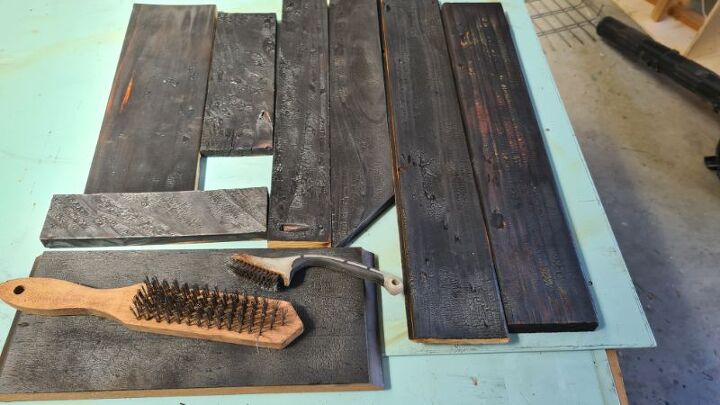
Cleaning up the wood
This is where this project gets really messy, so prepare to get dirty. To start you need to use a wire brush to remove the top charred layer. If you can do this step outside, that would be better. Be sure to use the wire brush in the direction of the wood grain.
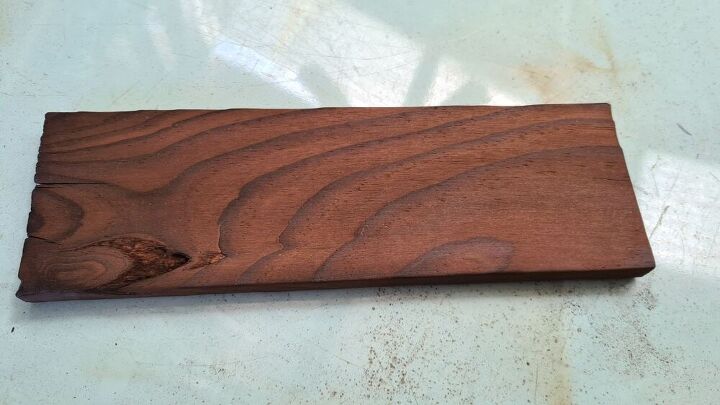
Once you have removed the charred layer your wood will look like the image above. Next, you want to remove some of the wood between the woodgrain. This will also add some great texture to the surface. You can keep going with a wire brush, but that is hard work after a while. It is worth buying a brush that you can attach to a drill.
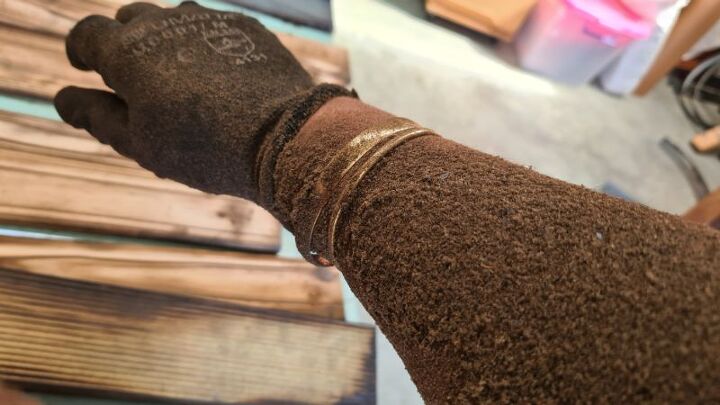
You will need to use some protective gear such as a respirator/ facemask, safety glasses and gloves. Wearing old clothes is also recommended because you will get filthy, as my arm shows above. The rest of me looked like a coal miner after a 12-hour shift underground.
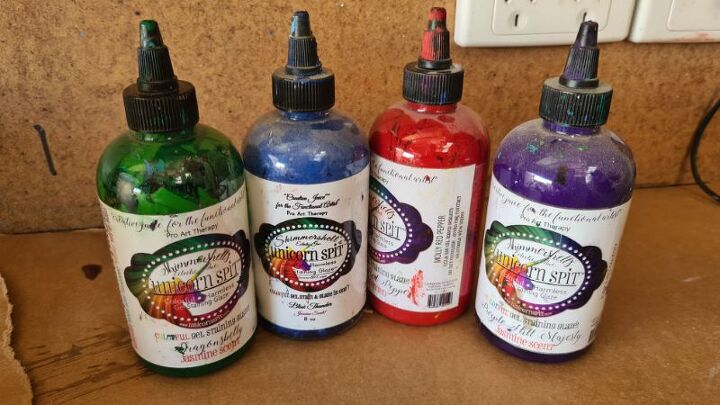
Adding the colour to the shou sugi ban
To colour the wood I messed around with a few methods and products. I am in the process of creating a post showing the results of each product used. That is a post on its own because there are so many factors that determine the colours.
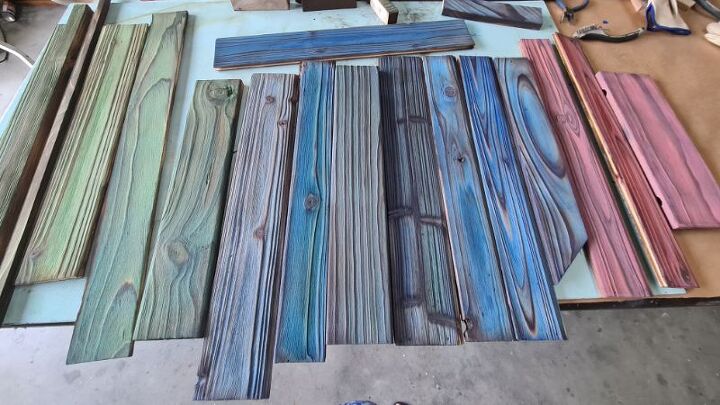
Once the wood has been coloured you can start making your wall hanging.
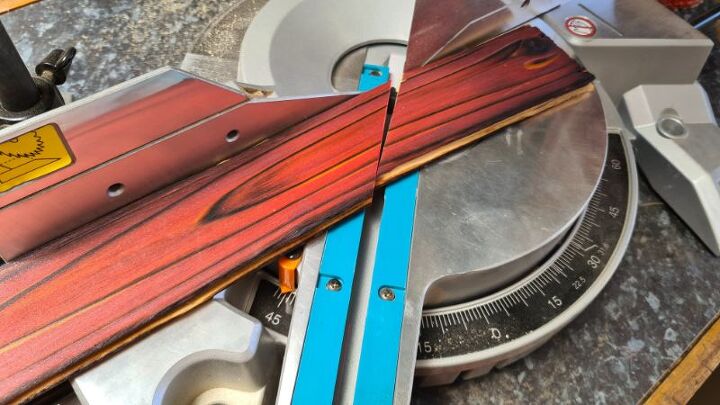
Making the base
To make the base you will need a sheet of 12mm plywood cut to the size you want your wall hanging, mine was 1m square. To add so character to my hanging I cut some of the wood at 45-degree angles. This will allow me to mix the colours up and still get them to fit together.
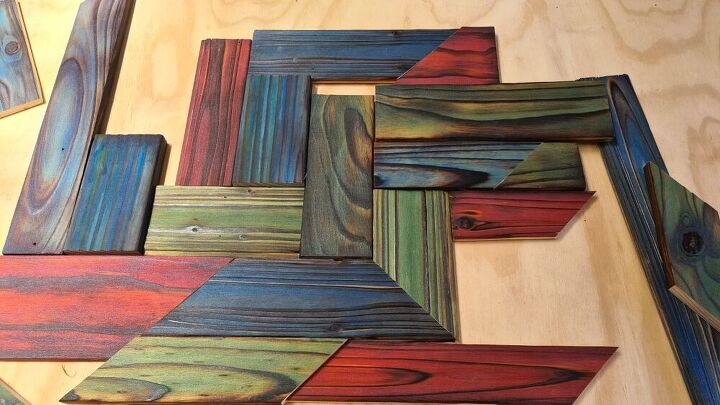
You can now start creating the design you want. You can keep moving the wood around until you are happy with the look. I messed up here and did not burn the wood on the base. The reason for this is to disguise any gaps you can not fill, it will make them less obvious. I had to go back and burn the base.
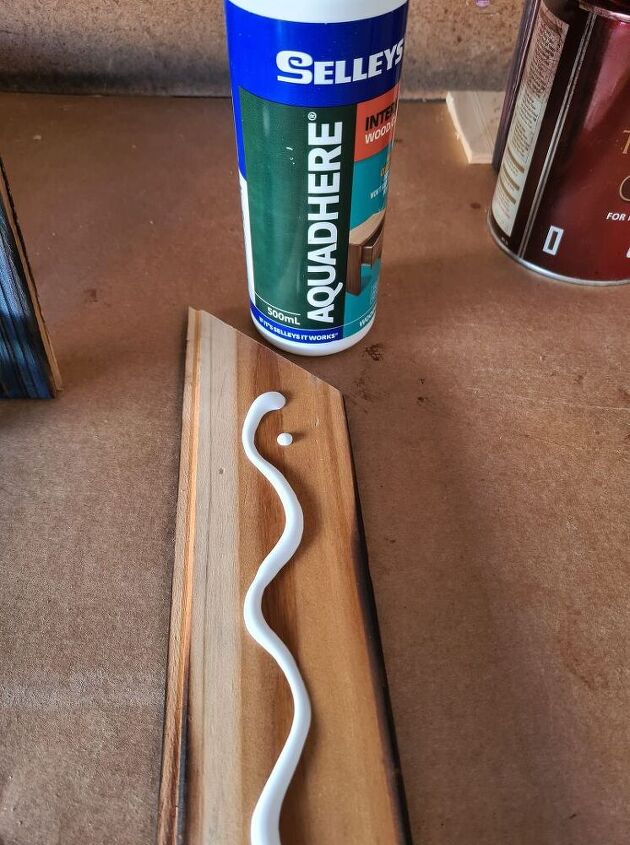
Glue the wood to the base
You can use wood glue and a nail gun, but I found the nail gun spoilt the look. I used wood glue and two drops of hot glue on each end. The hot glue will hold the wood in place while the glue dries and you can proceed.
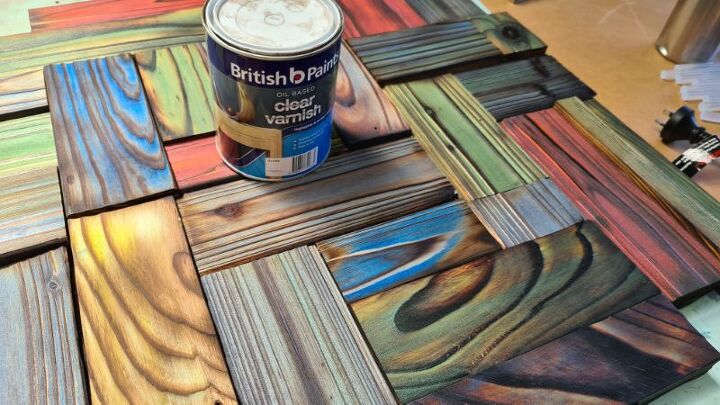
Seal the wood
I used mainly Unicorn spit stain and glaze on this project and it needed to be sealed with 2 coats of oil-based polyurethane. This is where you will see all the colours pop and all the different shades of colour.
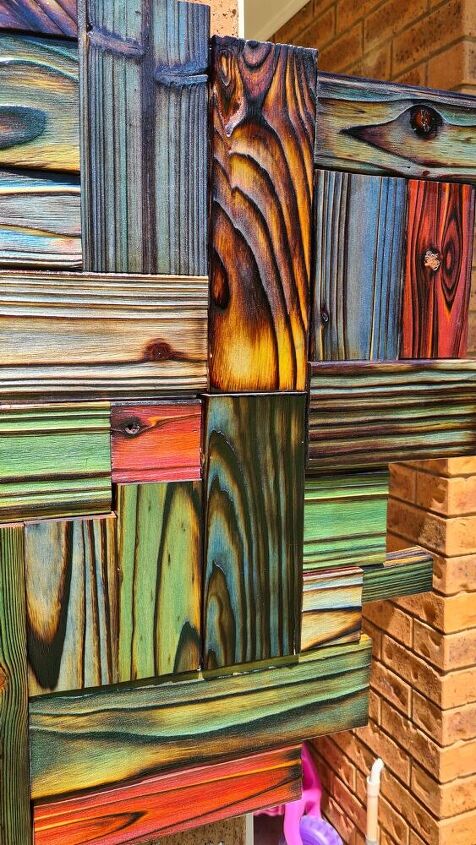
Depending on the angle and the light, the colours will look different.
The full detailed tutorial showing all the products I used and giving you more tips and tricks on how to do this project. Is available using the link below.
More project ideas for you
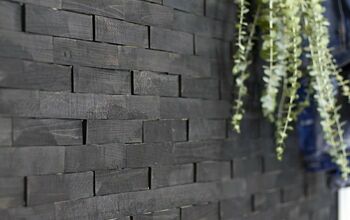
This is another Shou Sugi Ban project made using just one unicorn spit colour.
Your cost to make this project will depend on what items you have at home. I always make my projects using recycled materials and using products I already have at home.
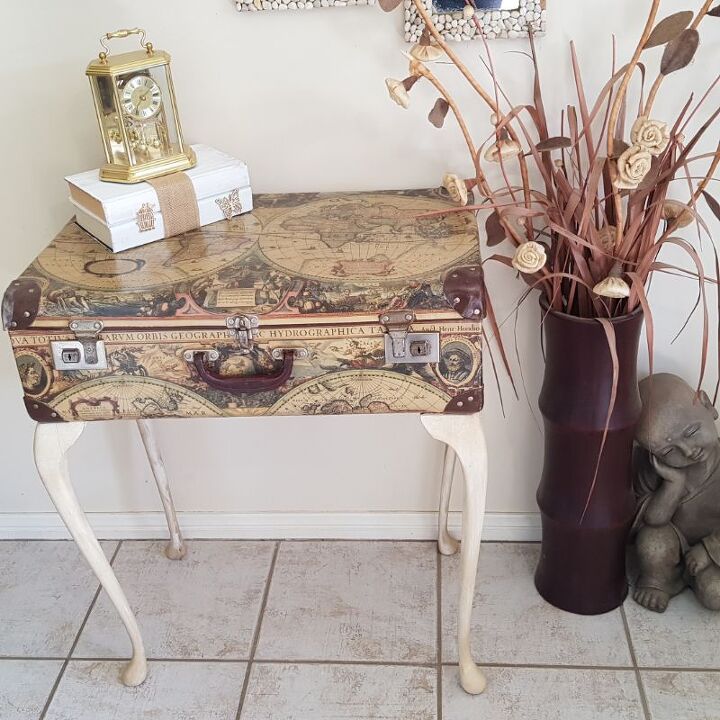
Vintage suitcases are so popular in home decor at the moment. I repurposed mine into this unique table with storage inside.
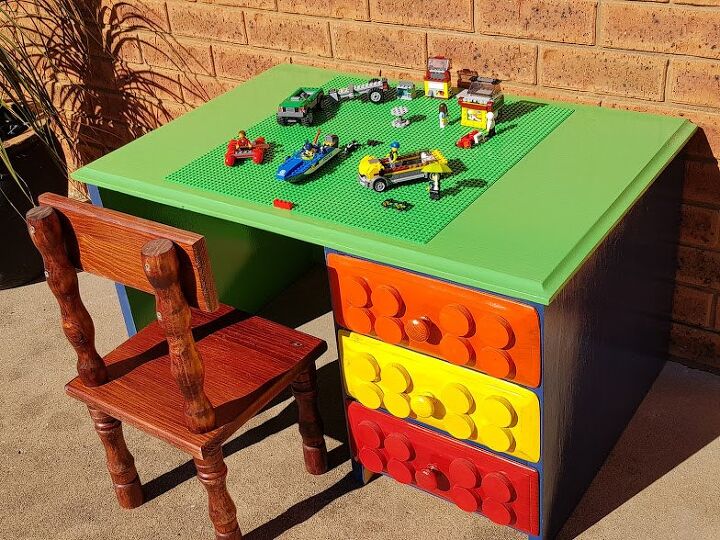
This cute lego table was created using a common study desk that is so easy to find.
Resources for this project:
See all materials


Comments
Join the conversation
-
So pretty. This is a great project for me since this piece looks modern abstract art. Thanks
-
Absolutely stunning! 😀


Frequently asked questions
Have a question about this project?
I ABSOLUTELY LOVE THIS!!! But unfortunately I cant seem to find the link anywhere. Can you please give that to me?
Love this!! Where is the tutorial link? Can't find it and would really like to watch your process. Thanks again
Do you make any to sell