


Flour Sack Pumpkin
Flour Sack Pumpkins
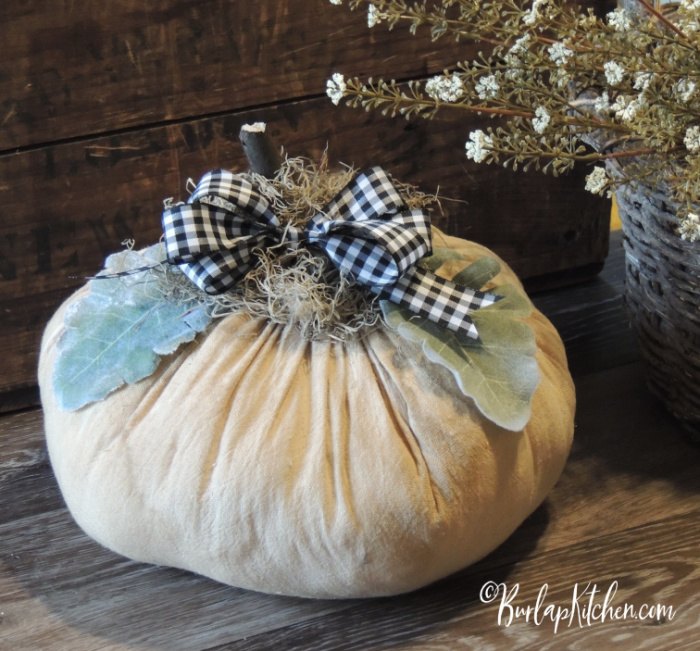
I’m always looking for cute inexpensive ways to decorate my home. I came across these flour sacks at Walmart and thought they would make adorable pumpkins, I was right! These were so easy to make and 1 pack of flour sacks will make at LEAST 5 pumpkins. You could always cut the sacks down to make different sized pumpkins.
*TIP– I originally found the flour sacks in the craft department. I want to say they were something like 3 for $5. After walking around Walmart for a little a found a 5 pack of flour sacks for $5 in with the tea towels.
Materials:
- Flour sacks
- Left over morning coffee
- stuffing
- rubber band
- stick
- hot glue gun and glue sticks
- spanish moss
- leaves ( I used these dusty miller leave I found at Walmart)
- Ribbon
- Starch ( You can skip this step but I like to stiffen them up some)
How to:
Step 1: Coffee dye the flour sacks. To do this just soak them in coffee for about 10-20 minutes and then ring them out and hang them to dry. Make sure you put something under them to catch any coffee drippings if hanging them inside.
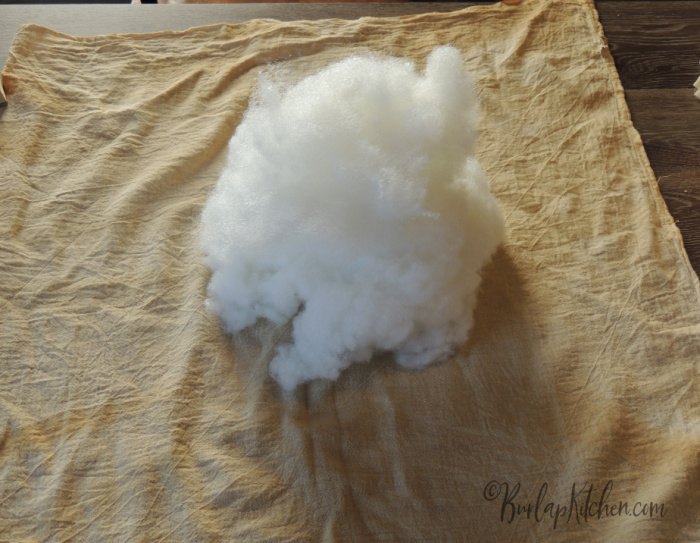
Step 2: Lay the flour sack flat and place a big pile of stuffing directly in the middle of the sack.
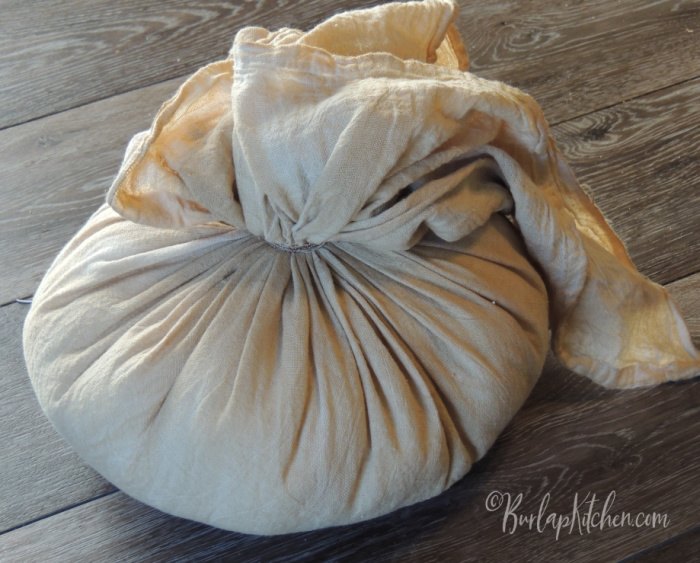
Step 3: Pull the flour sack up tightly around the stuffing and secure it with a rubber band. You can then pull any loose fabric up through the rubber band. Cut all the excess material around the band. I cut it as short as I could with out getting too close the the rubber band.
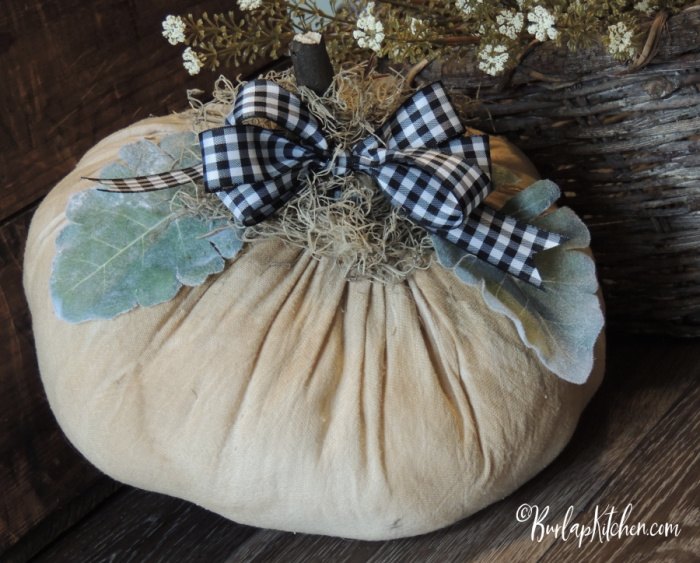
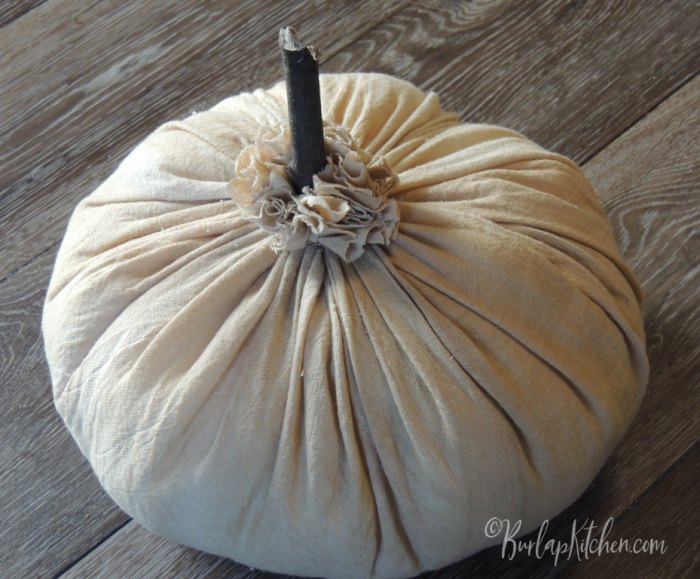
step 4: Put a stick in the middle of the rubber band and hot glue it in place. Then glue on the leaves and a ribbon. If you want, you can now spray your project with starch. The starch just makes the pumpkins stiff. I like them this way but you could totally skip this part if you wish.
And that’s it guys! These pumpkins were so fun to make. I hope you enjoy them as much as I do!
If you decide to make this DIY I’d love to hear from ya! You can drop a comment below or message me on any of my social media pages. Hope you have a blessed weekend and as always remember to keep it simple. Catch ya next week my friends! Facebook, Twitter, Pinterest, Instagram, youtube

Comments
Join the conversation
-
After an injury a few years ago left me depressed, we put our tree I’m Oct and decorated it for fall. It’s a new annual thing. I’ve been looking for something to tuck under/near the tree to finish it. I believe a few of these would do the trick.
-
this is adorable, I will be making this, thank you for sharing your idea.


Frequently asked questions
Have a question about this project?
Is this starch can spray starch or liquid starch in a spray bottle and if so do you dilute the starch??