


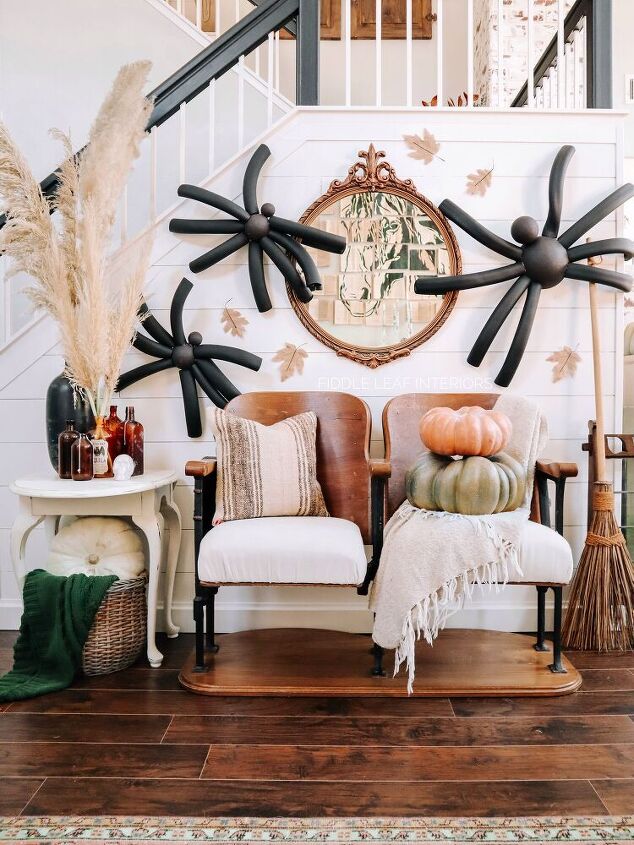
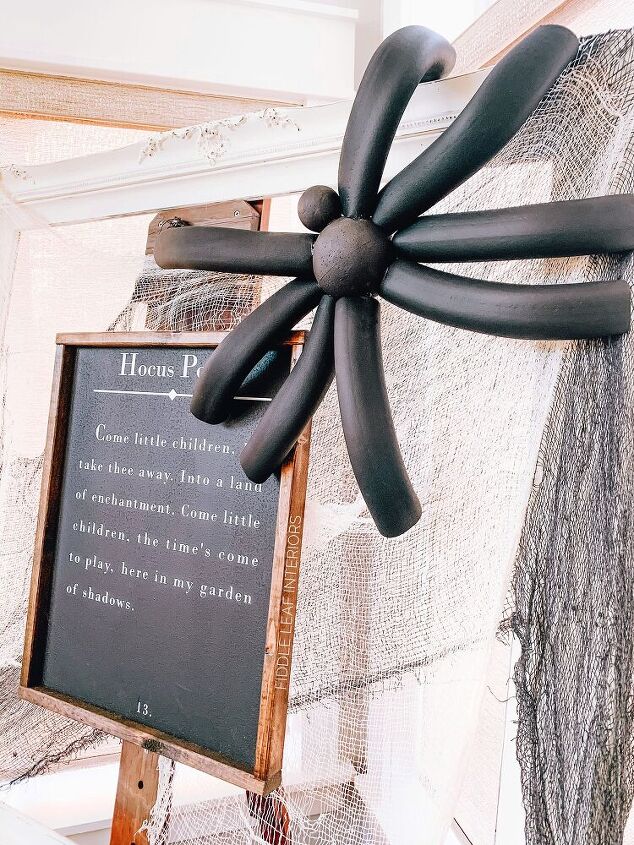
DIY Giant Spiders
It may still be summer, but Fall and Halloween are just around the corner, so I’ve got a spooky DIY for ya – DIY Giant Halloween Spiders! I got this idea from a Better Homes & Gardens tutorial, but tweaked it a little to 1) make it CHEAPER, and 2) make them easier to hang.
Head to my BLOG for more fun DIYs to plan for the upcoming fall and holiday seasons!
In total, I made 8 of these guys and spent about $90. I already had some materials, including the krylon, hot glue/glue gun, paint/brush, picture hangers, scissors, and wire cutters, etc. If you only want to make a couple of these DIY giant halloween spiders, then it will be much less $$$!

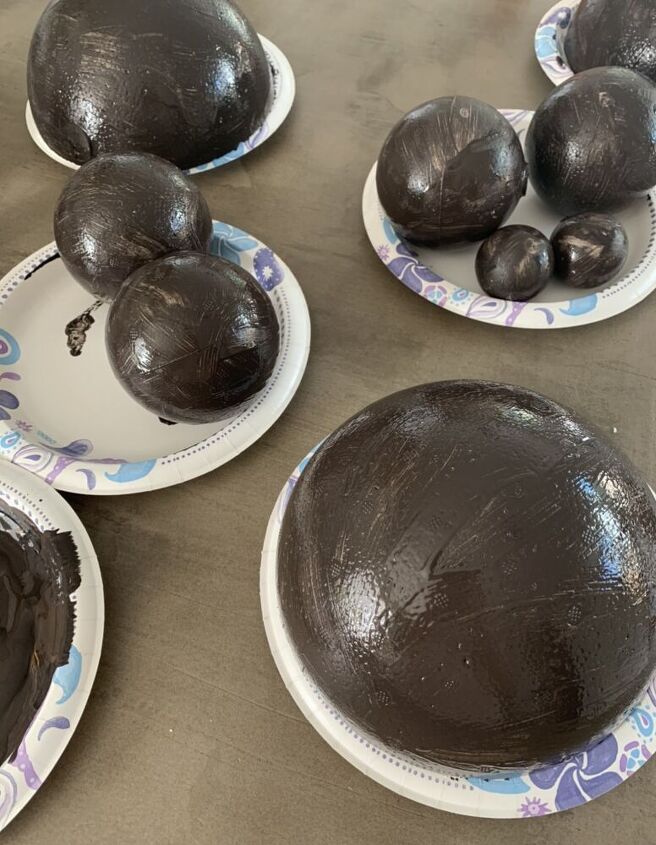
Step 1: Use your serrated knife to carefully cut your 2 large 8″ styrofoam balls in half. Each will be used as the body of your large spiders. You can spray the cut side lightly with Krylon to keep the styrofoam from constantly shedding.
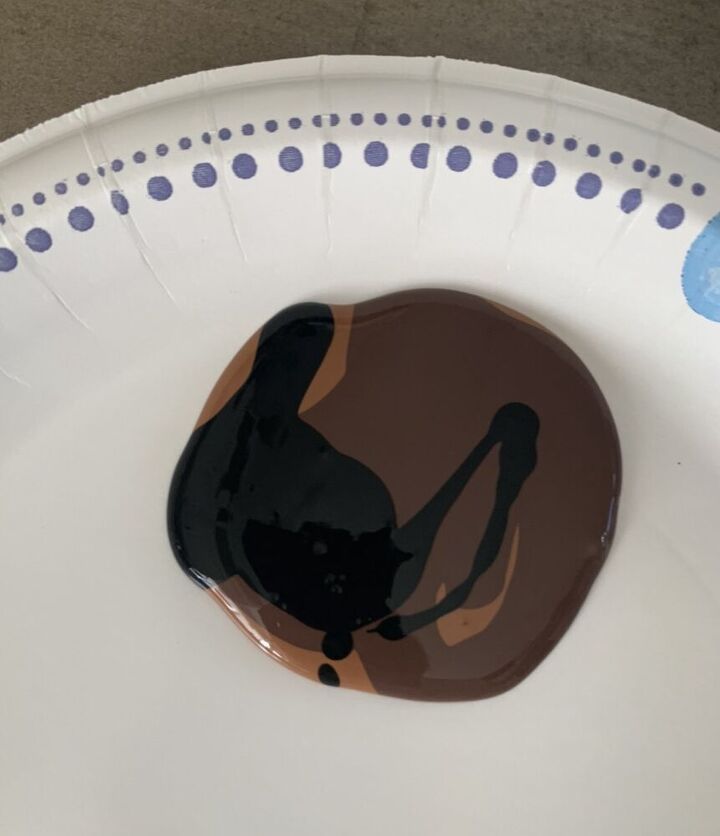
Step 2: Using your foam brush and brown acrylic paint, paint your styrofoam balls. This part can get messy and you’ll need two coats, plus mostly likely a few touch ups (I did these at the end). However, make sure you use acrylic paint and not spray paint, because spray paint tends to melt styrofoam.
(If you plan to put these outside, you will want to give them a coat or two of sealer, like a matte outdoor waterproof polyurethane. If you are only using them inside, you can skip this step).
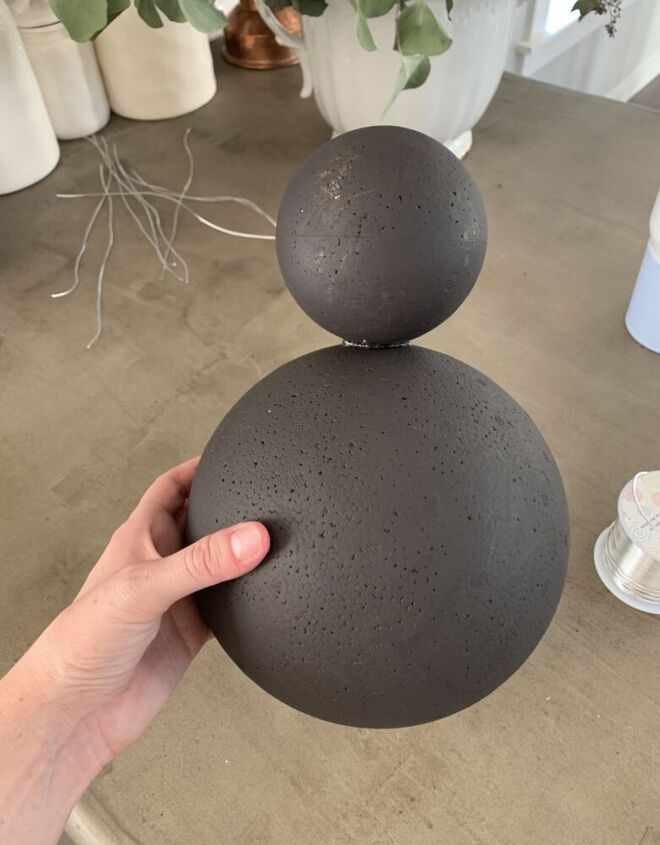
Step 3: Once your styrofoam balls are dry, heat up your glue gun. Glue your 4 2″ styrofoam balls to 4 of your 4″ styrofoam balls. Glue the other 4″ styrofoam balls to each half of your 8″ styrofoam balls. You should now have 8 spider bodies – 4 small and 4 large.
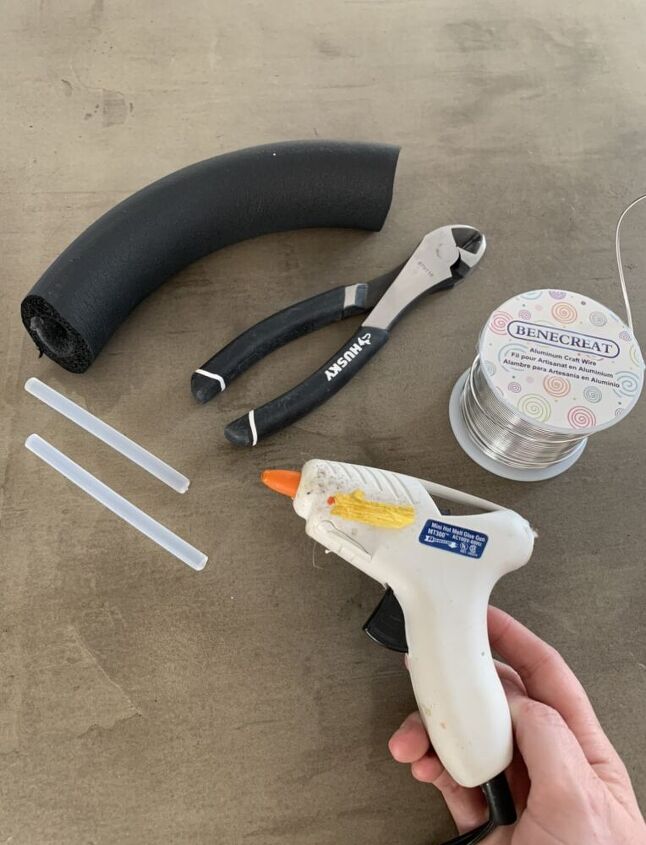
Step 4: Cut your foam tubing to make your spider legs. I cut each of my small spider legs to be about 10″ long, and my large spider legs to be about 15″.
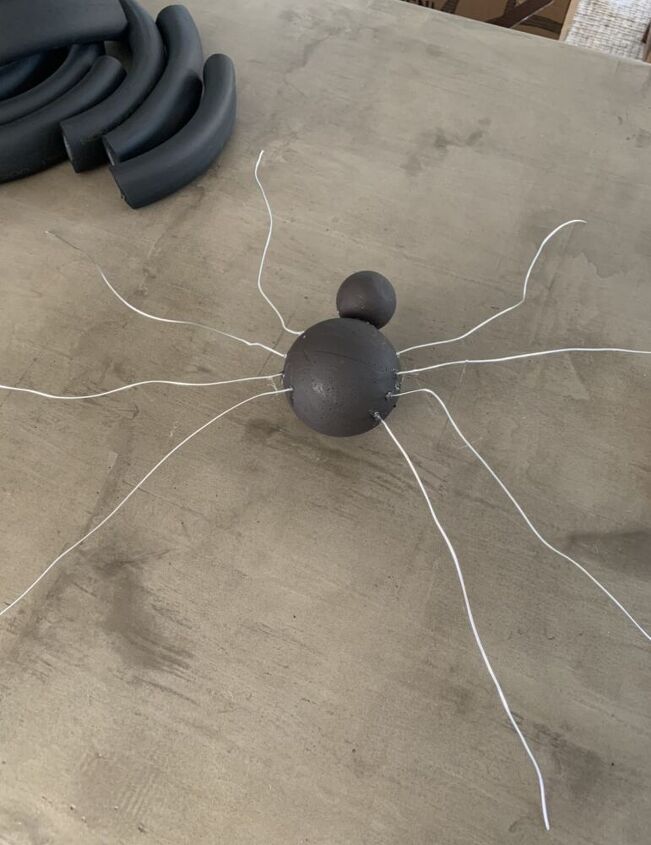
Step 5: Cut 8 pieces of wire for each spider. You want your wire to be about 3-4″ longer than your foam tubing. Use a dab of hot glue on the end of each wire and poke into the body of your spider about 1-1.5″. The hot glue will help keep the legs stable and in place. Repeat until all the wires are in stuck into the body.
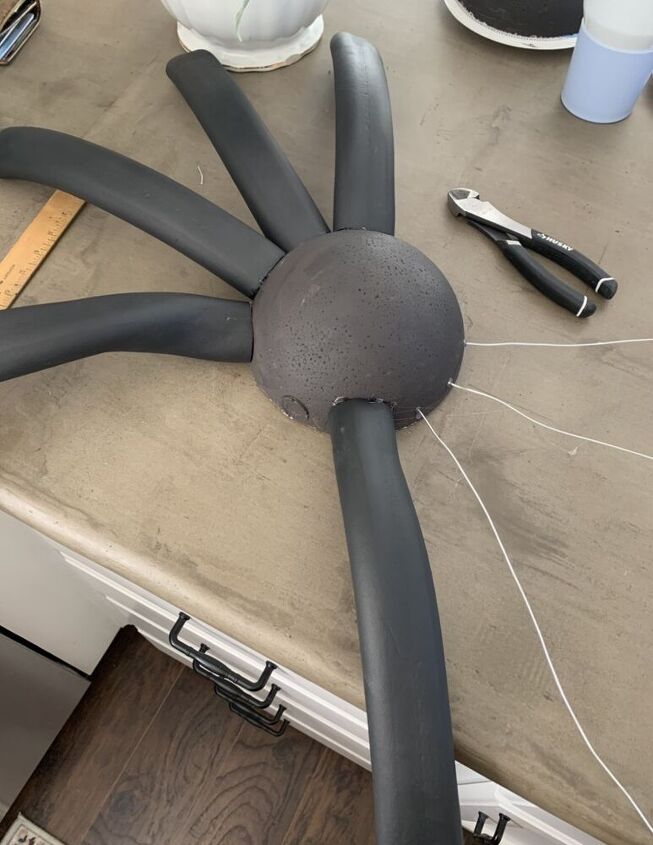
Step 6: Slip each of your cut foam tubes over the wire legs until they hit the spider body. You may need to do some manipulating of the foam tube to get the wire through, but it’s not too difficult. Then fold the excess wire over at the end to hold the tubing in place. If your wire is more than about 1″ longer than your tube, trim off any excess.
Step 7: Use hot glue to secure the base of your foam tubing to the spider body if needed.
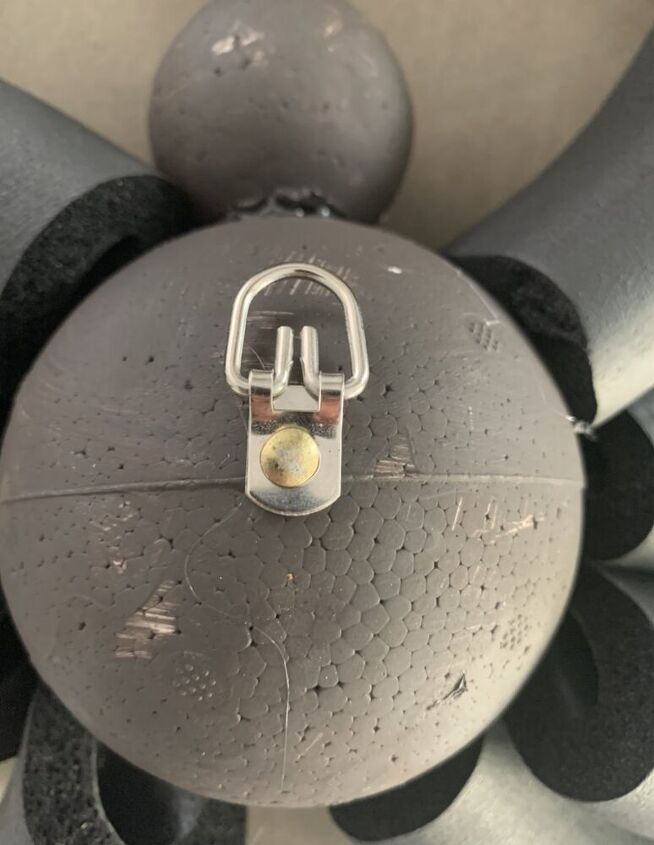
Step 8: Poke a small photo hanger and a large headed nail into the bottom of your spider bodies. I used some hot glue on the tips of each nail to make them extra secure.
Step 9: Do any final paint touch ups as needed.
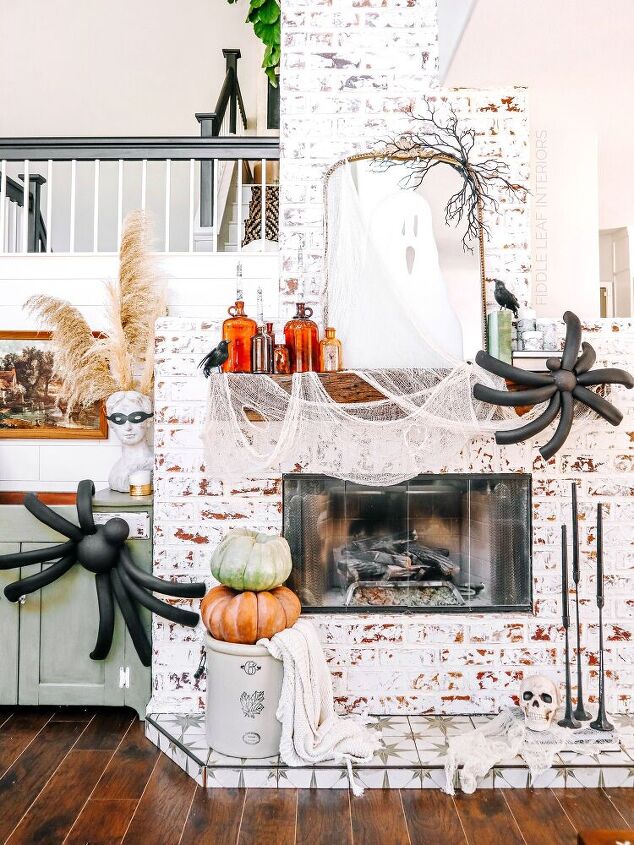
Step 10: Hang using small nails or command hooks. You can manipulate the legs a bit by folding them and positioning them as desired.
You’ll notice if you check out the Better Homes & Gardens tutorial that they covered their spiders in faux fur, which is super cute! However, I wanted to spend as LITTLE on this project as possible (your girl is CHEAP, especially when it comes to holiday decor that is not Christmas! ), so I nixed that for paint instead. I also may use these outside (remember to seal them if you plan to use yours outside as well) and I didn’t like the idea of the fur getting all matted down and gross in a possible rainstorm! I also used 8″ styrofoam balls instead of wire globes because they were less expensive.
And there you have it! A GIANT (literally) statement for your home or outdoor Halloween decor! Kids love them, too, and they are very easy to make. They are also relatively inexpensive if you consider what you might pay to buy something similar! Plus, the memories of making them are what’re really truly special!
Hope to see you over on the BLOG, friend!
Resources for this project:
See all materials


Comments
Join the conversation
-
Spider legs are connected to the cephalothorax, not the abdomens of arachnids. Insect legs are connected to the abdomen.
-
To make my spiders I use a black tablecloth from Dollar tree and pool noodles from the Dollar tree and the bags like Walmart bags and Dollar tree bags good stuff my tablecloth for the body and a spider


Frequently asked questions
Have a question about this project?
Could u use pool noodles, from the dollar store which I think would be cheaper than foam tubing and spray paint them? Just not sure what gauge wire or type to use though?
What is the diameter of the tubing you used? The legs look so much larger in the pictures than the tubing that came up on Amazon when I clicked on the supply list. Thanks.
I know you wanted to stay frugal, but your spiders are calling out for red eyeballs! Could you add small, inexpensive red Styrofoam balls? Wood beads? Faceted plastic gems, flat on the back for easy gluing, colored with red or yellow nail polish? Do they make cheap glow-in-the-dark paints?
Also, if you raise the Styrofoam by putting toothpicks into the bottom, would the painting go quicker?
Great project! Thanks for sharing!!