


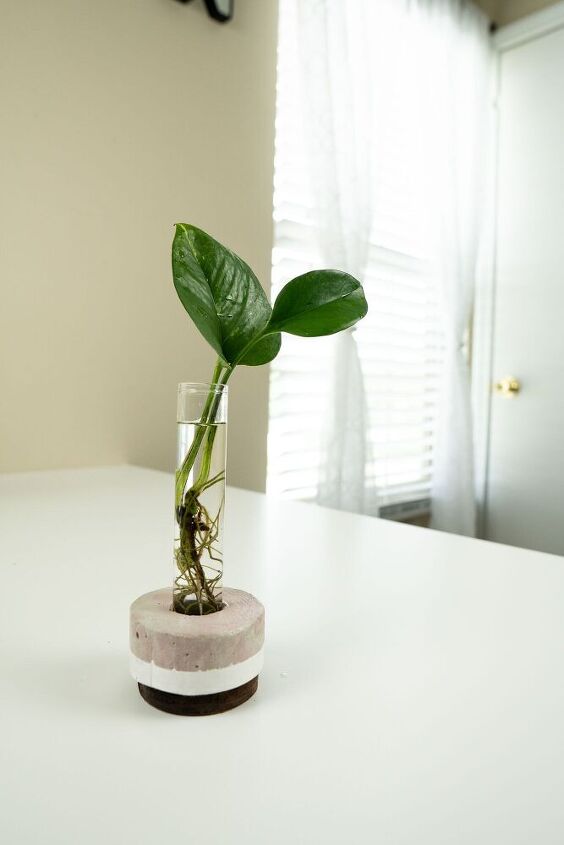
DIY Test Tube Planter Stand
An easy DIY Test tube Planter stand to spruce up your work desk. If you don’t want the plant on your counter or desk, then hang it on wall with this scrap wood DIY wall mounted test tube planter
You can check out the video tutorial below.
DOs and DONTs
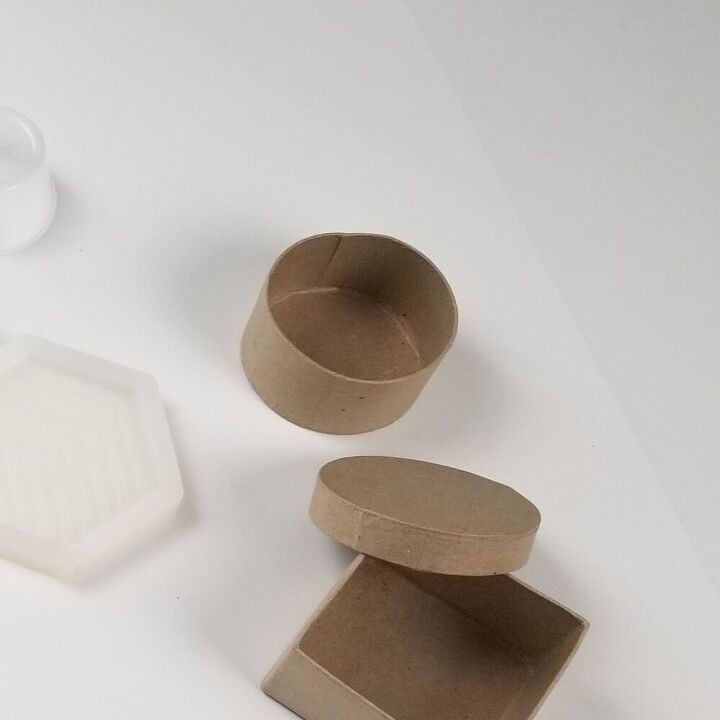
- You can use any kind of mold for your casting. I have seen people use all kinds of material as mold. You can make silicone mold with this kit from amazon or buy one (like I did to make my coaster) or make one with melamine wood or use any plastic container. It really depends on the size of your object and what shape you want to cast. If you are casting a small and simple object, you can also make a mold in the desired shape with cardboard. Once concrete cures, cardboard can be peeled off easily.
- Prepping the mold: Make sure the mold is water tight. If you are using any material other than silicone or melamine, I recommend coating the mold with clean vegetable oil or some release agent. This will help a lot when you demold.
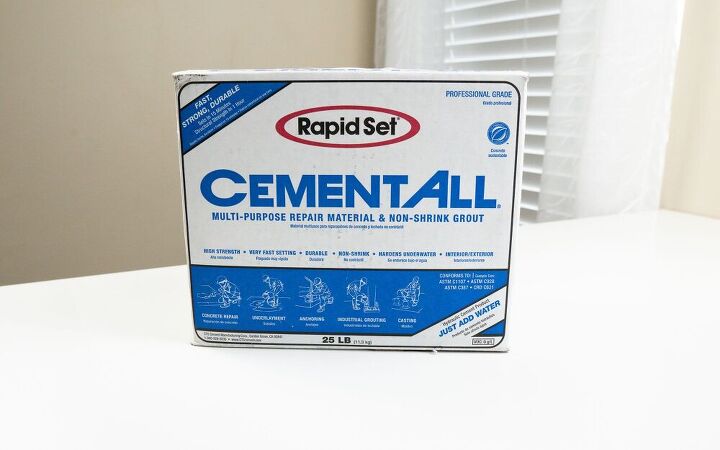
- Make sure that you follow the cement to water ratio as per the manufacturer’s specification. I have used ‘Cement All’ in this project. As per the direction, I used a 1:4 ratio. You want the mixture to be in pancake batter-like consistency.
- After you fill the mold, it is very important to release the air bubbles. So, give a few taps on all sides and corners of the mold. If you are casting a bigger item, pound on the mold with a rubber mallet.
- To add a personal touch, you can add liquid cement color to your concrete mix. In this project, I have only used acrylic paints to color the cement. In the case of acrylic paints, use as little as possible. Otherwise, it could affect the composition of the mixture.
- After curing, you should seal it with a water-based sealer. I use this polyacrylic sealer for most of my projects. It gives a little shiny finish to it.
DIY Test tube Planter stand for desk
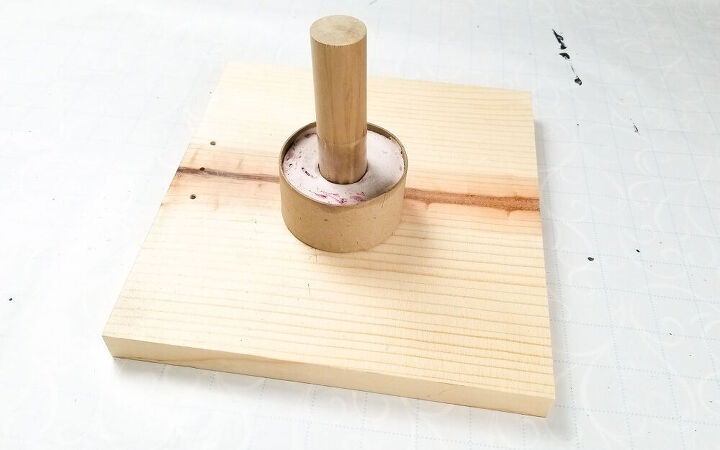
Step – 1: Cut the wood dowel 6 inch long. dowel should be same diameter as the test tube.
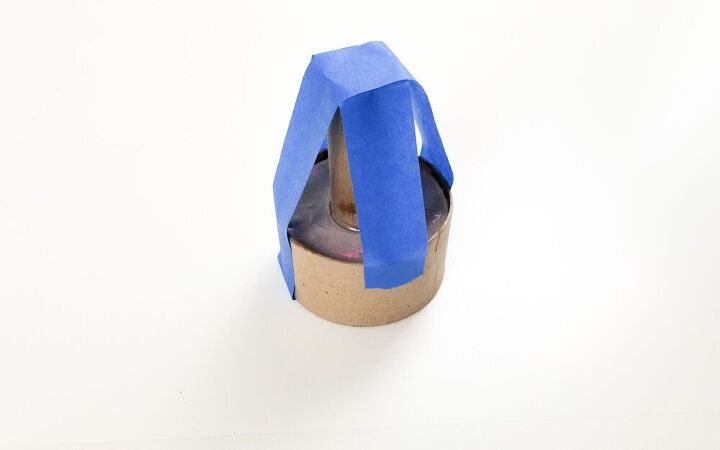
Step – 2: Cover the dowel with packaging tape and hot glue it to the center of the mold. For this, I am using this craft round box that is made out of cardboard paper.
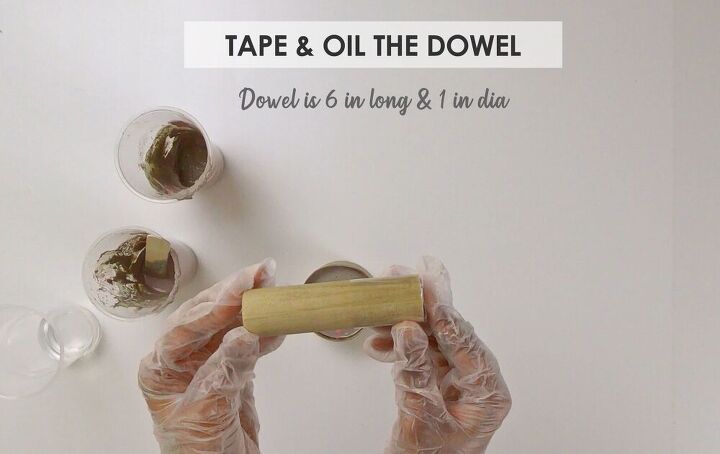
Step – 3: Grease the taped area of the dowel with vegetable oil. You can use any kind of oil here. The oil will not mix with cement and it will make the demolding process easier.
Step – 5: Pour the mixture into the mold and tap on all sides to release the air pockets. Next, tape the container and the dowel to secure in its straight vertical position.
Step – 6: Let it cure for at least 24 hours.
Step – 7: Demold by peeling the sides off.

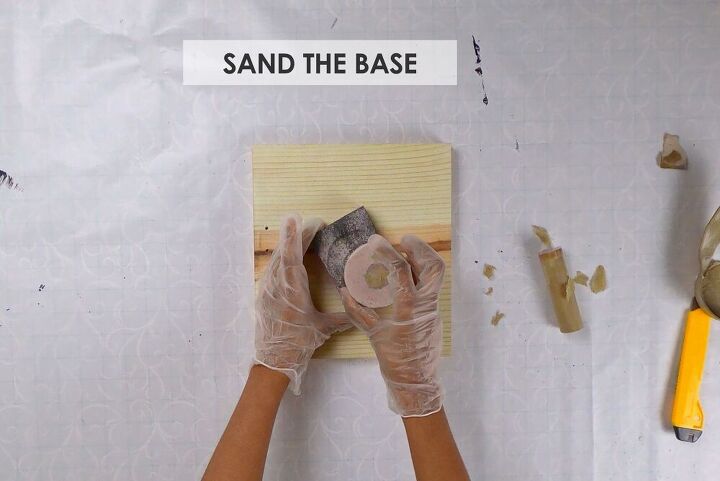
SANDING:
Step – 8 : Sand the whole piece and remove all the dust with clean towel.
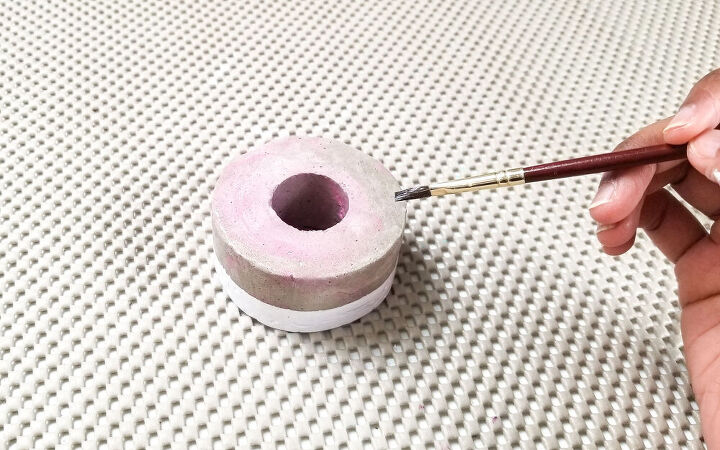
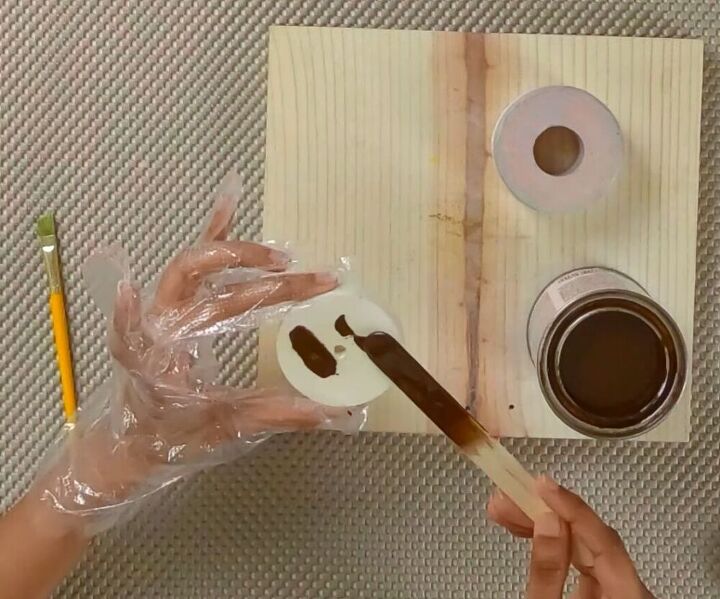
Step – 9: Personalize it with any color paint you want or leave it as it is in cement color. Finally finish with water based clear sealer.
Step – 10: Cut a half inch thick wood to to the same diameter as the cured base or smaller. I just used a hole saw bit and cut a round piece from 1/2 inch thick scrap wood. Then, stain the circle or paint it and glue to the base.
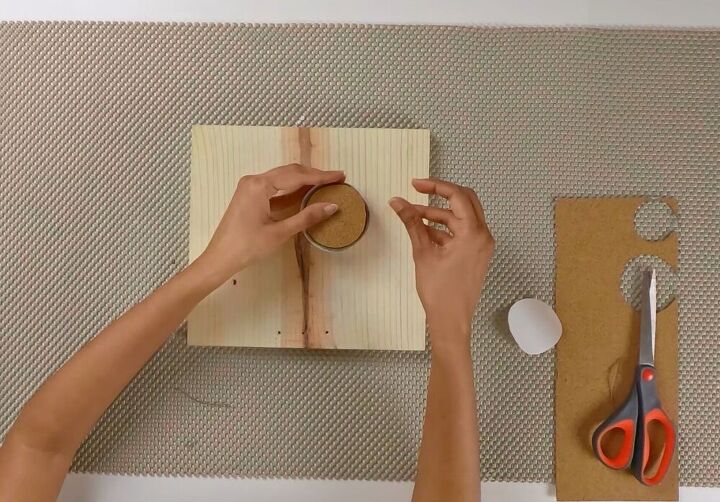
Step – 11: Once glue dried, add clear sealer to the wood and add adhesive cork sheet underneath to protect your table surface. Alternatively, you can also use felt or silicone bumpers.
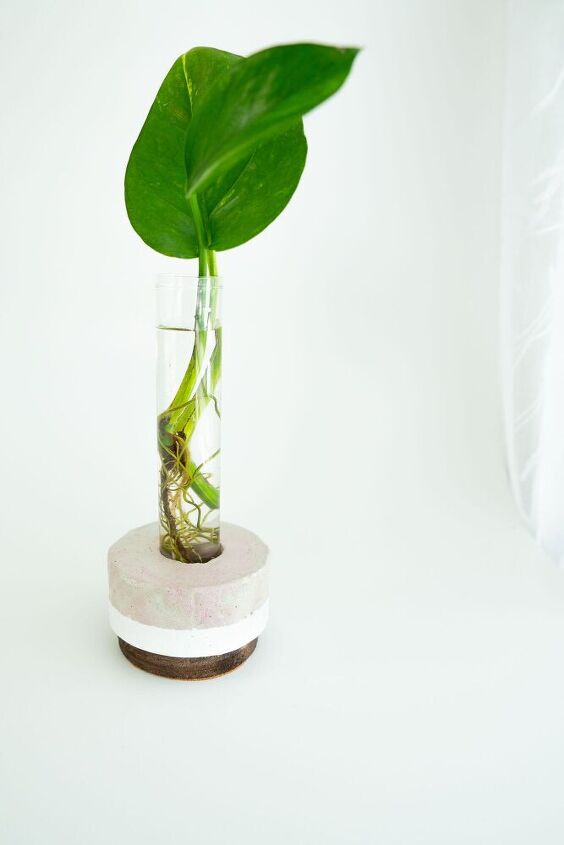
Fill the test tube with water, plant and place it in the base. I have used pothos here. You can also keep any flower that has long stem as the test tube. Its cute and perfect to have on your desk , table or counter.
For more such DIYs please visit my blog : https://www.thenomadstudio.com/diy-projects/
YouTube : https://www.youtube.com/user/nomadstudiovideologs
Resources for this project:
See all materials


Frequently asked questions
Have a question about this project?