


Chair Rail and Box Molding Accent Wall!

Updated: Jul 6
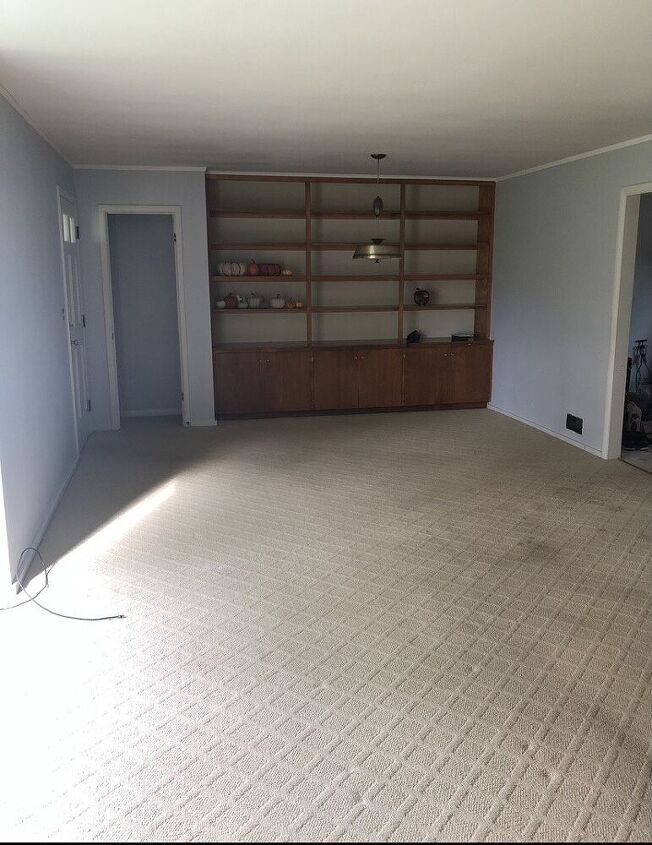
I have been seeing lots of chair rails and box molding accent walls and quite honestly I just wanted to give it a try! I love the look and how some simple trim can really spruce up a room! My dining area was the perfect place to give this type of accent wall a try! Before we get into the nitty gritty, here are the before pictures of this space when I first moved in!
I headed to Lowe's and grabbed my supplies. Here is everything that you will need...
- Chair Rail Molding
- Box Molding
- Poplar Square
- Nail Gun & 2in Brad Nails
- Miter Saw
- Level
- Wood Filler
- Sand Paper
- Caulk and Caulk Gun
- Paint Color of Your Choice (I used Behr Ultra Alabaster)
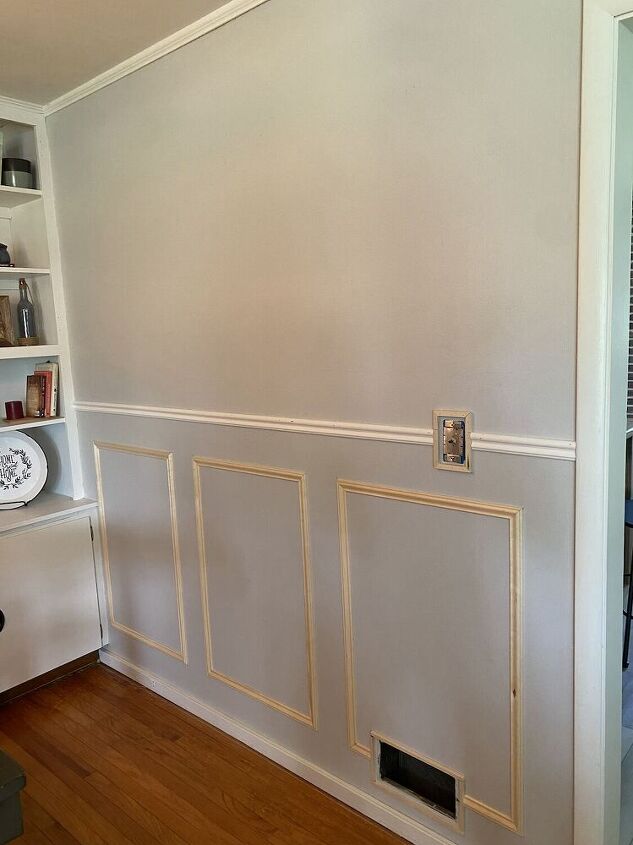
I started by using painters tape to "sketch" out my general idea on my wall of what I wanted. This helped me ultimately decide that I wanted three boxes, the spacing in between the boxes, and the heights of the chair rail.
It isn’t perfect but it really helped me visualize the idea I was going for! A typical chair rail is paced at 1/3 the height of your wall. I broke that "rule" and went higher, just because I liked the look better for my space. Totally up to you, but don't be afraid to break the rules. I have 8ft high ceilings and placed my chair rail at about 43in, again just preference. I just liked that look for my room.
The width of the wall I am working with is 87in. I wanted three boxes, with 5in spaces in between. I chose 5in spacing also just because of preference. I believe a typical chair rail spacing is about 3in spacing, but again don't be afraid to break the rules :)
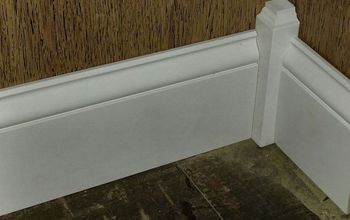
You may run into some obstacles on your wall. For example my trim pieces were going to run into my light switch and vent, there was really no way to avoid this. But, if you by any chance can avoid these, it will make your life way easier. The poplar squares are to frame or trim out your obstacle pieces, so these may be optional in your case! In my case they were not.

To start, you want to trim or box out your obstacles, AKA light switch and vent in my case. I used my miter saw to trim the poplar squares to the size of my obstacles then used my nail gun and 0.5in brad nails to secure into place. I opted out of using liquid nails for this project but you can always use that as well to really secure your trim pieces to the wall!
Next I tackled the easiest part, the chair rail. I used the thicker colonial chair rail trim piece for mine. You can really choose whatever type of trim you prefer, again totally preference depending on your design style! My chair rail ran into my light switch so I cut two pieces of the chair rail and used my level and nail gun (this time with 2in brad nails) to secure to my wall. If you do have an obstacle that your chair rail is going to run into it should run flush into your poplar squares for a nice clean finish.
Next I tackled my boxes! Every wall is going to be different measurements, but I‘ll use my mine as an example. This part definitely took the longest, mostly because of all of the math and triple checking of everything. Again, I planned for 5in spaces in between the edges of my wall and the trim, and in between each box. Take into consideration when you are planning out the measurements of your cuts, the thickness of the trim pieces. So for example, the box trim I linked and used is 1.3125in thick. So, I took the width of my wall (87in), subtracted 4x5in (for 4 x 5in spaces) and 1.3125x6 (for the 6 trim pieces). I then dived this number by 3 (for 3 boxes) which is 19 11/16 in. This gave me the measurement for the horizontal pieces of the boxes, which I needed 6 of these cuts.
I did the same math for my vertical box pieces. Take the height of your chair rail to the baseboard or floor. My height was 43 3/4in. I subtracted 10in (2 x 5in for the spaces above and below the boxes). And also subtracted 1.3125x2 (for the thickness of 2 trim pieces). This gave me the measurement for the vertical pieces of the box, which I also needed 6 of these cuts.
Once all of your measurements are made, you are ready to make your cuts! Adjust your miter saw to a 45 degree angle. All of your mitered cuts will be inward on both ends. You should have 12 pieces when you are done. Now it is time to assemble! I used a pencil to mark where all of the pieces were to go. I then matched my trim piece up, ensured it was level and used my nail gun with 2in brad nails to secure to the wall!
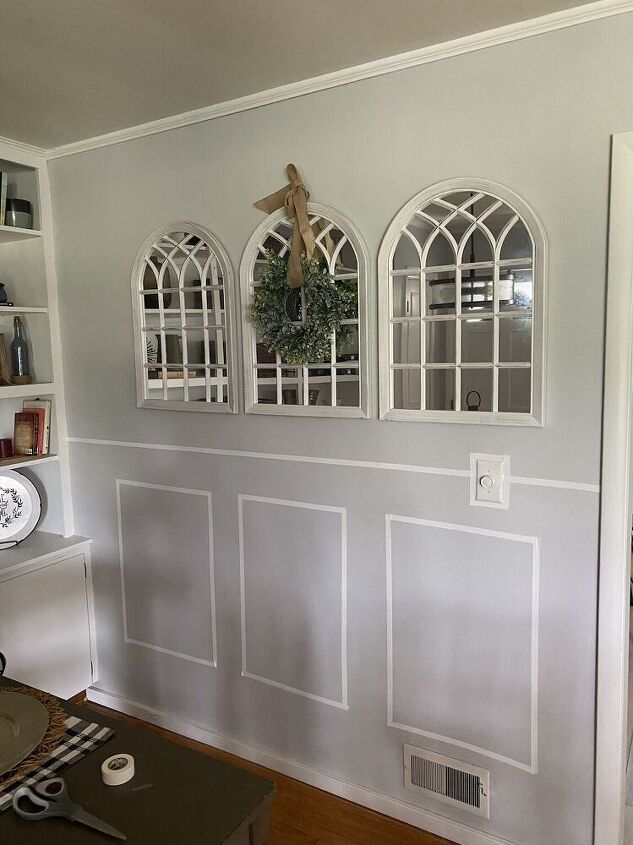
Next, wood fill all of your nail holes and where your trim pieces meet up. Then caulk around all of the trim pieces where they meet the wall. Smooth out with a damp paper towel or baby wipe for a smooth finish. Once that is all dry, gently sand down you wood filled areas. Then you are ready to paint! Here is how mine turned out, I love it!!
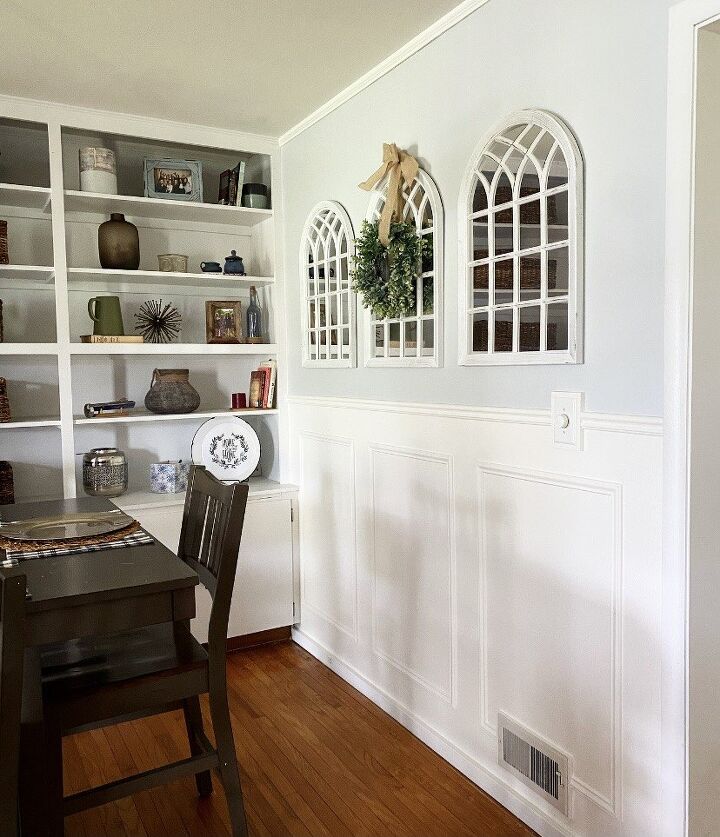
Here I have linked similar mirror options that I love! These mirrors really made this wall pop! If you try this chair rail and box molding yourself make sure to let me know by either tagging or messaging me on Instagram @abbbclarkhomeee. I would love to see how yours turns out! I hope this tutorial was helpful. Feel free to message me with any questions! Thanks for reading!
Resources for this project:
See all materials


Comments
Join the conversation
-
What a beautiful difference! I love what you did.
-
What a huge difference, very classy indeed.


Frequently asked questions
Have a question about this project?
Wow, nice transformation but can you include a view of the entire room just like the Before picture?