


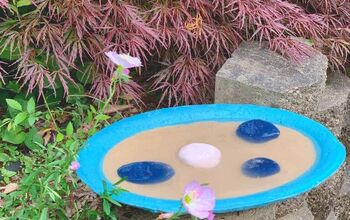
Homemade Cement Bird Bath
Use a Dollar Store bowl to make a brightly colored cement bird bath.
I’m a birder (bird watcher) and and what's a better way to see more birds than to put out a bird bath. And why buy one, when you can make one for cheap!
Homemade Cement Bird Bath Video Tutorial
Please click the button to subscribe to my YouTube channel and be notified when I have a new video tutorial!
So how to make a homemade cement bird bath?
I kept envisioning a bright orange or yellow tulip for some reason when I started brainstorming on this bird bath and I thought maybe somewhere I could find a big plastic, flat flower that could work as a mould.
A colleague at work was talking about how she watches the owls and hawks splash around in the creek in her backyard and I felt a little envious.
Well, I probably won’t get birds as big as owls or hawks in this bird feeder, but I think the little ones will appreciate it.
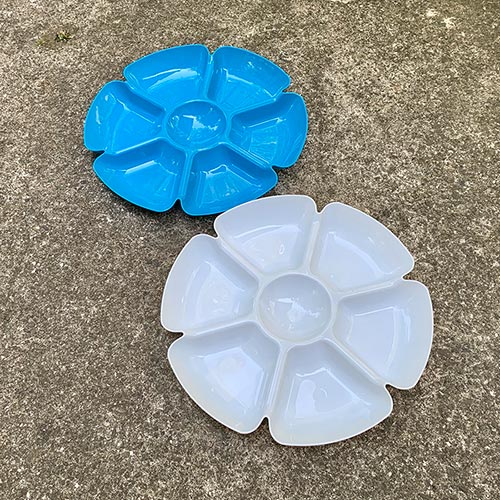
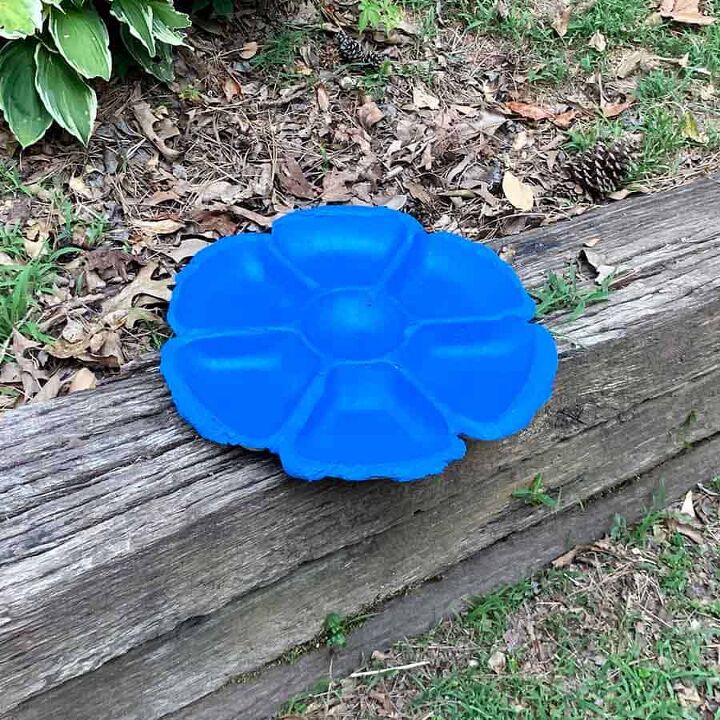
So I stopped in at the local Dollar Tree store and didn’t find an actual flower, but I did find a cool petal shaped chip and dip bowl that had the perfect depth for a bird bath and mimicked the shape I had envisioned.
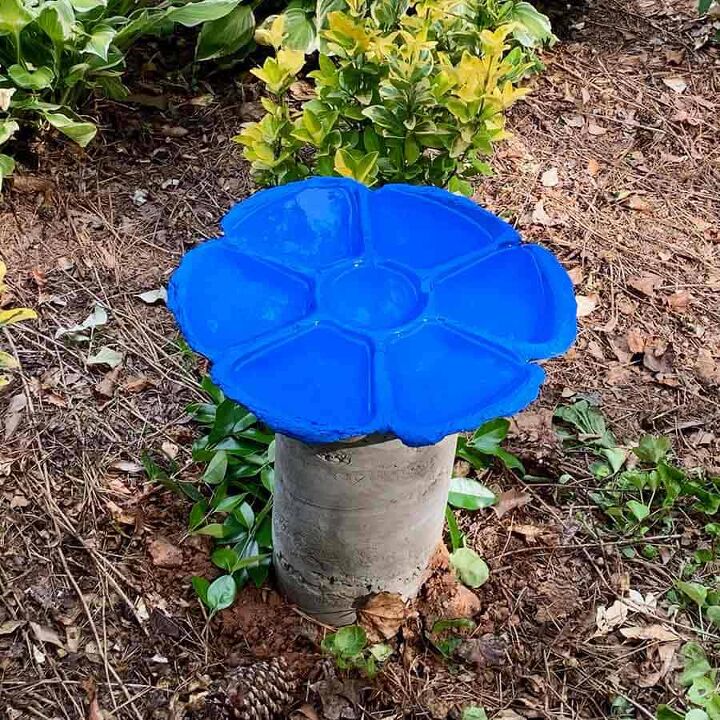
I even ventured a little out of my norm here and painted this cement bird bath, because not only is it painted, but I actually followed through with a bright color, but I made it blue instead of orange or yellow.
If you want to attract butterflies to your yard, in addition to birds, then take a look at this DIY Concrete Butterfly Puddler tutorial!
I hope you enjoy this little Dollar Tree DIY.
**If you love making concrete projects, then check out my Pocket Guide to Concrete Mixes! I tested 6 mixes and made a handy reference chart. It's a FREE download. 😉
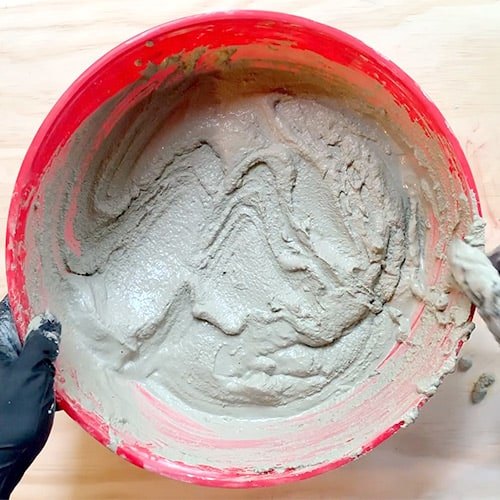
Step 1 | Mix The Cement
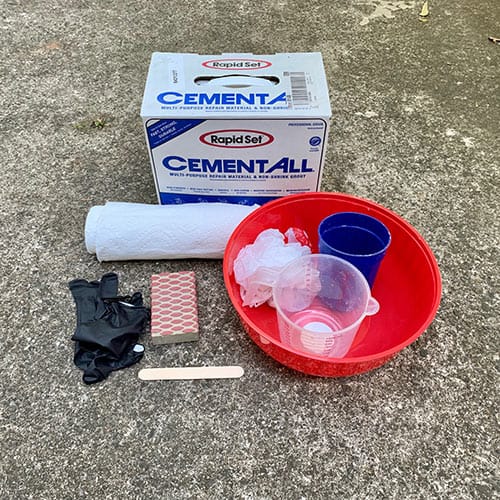
The first step in making this homemade cement bird bath is to mix the cement. In a disposable bowl, use the disposable cup and measuring cup to add cement and water.
Next, you’ll need about 6 cups full of cement (my cup holds 16oz.), but do this in batches to make it easier to get smooth. If you have lumps, it will add air bubbles.
You want this to be the consistency of a thick shake. It should be pourable.
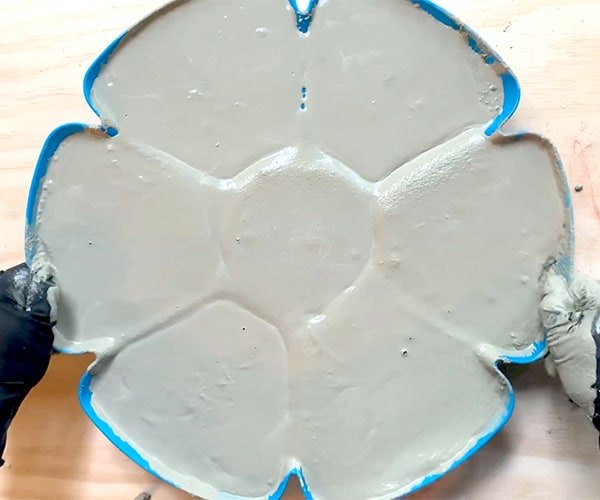
Step 2 | Add Mix To Mould
Pour the cement mix into the mould. If you are using this same chip dip- petal shaped mould, then make sure to pour enough to cover the inner rims.
*This is very important, you must make sure you fill the mould as high as it will go. Now gently tap and shake the mould until the air bubbles release and it looks very smooth.
Pop any air bubbles that don’t release on their own.
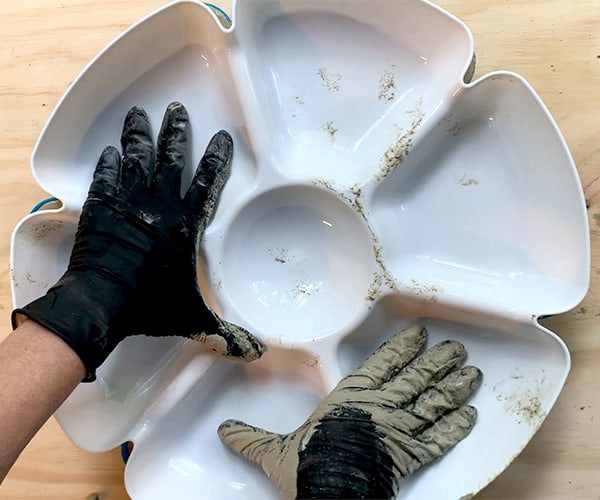
Step 3 | Cap The Mould
Take the other mould and place it on top of the cement so that you create a sunken impression.
Press firmly and evenly, and while doing this, the petal edges will spill over. Be sure to remove the excess around the rim so you can avoid under cuts, which make it difficult to remove the mould.
I wanted the look of the overflowing petals, and thought I took care of the under-cuts, but didn’t get them all and spent an extra 15 minutes chiselling the cement when de-moulding.
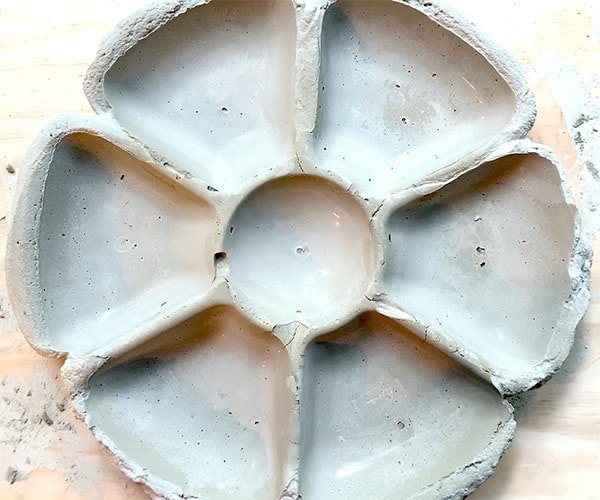
Step 4 | De-mould The Homemade Bird Bath
Remove the top piece of the plastic mould and place the second mould that has the cement in it on something soft like a towel and turn it upside down.
Now gently shake the mould a little and pry up the plastic. If you don’t have undercuts, then cement will de-mould easily.
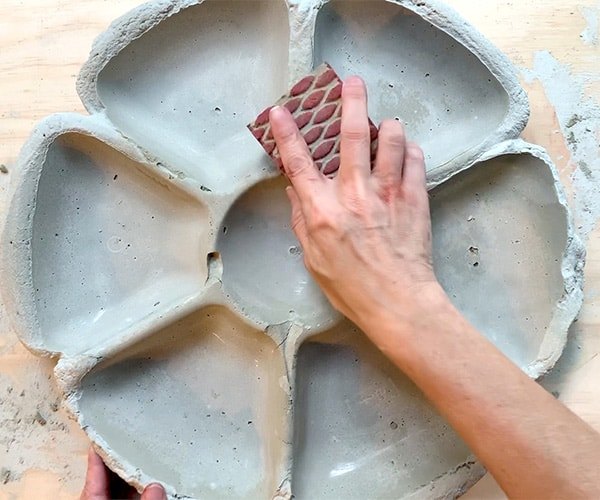
Step 5 | Sand The Cement
Flip the bird bath back over and use the sanding block to sand away any sharp edges or lines you have.
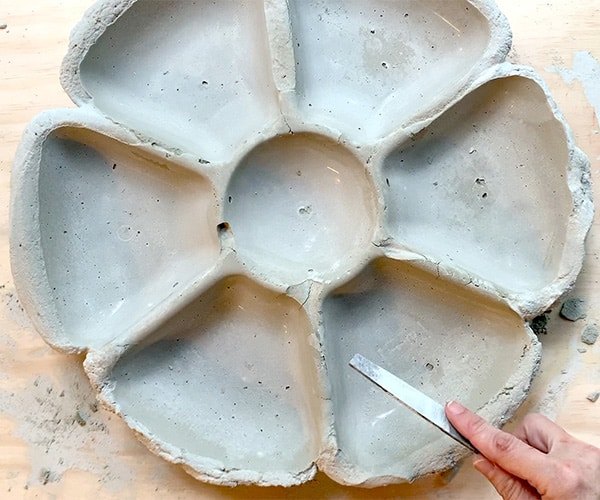
If some are especially sharp, use the file or chisel. Then use a wet paper towel to wipe out any cement dust to prepare it for painting.
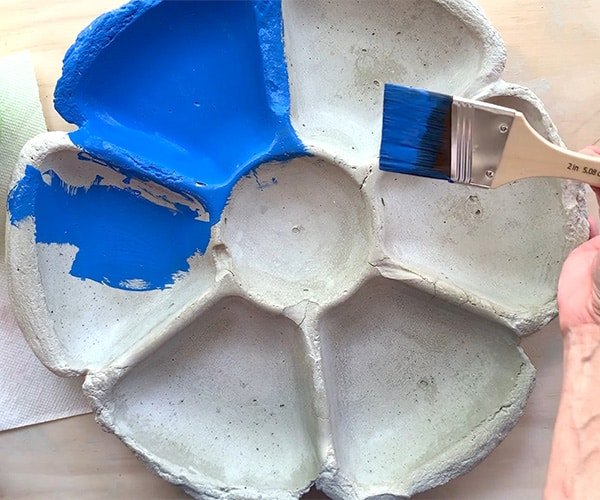
Step 6 | Paint The Cement
Take the paint brush and apply the acrylic paint to the bird bath. I painted only the top and the edges of the petal lips.
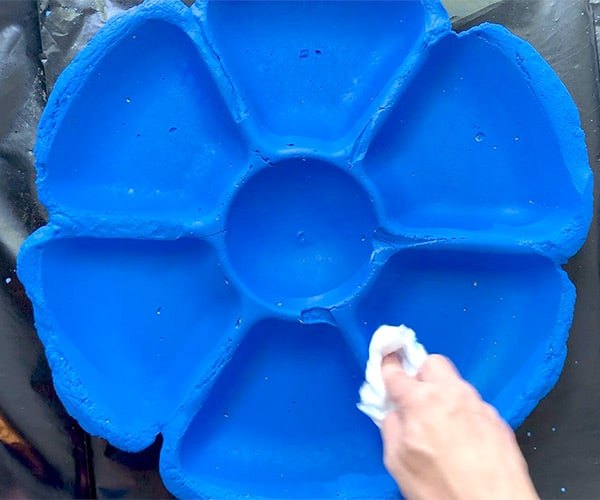
Step 7 | Seal The Cement
Pour a little bit of sealer into the plastic cup. The sealer will stick to the cup and not easily come off, so use something you can throw away.
Next take a cotton ball or pad, or foam brush and just dab the sealer on and wipe to make it even. You only need to seal the areas you have painted, the cement doesn’t need to be sealed.
If you have chosen not to paint your homemade bird bath, then you still may want to seal the top parts to make it a little easier to clean.
The Pedestal Base– You can choose not to make a base and just set the bird bath on top of something else.
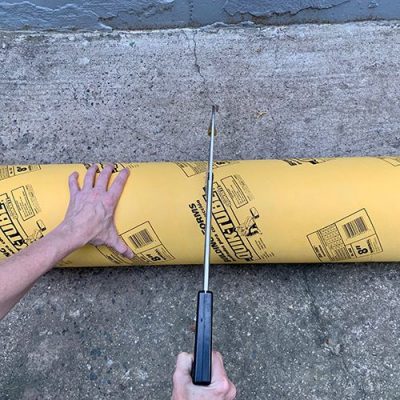
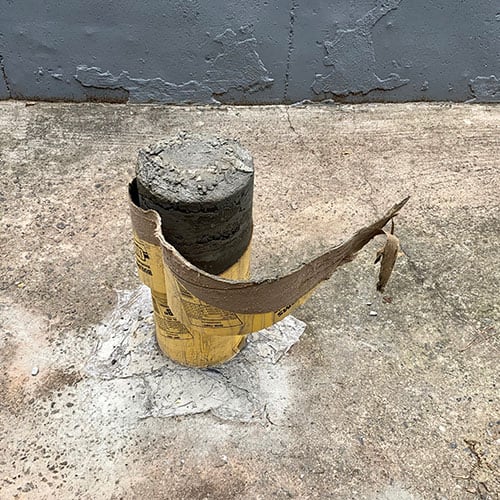
Step 8 | Cut The Form
Using a hack saw, you’ll be trimming the form to the size you need. I made mine 18″ high because it worked with the landscape in the spot where I wanted to place it.
Now mark your cutting line and take a hack saw and trim the tube.
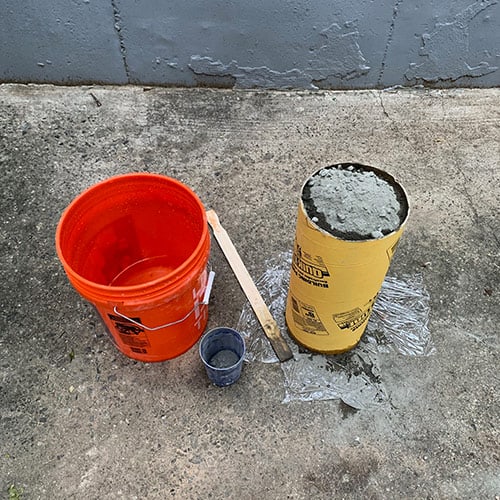
Step 9 | Mix The Concrete
I did this right inside the tube and it worked fine, but I recommend mixing it in a bucket first because I didn’t have a good way to mix it and I think some areas ended up being less strong than others.
First, place a piece of plastic wrap underneath the tube so it doesn’t leak out from the bottom.
Now add the dry concrete mix into the bucket. If you are making your base 18″ high, I estimate, in a 5 gallon bucket, you will end needing to have the mixed concrete about 2/3 or 3/4″ full.
It will be easier if you don’t try to mix it all at once. You should mix a 4:1 ratio of concrete to water. Next, use a hoe, spade or extra large paint sticks to mix the concrete.
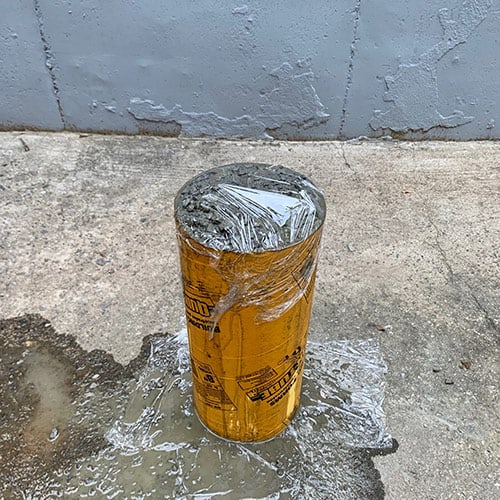
Step 10 | Pour The Concrete
Pour the concrete into the tube- it helps to have an extra set of hands, one holding the tube in place and one also making sure to hold it to the ground so the cement doesn’t seep out.
*Alternatively, you could also just pour this in the location you will place the pedestal, that way you don’t have to carry it to the location after.
If you are mixing the concrete directly in the tube, make sure to pour enough concrete that it comes above the tube, but doesn’t spill over.
You are trying to leave a bit of a bump because you will create the shape of the homemade bird bath so it sits nicely.
So once you have a little bump, tear off another piece of plastic and place it over the top of the cement.
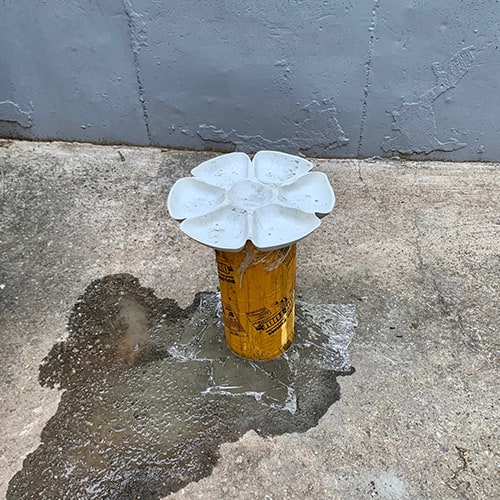
Step 11 | Make A Platform Mould
Take your finished bird bath and place it on the bump so that it sits evenly and is level.
Then push it down a little so that it feels secure, then you can take it off. It should have left a perfect indentation.
Now wrap the whole thing with a trash bag to help with the curing process. It will likely take a minimum of 24 hours to cure.
Mine took at least 48, but that may be because I didn’t wrap it with the trash bag during the first 24 hours, and also possibly because I mixed it in the tube.
Final Step | De-mould The Pedestal
Check that it is fully cured by touching it and if it feels warm, then it is still curing. If there’s no heat coming off of it then it should be safe to de-mould.
Take off the plastic and tear the cardboard tube off of the pedestal and move it to its permanent location and place the cement bird bath on top.
Then twist it so that it sits perfectly into the moulded shape you created on top of the pedestal.
Finally, fill the bath with water and enjoy watching the birds in your new homemade cement bird bath!
Materials For Making A Homemade Cement Bird Bath
- (2) Petal shaped plastic molds (chip dip bowl)- from Dollar Tree
- Cement All, Rapid Set
- Disposable plastic bowl
- Disposable plastic cup
- Disposable measuring cup
- Durable nitrile gloves
- Paint sticks for mixing cement- if you wish (I use my hands)
- Acrylic paint- Blue
- Soft nylon paintbrush
- Foam brush or cotton pads
- Concrete sealer
- Chisel or metal file
- Sanding block
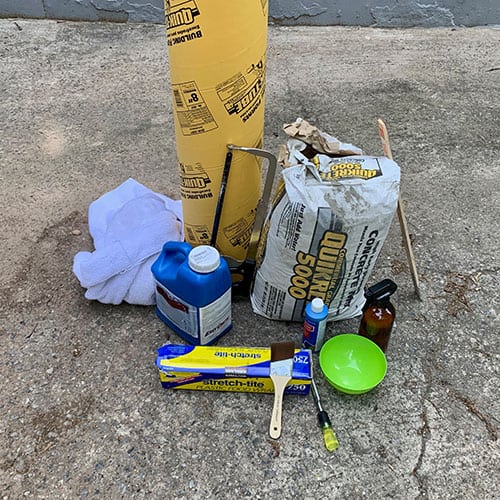
Pedestal Materials: (It’s not necessary to make a pedestal, you can choose not to make a base and just set the bird bath on top of something else. *Please note the curing time for this pedestal will be a minimum of 24 hours.)
- 8″ Concrete form tube
- Hack saw
- Plastic wrap
- Fast setting concrete
- 5 Gallon bucket
- Something to mix it with- like extra large paint sticks, a trowel or spade shovel
- Plastic trash bag
Resources for this project:
See all materials


Comments
Join the conversation
-
We have Coopers Hawks everywhere and the hunt songbirds (ugly). So anything that causes bird gatherings is just feeding time. What I do is put sprinkler out for half hr twice a day. Birds line up to play/bath/drink. So entertaining. I’m able to guard them and they reward me with a lovely show
-
Leslie. Cooper’s hawks main diet is song birds unlike the red shoulder hawks (love them and yes eat things we don’t care to live with). Song birds are in decline. And nothing better to wake up to the beautiful music they make. Not a fan of finding bloody feathers everywhere on regularly either. Cooper hawks have driven away regular hawks and our neighborhood owls. Loose loose. Other hawks interacted with us and are enjoyable Cooper’s hawks aren’t interested. Sad😌


Frequently asked questions
Have a question about this project?
Have you tried putting the glass beads from the dollar store in the cement before putting the top mold on to set? Just thought some blue, green and clear beads and you wouldn't have to paint the cement to achieve a more decorative look. Don't know, however, if it would weaken the cement.
I wonder... do birdbaths need to be elevated? So it's fine how you show it. I see the chipmunks etc also enjoying the low ones! If you want to forego the plastic mold you can also mound up a bit of sand or soil and use a rhubarb leaf for the mold. https://www.madebybarb.com/2021/05/16/leaf-cast-concrete-bowls/
Are the sealer and paint non tocic?