


DIY Reusable Beeswax Wraps Three Ways!
DIY reusable beeswax wraps are a fun way to get away from using so many disposable plastics. I tried three different methods to see which one works the best.
This post contains affiliate links.

The idea behind the challenge was to stretch ourselves to learn a few new skills. All the while filling our homes with purposeful handmade items! You can find my first four projects for the challenge below.
- How to Crochet a Dishcloth for Absolute Beginners
- DIY All-Purpose Cleaner & Bathroom Spray with Witch Hazel
- Easy Farmhouse Envelope Pillow Cover Tutorial
- How to Sew a Simple Tote Bag with Flat Bottom and Lining
Why Make or Use Beeswax Wraps?
I am not going to get on a soapbox here, I am not an environmentalist per-se. However, there is something in me that hates waste. I don’t like to throw things away that have been used only one time, it just feels wasteful. I like to model our lifestyle after the old-fashioned way of “use it up, wear it out, make it do, or do without”.
Plastic isn’t my favorite substance either. We like to use glass whenever we can. (My husband is a glass engineer, so he has taught me to support the glass industry by buying products in glass rather than plastic). Covering a glass bowl with a compostable sustainable wrap sounds much better than plastic wrap! Plus they are pretty, which is important to me!
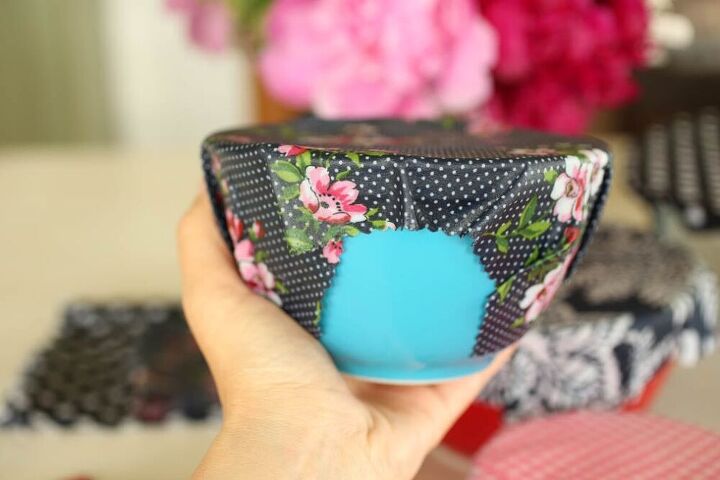
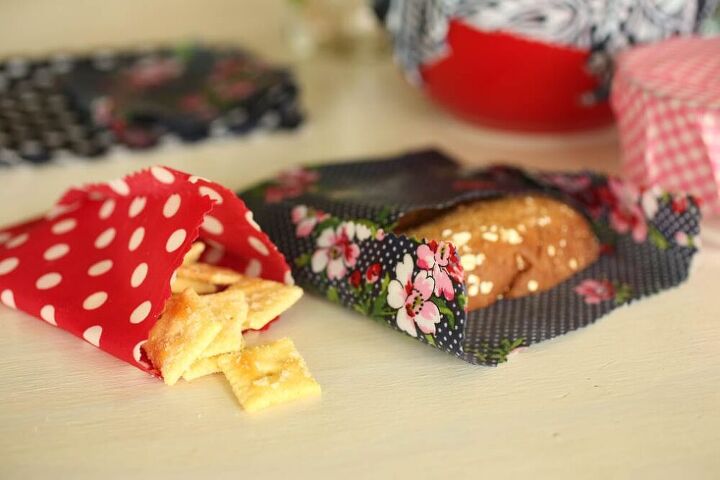
Beeswax wraps last for a year or more. You can always refresh them by heating them up. You could even add a bit more wax. If they are beyond use, they are compostable! I appreciate reusable, non-toxic biodegradable products!
Beeswax Benefits
The benefit of using beeswax is that it has natural antibacterial and antifungal properties. It keeps food fresher and helps inhibit the growth of bacteria. This helps to prevent food spoilage as the wrap is actually breathable. Beeswax makes the fabric moldable and clingy.
What Sizes for Beeswax Wraps?
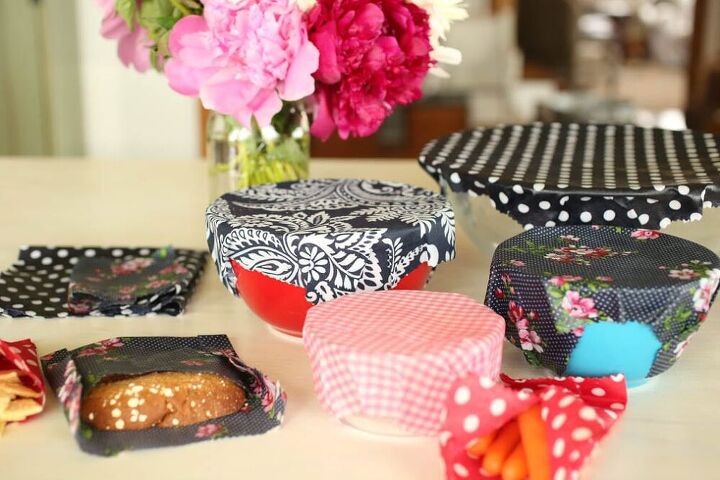
I made about a dozen wraps. Mine varied in size. I did some 14×14, some 10×10, and some 7×7. Measure your most commonly used bowls and see what size you would need to cover the top and stick to the sides.
Choosing the Best Fabric for DIY Beeswax Wraps
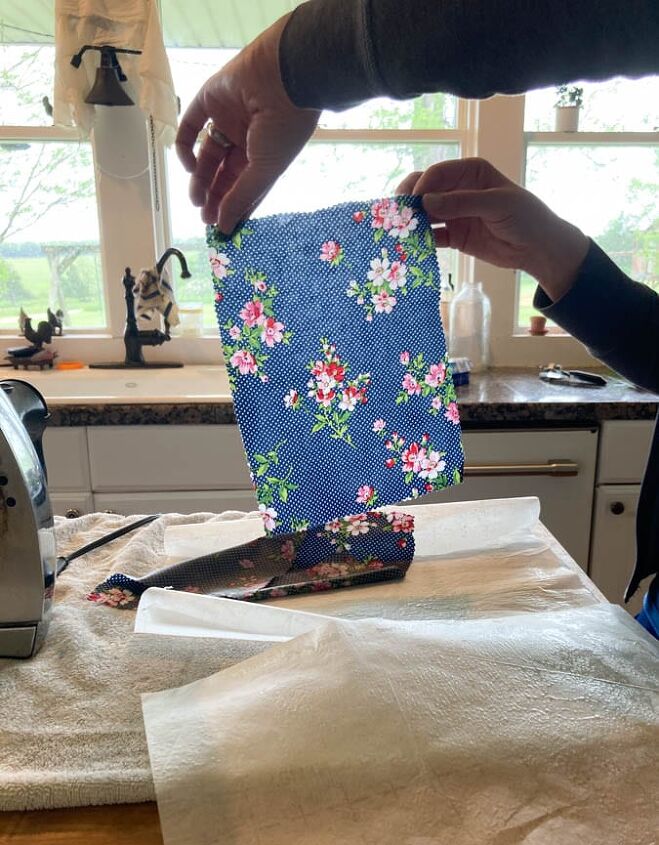
This is a pretty important step. The fabric you choose should be 100% cotton and rather thin. I didn’t think about how my choice of fabric would affect my wraps. However, after my experimentation, I realize why it is important! Don’t you love that I make the mistakes for you?
I just grabbed the scraps of fabric I had that were pretty and coordinated with each other…you know for pictures! It turns out that the thin 100% cotton pink calico fabric made the best wraps. Some of the other fabric, particularly the blue and white paisley print was thicker and it just didn’t want to mold around the bowl as well.
It was actually fun to experiment and see what worked best. My three-year-old was my big helper for the whole project. All of the kids were fascinated with my makeshift kitchen lab! So here are the results of my experiment, beeswax wraps three different ways!
#1 Beeswax Wraps Using Only Beeswax
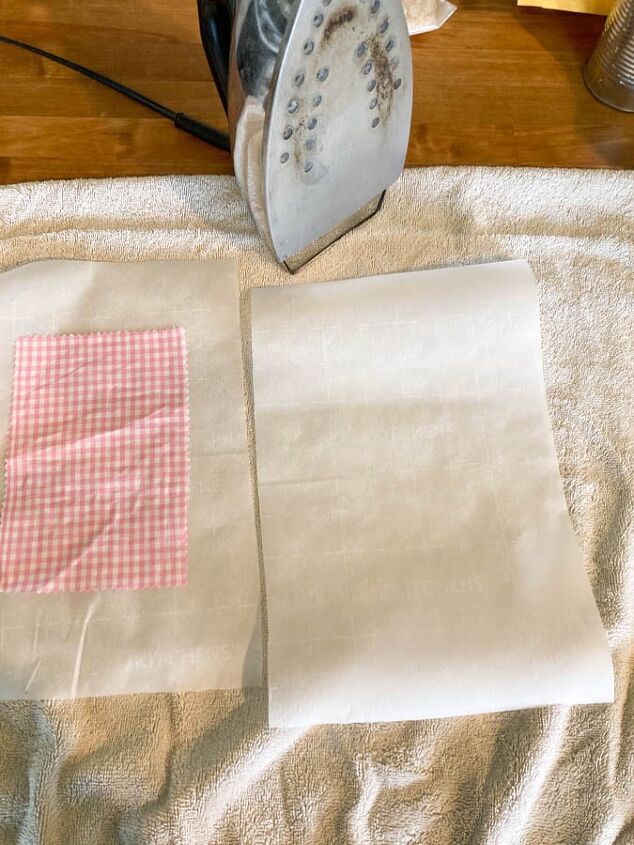
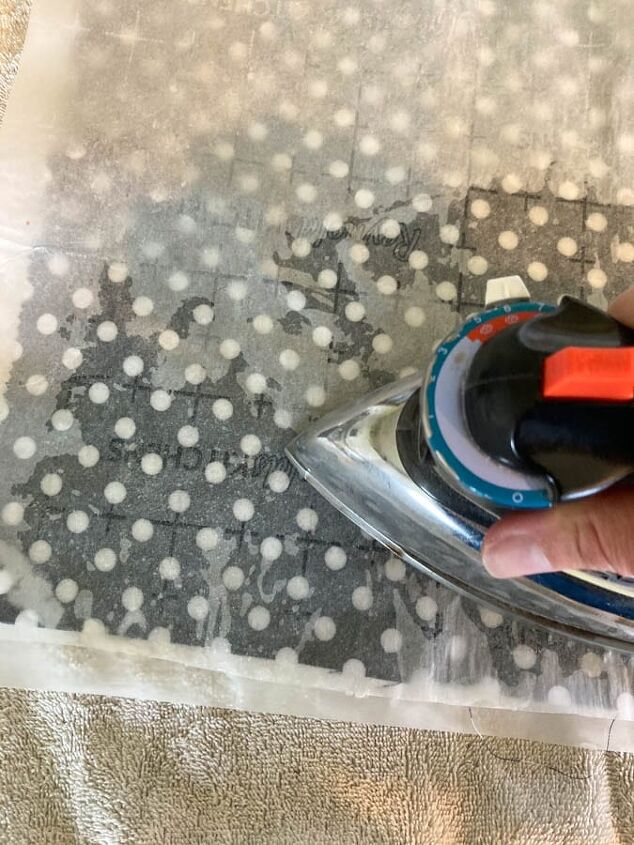
I had to try this method first because it just sounded so easy! I read several articles claiming that these work just fine. Some people lay the fabric on a foil-lined baking sheet and sprinkle wax over the fabric. They then let it melt in a 170-degree oven. They then spread the melted wax out with a brush.
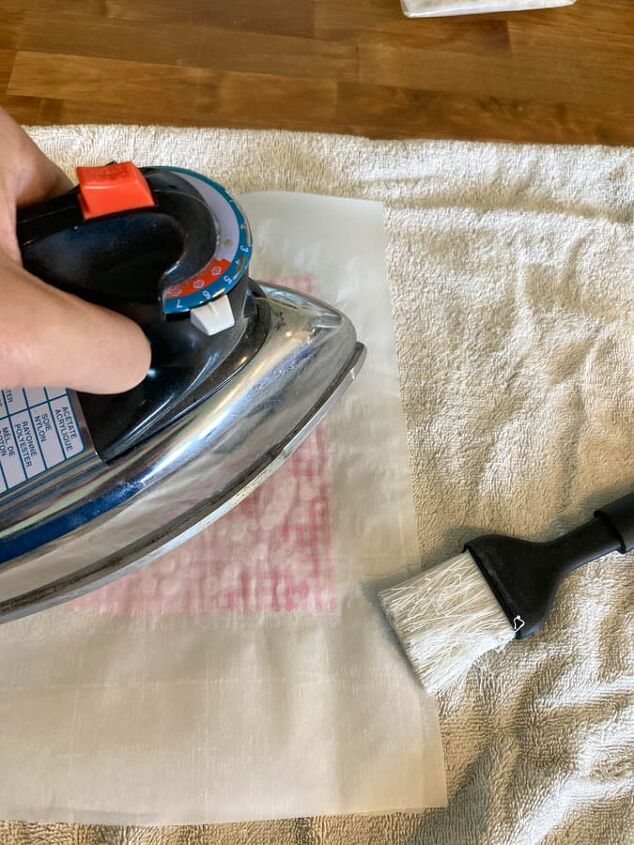
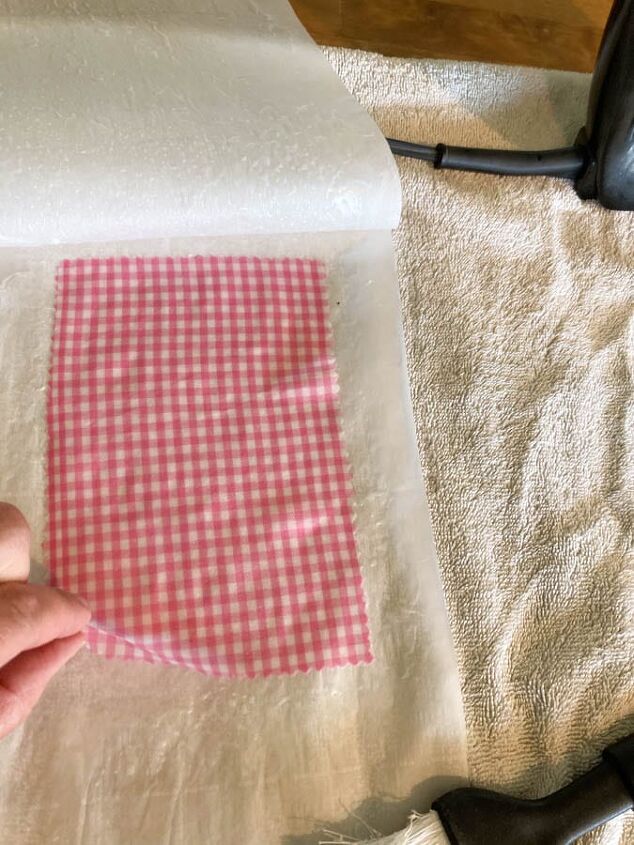
I did something similar. It was a rather warm on the day I was making these, and I didn’t want to heat up the oven. Therefore I tried the iron method. I spread a towel on the kitchen island, then I put down a piece of parchment paper, next I sprinkled enough beeswax pellets on the fabric to sparsely cover it. Then I layered another piece of parchment paper on top. Using the iron I went over the parchment paper until I could see that the wax had melted. This actually spreads and distributes the wax nicely.
The Result?
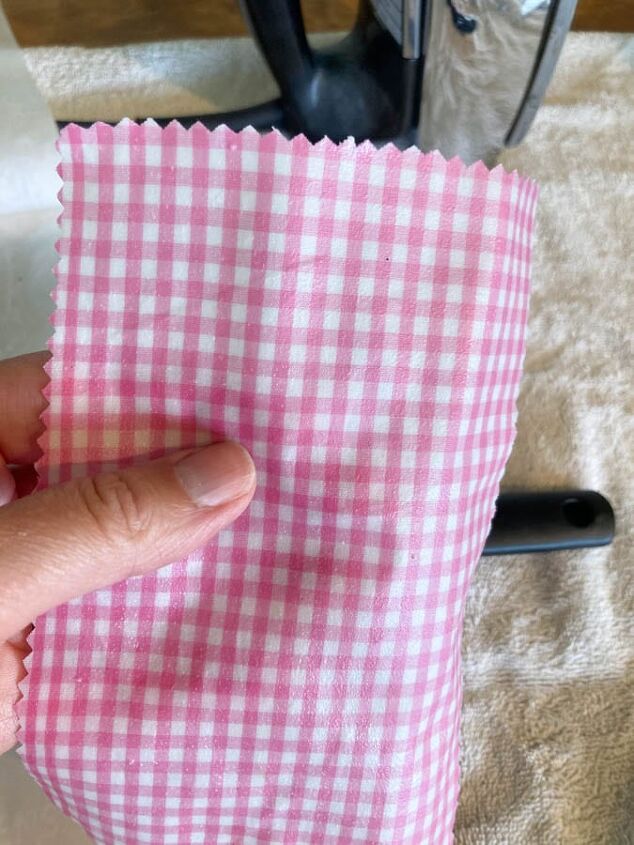
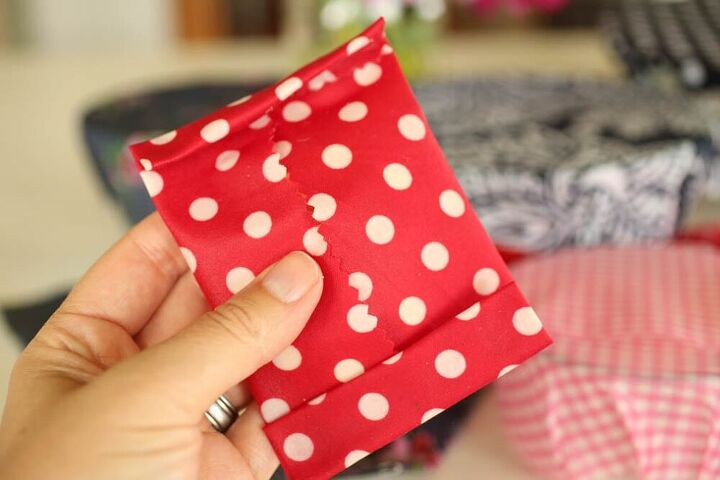
Meh…these are just okay. Beeswax only yields a stiff wax-coated piece of fabric. These rely on the heat from your hands to soften them and make them moldable. They do not stick to a bowl, but they will stick to themselves…sort of. So, if you are wanting to try these and only have beeswax on hand, and if you plan to wrap food with them, these might work for you.
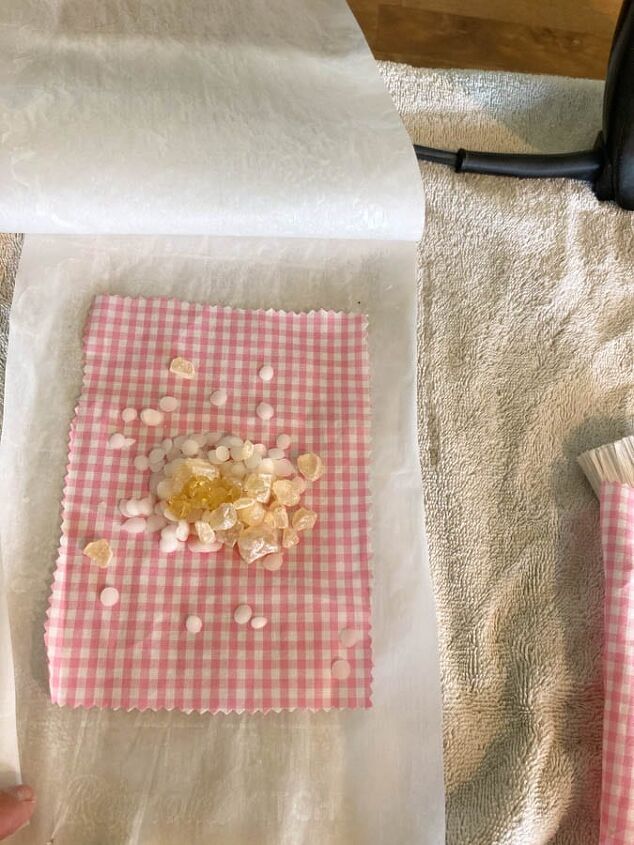
#2 Beeswax Wraps Using Beeswax, Pine Resin, Jojoba Oil, a Double Boiler, and an Iron
If you are planning to try this method, save a can, or open a can of beets and snack on them while you make the wraps like we did! Whatever you use will be pretty much ruined by the time you are done. Pine Resin is extremely sticky.
I think this method would work better with different ratios. Here is what I used:
- 1/2 Cup Beeswax
- 3 TBS Pine Resin ( I think this method would be better with more, like 1/2 cup)
- 1 TBS Jojoba Oil (This could be increased as well)
While you should be able to paint the mixture on the fabric, I found that I still needed to go over it with the iron. The iron really helps it to spread evenly and soak into the fabric.

The Result?
This recipe and method made pretty good wraps. I really think the pine resin needed to be increased. They just weren’t as sticky as I would have liked. As you will see in the next recipe, I think the ratio of equal parts beeswax and pine resin with half as much jojoba produces a nice sticky wrap.
#3 DIY Beeswax Wraps Using Beeswax, Pine Resin, Jojoba, and an Iron
This final recipe is the winner! This method really surprised me, it was easy and yielded the best results. I wasn’t sure how it would work for distributing the oils evenly, but it really worked well! Plus there was no waste from the double boiler set-up. No brushing and no can!
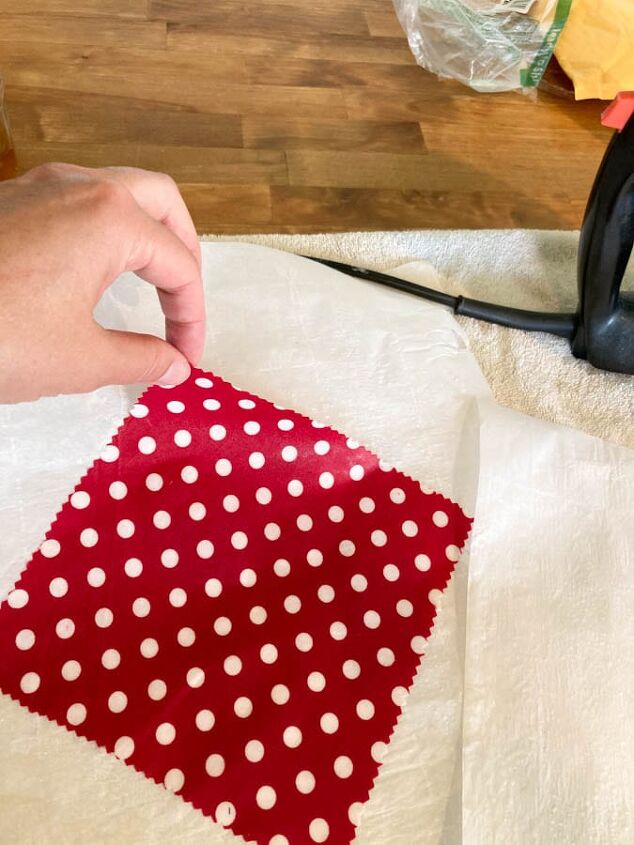
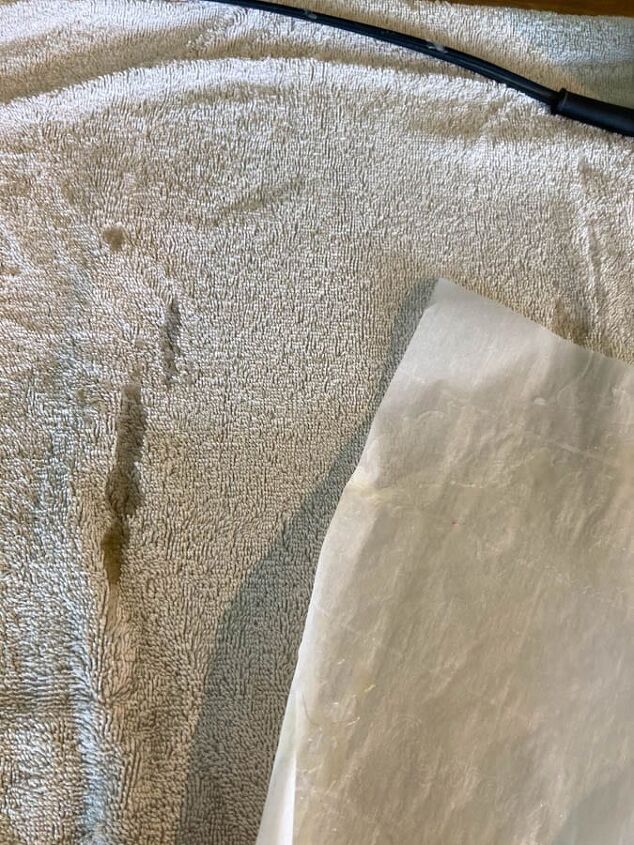
I think these ratios are perfect, I also think the above double boiler method would work well with these ratios. For this method, I simply piled the ingredients in the center of the fabric. Then I pressed the iron on the paper and moved it around until it was melted and soaked into the fabric.
Then you peel it back and let it cool. As you can see, the towel is there to protect in case some of it seeps out.
The ratios are as follows:
- Equal parts beeswax and pine resin
- Approximately half as much jojoba oil. You can use less, the jojoba just helps to keep the wrap pliable.
Here is the approximate amount to sprinkle on each wrap, really you can just guess and add more if you need it. If you get too much, just put another wrap in there and press them at the same time, it will soak both wraps. Don’t overthink it. The idea is just to soak them with the ingredients.
- 11×11 or 14×14- 1 TBS beeswax 1 TBS Resin and 2 tsp jojoba
- 8×8- 2 tsp beeswax 2 tsp Resin and 1/2 tsp jojoba
the result?
These are very sticky, but not so much that they stick together when you are storing them. The tackiness calms down some over time. I like that these wrap around bowls and really stick.
How to Clean Pine Resin Off Your Hands
Your fingers will feel sticky after making these wraps. Thankfully, there is an easy way to get it off of your hands or any other surface. Just use coconut oil, olive oil or whatever other oil you have on hand. Rub the oil in your hands and then just wipe it off with a towel.
How to Clean DIY Beeswax Wraps
The wraps can be cleaned with coolish water and mild dishsoap. You just don’t want super hot water, slightly warm is fine. Hang to dry.
What Do You Think About DIY Beeswax Wraps?
Is this something that you would try? I’m not sure I would have tried this without the push from the However, I’m glad I did it! We have been using these wraps and really like them. I like that they are pretty and of course it always feels good to use something handmade!
Sourcing Ingredients or Ready-Made Wraps
If making wraps aren’t for you, you can buy them here, here or here. Also below is a link for a product that has all of the ingredients pre-mixed!
Organic Beeswax
Pine Resin (Rosin)
Jojoba Oil
Ready Mixed Ingredients

Comments
Join the conversation
-
I plan to try this project in the fall. Thank you for sharing this!
-
I plan do do this project in the autumn. Thank you for sharing this!


Frequently asked questions
Have a question about this project?
Can you substitute other oils for jojoba? Olive oil or coconut oil? Also where do you get food safe pine resin?
Is the ine resin really safe on food?