


Coastal Theme Desk Re-Do
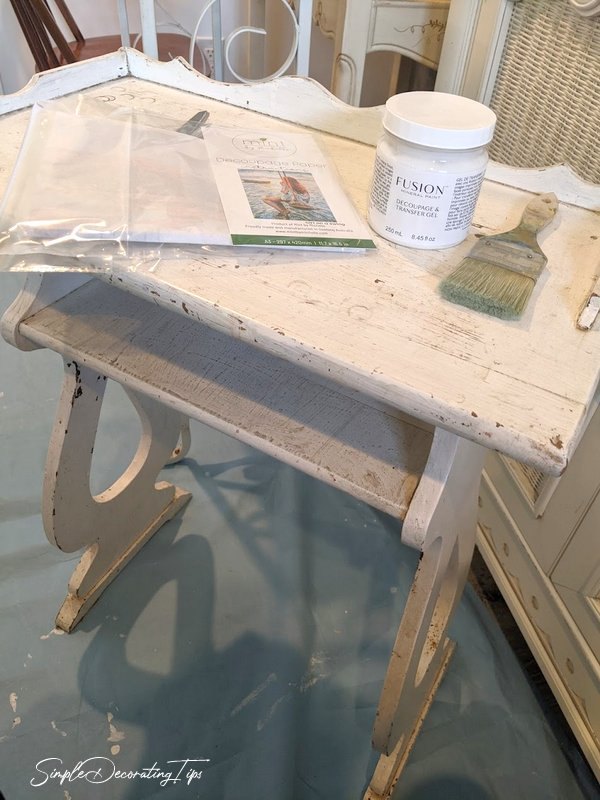
Hi, I'm Liz from Simple Decorating Tips, a DIY and decorating blog. I also have a DIY supply shop called Frame and Frills, in Wisconsin, but available online too. We stock Fusion Mineral Paints and Mint Decoupage Papers, both of which are what I used to transform this vintage desk into a coastal themed desk.
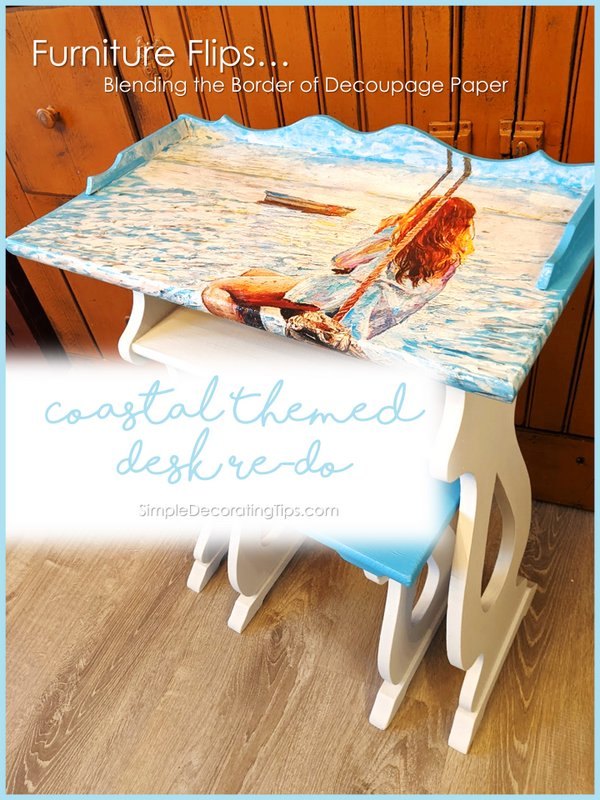
This coastal theme desk re-do was such a fun DIY project! Using one of the Mint Decoupage Papers I sell in the Frame and Frills shop, and extending the borders of it by blending paint out made me feel like an artist! Though I love to paint and re-do, I am not a trained artist. That’s what’s so wonderful about using these papers, it’s the middle ground of being an artist and just being creative with no training.
Here’s my technique and how I did a bit of a ‘furniture flip’, changing this little vintage desk into a coastal piece of art… (all the products I used in this project will be linked at the end of the post)
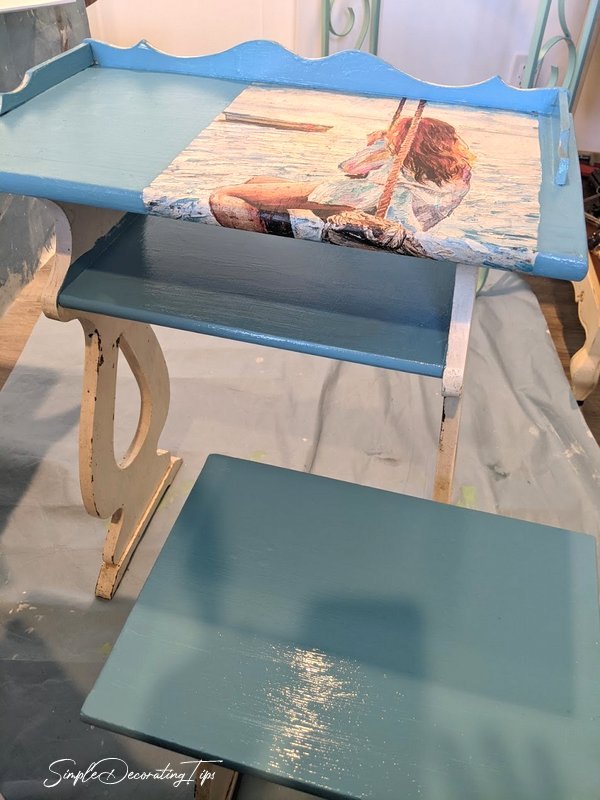
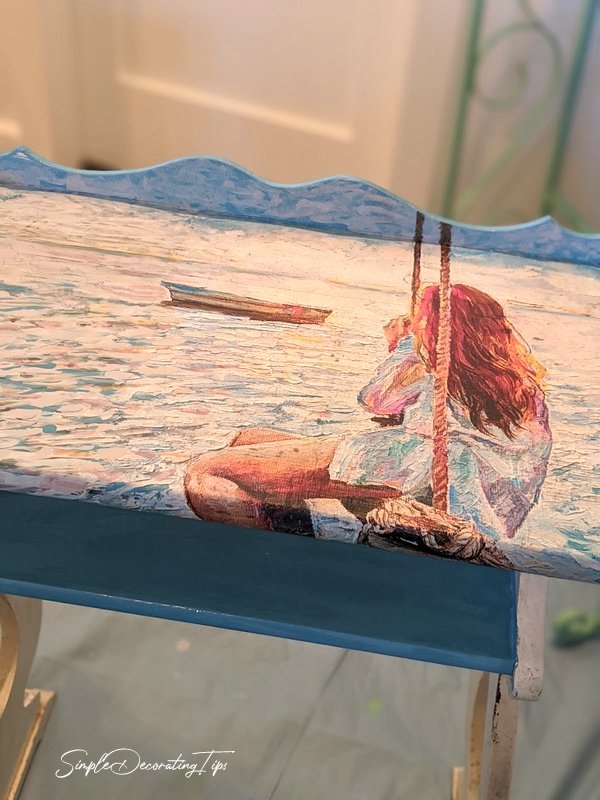
The Mint paper I chose is a sweet print of a girl on a swing over the water. I love the impressionistic style of the print. That also makes it easy when the ‘border blending’ process starts.
All the Mint Decoupage papers are curated on a thin but very strong tissue type paper with gorgeous printed detail. The art is specially selected for this type of painted blending.
Using Fusion Decoupage and Transfer Gel, goes on so smooth and it’s easy to spread. I used to use Mod Podge, but that stuff is very tacky and much harder to spread, I way prefer the Fusion Gel. I’m not just saying that because I sell it… I sell it because like all the Fusion products I stock in my shop, I have found them to be superior to other products!
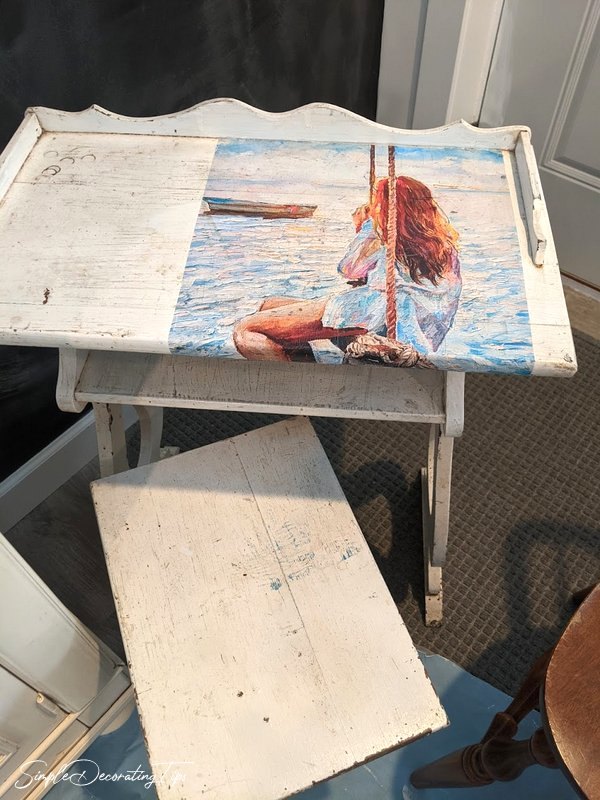
The decoupage paper is narrower than the desk top, so I placed it how I felt it would look good once the borders were extended with the paint.
To apply the paper, I brushed the decoupage gel into the desk, being sure to paint it out a bit beyond where the paper would actually be, so every part of the paper would be completely glued down. Then, while the gel was still wet, I carefully laid the paper on the gel and smoothed it out a bit, carefully working the air bubbles out.
This paper crinkles as soon as it’s wet from the gel. It’s meant to do that, that’s part of the ‘look’. Some on the crinkles will dry flatter, but they will still be visible and offer texture to the finished piece. Air bubbles do need to be worked out as best as possible though. If need be, and air bubbles are present after it’s dry, a slight razor poke and dab of gel can take care of it.
I’ve gotten smart and have started to write notes to help keep track of the Fusion Mineral Paint colors I use for the blending process. That way when clients buy a decoupage paper I can easily show them what colors I found blended well with it. It’s great that every color of Fusion Mineral Paint is stocked in tester sizes too, that works perfect for projects like this!!

Another tip is to mix up the color and then put a small test patch of the custom paint on the piece right next to the decoupaged paper and let it dry. The paint color does change slightly after it’s dry… and being right next to the paper helps so much to actually ‘see’ the color with it.
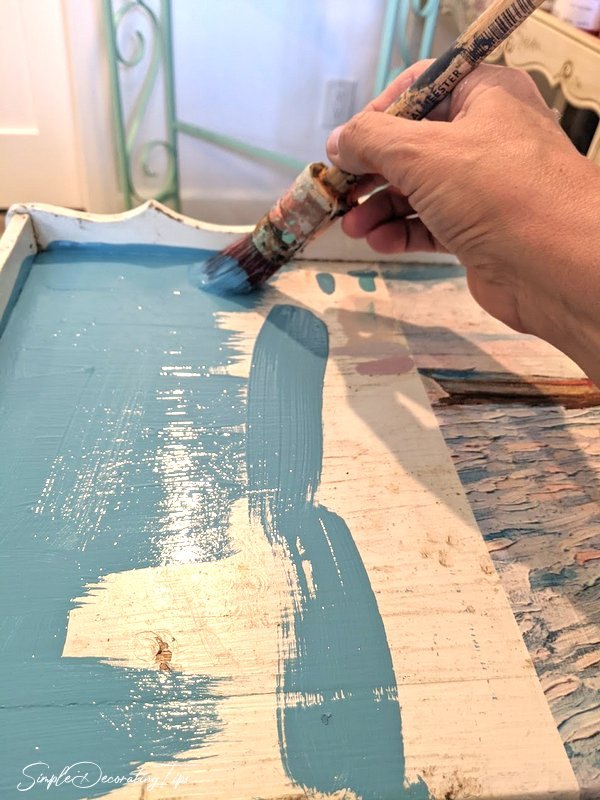
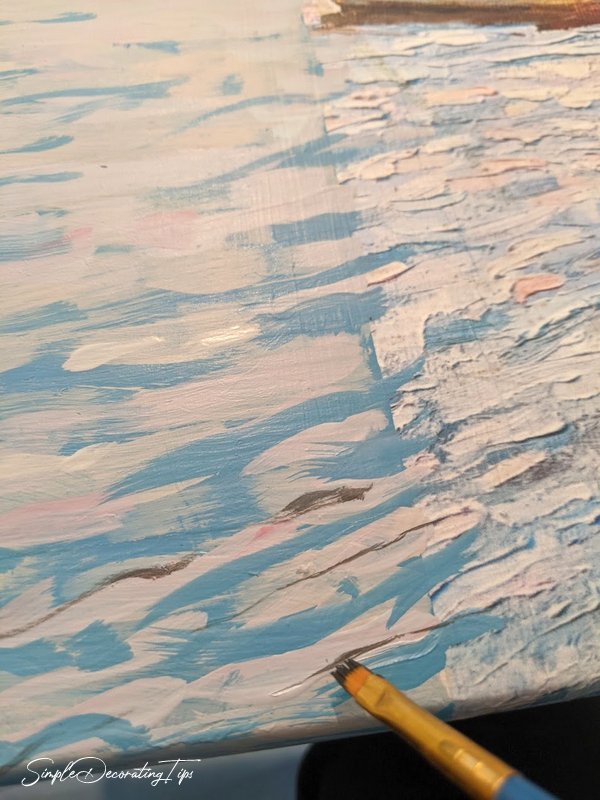
Looking at the print, it has a blue background and the other colors are added on top of that. So that was my approach for the top blending techinque.
I mixed enough paint to do the shelf and bench seat top too.
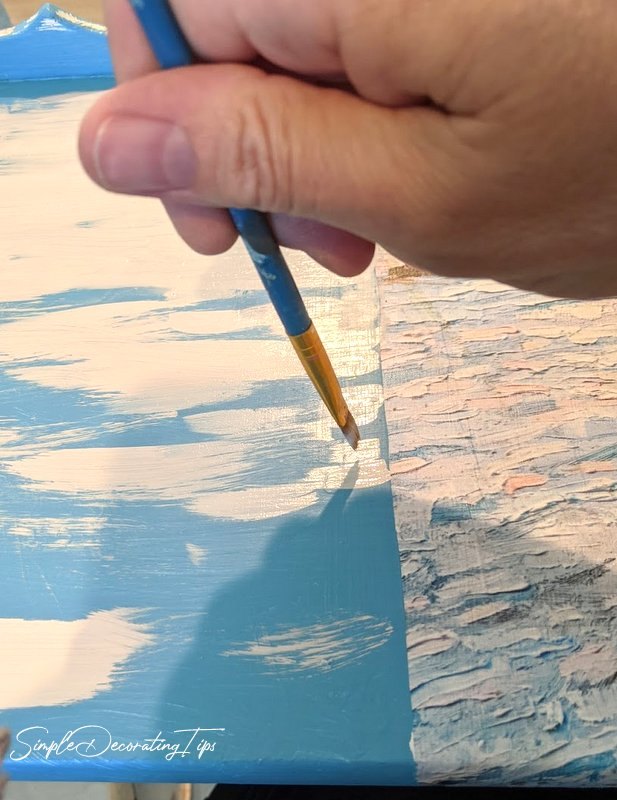
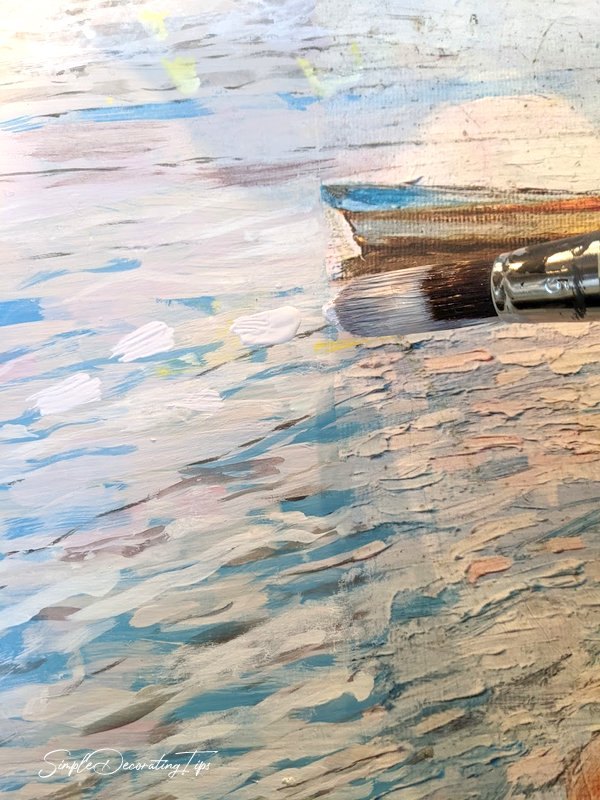
Once I started to add the other colors on the top, I quickly realized that the painter of the original print was left handed. To match the way the strokes of paint were shaped, the brush had to go from right to left. That was a little getting used to for this right-handed gal.
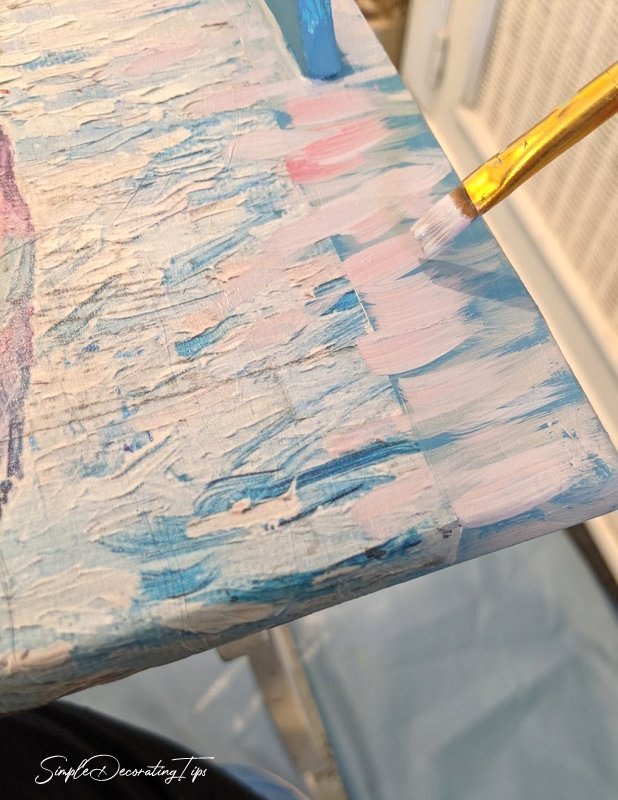
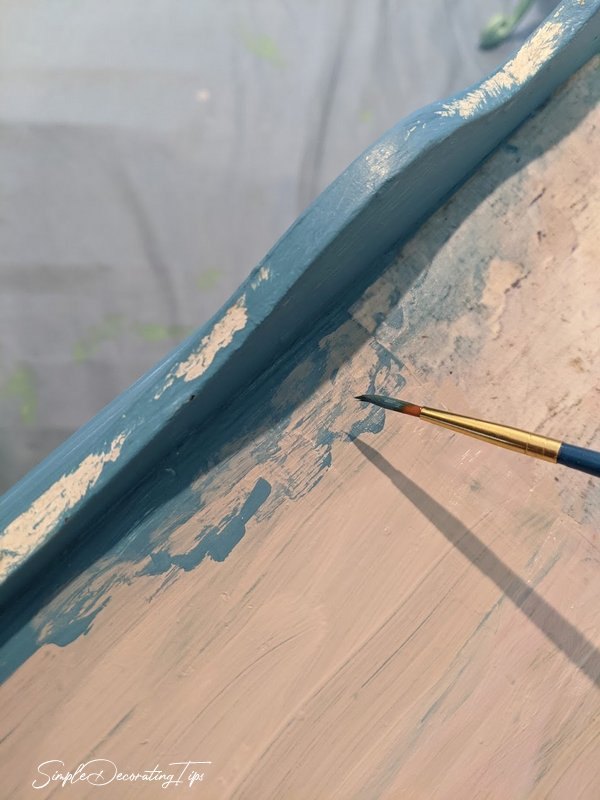
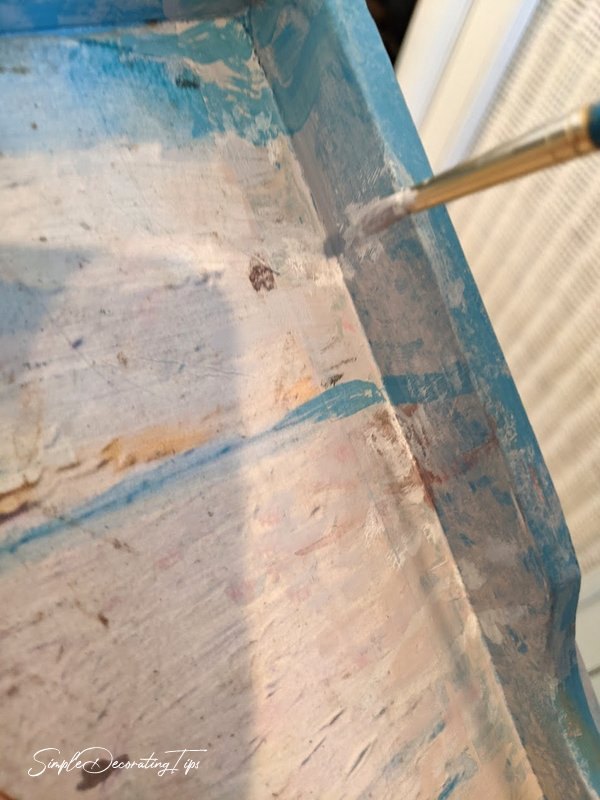
A secret to blending the borders with paint, is to not be shy about adding the paint onto the actual decoupage paper. It’s nearly impossible to perfectly match the same color that is on the print, so instead, my approach is to come close and then work it into the print as well.
I thought to bring the picture up on the inside of the little top trim would be fun. I’d paint in the ropes of the swing on that trip edge piece once the the sky part was done.
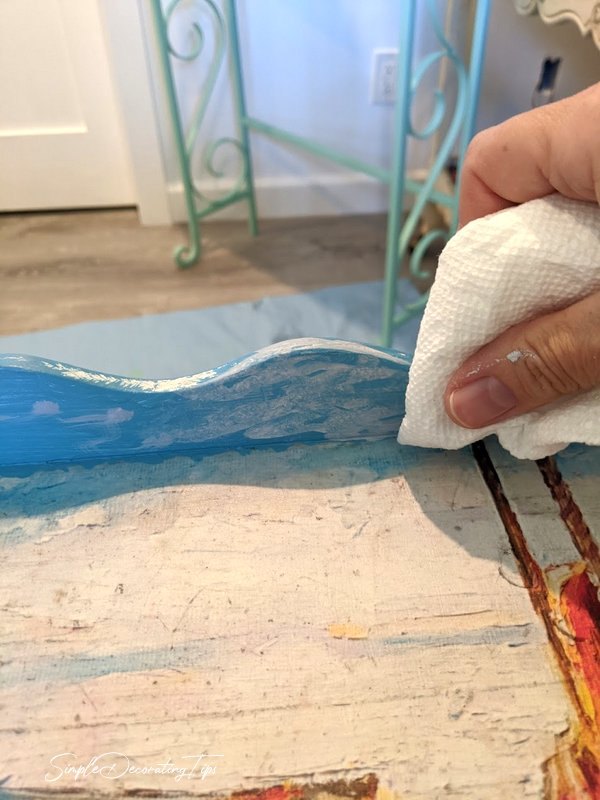
I used artists brushes and paper towel to give a soft mottled effect for the sky.
Layers and layers start to bring it together.
Part way through, the effect of blending is starting to take shape, but the border of the paper edge is still quite noticeable. I like to step back and examine it, over and over, as I’m going along.
Bringing the paint over onto the paper really blended the border.
Once the top was done, I painted the sides and rest of the desk with the white color ‘Casement’.
To finish the desk top, I top coated with 5 coats of Tough Coat. (You can pop over to my Simple Decorating Tips blog and read more about the technique I apply it) Tough Coat is a water based polyurethane made by Fusion. It is available in matte and gloss. For this print of water I thought the gloss finish would look good.
Here she is all finished!
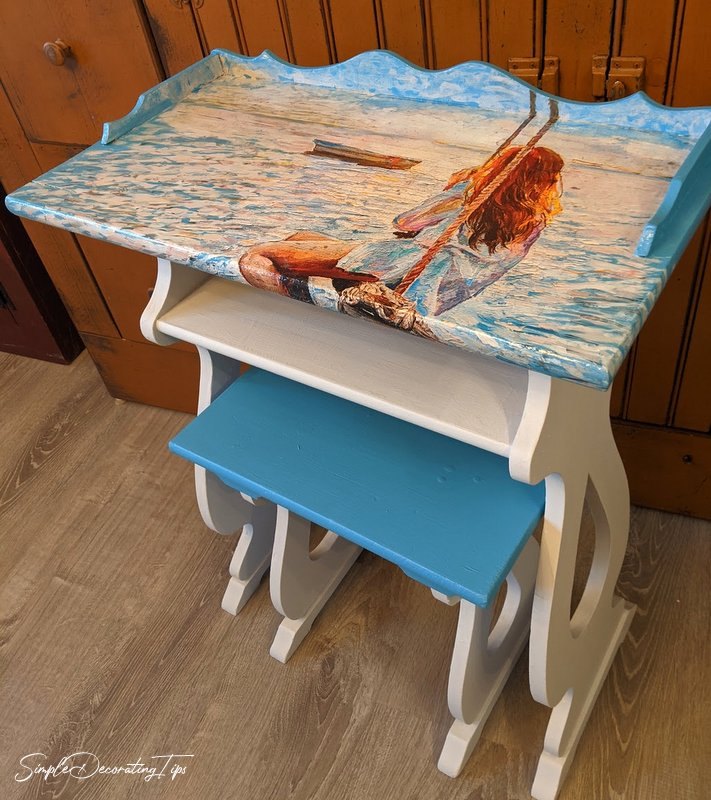
I decided that the blue shelf and stool top looked a little too much, so I painted the shelf to match the rest of the body. That’s the thing with paint… it’s only paint and usually very easy to quickly fix or change it if something didn’t turn out how you envisioned!
I love, love, love creating a blended border with the decoupage paper! It is so much fun! The prints are chosen so that they will work well for blending and I haven’t had one not work out…
Here are the products I used to create this coastal theme desk re-do: (all these products I sell in my Frame and Frills shop in person and online!)
- Mint Decoupage Paper Girl on a Swing
- Fusion Decoupage and Transfer Gel
- Fusion Mineral Paints in the following colors: Casement, Liberty Blue, Azure, Lamp White, Damask, Little Whale, Fort York.
- Pointed Sash Brush for main body
- Tough Coat Gloss
- Applicator Pad
Resources for this project:
See all materials


Comments
Join the conversation
-
ABSOLUTELY 100% A M A Z I N G transformation.
LOVE it!
-
We're talking serious artist here. This is not an easy diy project. However, very well done. I'd buy something like this.


Frequently asked questions
Have a question about this project?
would it have worked to just turn the table around and paint from the other side. or would the stroke go up a bit in the opposite direction.