


How To Paint a Ceiling Like a Professional

Painting a ceiling is an intimidating task for some DIYers. The concept of applying a liquid overhead feels foreign while choosing the appropriate paints and primers seems like a big mystery. Well, there’s good news for anyone who doesn’t know how to paint a ceiling: It’s not that hard. Sure, painting a ceiling is slightly different from applying a fresh coat to a wall, but it’s well within a novice’s capabilities.
This article will cover how to choose the right paint and primer for a ceiling, as well as the tools and techniques required to get the job done.
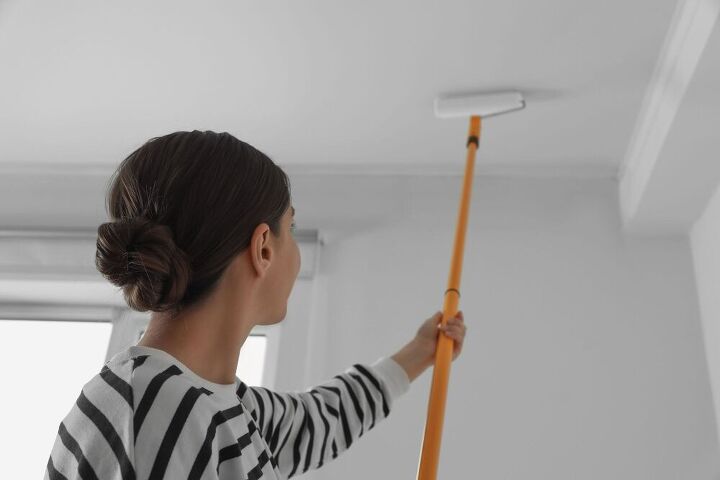
Photo via Shutterstock
Best Paints for Ceilings
The first step to painting a ceiling is understanding that ceiling paint is different from wall paint. Choosing the right paint matters, as it will make the job go smoother, look better, and reduce the amount of mess involved.
Ceiling Paint Primers
The best way to paint a ceiling is to start with a coat of primer. For fresh drywall, a coat of PVA, (polyvinyl acetate) primer will seal the porous surface and prevent it from soaking up all the ceiling paint. This primer is latex-based, but it’s exclusively used for drywall projects.
For ceilings that already wear a coat or two of paint, a basic interior latex primer will do the job.
If the ceiling is recovering from water damage and stains, give it a boost by using a stain-blocking primer.
Keep in mind that some ceiling paints also contain primers in their formulas. They’ll typically do a good job, but two coats are almost always still necessary. Generally speaking, two cans of paint and primer mix are necessary for a room that measures 12 feet by 12 feet.
How Ceiling Paint Is Different
Ceiling paint is thicker than standard interior paint, which allows the painter to apply it with fewer drips. The thicker viscosity also enables the paint to cling to the ceiling surface while it dries, while thinner paint would run and drip.
Most manufacturers offer latex-based paint specifically designed for ceilings, and it’s ideal for DIYers who don’t want to spend a lot of time comparing paint viscosities. This ceiling paint typically comes in a flat white, but the paint counter attendant can tint it to almost any color desired.
There are several reasons why someone would want to tint their ceiling paint—the most obvious of which are taste and design choice. But also consider that a ceiling painted to match the walls can give a room a larger, more airy feel. The continuous flow of color avoids contrast, which can make walls feel shorter and ceilings feel smaller.
If the job starts with a coat of primer, a 12-foot by 12-foot room will likely only require one can of ceiling paint.
Tools and Materials Needed for Painting a Ceiling
The tools and materials required to paint a ceiling are pretty standard, but there are some nuances that are worth noting.
Tools
- Ladder
- Screwdriver
- Foam sanding block
- Painter’s tool
- Spackle knife
- Cut bucket (a small bucket to hold paint while cutting in with the brush)
- 2-inch angled paintbrush for latex paints
- Paint roller handle
- Roller sleeves
- ⅜ to ½-inch nap for smooth ceilings
- ¾ to 1-inch nap for textured ceilings
- Extension pole
- Paint trays
- Work lights
Materials
- Drywall compound or spackle
- Latex primer
- Latex ceiling paint
- Paint stirring stick
- Painter’s tape
- Canvas drop cloths
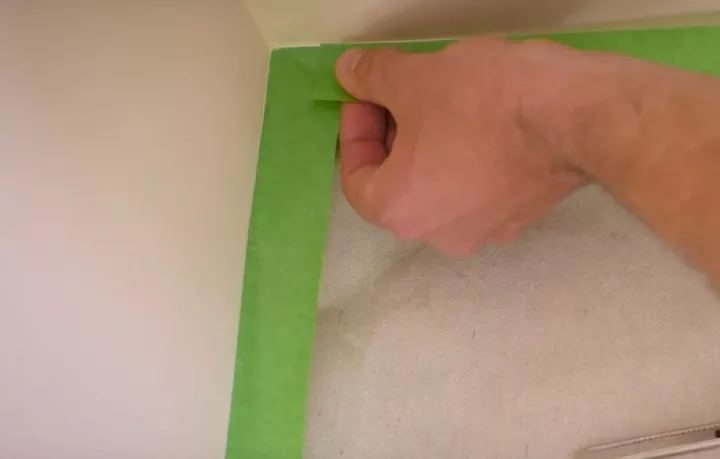
Photo via Hometalk Skills
How To Prep for Painting a Ceiling
Don’t just jump into painting the ceiling. As with any paint job, one of the biggest keys to success is solid prep work. Here’s how to prep your workspace and your materials for painting a ceiling.
1. Prepare Space
Start by removing as much furniture as possible from the room. Remove beds, chairs, dressers, tables, and anything else that might get in the way. Cover any objects that remain with a canvas drop cloth. Also, cover the floor with drop cloths, as drips during the painting process are inevitable.
2. Set Up a Ladder and Remove Ceiling Fixtures
Next, set up the ladder and remove any light fixtures mounted to the ceiling. Use a piece of tape to keep the light switch in the off position and use a screwdriver to unfasten the light fixture. A few wire nuts on the back and removing the ground wire from the fixture should be all it takes. Set up some work lights to illuminate the room.
3. Prep Ceiling
Search the ceiling for bumps, lumps, and old paint ridges. Use the painter’s tool to scrape them off or bump them into the drywall slightly. Use the spackle knife to fill any gouges, rips, or dents. Once dry, sand these areas flush with the foam sanding block.
4. Apply Painter’s Tape
Finally, run painter’s tape along the top of the walls or on the edge of the crown molding. The paint will protect the walls or molding from errant brush strokes while also creating a clean edge once removed.
How to Paint a Ceiling
Finally, with all the tools, materials, and prep work handled, it’s time to paint the ceiling. Here’s how to do it, step by step.
1. Mix Primer and Prepare Tools
Start by mixing the primer with the paint stirring stick to reincorporate the ingredients. Also, slide a roller cover onto the roller handle and screw the extension pole into the end of the handle. Remove the brush from its cardboard sheath.
2. Cut in with Primer
“Cutting in” is the process of applying paint at the edge of where two surfaces meet, such as a ceiling and a wall, or a wall and a piece of trim. It’s necessary for a clean, professional-looking job.
Pour some primer into the deep end of a paint tray as well as in the cut bucket. There’s no need to fill either, so start with a small, manageable amount.
With the two-inch paintbrush in hand, climb the ladder to reach a corner of the ceiling. Dip about ¼-inch of the brush’s bristles into the primer in the cut bucket and gently slap the brush a time or two against the inside of the cup to remove excess primer. With the brush loaded with primer, apply it along the ceiling’s edges along the tape.
Continue to paint roughly three feet from the corner in either direction.
3. Roll Primer
Before the brush strokes dry, get down from the ladder and move it out of the way. With the extension pole in hand, skim the top of the pool of primer in the paint tray, dragging it up the shallow, slanted section. Roll the cover back and forth through the paint until the paint saturates the roller.
Carefully lift the roller and touch it to the ceiling, initially holding it back about a foot from the wet brush strokes. Next, roll the primer onto the ceiling, back and forth, working within the already cut-in areas. Ensure to overlap the previous roller stroke to maintain a wet edge. Also, be sure to lap over the wet brush strokes for the best results.
Avoid roller lines in the painted surface, also known as lap marks, by keeping the roller full of paint and maintaining just enough pressure to apply the paint. Dry rollers or pressing too hard can create ridges.
Also, roll back and forth in one direction; some painters may apply a second coat perpendicular to the first coat, but the individual coats must be applied in one direction.
4. Alternate Between Cutting and Rolling
Continue alternating between cutting in and rolling the primer on, working in small sections. Be sure to keep the roller loaded with primer and rolling before the brush strokes dry. This will make a big difference in the final product; otherwise, the brush strokes might be visible.
Allow the primer to dry completely before moving to the next step. Humidity and temperature greatly affect how long a coat takes to dry, so give it plenty of time. This is an excellent time to pour the remaining primer back into its bucket, swap the roller sleeve for a new one, and clean the paintbrush.
5. Cut in With Paint
Once the primer is dry, the ceiling is ready for paint. Start the process over again, this time using the ceiling paint. Start by pouring paint into the deep part of the paint tray and filling the bottom of the cut bucket.
Again, climb a ladder placed under the corner of the ceiling. Dip the tip of the clean paintbrush into the paint and cut in along the edges of the ceiling. Continue cutting in for three feet in either direction before getting down to roll.
6. Roll Ceiling Paint
Load the roller with paint the same way as with the primer. The paint will most likely feel thicker than the primer, which could require a few more passes to load the roller at first.
Just as before, carefully lift the roller to the ceiling, making contact about a foot away from the wet brush strokes. With light pressure, apply the paint by rolling back and forth, working in small sections.
The same rules apply as painting the ceiling with primer:
- Keep the roller loaded with paint
- Overlap the previous strokes
- Overlap the wet brush strokes
- Only paint in one direction
7. Alternate Between Cutting and Rolling the Paint
Continue alternating between cutting in and rolling the paint onto the ceiling surface. Work in small sections, maintaining wet edges and overlapping brush strokes.
8. Put Room Back in Order
With the ceiling coated with a fresh coat of paint, allow it to dry. Start putting the room back together by removing the painter’s tape. There’s an art to this: Instead of pulling the tape straight out, pull it at a sharp angle, forward and slightly downward, to allow the tape to release cleanly.
Reinstall the light fixture(s), clean up the drop cloths, and start bringing the furniture back into the room.
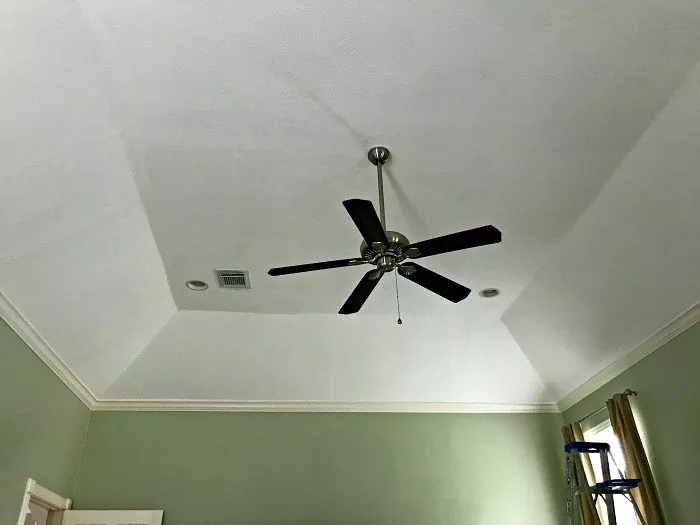
Photo via Stephanie Abbott
How to Paint a Tray Ceiling
Tray ceilings look fancy and complicated, but painting them is actually just as simple as painting a traditional ceiling (with an added step or two).
Start by using the same preparation steps as a traditional ceiling outlined above. Tape along the top of the walls with painter’s tape. If the inner vertical section of the tray ceiling isn’t getting a coat of paint, tape along its top edge as well.
Start with the innermost section of the tray ceiling. Alternate between cutting in with the primer and then rolling, working in small sections.
After finishing the inner section, move to the outer, lower sections of the tray ceiling and repeat. Cut in along the edges of the ceiling and then roll, working in small sections and alternating before the brush strokes dry.
How to Spray Paint a Ceiling
Heavily textured ceilings can be difficult to paint with a brush and roller. The “popcorn” material has a tendency to break off, and getting paint into the nooks and crannies can seem impossible. In those cases, it’s often better to spray the ceiling (though painting the walls after is likely unavoidable).
Start by preparing the room like any other paint job; move furniture, remove the light fixtures, and lay down some drop cloths. With the paint (or primer) in the paint sprayer’s hopper, spray long, smooth strokes. Work in one direction, overlapping the last stroke to maintain a wet edge.
The paint will unavoidably overlap with the walls, so taping is a moot point. Try to minimize it with discerning strokes, but painting the walls afterward is best for covering up overspray.
Note: While low-VOC (volatile organic compounds) paints are generally safe, spraying does create a breathable mist that doesn’t belong in the painter’s lungs. Wearing a respirator is advised.
Pro Tips for Painting a Ceiling
How to Choose the Rolling Direction
Generally speaking, roll paint in the direction parallel to the longest wall in the room. But, if there are south-facing windows, roll the paint perpendicular to that window’s wall. The sunlight that passes through won’t hit any ridges, making the finished product appear that much smoother.
How to Paint a Ceiling Without Making a Mess
Painting a ceiling doesn’t have to be as messy as it might seem. Using the proper ceiling paint will help minimize much of the mess. Also, rolling slowly will minimize throwing paint and splatter. Drop cloths will do a great job of minimizing messes, as well.
Also, try to avoid rolling directly overhead. This is easier with lower ceilings, but avoiding painting overhead will keep drips and splatter from collecting in hair, eyes, clothes, and anywhere else paint’s not supposed to be.
Stretch Beforehand
Truth be told, the hardest parts of painting a ceiling are looking up constantly and how much it taxes the painter’s shoulders. Painters should stretch their necks and shoulders beforehand to prevent cramps and discomfort. Soreness, however, is a foregone conclusion.
We hope this guide was useful and provided you with all the information needed to paint your ceilings. Let us know if you have any great tips for painting ceilings in the comments below!


Frequently asked questions
Have a question about this project?