


Mason Jar Chandelier
$20
2 Hours
Medium
Hi Friends, how are you today? I am great and so excited to finally share my new Mason Jar Chandelier and lighting fixture in my kitchen. Our kitchen is very shabby n cottage chic in style and I’ve kept it close in style with our 1922 cottage.
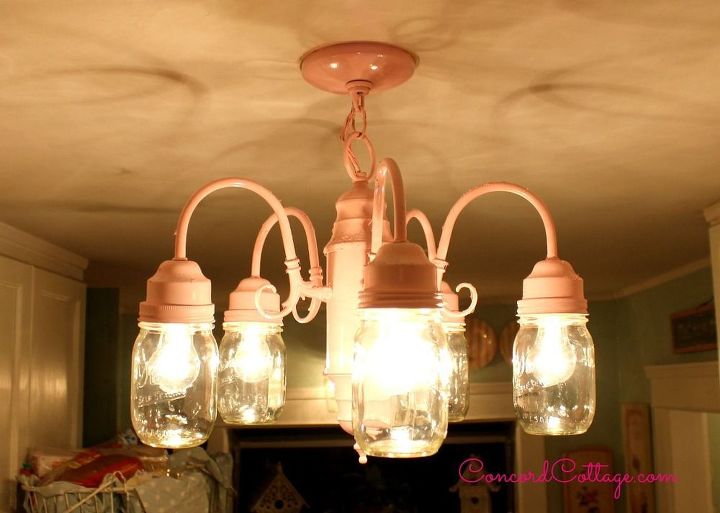
We had some old lighting fixtures that were here when we moved in and I plan to replace them down the road but I was so inspired when I saw a mason jar chandelier project on Hometalk and knew it would be the perfect fix for our kitchen. I LOVE the way it turned out and although pink may not be your color this was a super fun and pretty easy project and you can do it in any shade you like.

Our kitchen is a very small galley style and the kitchen nook is to the right and the dining room to the left.

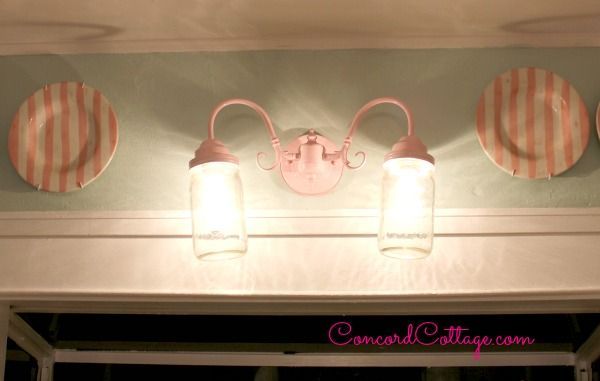
I painted both the chandelier and the coordinating lighting fixture above our sink too.
I used Rustoleum 2X Ultra Cover in Candy Pink and after using it to paint our Plastic Adirondack chairs this summer and our other Plastic Patio Chairs here I knew this paint was so wonderful to work with and has primer inside.
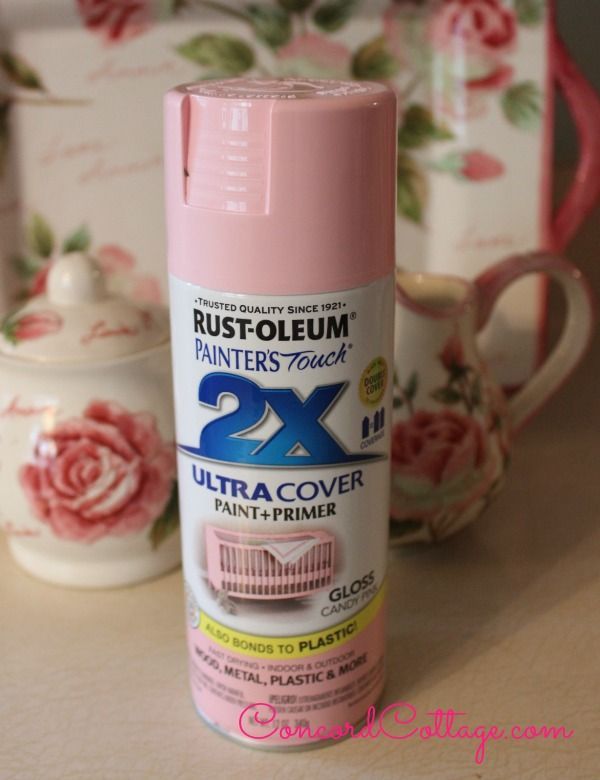
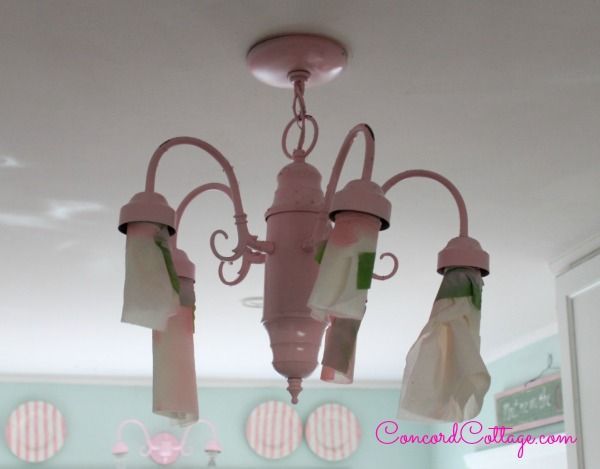
I sprayed 3-4 coats of paint throughout the day and had all the windows open and fans going, the fumes were very strong.
The hardest part of this project was cutting the mason jar lids. You need the tops as well as the rings so that you can screw the glass jar into them on your fixture. Our fixtures had these white plastic rings so they screwed on under the jar lid which holds it in place.

Then I took the lid and the lid rings outside and spray painted them several times both on top and under as you can see both sides through the glass.
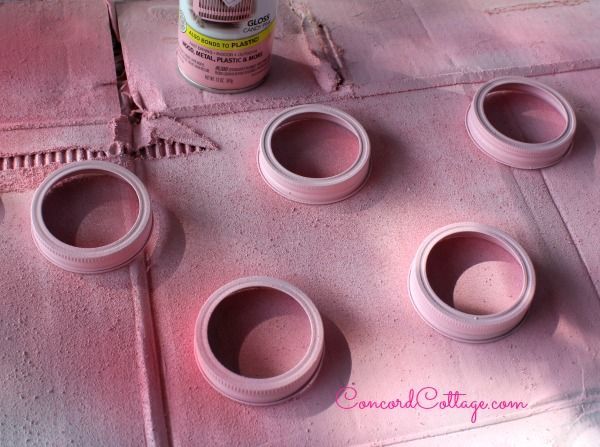
Once they were dry I put the mason jar ring and top up onto each arm of the fixture and then screwed the plastic rings on. I used low 40 watt light bulbs too so they don't get too hot. They look like part of the fixture which I love. Once that was done I screwed the mason jars on.

The Inspiration came from Lauren at Blesserhouse and here is her post if you want to take a peek at that.

I am so happy with the way these turned out and LOVE them. Everyone once in a while people comment and wonder how my husband can like or stand a pink roses themed kitchen. He is awesome and is pretty ok with the feminine kitchen and to make it up to him I gave him a really manly sports themed Tv Room or Mancave right off our kitchen and you can see his Steelers Tv Room here.

Want more details about this and other DIY projects? Check out my blog post!
Comments
Join the conversation
2 of 89 comments
-
Great Idea
-
Love the mason jars great job.


Frequently asked questions
Have a question about this project?
I am trying this and can’t figure out the order in which you put all back on the light fixture. Do you have to take apart the light fixture at all (other than the light bulb)?