


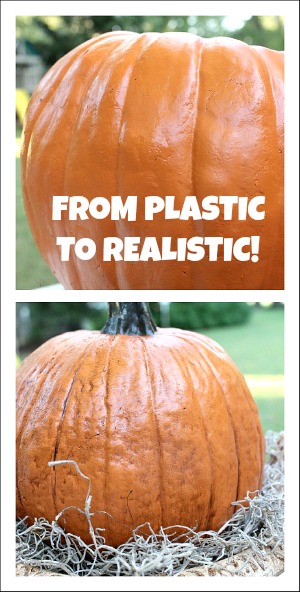
Making Your plastic pumpkins look real!
Do your plastic pumpkins look really, really fake? Well, thought I would write a quick post to tell you how to fix this problem in just a few minutes!
All you need is some antiquing gel, also called antiquing paint from the acrylic paint section. My standby is "burnt umber".
Pour some of the burnt umber paint onto a paper plate. Add a little water and mix. Next, using a brush, add your paint to a small section of your pumpkin. Then take a dry paper towel and rub up and down your pumpkin gently. This will leave the paint in the crevices of the pumpkin. Continue this technique all the way around your pumpkin.
Once you are finished, let it dry completely. Then spray with a sealer. That is it! It makes a world of difference! Happy Fall!
All you need is some antiquing gel, also called antiquing paint from the acrylic paint section. My standby is "burnt umber".
Pour some of the burnt umber paint onto a paper plate. Add a little water and mix. Next, using a brush, add your paint to a small section of your pumpkin. Then take a dry paper towel and rub up and down your pumpkin gently. This will leave the paint in the crevices of the pumpkin. Continue this technique all the way around your pumpkin.

Want more details about this and other DIY projects? Check out my blog post!
Comments
Join the conversation
2 of 26 comments
-
What type of paint
-
I have also used brown shoe polish. Wipe on and partially wipe off. Very cheap!


Frequently asked questions
Have a question about this project?