


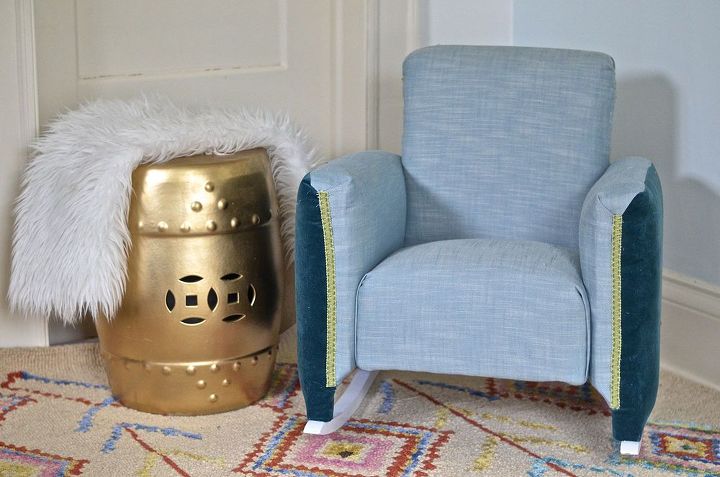
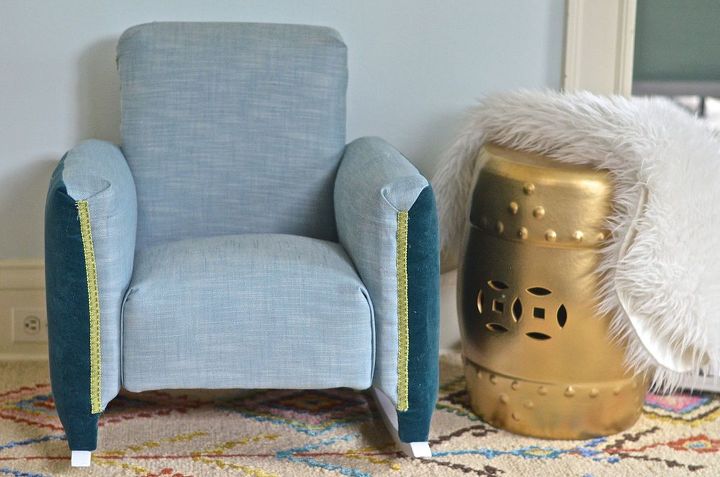
Reupholstered Kids Rocker
Months and months and months ago, I picked up this kids rocking chair for $10. It didn't occur to me that smaller doesn't mean easier... it's still reupholstering a whole CHAIR! Well, 2015 is my year to tackle upholstery so I decided to start small. I was able to finish this in a few days AND avoid sewing piping. (It's for kids... I cut a few corners.) Needless to say, this new reupholstered kids rocker is much more our style and MUCH more hygienic that the one I started with! (For step by step instructions, clock the link below and head over to my blog.)
You won't believe how this kids rocker looked before....
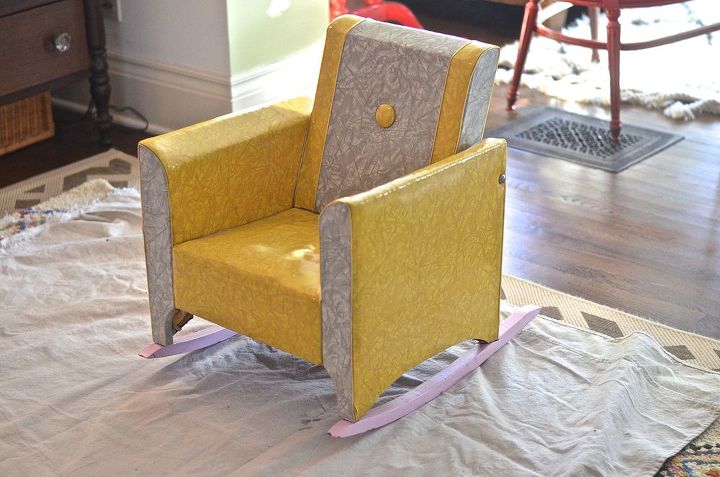
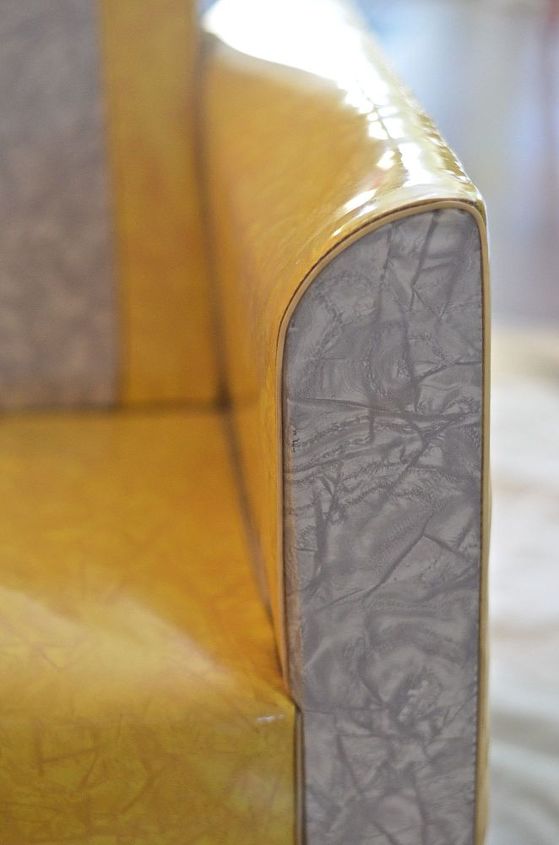
Retro. And filthy. I envisioned this being sort of a cool vintage-y think in the kids' room, but it was just cold and uncomfortable and, oh yeah... dirty.
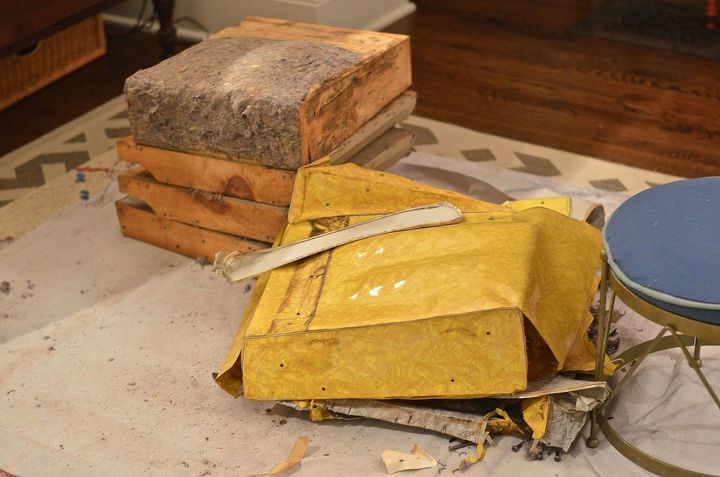
I took lots of pictures before pulling it apart to make sure I could put it all back together...
So. Dirty.
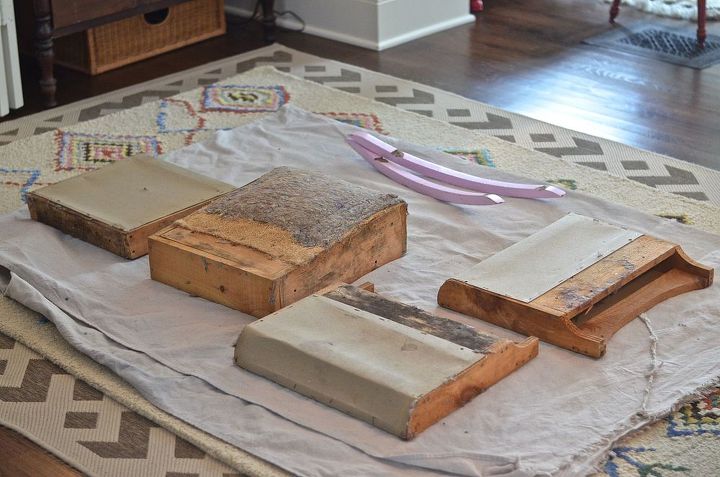
It's already better. And seems more manageable when in 4 small pieces, right?
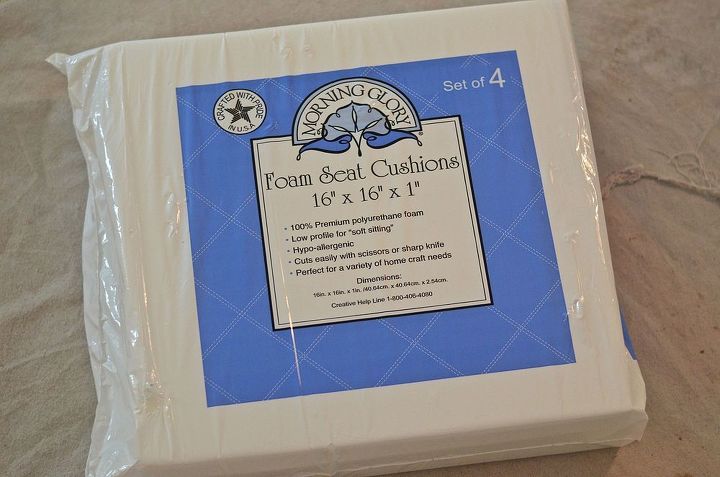
Foam is the most expensive part of upholstery so I cheated by grabbing two of these 4-packs from Walmart for $6 each.
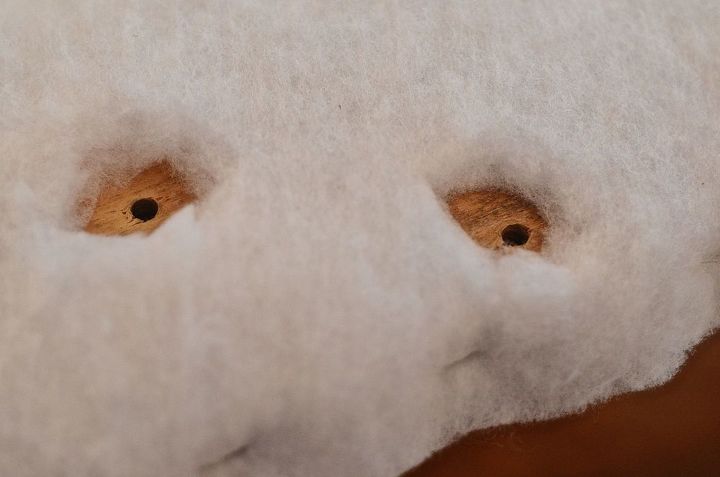
Make sure you cut away the batting and foam to expose the screw holes. It will make the reassembly much easier AND you won't get your screws all wrapped up in batting.
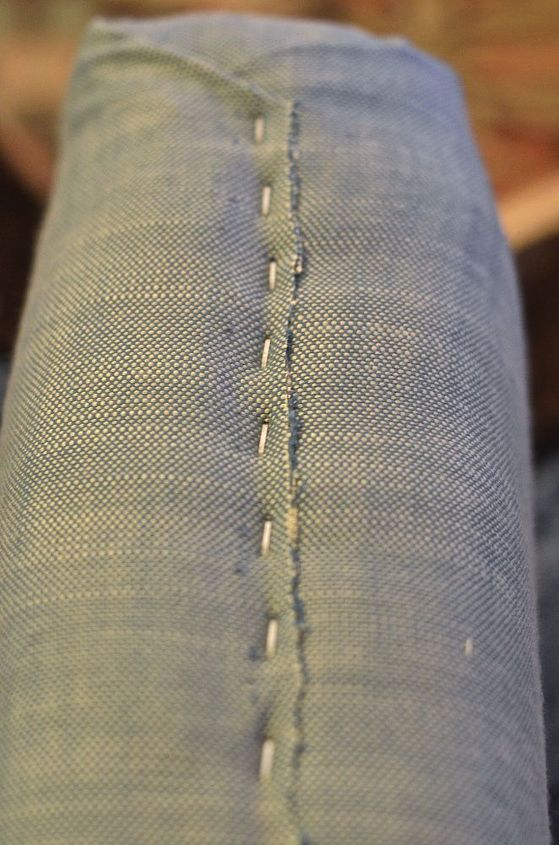
There aren't real rules for upholstery per say so I just wrapped each piece of this rocker as neatly as I could leaving one straight seam down the edge of each component.
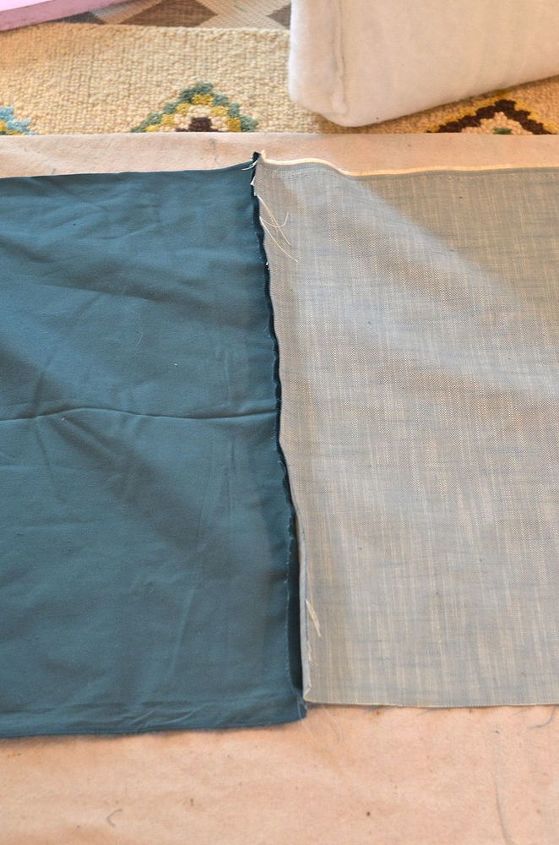
I ran out of fabric (whomp whomp) so used a remnant I had on hand for the outside of the arms. Because I didn't want a staple line along the armrest, I sewed the two fabrics together and then wrapped them like I had the seat and the back.
You can cover the seams with either railheads or piping or gimp. I didn't have nailheads. Piping requires sewing. And I had gimp and a hot glue gun, so the gimp won!
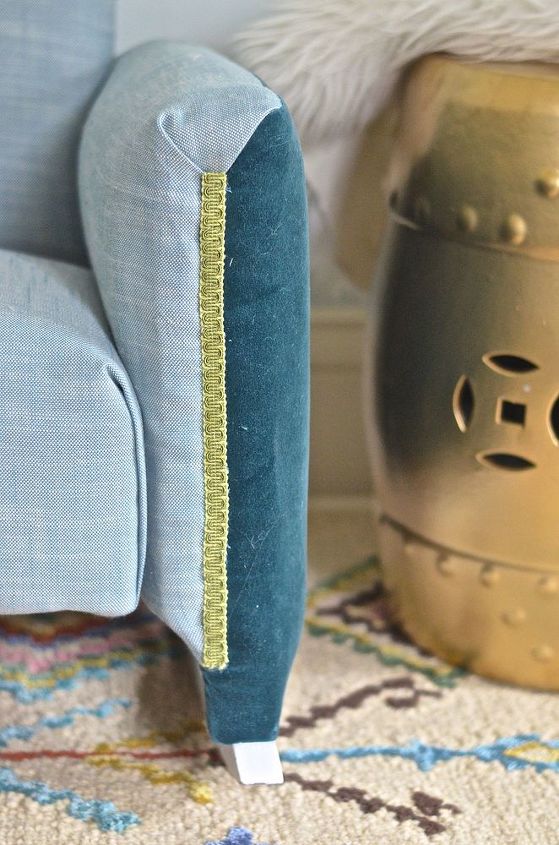
A detail of the gimp covering the arm with my impromptu color blocking. I actually love the two tone look! I'll consider this a happy accident!

Lastly, I gave the pink rockers a coat of glossy white spray paint. Bye bye, pink.

Want more details about this and other DIY projects? Check out my blog post!
Comments
Join the conversation
2 of 6 comments
-
That is so cute and you did such a good job sharing the steps!!
-
Awesome job


Frequently asked questions
Have a question about this project?