


DIY Rustic Floating Mantle

by
Catherine
$40
4-6 Hours
Medium
My husband and I are rehabbing an early 1900s duplex in an up-and-coming neighborhood in Columbus. The plan is to live on one side of the duplex and rent out the other (and then eventually move on and rent out both sides). The house was owned by slumlords for 10+ years, and with that came lots of discoveries, from roaches to black mold to mice (both alive and dead - eek!) But there were some good discoveries, too... like brick. Lots of beautiful brick.
.
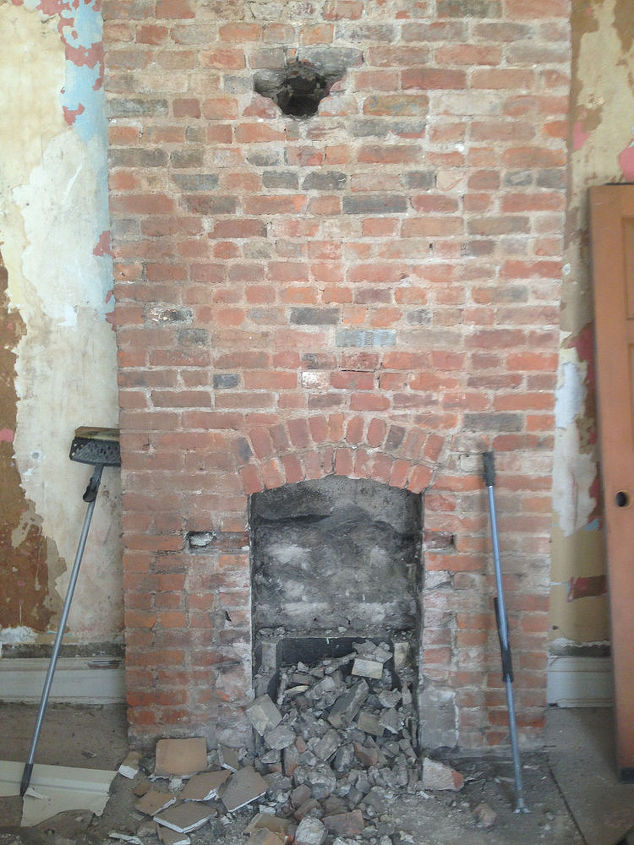
One of our first brick exposing projects was our dining room fireplace. This is what it looked like when we bought the house.
.
One of our first brick exposing projects was our dining room fireplace. This is what it looked like when we bought the house.
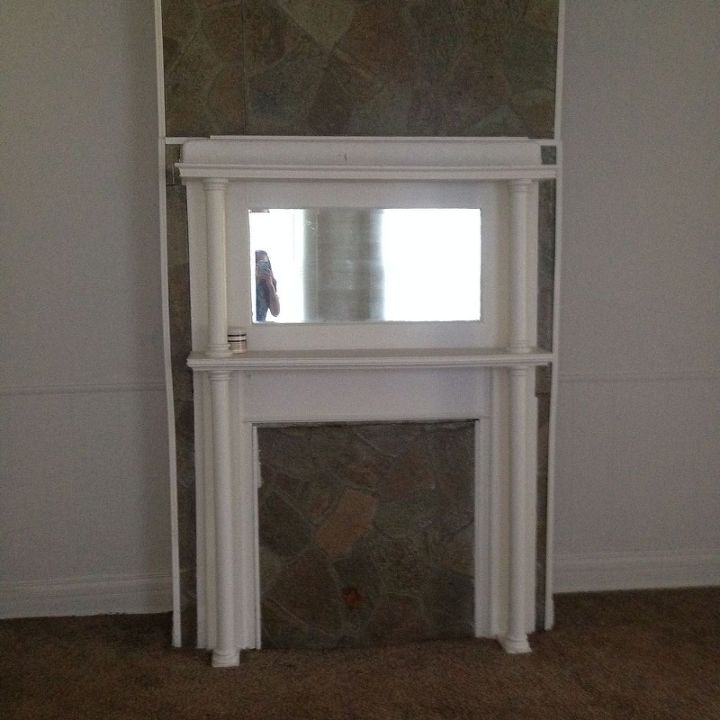
The mantle was painted many, many times and the entire fireplace was covered with linoleum paneling. Something had to change. We removed the mantle and put it aside for safe keeping, then got to work taking the paneling off. It was then that we discovered the house had a massive roach problem.
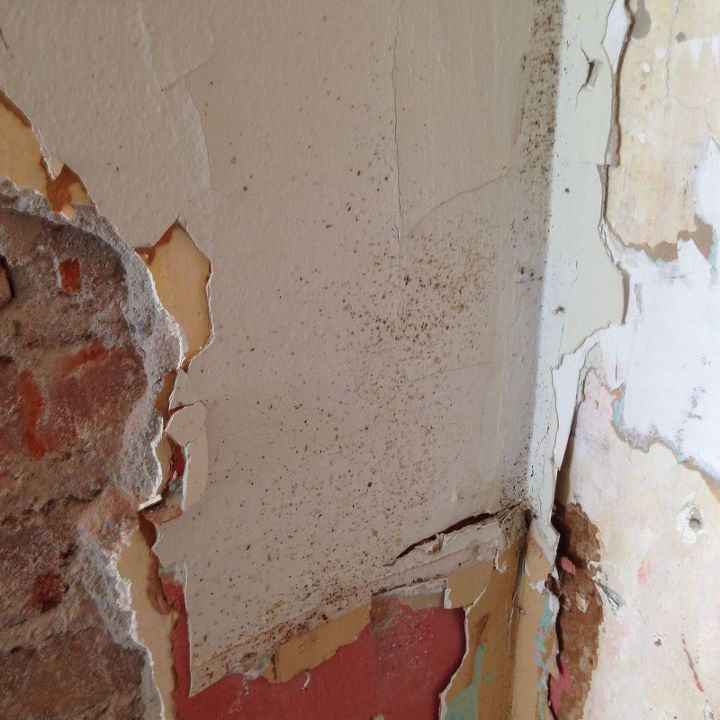
The entire fireplace and mantle were covered with dead bugs and remnants. So we made the decision to remove the plaster in the hopes of finding some nice brick underneath. Success!
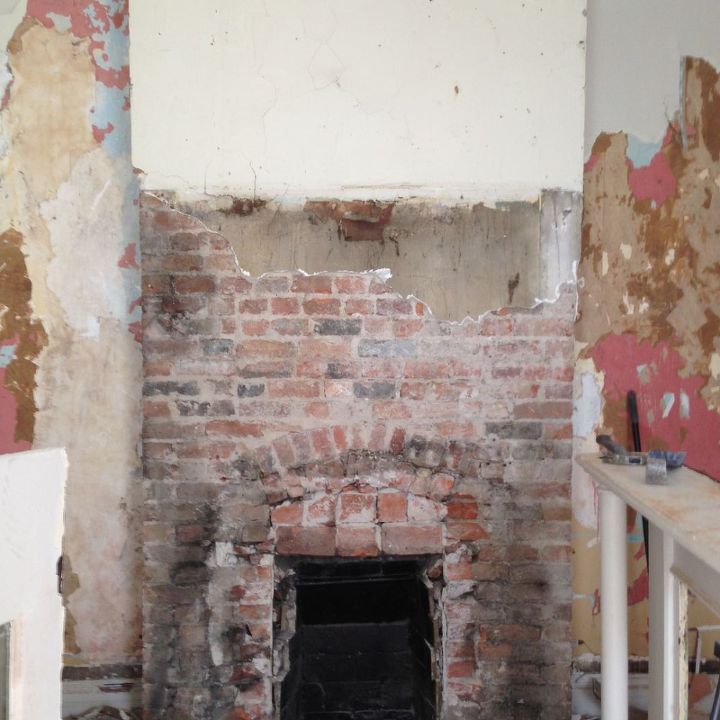
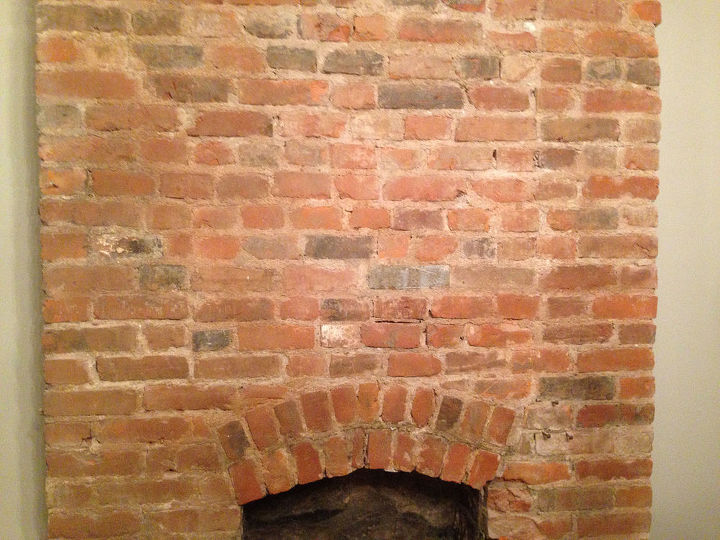
Even though the brick was dirty, it somehow felt a LOT cleaner than the plaster did.
We removed the oversized bricks under the arch, and lightly sanded the fireplace to remove the rest of the plaster.
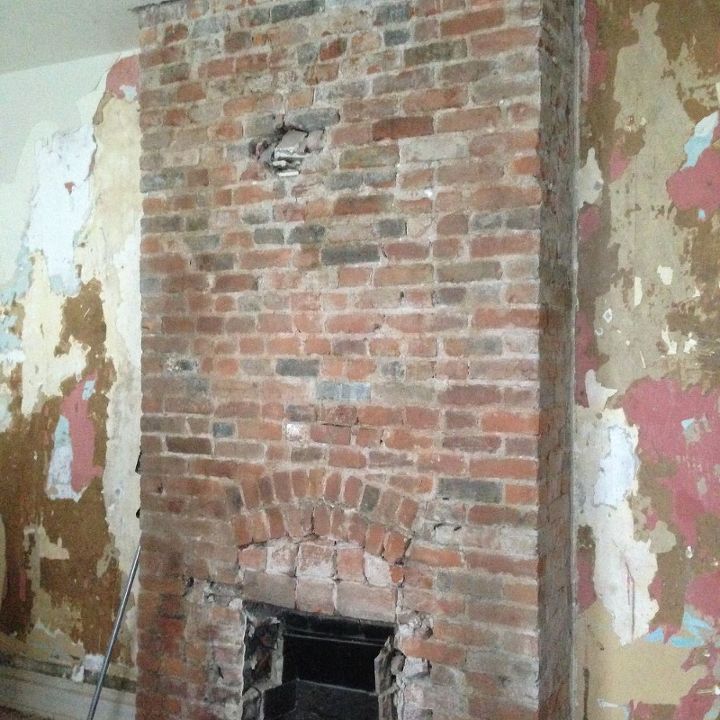
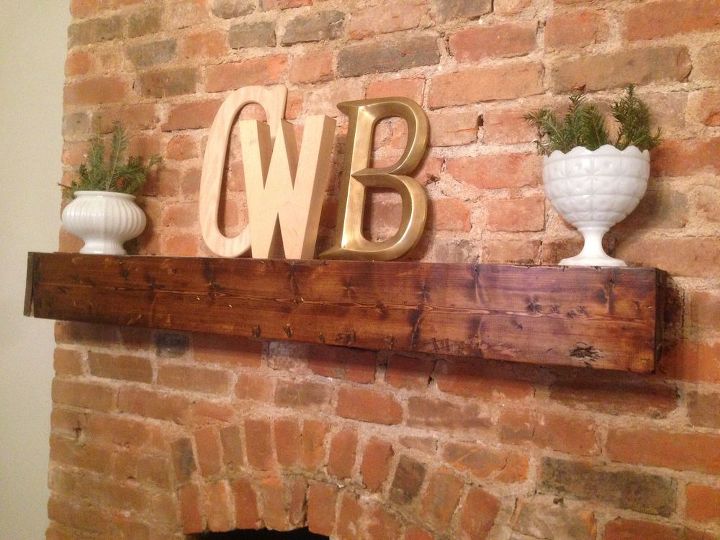
We were left with some beautiful brick and a beautiful arch, which we sealed so it wouldn't crumble. Once it was all cleaned up, we had a decision to make: Cover up the arch with the existing mantle (it had a square opening), or keep the arch exposed and come up with a new mantle plan.
We chose option 2, because we were too in love with the arch to cover it back up, and decided to do something simple and cost effective to highlight it. (Sidenote: We're keeping the original mantle and have big plans for it in our master bedroom!)
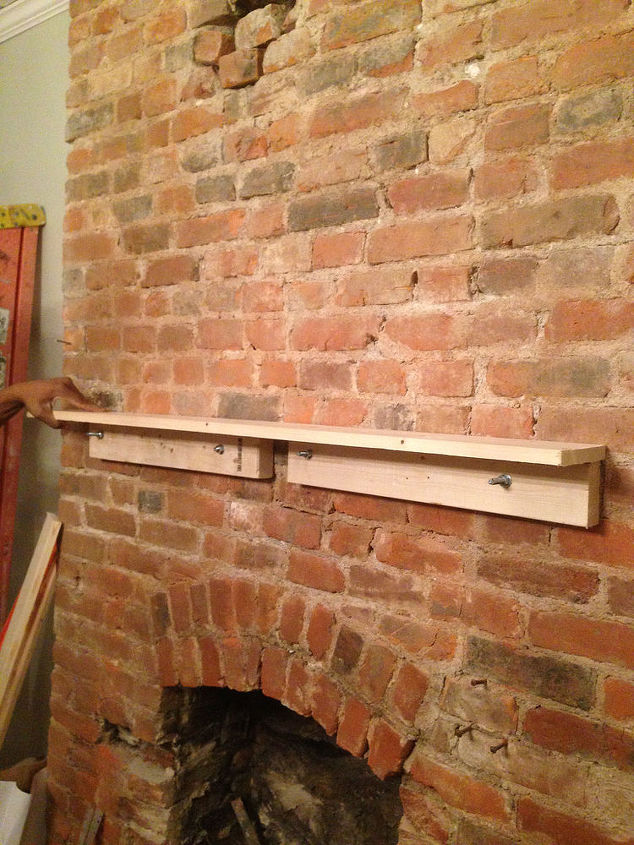
We first attached the 2x4 to the fireplace with the anchors, then nailed a 2x6 to the top, one to the bottom, and another to the front. (Note: we used two small scrap 2x4s instead of 1 big one just because we had them lying around)
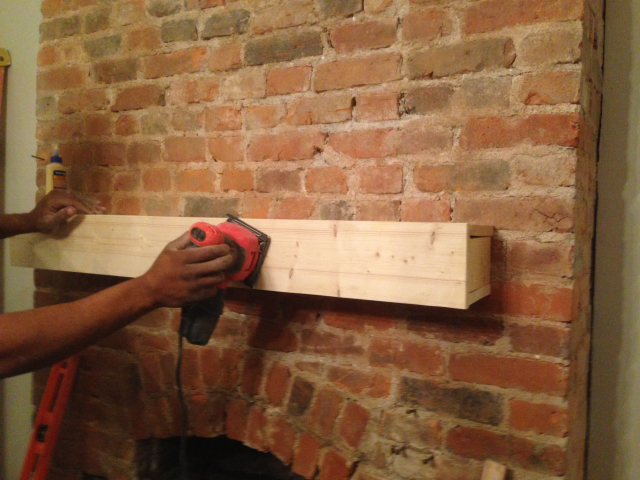
We cut square pieces to fill in the holes to fill in either side, and stained about 5 times.
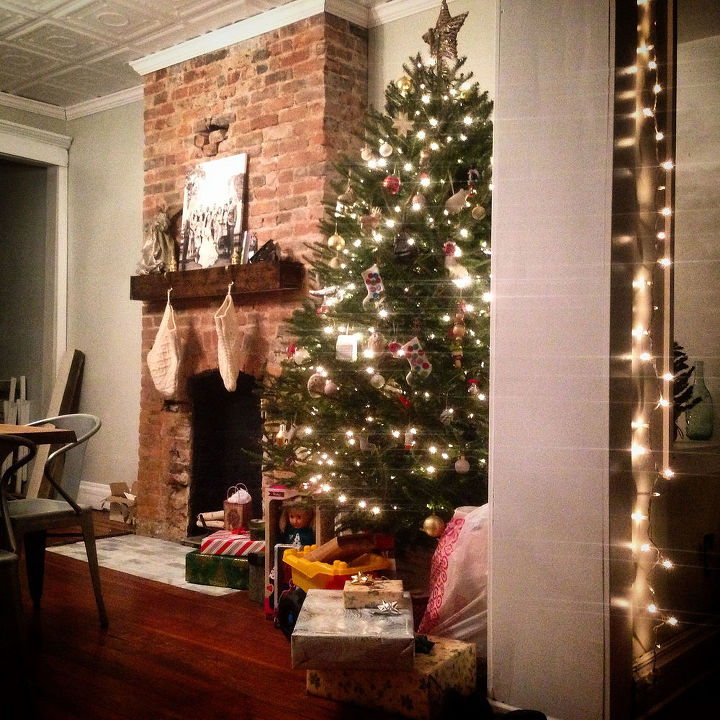
Last but not least, we insulated the chimney, cleaned the firebox, and painted it with black high heat paint. Since this house will eventually be a rental, we do not plan on making it a working fireplace. We also added marble subway tile to the hearth.

We'll look into repairing the bricks along the firebox and the hole on the chimney when the larger projects on both sides of the duplex are complete.
For a step by step tutorial and more photos, head over to the blog. And if you want to see more frequent updates about our reno project, follow us on Instagram @beginninginthemiddle.
Want more details about this and other DIY projects? Check out my blog post!
Comments
Join the conversation
2 of 7 comments
-
Lovely. I love the original, and it doesn't need to be a working fireplace to pu out the Christmas vibes. Congrats!!
-
I can’t figure out how to get this on the blog.


Frequently asked questions
Have a question about this project?