


DIY Farmhouse Kitchen Makeover for $5000 - Including Appliances!

by
Noting Grace
$5345
6 Months
Medium
It took almost 6 months, off and on, to create our Farmhouse Kitchen Remodel and we are so excited to share with you the final reveal! We were able to create a new kitchen, including appliances, for just over $5000, and raise our home's value by TENS of THOUSANDS!
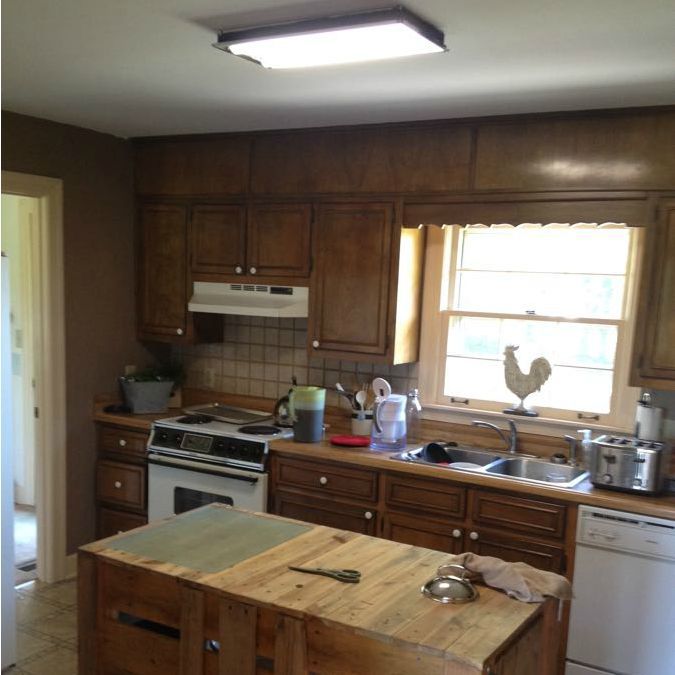
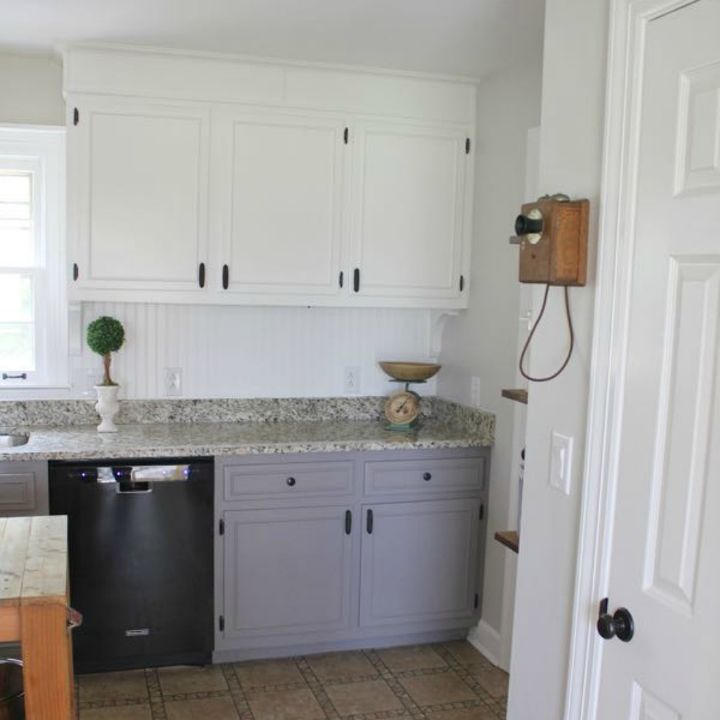
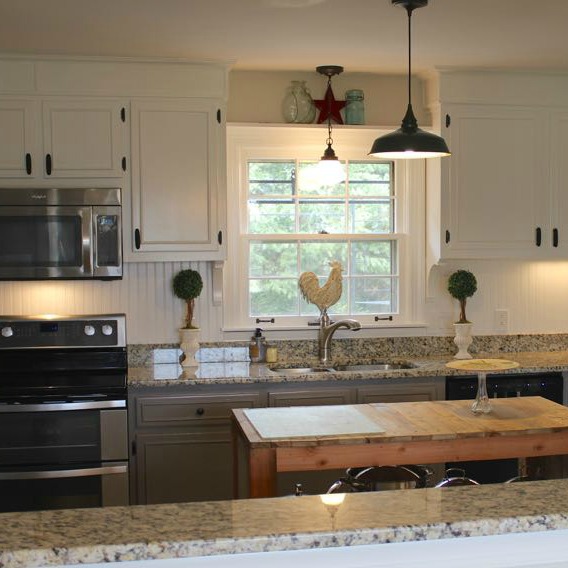
When we purchased our Tennessee home, I knew two things had to be changed immediately -- the pink carpet, and the kitchen. However, overhauling a complete kitchen on a tight budget was going to be tricky. Our goal was to completely renovate the kitchen for less than $6000, including the appliances! The house has good bones and the cabinets were made of real wood and in great shape. The counter tops were laminate butcher block that needed to be replaced and the floors are in fair shape, however, not my favorite. The top kitchen cabinets were really low--so low, that I couldn't fit my coffee maker under the cabinet! Those are fightin' words in my world! The cabinets would have to be raised. A typical height for cabinets over the counters are 16 -18 inches. These were set at 14 inches above the counter. The soffit was made of wood, so we knew we could remove it and raise the cabinets. There is one, tiny window in the kitchen which makes it one of the darkest rooms in the house. The kitchen was the only room in the house that had been painted from the builders original paint and it was a dark, chocolate-y mauve. We needed it brightened right away.
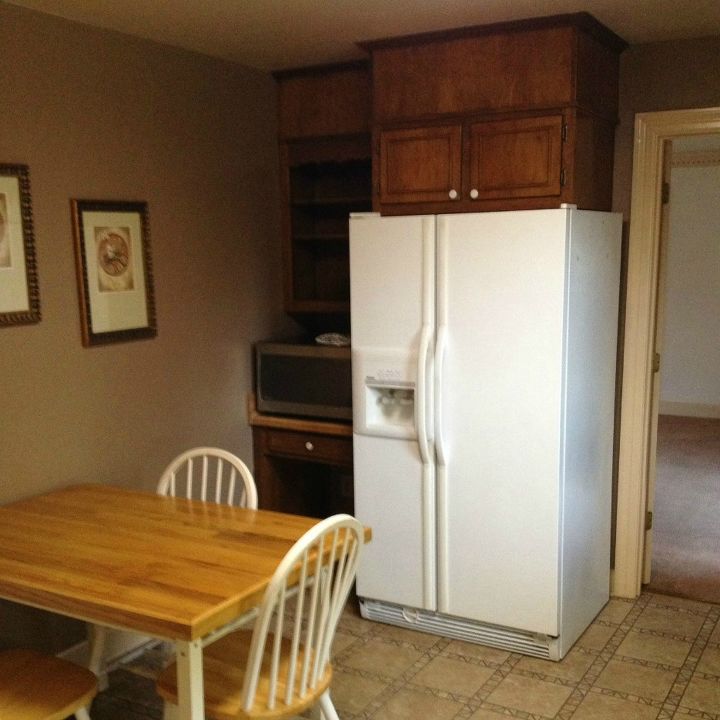
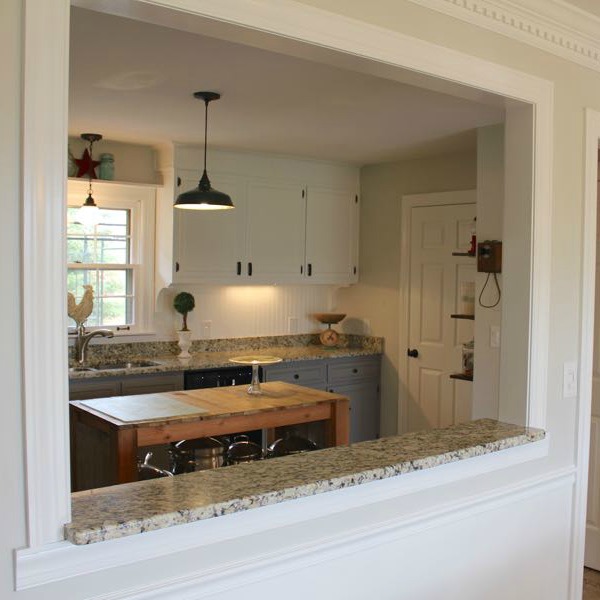
Next to the refrigerator is a small little desk niche. It's tiny. Like "too small to sit there unless you are a child" tiny. You can see that the previous homeowners used it to house their microwave. It was dark and uncomfortable sitting next to the fridge like that! I can't imagine it being an effective desk area in it's original plan. We wanted to open up the wall and add a pass through to bring in the light from a bay window in the dining room to brighten up this dark kitchen.
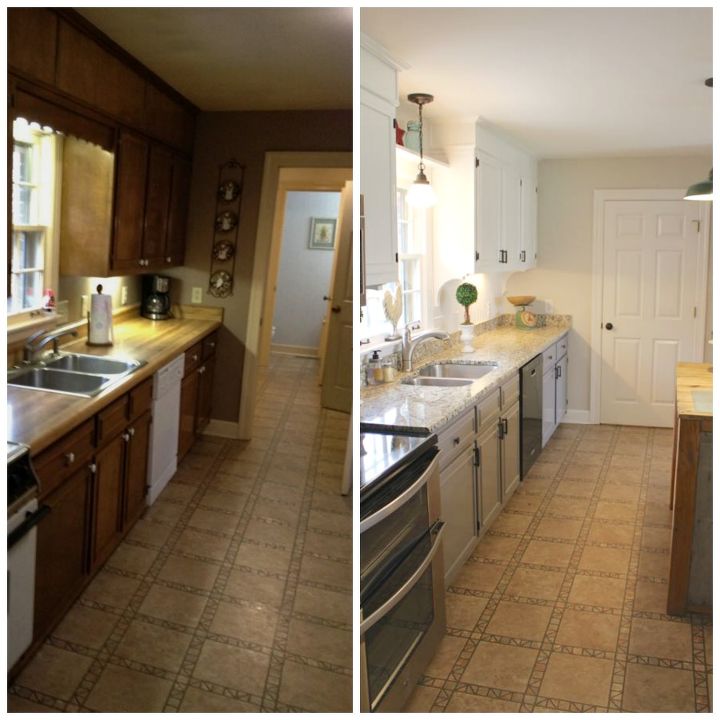
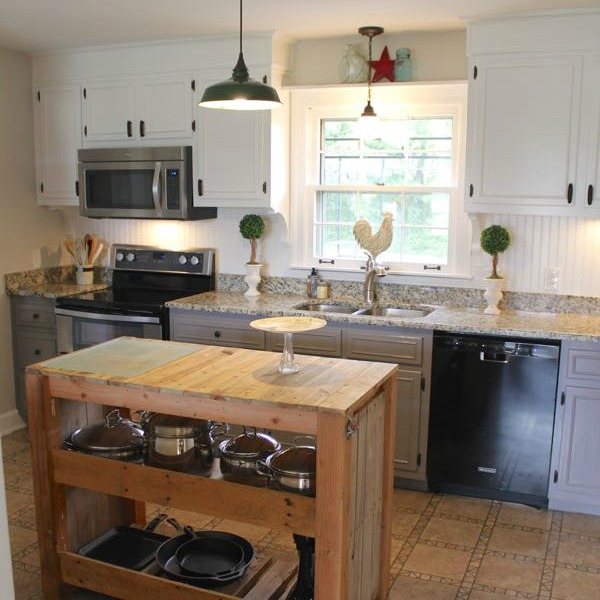
Here are the Before and Afters! We wish we could tackle the floors for this reveal, but that project will be put off until later this summer! (UPDATE!!!: Click the link below to see the new floors!!) By opening up the soffit and raising the cabinets, light can now come in from the window over the sink.
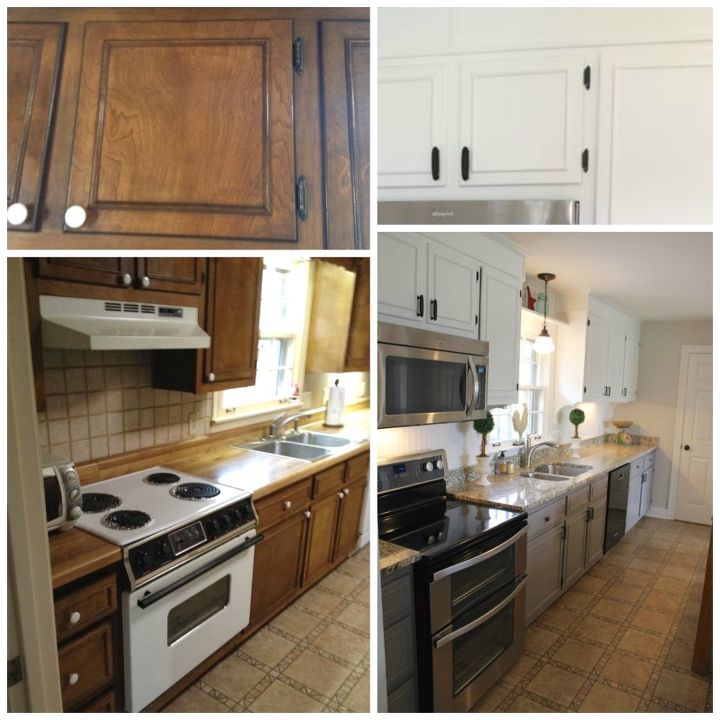
The oven hood was replaced with an over the range microwave. In keeping with our budget, we spray painted the existing hinges with Rustoleum's Oil Rubbed Bronze, as well as the door and window hardware instead of replacing them. Our knobs I had on hand for a few years. I stumbled across them at a sidewalk sale at Lowe's. They were 38 cents each, so I snatched them up and have been hanging on to them for just this type of project!
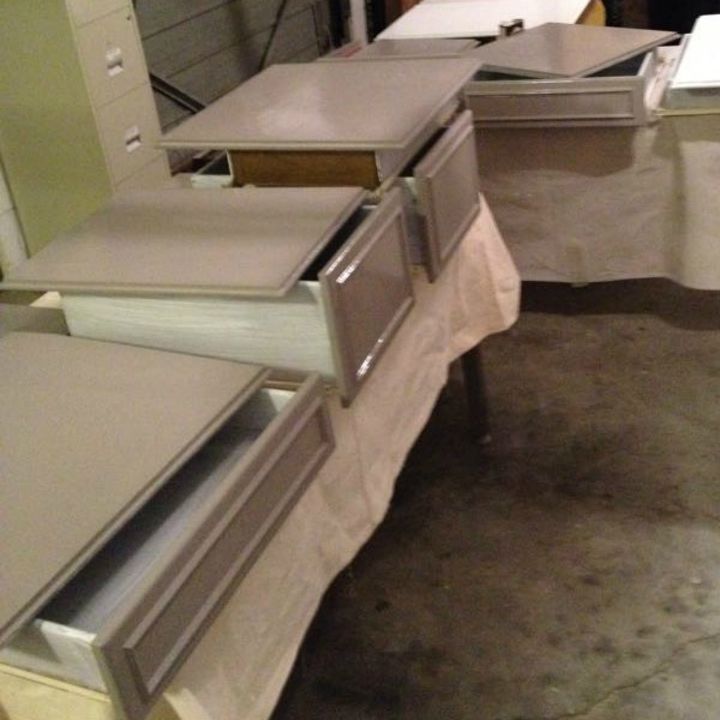
We painted the bottom cabinets in gray and the top cabinets and trim in white. The Painting Process: So I went with oil paint. Now before you balk at oil, let me explain. Our entire trim, doors, moulding, dentil moulding, etc. was painted in peach oil. The whole house! There would have been so much prep just to paint over the old oil with latex, the rep at Sherwin Williams strongly suggested repainting with oil AND I got a killer deal to boot! Painting with oil is a bear if you're not used to it. The cons: It drags differently with the brush than latex and is extremely messy. Be sure to have LOW ODOR Mineral Spirits on hand for easy clean up. The pros: It flattens out nicely and is VERY durable.

We replaced the counters with granite and raised the cabinets. All lighting was florescent lighting, which we replaced with pendant lighting and under cabinet lighting.
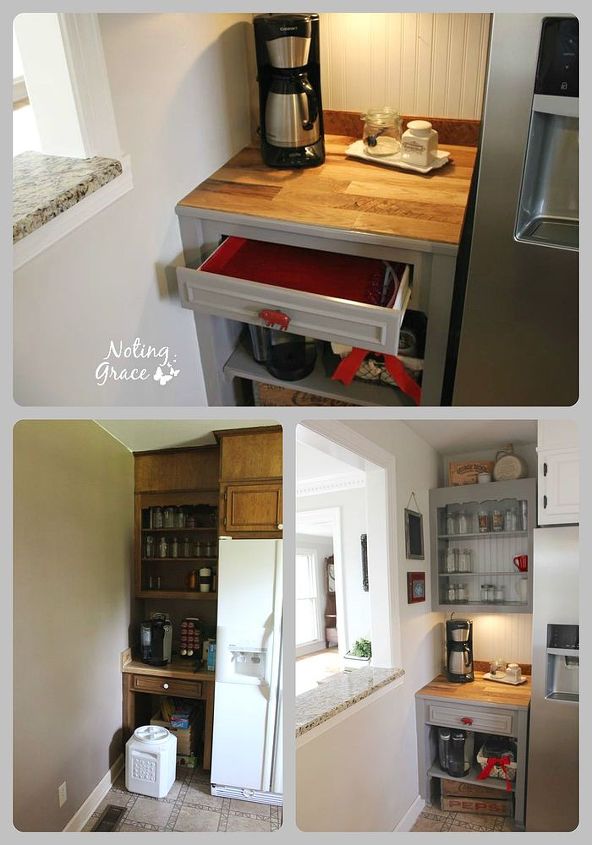
The former desk niche was tiny, dark, and next to the refrigerator, so we opted to create a look that made the niche look more like a stand alone hutch than a built in cabinet. By the addition of a shelf under the drawer, we added more storage to place another coffee maker.
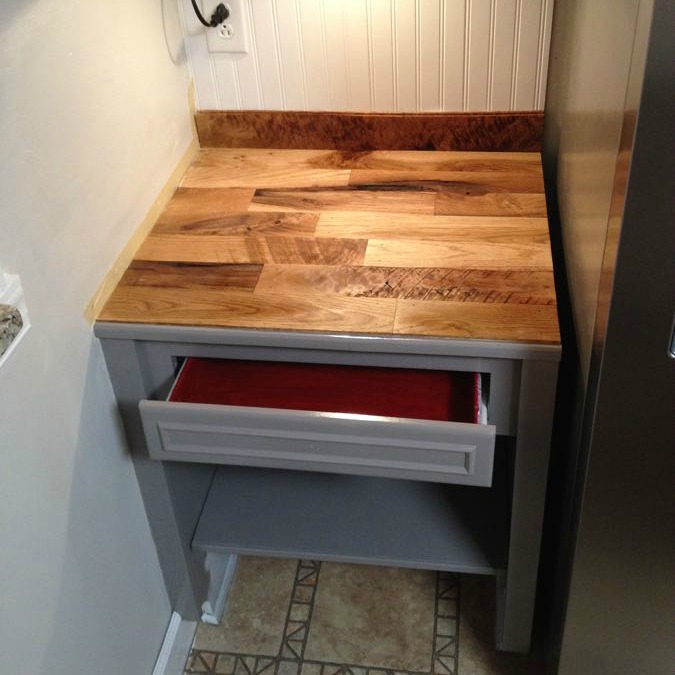
With leftover Hardwood flooring, we made the countertop for our Coffee Bar. It mimics the look of pallet wood which matches our Pallet Kitchen Island.
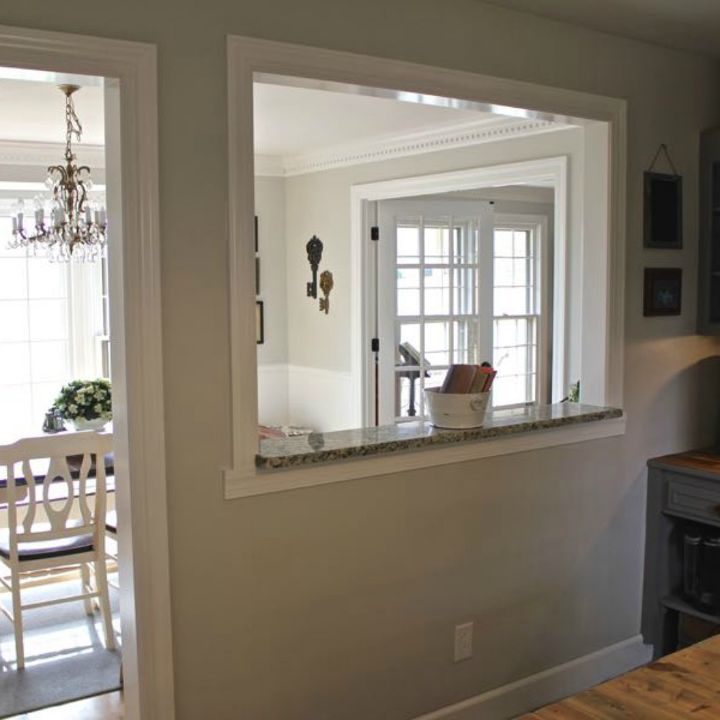
The wall was opened up with a Pass Through to allow that light that spills in to the Dining room to fill up the dark kitchen. The Pass through was topped with the same granite used for our countertops.
Now our kitchen is much brighter!
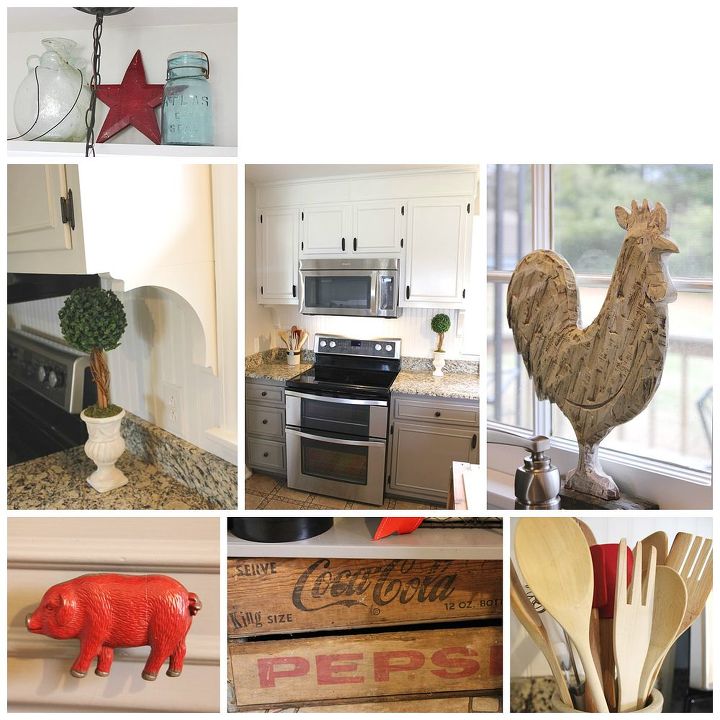
To complete the Farmhouse feel, I added corbels under the cabinets and used beadboard as our backsplash. Little touches of farmhouse whimsy are scattered throughout, like that cute, red piggy!
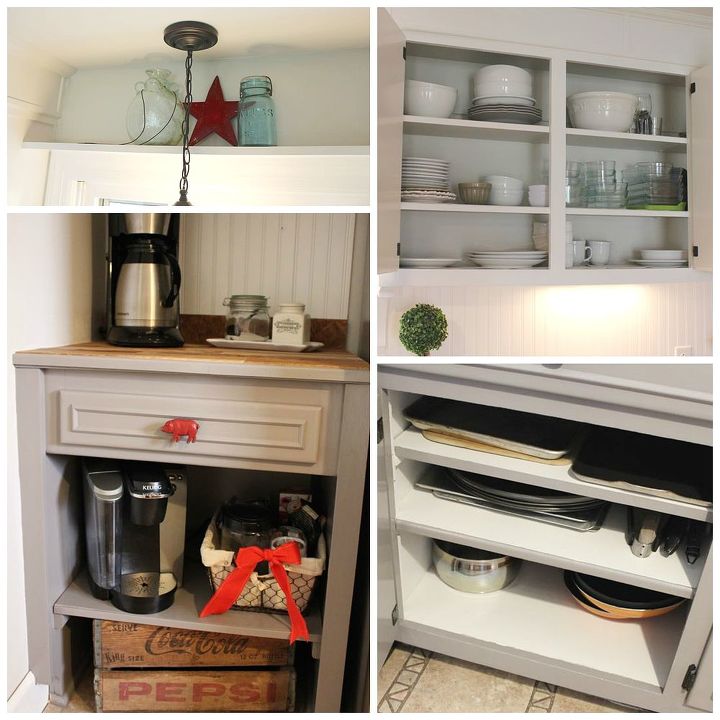
Additional shelves were added in one cabinet as well as under the former desk niche turned coffee bar. We painted the interior of the cabinets the same color as our walls, Sherwin Williams Crushed Ice.
Now, for the numbers: $5345 - including new appliances! Appliances - $2915 Countertops, sink and faucet - $1950 Lights, Paint and supplies - $330 Pass Thru - $150 If you take out the appliances and countertops, the cost would have been $480 - less than $500!
This type of renovation subcontracted out could have cost us twice as much, if not more. Sticking with a budget and tackling this ourselves, not only saved us a bundle, but we also added value to our home! This is a very doable task that I think anyone could accomplish if you plan and have patience.
Be sure to head over to my blog to see all 3 parts of this renovation series where I share more details of the makeover process. ****UPDATE: Be sure to click the link below to see the new floors and kitchen island!!
Want more details about this and other DIY projects? Check out my blog post!
Comments
Join the conversation
3 of 418 comments
-
Excellent! My kitchen looked just like yours in my "Colonial" / "farmhouse" style. I have the same problems in the dark spaces just like yours. I have TWO bearing walls so I can't easily open the kitchen dining room wall without help. You have given me great ideas & inspiration. Thank you.
-
They make amazing looking LVP tile, you can go right over that ugly tile! That would really brighten it up more!


Frequently asked questions
Have a question about this project?
Where did u get your faucet and countertop? Was doing that yourself how that price was so low?
Hi! I love the pass-through! Am I reading this correctly, did you only spend $150 on it?? If so, how did you do it? Thanks in advance!
How did you build the island?