Repair and Replace Door Hardware

BrightNest
by BrightNest
WHY DO THIS?
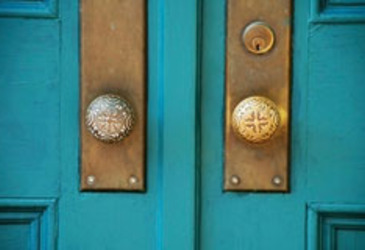
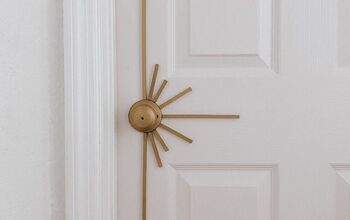
Whether you’re replacing door hardware for security, accessibility or for a new look, it’s important to use the right tools and the right hardware. A nice looking doorknob doesn’t have to be expensive – you can find brand-new knobs or handles for $20 or less!
WHAT YOU'LL NEED:


-Phillips screwdriver


-straight screwdriver


-hammer


-door hardware set of your choice.


HOW TO:


1.) Install the faceplate. Make sure the plate fits flush with the door. If it doesn’t, use a hammer to lightly tap the faceplate until it sits flush.


2.) Measure your door. Before you purchase your new door handle, measure your door. The standard door size is 1 3/8-inch thick, and modern door handles are designed to fit this size.


3.) Choose your hardware. There are three hardware types for interior doors: privacy locksets, passage latch sets and dummy sets.


4.) For a bedroom or bathroom door. Opt for a privacy lockset, which is hardware with a simple push lock. They are typically accompanied by a thin wire key and start at about $16 at your local hardware store.


5.) For large closet doors or main rooms in the house. Opt for a passage latch set, which starts at about $16 at your local hardware store.


6.) For small closets or rooms where the door does not latch. Opt for a dummy set, which also starts at about $16 at your local hardware store.


7.) Choose your door handle style. There are a few common options: a knob-type handle or a lever-type handle. Knob-type handles turn with a round knob, while lever-type handles look like a sideways “L.” You push down on the lever design to open the door.


8.) Purchase your hardware set. When purchasing, make sure your package contains: interior and exterior sides of the handle set, the latch, a strike plate that goes on the jamb of the door, installation screws and key (if you’re using a privacy lockset). Most likely, the items will be listed on the package.


9.) Remove your old door hardware. To do this, look for two screws on the interior side of the handle (near the door). Remove the screws in the door edge and pull off the knob slowly.


10.) Remove the strike plate on the doorjamb. The strike plate is the metal plate affixed to a doorjamb with a hole or holes for the bolt of the door. Your doorjamb is the vertical part of the frame where the door is secured.


11.) Install the new hardware. Install the strike plate in the doorjamb with two screws for wood. Insert your latches into the faceplate holes and secure them with two screws.


12.) Insert the side of the handle set that fits through the middle of the latch. Then, fit the exterior half of the doorknob over the interior half (it will fit snugly) and secure the two halves together with the two screws that came with the knob. Tip: Install the first screw loosely and then insert the second screw. That way, you’ll be sure they line up properly. Once they’re both in, then you can tighten the screws with a screwdriver.


View the full post, and other great home tips and tricks, at: http://bit.ly/1C1mP6d
BrightNest
Want more details about this and other DIY projects? Check out my blog post!
Go
Frequently asked questions
Have a question about this project?
Comments
Join the conversation
Next