Yes! You Really Can Paint Tiles: Rust-Oleum Tile Transformations Kit

Sabrina
by Sabrina
4 Materials
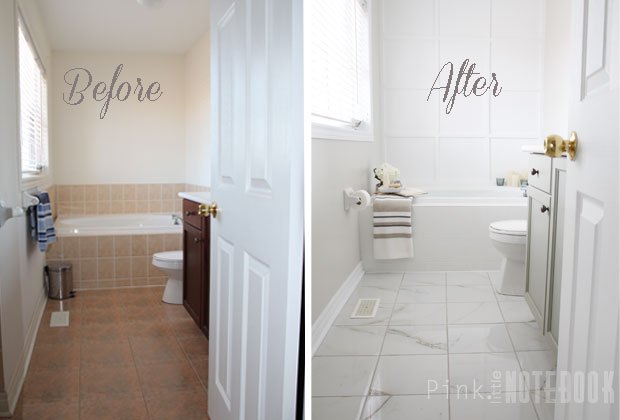
During my bathroom reveal, a lot of you were surprised to learn that bathroom tiles can actually be painted!
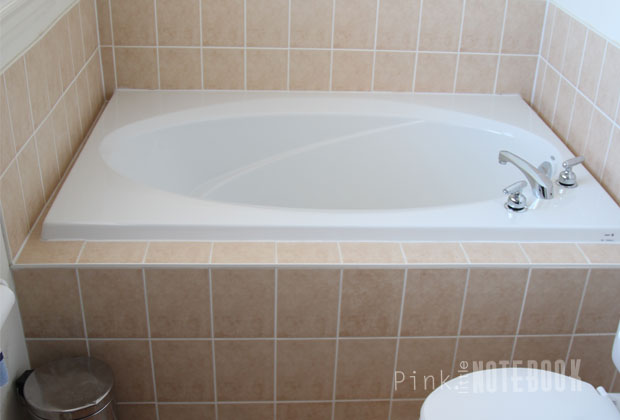
Are you curious as to how this tile. . .
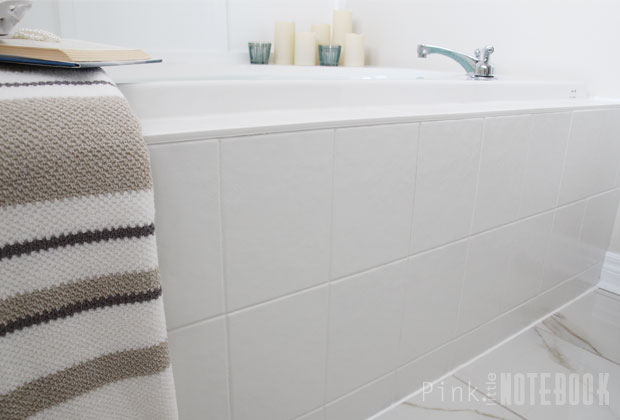
can look like this?
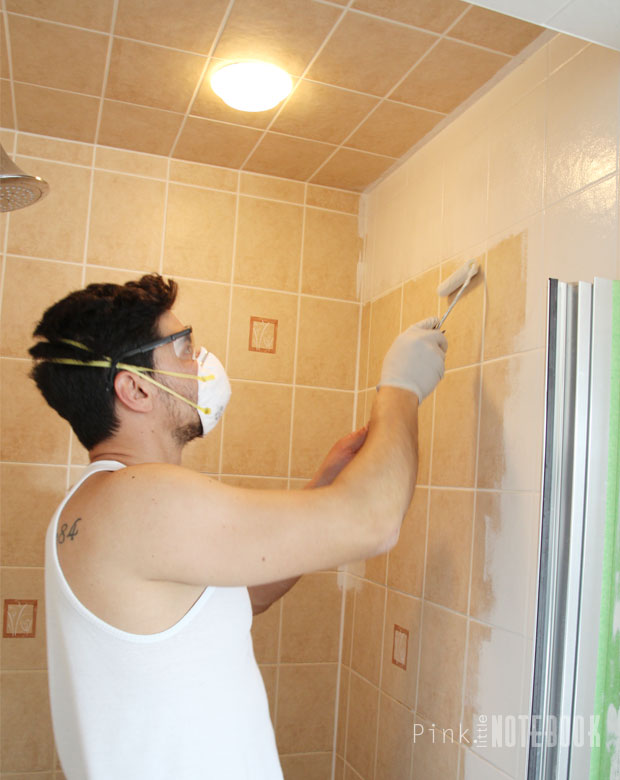
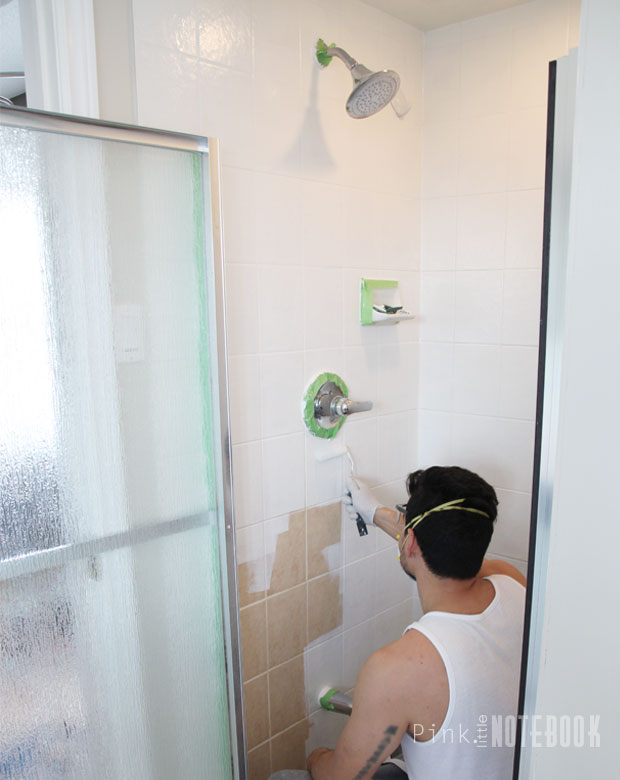
As you may recall from my One Room Challenge, the only area I replaced the tile was on the bathroom floor. The pink tiles around the tub and the shower stall where left as is. I felt like it was a waste of time and money to tear down perfectly good tile due to its dated colour. So I opted for an easier solution, tile paint! And what a transformation it ended up being!
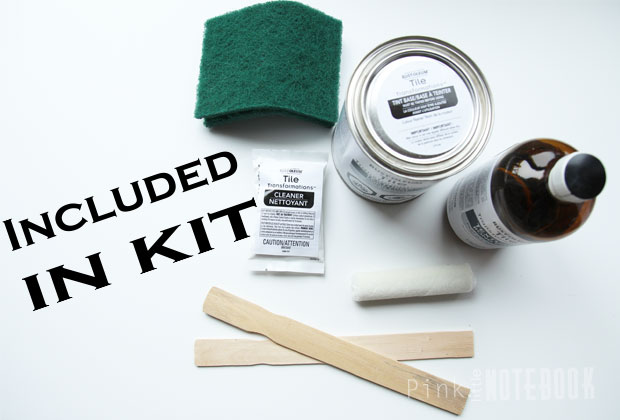
Now I'm not going to lie, at first I had some hesitation to tile paint. . .
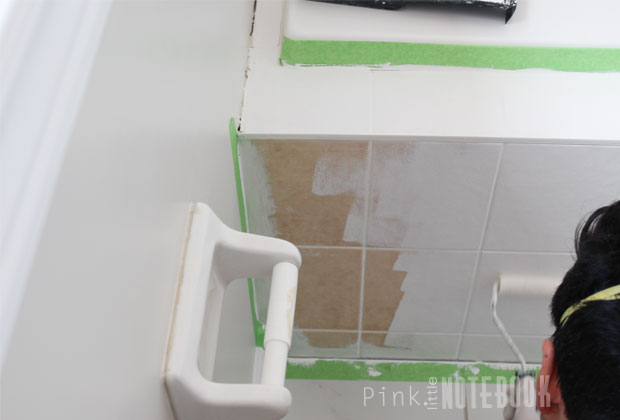

Does it actually work?


Will it look good?


Is it hard to do?


Will it last?


But after a little online research and many positive reviews (gotta love the internet), I decided to give it a try with Rust-Oleum Tile Tranformations - Solid Colour Textured Finish.
Clean + Tape


Use the enclosed cleaner to scrub the entire surface you want to paint and make sure you do a really good job. Remove all caulking. The paint will not stick to it.


Tape off the areas that you want to protect. This paint kind of reminds me of a krazy glue on steroids, it is super duper adherent and will not come off easy after it dries. Make sure you protect your fixtures or any areas that meet the wall. Cover your tub or shower areas with a drop cloth.
Mix + Paint


Put your protective mask on and mix the two parts of paint together (pour Texture Bond Coat A Activator into Textured Bond Coat B Base). Be prepared for some harsh smelling fumes.


Next, start the painting. The instructions suggest that one person uses the synthetic paint brush to cut the outer edges and corners, while the other partner follows behind with the roller for vertical surfaces. (I obviously called dibs on the cutting and the hubby was left with the rolling.)


This process seemed to work okay for the bathtub but as you can see two people in our tiny shower stall was not happening. Since you have to move fairly quickly with this paint, the hubby just used the edge of the roller to cut the corners in the shower. It went a lot faster this way.


However, this may be the very reason why our roller started breaking apart at the very end.
Inspect


When everything is all said and done, inspect for any drips, imperfections, uneven texture before you call it a day.


I will mention this. One of the very first things listed on the instruction sheet is about lighting, it says:


"if lighting is dim, bring in extra light source"


We should have listened!


We started painting around mid afternoon when the sun was shining through the window, by the time we finished painting, the sun was no longer gleaming in. We inspected everything twice to make sure we had good coverage and it looked perfect. However, the next day, I noticed this at the bottom of our shower stall.
We had a little unevenness towards the bottom of our shower stall. I guess working in a tight space, we didn't realize the shadows starting to creep in especially when we got to the bottom. If we had the extra lighting, we would have caught this but in our current lighting conditions it was literally undetectable.


So if your working in a tight space where shadows maybe lurking around, bring in the extra lighting!


A couple other things to note:


I was a little worried how these raised flowers would look after the paint job. I can tell you I'm quite pleased with the results! In fact, it took me a couple of minutes just to locate one of these flowers to take a photograph. I also had to darken the image a bit just to show you the outline. . . .
Check out Pink Little Notebook's post for the full tutorial!
Sabrina
Want more details about this and other DIY projects? Check out my blog post!
Go
Frequently asked questions
Have a question about this project?
3 of 23 questions
  • Dori Deaton Dori Deaton on Aug 25, 2018

    Does this work over vinyl and fiberglass? Because if it does I'm on it.

  • LCoucher LCoucher on Oct 14, 2018

    What did you do to the wall behind the bathtub, above the tile?

  • Margaret tarulli Margaret tarulli on Sep 06, 2022

    WHERE DO WE GET THE PAINT KIT ?

Comments
Join the conversation
2 of 30 comments
Next