


How to Make T-Shirt Carrots

by
Sue Purdy
With Easter around the corner, I was inspired to create something new and fun. I have seen "carrots" made from an old sweater before, and it was adorable, but I didn't have an old orange sweater on hand, and I wanted to keep my costs to a minimum, so I came up with the idea of using an old T-shirt instead.
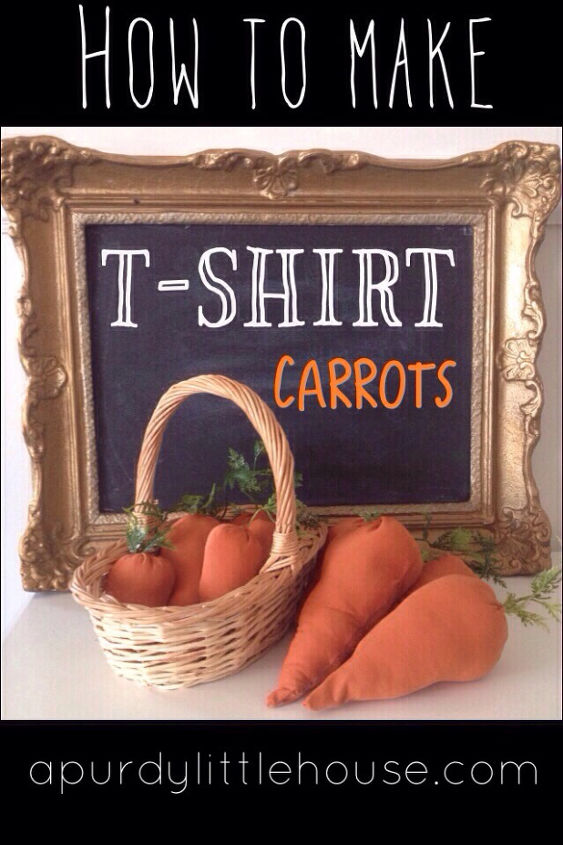
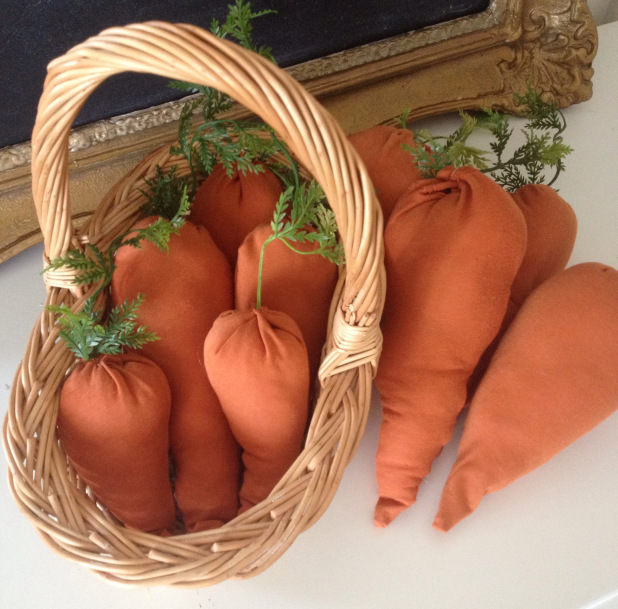
Here is the finished batch of carrots. I love that they turned out kind of lumpy, just like real carrots.
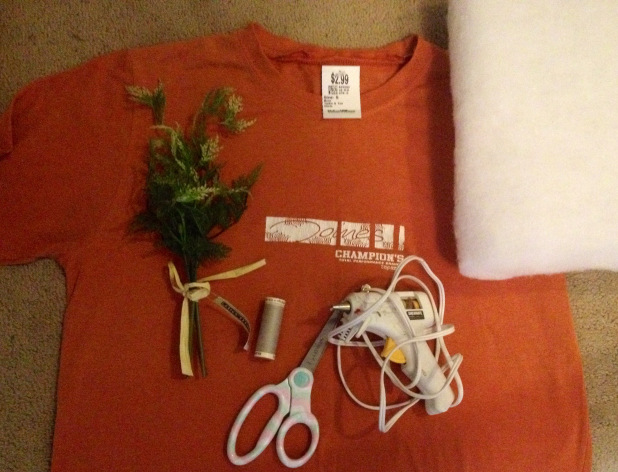
The total cost for this project was $4.99. The T-shirt was $2.99, purchased at a thrift store, and the faux greenery was $2.00, purchased at Michaels. I had all the other items on hand.
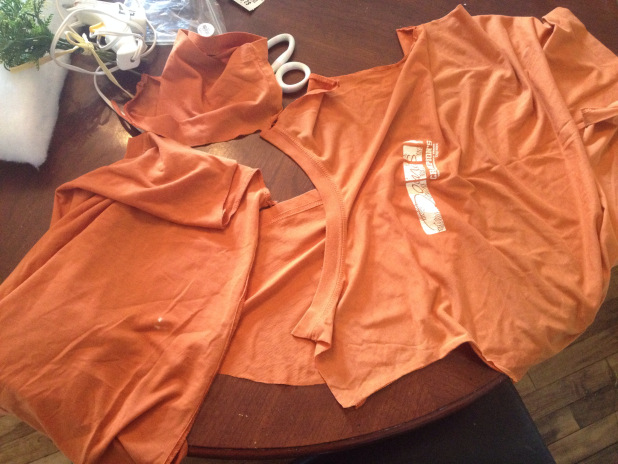
I wasn't really sure how to start this, so I just began cutting the shirt up wherever there was a seam.
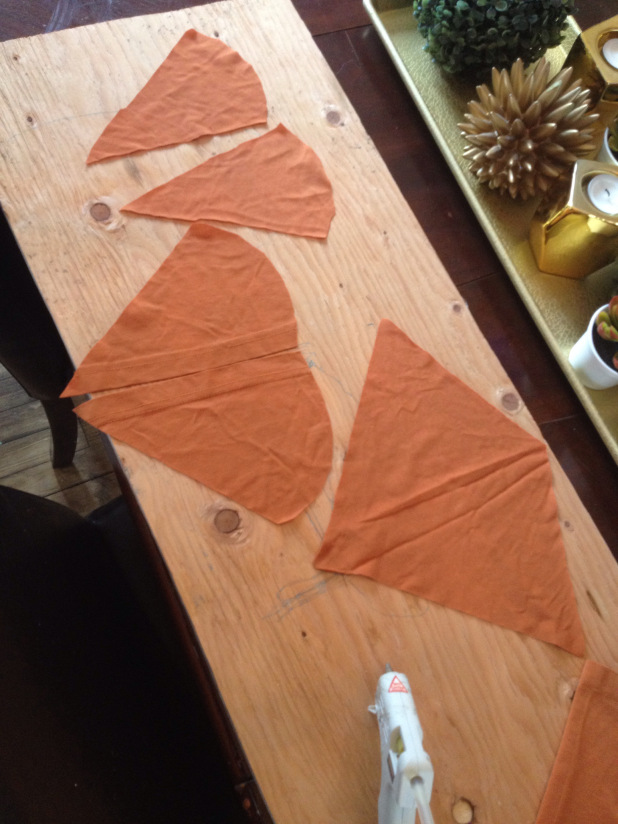
I then kind of figured out the size of the carrots I wanted, and started cutting the fabric in varying triangle shapes. To save time, I hot glued the edges together to get the carrot shape. I suppose you could sew them, but the hot glue worked just fine for me.
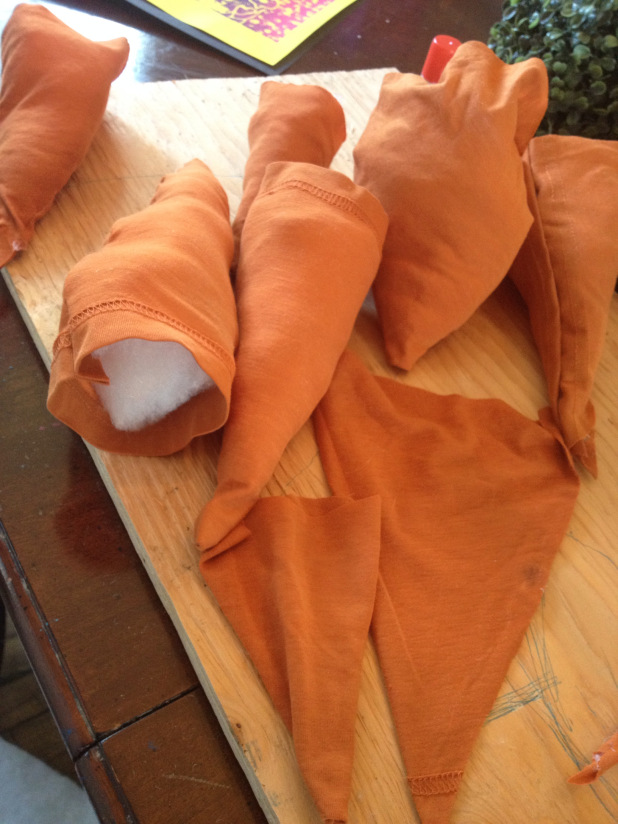
Once the glue had dried, I turned the carrots inside out, and stuffed them with the batting. I also cut the batting into triangle shapes to make this step easier.

Once they were all stuffed, I hand sewed up the tops. At about this stage of this step, I added in my greenery, which was secured in place using my needle and thread. I tried to pierce a couple holes in the leaves with the needle as I sewed, so it wouldn't fall out. You could also use felt, but I wanted my greenery to look a bit more realistic.
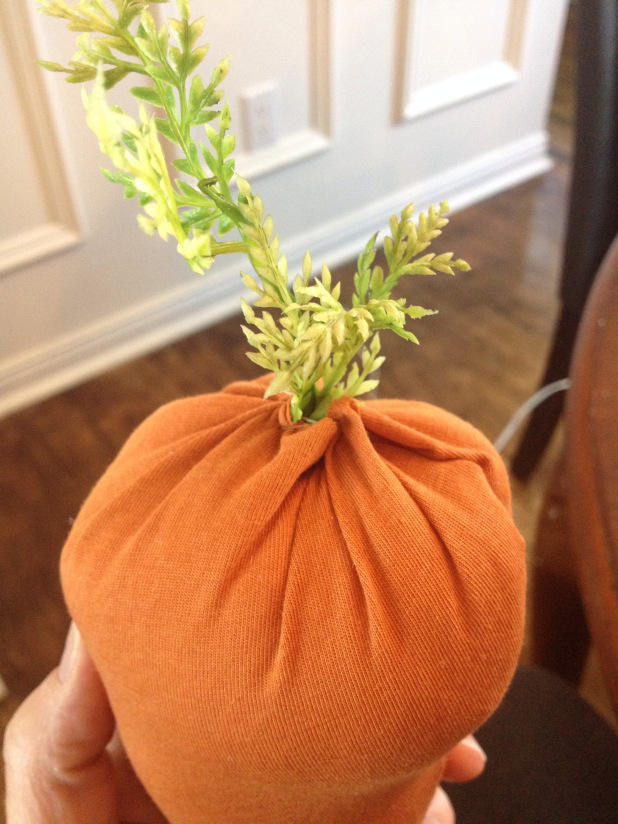
Here's a close up of the finished carrot top.
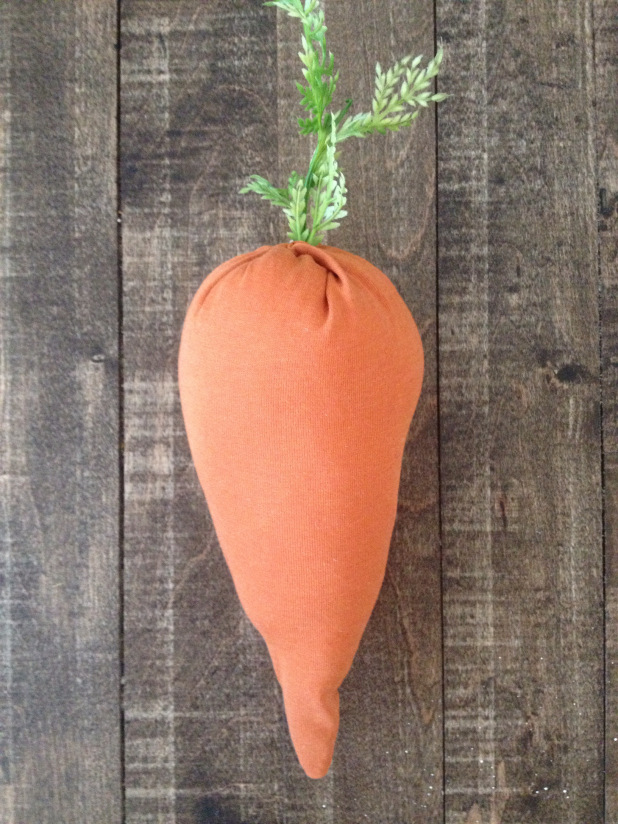
Here's one of the finished carrots.
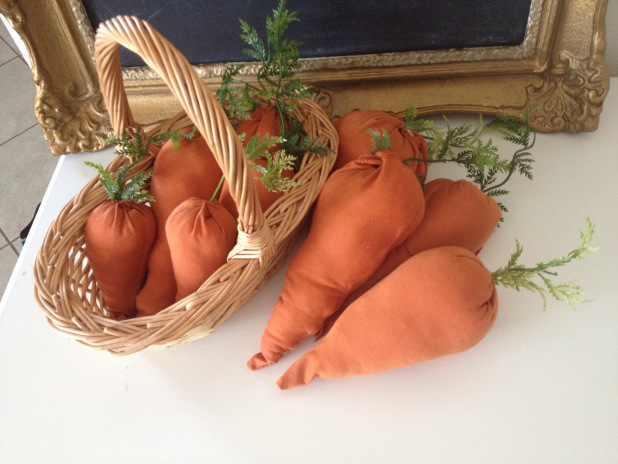
Just add them to a cute little basket, and we're done :)
With Easter only two weeks away, this should motivate me to get my Easter decorating underway. Thanks so much for checking out my post. Hop on over to my blog to see more.
Want more details about this and other DIY projects? Check out my blog post!
Comments
Join the conversation
2 of 20 comments
-
How cute are those carrots!
-
So cute i can’t wait to try it. Thanks for sharing


Frequently asked questions
Have a question about this project?