DIY Personalized Easter Eggs

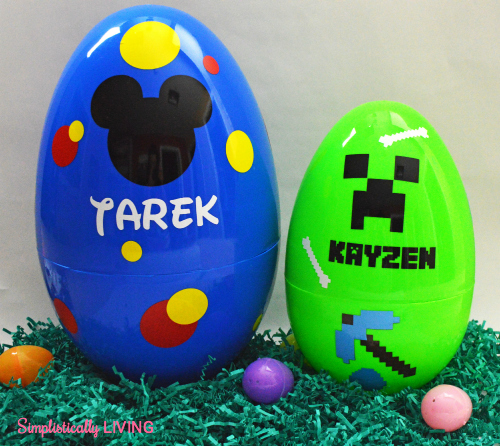
In my opinion, personalized gifts are the best. That is why I created these Personalized Easter Eggs for my boys. I wanted them to have something that made them special come Easter morning.
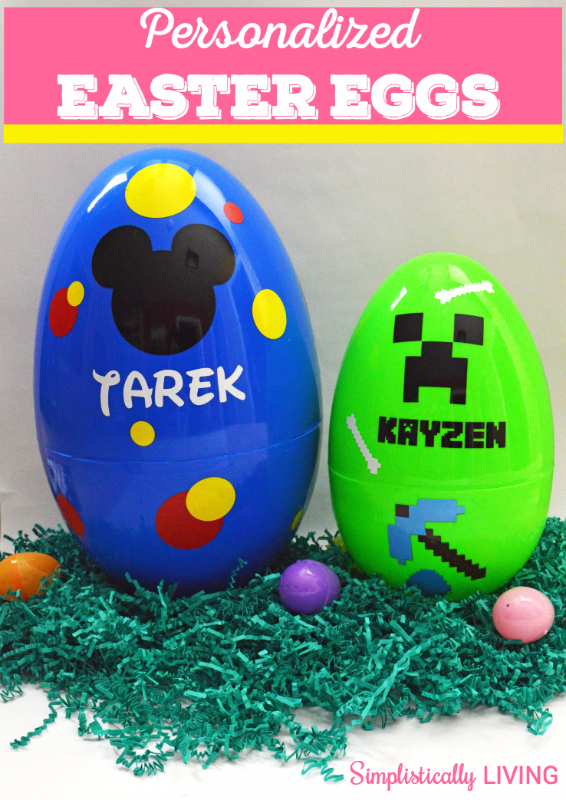
I recently visited my local Hobby Lobby (okay, that store is basically my second home) and found these giant plastic Easter eggs. They were priced at $19.99 but of course I used my 40% off coupon so paid much less. Anyways, they came with 3 large eggs, basically a smaller egg in each egg and they were different colors. So I decided to personalize them for my boys and use them for Easter this year.


The easiest way to personalize your eggs is with vinyl. My favorite place to order vinyl from is Expressions Vinyl because they have awesome prices, fast shipping, great prices and great quality vinyl. In fact, they supplied me with the vinyl to complete this Easter project. If you want to complete it too, order vinyl from them and get working on your eggs! Ready to make your own? Check out the tutorial below!


DIY Personalized Easter Eggs


Supplies Needed:


Permanent adhesive vinyl (in a variety of colors)


Jumbo plastic eggs (found at Hobby Lobby)


Silhouette weeding tools


Silhouette electronic cutting machine (and studio software)
Start by choosing the theme of your plastic egg. For my 6 month old son I chose to go with Mickey Mouse Clubhouse and for my 4 year old son, I went with Minecraft.


Once you’ve chosen your theme you will need to find images to trace (I am assuming you know how to do this). You can also find coordinating fonts and download those your computer. I suggest getting fonts from DaFont.com (they are free and I have not had any issues with viruses)


Trace your images in your silhouette studio software then cut your vinyl.


Once your images are cut and weeded, it’s time to transfer your vinyl to your plastic egg.


Repeat step 4 until all your items are placed onto your plastic eggs like you want.


Enjoy your personalized easter eggs!


Tip: Since this eggs have a rounded surface, I found it easier to lay the vinyl by hand and work from the middle out to the edges to remove any bubbles and ensure a smooth surface.
Brittanie Pyper
Want more details about this and other DIY projects? Check out my blog post!
Go
Frequently asked questions
Have a question about this project?
Comments
Join the conversation
Next