Asked on Mar 31, 2015
Skirt board on stairs all screwed up under the carpeting!

by
Barb Belcher
+14
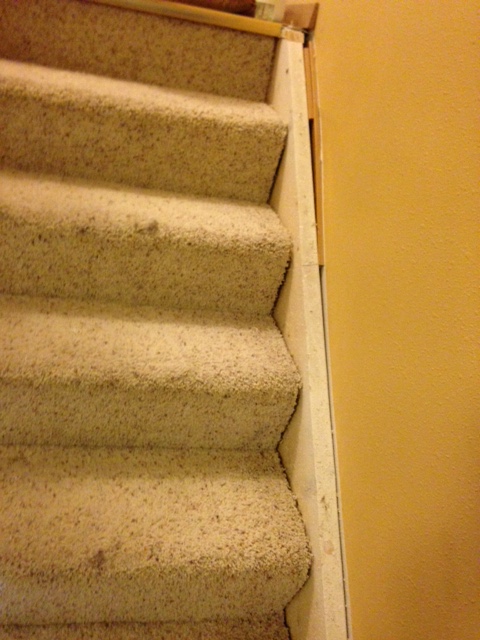
We tore up the carpeting to prepare the stairs for laminate flooring on them. We were planning on sanding and painting the stair skirt board. But found this!!
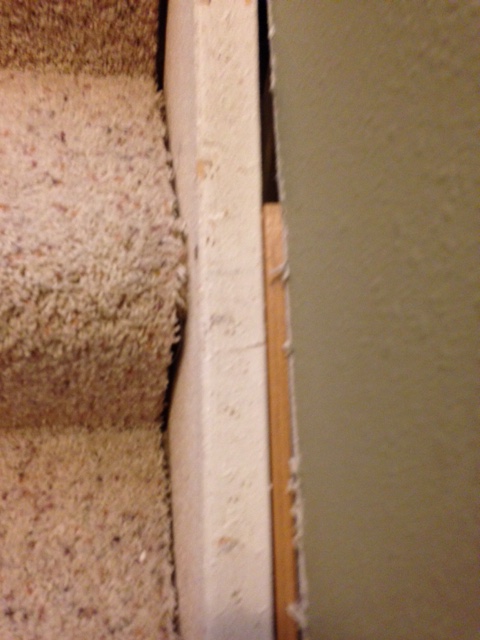
The builder installed the stair crooked so there are shims (actually the trim from the floor used as shims) on the sides of the stairs!
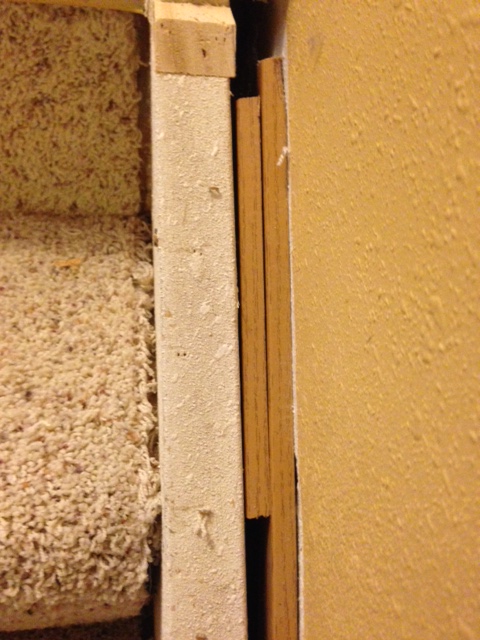
We can't think of any way to paint these now as it will be crooked all the way down! The carpet hid it, but I don't know if there's a way to paint, or cover them in veneer to make it look good.
Any ideas of how to fix this would be greatly appreciated! The stairs are IMBEDDED into the skirt, and we're not going to rip out the stairs as it's sheetrocked underneath. We're thinking that our only option is to re-carpet. NOT what I wanted. I HATE carpet on our main stairs! Any help??
13 answers
-
I would find some nice moulding that would cover all this wood that is exposed & you can paint it white along with the risers, leaving the stained/laminate steps. Also I would paint the sides of the staircase beneath the moulding white as well. Hope this is a solvable solution for you! Good Luck!
 Jan Loehr
on Mar 31, 2015
Jan Loehr
on Mar 31, 2015
-
If you have a skilled carpenter , he could custom make a moulding that would exactly match that angle so as to hide your problem. Or could try creating a sliver to put behind your moulding yourself and use "Fast and Final" , to crack fill, then sand and paint.
 Dragonintheattic
on Mar 31, 2015
Dragonintheattic
on Mar 31, 2015
-
The professional carpenter would be my next suggestion....worth an estimate to fix this!
Jan Loehr
on Mar 31, 2015
-
I agree. I have a very old home. During the kitchen remodel we found there isn't a square corner in the place! In one 42 inch span the counter's backsplash actually varies from touching the wall behind it to sitting out an inch and a quarter away from it. The old plaster walls, as well as the mortar and lath behind them, had been torn away and replaced with drywall. I lived with the gap-of-doomed-fallen-things for a while, losing a few recipe cards, a good spoon, a couple of take-out menus...then finally decided to just fix it. I bought an 8'x2"x1/4" piece of plain wood trim. To begin the cover-up I very carefully applied 2 inch painter's masking tape to the top of the backsplash, being very sure to match back edges of the two together. Then using a 6" ruler, I measured from the wall to the FRONT edge of the countertop backsplash, making a mark every linear inch on the tape. When finished measuring I carefully removed the long piece of tape and re-applied it directly to my piece of wood trim. The little dots gave me the slanted line to cut exactly where I needed to go. Cut, sanded, stained and sealed...I adhered it to the countertop with wood adhesive because it's what I had on hand. I'ts held up for 8 years.
 Sheryl Johnson
on Apr 01, 2015
Sheryl Johnson
on Apr 01, 2015
-
Shifting, settling and just plain bad carpentry, and you find stuff like this in every home. It was used to "square up" the wall or stairs. You can cut away enough of the drywall further up to visually square it up. Fill the gap with the cut away drywall then use your choice of moulding. I hope I explained that ok.
 Hope Williams
on Apr 01, 2015
Hope Williams
on Apr 01, 2015
-
I have the same problem in my home. The builder or the previous owner covered it up with baseboard molding.
 Kathy
on Apr 01, 2015
Kathy
on Apr 01, 2015
-
I had exactly the same situation. I took a piece of 1 x 3 pine an laid it against the wall. The take a pencil an scribe the underside. Cut the board along the scribed line and nail in place. I then yook a vrry small moulding on yop and against the wall.
 Dann
on Apr 01, 2015
Dann
on Apr 01, 2015
-
Dann suggested exactly what I was going to recommend : cover horizontally first, then vertically. You shouldn't need a professional carpenter$$$
 Barb Burnham
on Apr 01, 2015
Barb Burnham
on Apr 01, 2015
- See 1 previous
-
Perhaps use a thin sheet of drywall, 1/8" thick and recover the entire wall. That will bring the wall out and a good dry-waller can tie it into the existing walls and it will not be noticed. I like the knock down drywall covering that will hide any deviations or slight curves. A good molding will also help tie it in.
 John
on Apr 01, 2015
John
on Apr 01, 2015
-
Interesting to an old-house owner. Isn't there a line of vinyl mouldings for cornices, etc., that give enough to fit imperfect walls?
 Duv310660
on Apr 01, 2015
Duv310660
on Apr 01, 2015
-
This may sounds ridiculous, and cost a little more than you're looking for, but my sweetie and I are rehabbing our original 1840 home, and in our bedroom there was something like the same problem you're having, only ours was a gap from our original molding to the wall. He's a carpenter, and just filled the cracks flush with white caulking. It's still even to the top and filled in really nice, and of course if you really look at it you can tell, but as a quick fix without too much hassle, it did do the trick.
 Aleshabillie
on Apr 03, 2015
Aleshabillie
on Apr 03, 2015
-
The stairs where put in after the drywall was added .Carpenter did the best he could do but to fix it you need to remove about 2 feet of drywall taper the studs and make it level up and down and sideways. put on a new sheet of drywall and blend it in with mud and texture and paint.
 Fred Mayers
on Apr 07, 2015
Fred Mayers
on Apr 07, 2015
-
hope you are a Carpenter or have a table saw
Fred Mayers
on Apr 07, 2015
Sign Up to Answer