


DIY Mirrored Secretary Desk
After purchasing an IKEA Hemnes secretary desk as my workspace I decided to make some changes to it. Since it is sitting in my living room I felt that it needed to be dressed up a bit. I loved the look of fretwork and mirrors and I knew that a DIY mirrored secretary desk was the direction I was headed. It has a timeless look to it without being “too much.”
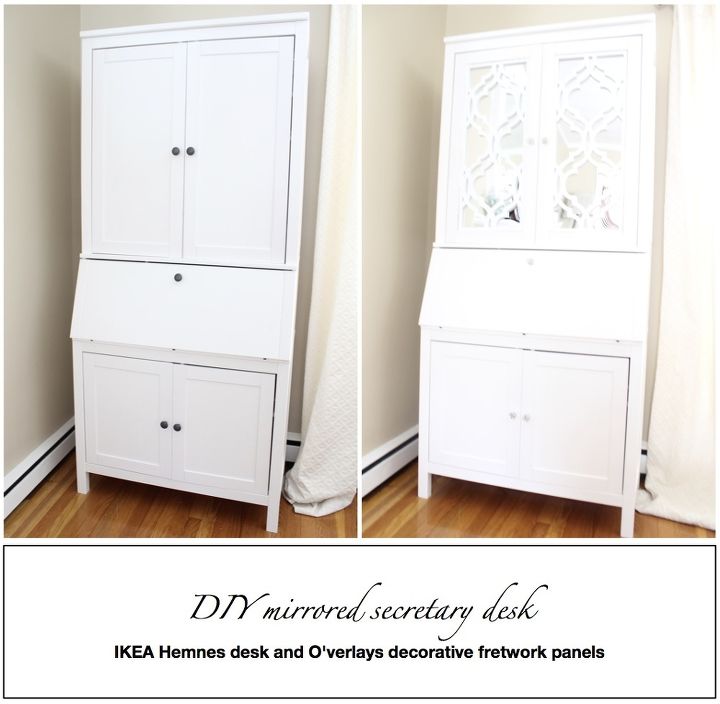
The plan was to cut out the two top doors and leave the frames intact. I would then attach a mirror and some sort of fretwork. The mirrored part seemed easy enough since I had just stumbled upon acrylic sheets of mirror at the hardware store. The acrylic sheets are much lighter (and less expensive) than an actual mirror. I was concerned that a glass mirror would cause the whole door to come crashing off since the IKEA doors are pretty lightweight to begin with. I purchased one 24 inch by 48 inch panel which I was able to cut myself. I scored it a couple of times with a box cutter and then snapped it along the scored line. It cut perfectly. This one sheet was enough for both door panels and then some.
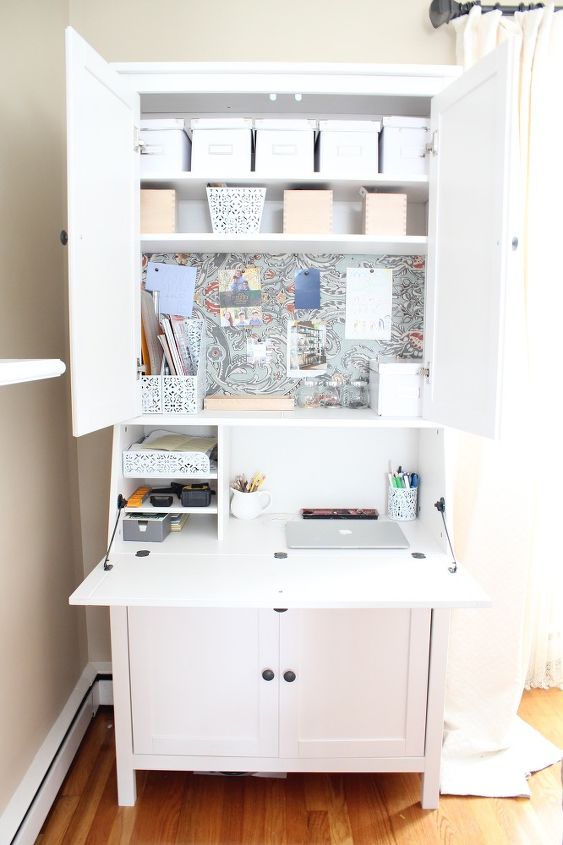
I needed a desk, storage, a place for a printer and plenty of room for ideas. This desk handled all of it. I can easily work in the living room and then pack “my office” up by simply closing the doors. Plenty of shelves and space for all my needs. I removed one shelf to create a fabric covered cork board for ideas, pictures and notes.
The tricky part was figuring out how to add the fretwork! I ordered pre-made lightweight decorative fretwork panels from O’verlays in the Khloe pattern. I used 1/2 inch thick panels that measured 11 5/8 wide by 28 3/8 tall. The panels arrived quickly, fit perfectly and I was able to get to work.
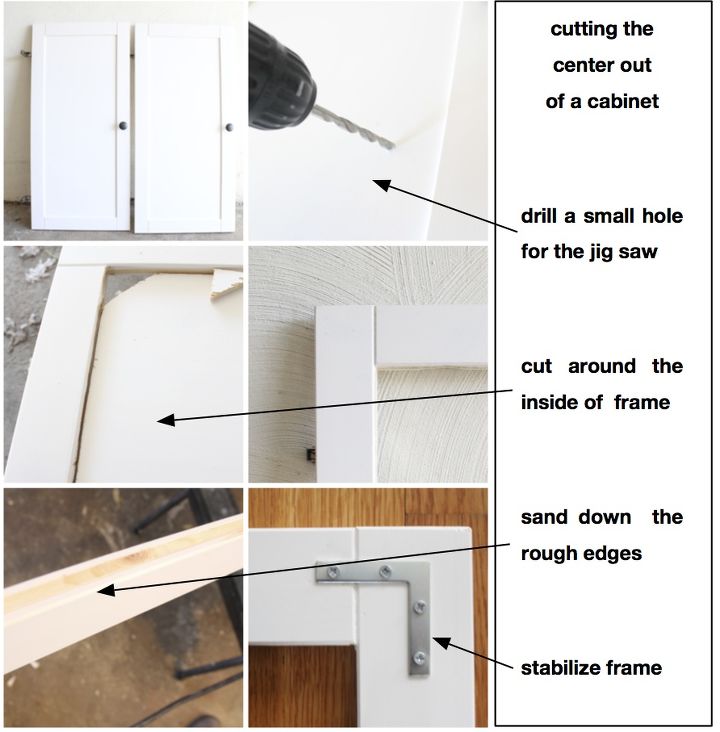
I cut out the center of the cabinet door with a jigsaw, sanded the frame down and stabilized the corners.
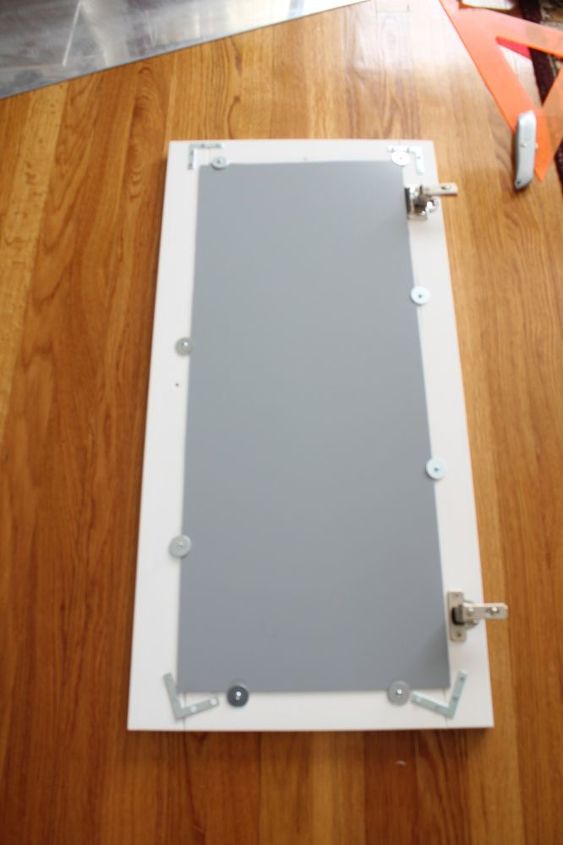
I then added the acrylic mirror using washers.
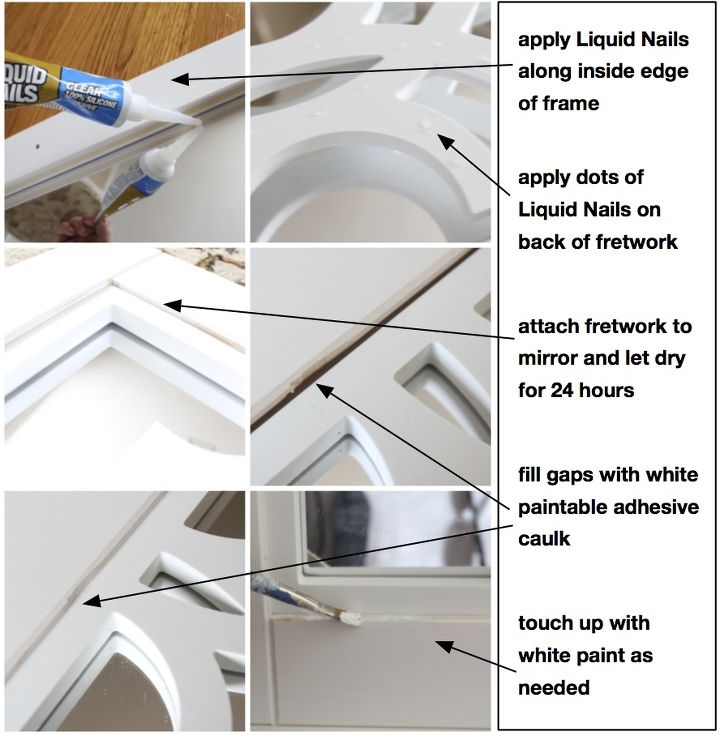
After that I used Liquid Nails to glue the fretwork onto the frame and mirror. All the gaps were filled in with paintable adhesive caulk and then touched up with white paint.
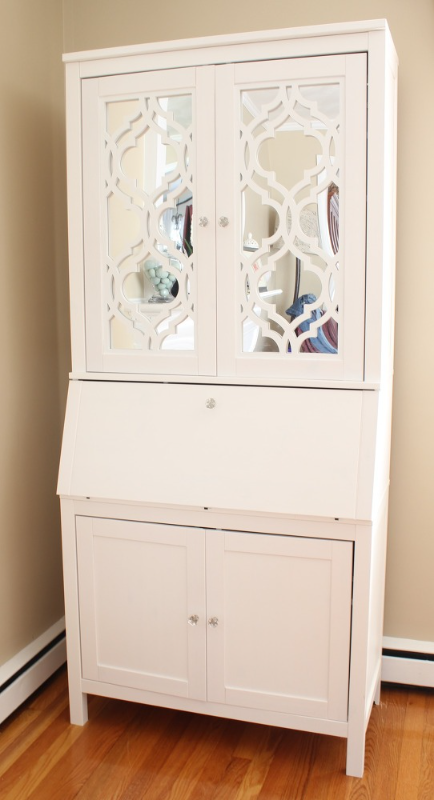
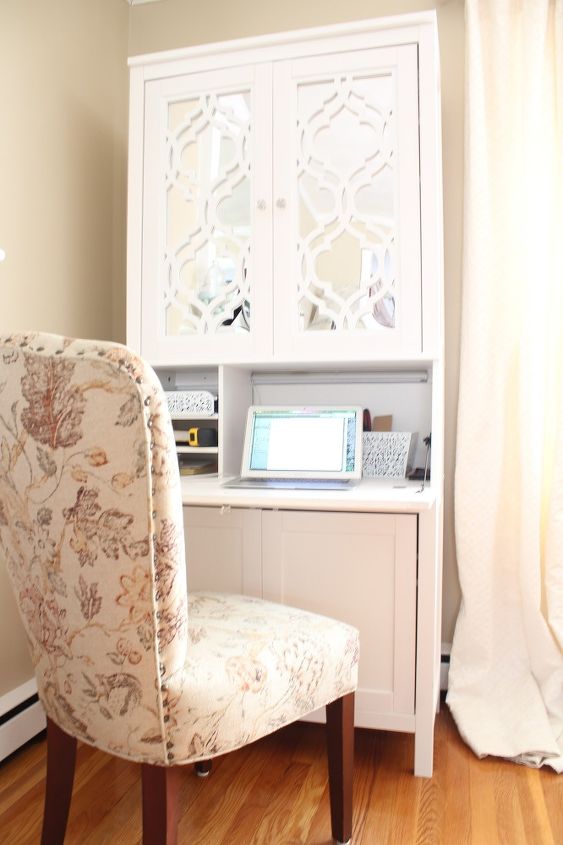
After the doors dried a bit I was able to reattach them to the desk. Some new hardware was added as well to lighten the whole look up. I chose glass knobs that wouldn’t distract the eye from the mirrored fretwork.
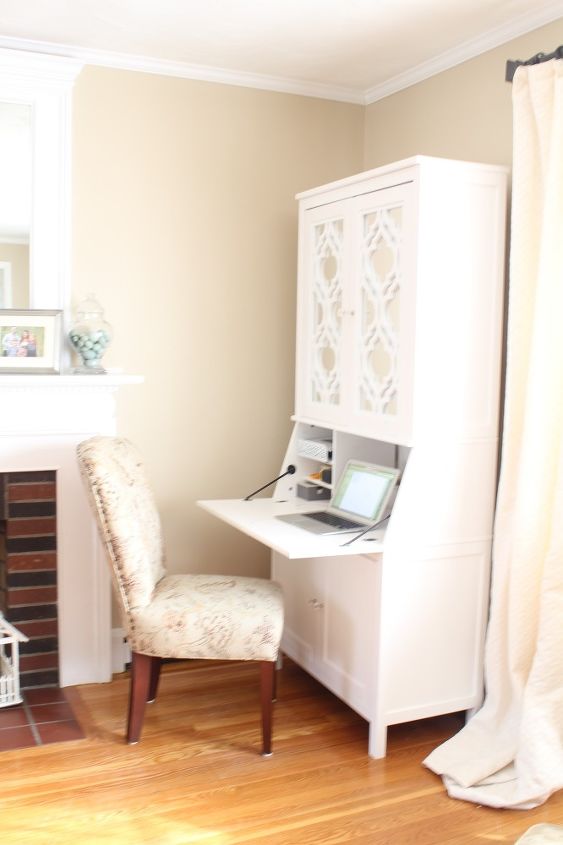
I now have a eye-catching desk in my living room with plenty of storage and charm!

Want more details about this and other DIY projects? Check out my blog post!
Comments
Join the conversation
2 of 7 comments
-
What a beautiful change!
-
You really did an excellent job.


Frequently asked questions
Have a question about this project?