


Clean Your Vacuum

WHY DO THIS? A dirty vacuum cleaner will actually create more work for you because it spreads dirt around instead of sucking it up. Clean a vacuum once a year (or every six months if you’re a vacuum fiend) to keep it in peak condition. Not only will you have to work less during each cleaning session, but your vacuum will last a lot longer, too. WHAT YOU'LL NEED: -Clean Cloth -Screwdriver -Scissors (optional) -Stiff Brush (optional)

HOW TO:
Note: All vacuums are different. Check your owner’s manual for more detailed instructions on performing any of these steps.
1. Unplug the vacuum.
This is important in order to prevent electrocution. After you unplug it, check your power cord for signs of damage. If you see any frays or nicks in the cord, cover them with electrical tape.
2. Check the vacuum bag or bin.
In order to work properly, air must be able to flow through all of the debris in your vacuum bag or bin to generate suction. So, you should switch your bag or empty out your bin regularly. For optimal suction, replace your bag or empty your bin once it becomes half-full. Tip: If your vacuum stops picking up dirt, your bag or bin is the first thing to check.
3. Remove the bottom plate.
This is a cover located on the bottom of your vacuum. Depending on your model, there may be latches or screws that need to be unfastened or removed before the plate will come off. Once removed, you will have access to the brush roll.
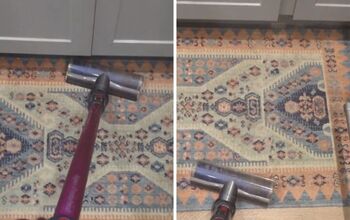
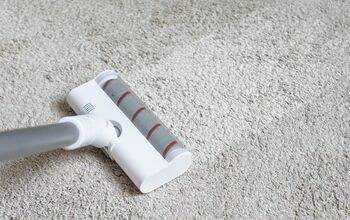
4. Clean the brush roll.
This is the spinning part on the bottom of your vacuum that sucks up extra dirt and dust. Over time, things like hair and carpet fibers can get tangled in the roll, which will reduce your vacuum’s efficiency. Pull the brush roll off (this can usually be done with just your hands) and then remove anything wrapped around the roller. Note: If you have a pet or a hairy family member, you might need scissors for this part.
5. Inspect the belt.
The belt will loop around the edge of the brush roll and another thin, circular metal rod called the driveshaft. Take a look at the belt, checking for cracks, unevenness, melting or other signs of wear. If it’s either loose or extremely damaged, it should be replaced. Vacuum belts cost around $3 and are available online or at your local hardware store. Tip: To keep your vacuum in top shape, replace the belt each year.
6. Clean the air passage.
This is located behind the brush roll. Wipe away any excess dirt or debris with a clean cloth. It may be easier to use a stiff brush for this step if you have a lot of build-up.
7. Replace the brush roll and bottom cover.
Simply reverse the process you used to remove them.
8. Clean your filter.
Most vacuums have a filter over the exhaust vent to catch extra dirt. The type of filter can vary, so clean yours according to the manual’s instructions.
9. Further maintenance.
If you’ve cleaned your vacuum, but it still has low suction, the hoses may be clogged. Push a broomstick or similar object gently through the hose to remove any obstruction. If you’re still having problems, take it to a professional for repairs.
See the full-post and other cleaning tips at: http://bit.ly/1ImAvNP


Frequently asked questions
Have a question about this project?