


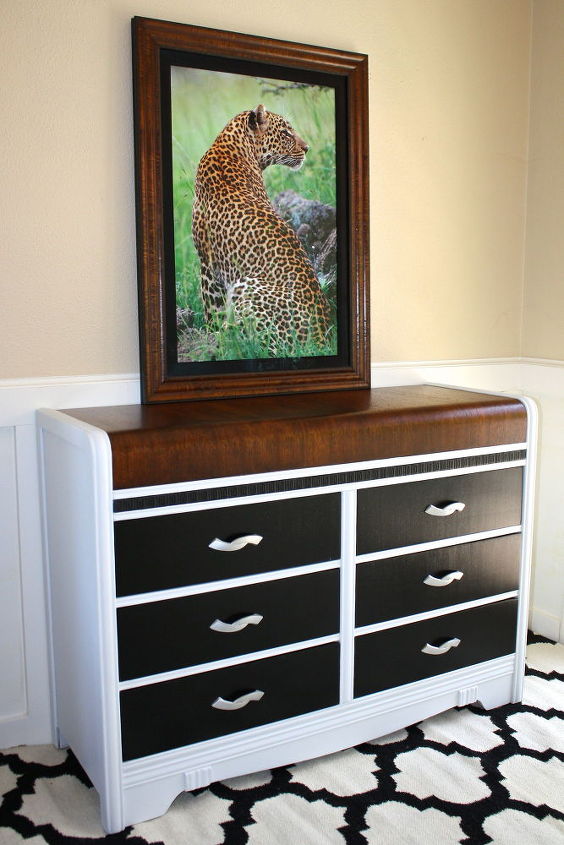
Another Horrendous Waterfall, and How to Redo Damaged Wood.
Medium
Redoing Art Deco Pieces ("waterfall" for the way the wood falls over the edge) can sometimes pose a challenge. The wood on top is often very damaged. But it's usually a beautiful walnut veneer. So instead of just grabbing a paint brush and covering it up, try your hands at saving the wood. You'll be surprised at just how forgiving wood actually is. Even if you have never refinished, with some simple steps, you can give it a try!
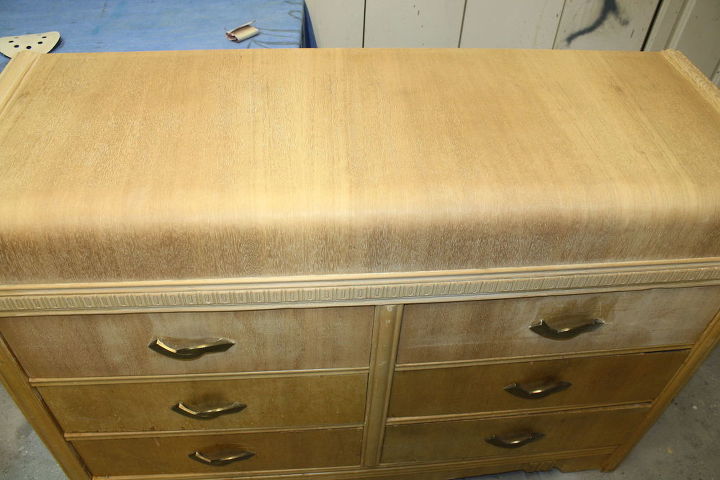
This piece was made of bleached walnut, top and drawer fronts, pine (body and frame) and inner drawers are cedar.
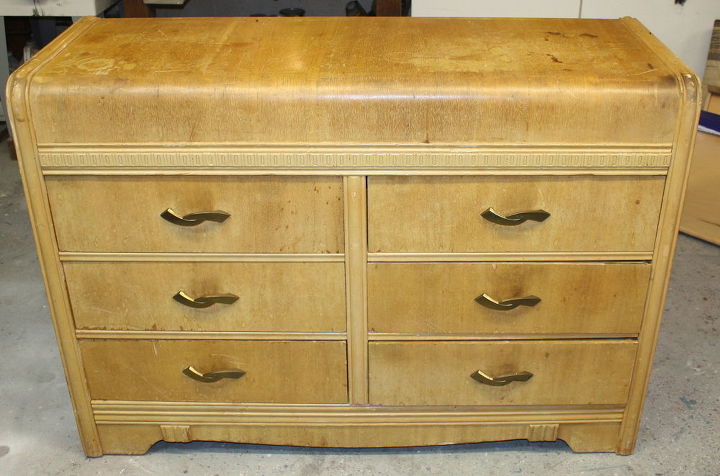
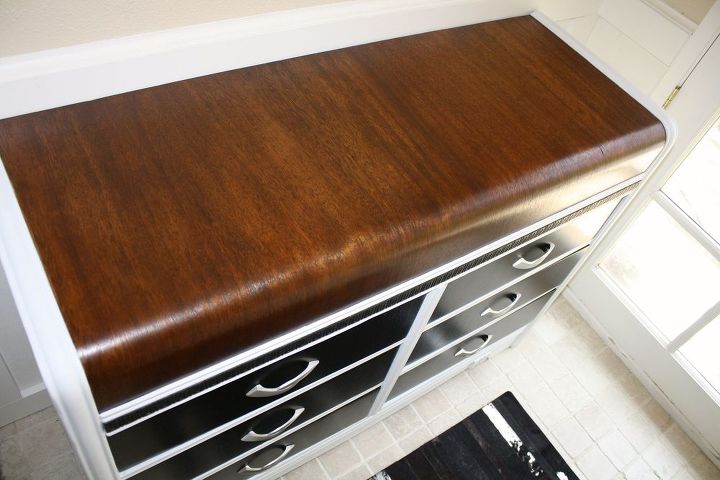
Here's what I started with. (Many years ago I did a desk with the worst waterfall top I've ever seen. I actually refinished it for practice, but was amazed at the transformation. That desk has been pinned to the moon and back on Pinterest.
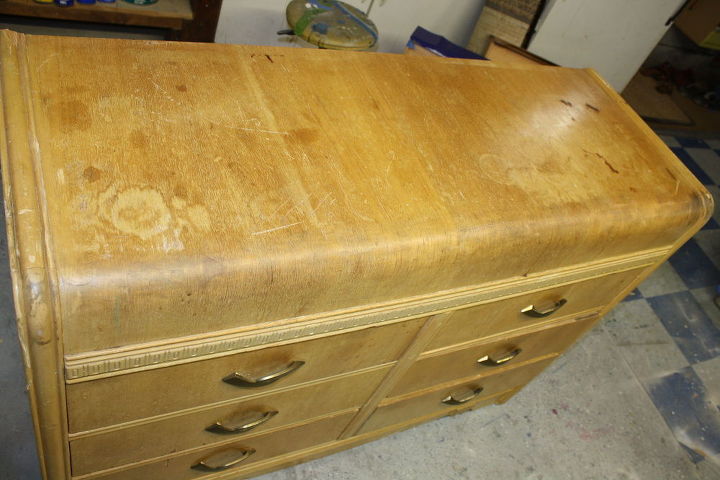
Do these tops by hand. The orbital sander will chew through the veneer and then you are up that proverbial creek. The curved front is very thin. Don't burn through it. Most of the finish was already stripped off. It's always best to use a stripper to remove old finishes if you plan on staining.
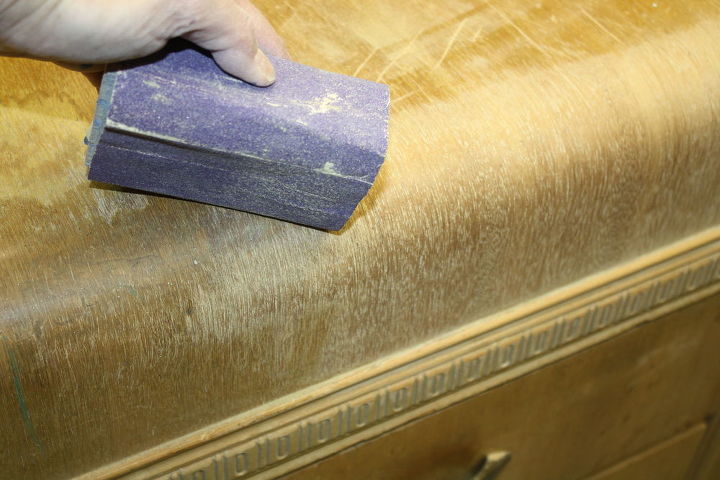
Use graduating grits. 80,120,150,220
Looks pristine doesn't it?? I tried to redo the drawers but there were too many patches where the veneer was missing.
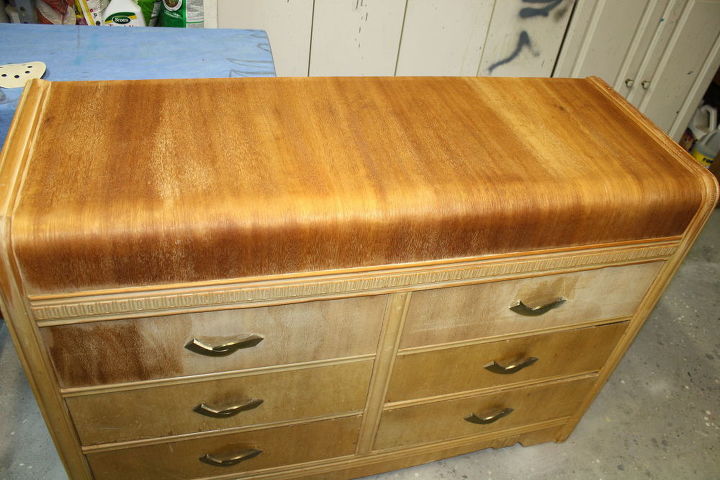
Wiping it down with mineral spirits will give you an idea of what it will look like.

I was playing around with colors to paint.
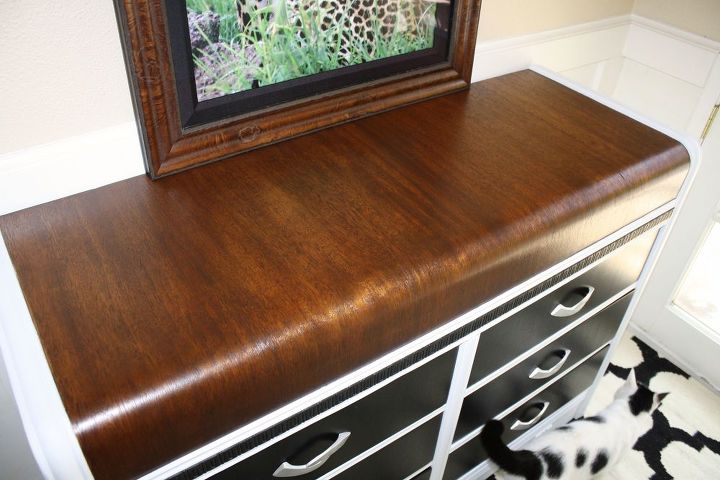
Think of your stain like nail polish. Doesn't actually penetrate but rather sits on top and dries. If you want a darker finish, use a darker stain,,,not multiple coats. It can get gummy. Gel is fine. Minwax stain is fine. Varathane is good too. Aniline dyes are a whole other game. Those do penetrate.
Mama cat blends into the rug!
Let it dry well before the top coat. On this one I used a brush on acrylic top coat by Deft, in satin. 4 coats. Sanding with a very fine (600) grit in between coats. It feels as smooth as silk. Use your hands when you are sanding to feel for rough spots.
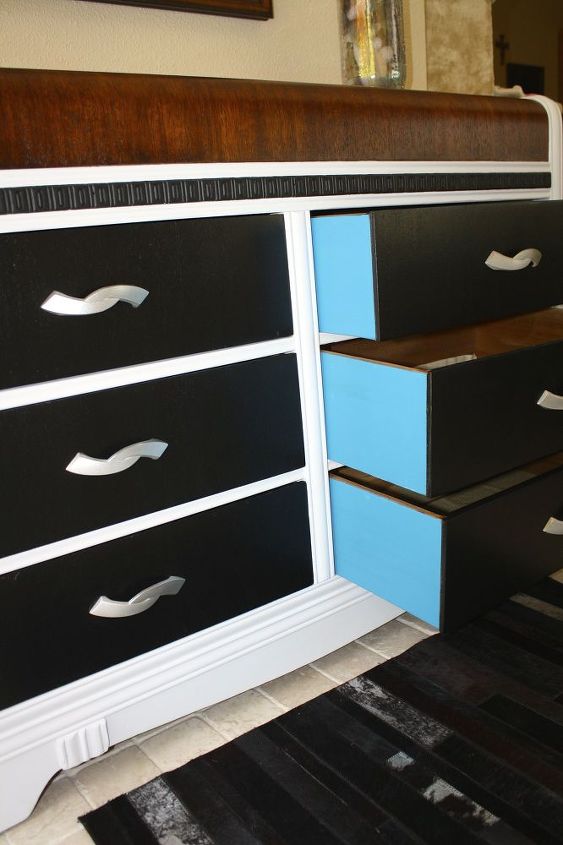
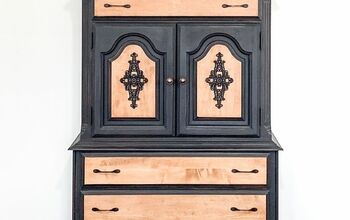
Anyone who has seen my work knows I like to add my signature by painting the sides of the drawers in vibrant color. I used GF Corinth Blue. The black is Lampblack by GF. The body is a very pale gray called "Vapor" by BM. The handles were sanded down to remove all the gunk and sprayed in a silver metallic.
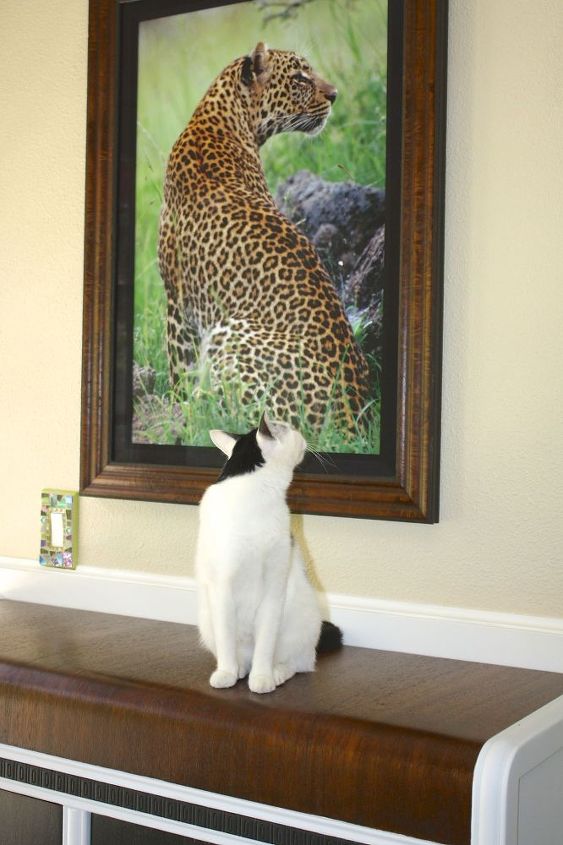
Mama cat cracks me up in this photo. It's like she's thinking, "hey, I know you!"
Just another shot of the top.
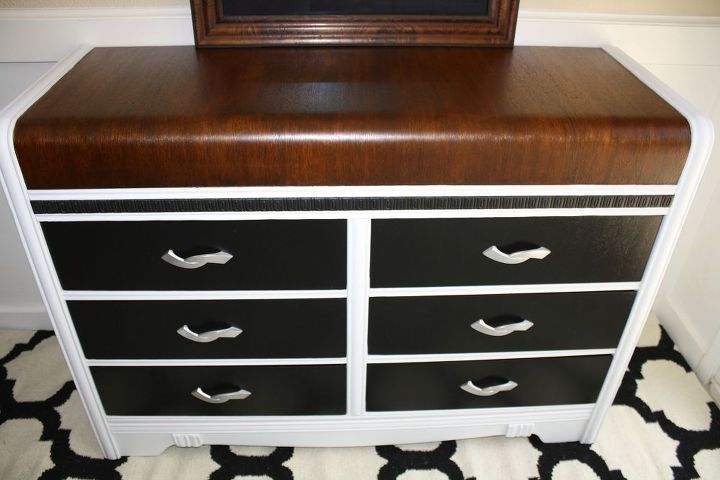
The drawer fronts got the same top coat as the top.

Want more details about this and other DIY projects? Check out my blog post!
Comments
Join the conversation
1 comment
-
You did a great job! Mama cats so cute!


Frequently asked questions
Have a question about this project?